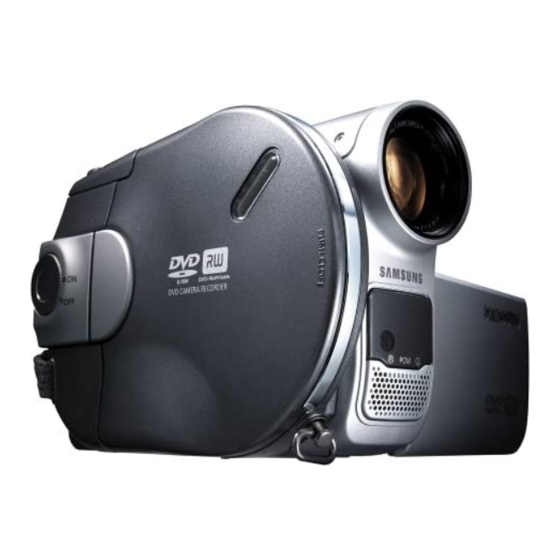
Samsung SC-DC163 Owner's Instruction Manual
Dvd camcorder
Hide thumbs
Also See for SC-DC163:
- Owner's instruction book (128 pages) ,
- User manual (5 pages) ,
- Owner's instruction manual (136 pages)
Table of Contents
Advertisement
Quick Links
I ENGLISH
I
DVD Camcorder
SC-DC 163/DC164/DC 165
AF
Auto Focus
COD
Charge Coupled Device
LCD
Liquid Crystal Display
Owner's Instruction Book
Before operating the unit, please read this Instruction Book
thoroughly, and retain it for future reference.
[ US PATENT 4415844 J
Use only approved battery packs.
Otherwise, there is a danger of overheating, fire or explosion.
Samsung is not responsible for problems occurring due to
us ng unapproved batter es.
_/Rw
Dw+r_w,_aI,Ee
DVD+_ _L
Advertisement
Table of Contents

Related Manuals for Samsung SC-DC163


Summary of Contents for Samsung SC-DC163
- Page 1 [ US PATENT 4415844 J Use only approved battery packs. Otherwise, there is a danger of overheating, fire or explosion. Samsung is not responsible for problems occurring due to us ng unapproved batter es. _/Rw Dw+r_w,_aI,Ee...
- Page 2 [ ENGLISH Notices and Safety instructions ShockHazardMarkingand Associated Graphical Symbols This symbol i s intended to alertthe userto the presenceof un[nsulated "dangerous voltage" within the product's enclosure that may be of sufficient magnitude to constitute a risk of electric shock to persons Explanation of Safety RelatedSymbols This symbol is intended to alert the user to the presence of...
- Page 3 I ENGLISH Notices and Safety instructions 19. POWER-CORD PROTECTION: 15. The apparatus shall not be exposed to dripping splashing and that no objects filled with liquids, such as Power-supply cords should be routed so that they are not vases, shall be placed on the apparatus. likely to be walked on or pinched by items placed upon or against them, paying particular attention to cords or plugs, 16.
- Page 4 [ ENGLISH Notices and Safety instructions 2t. LIGHTNING: 26. DAMAGE REQUIRING SERVICE: For added protection of this CAMCORDER during a lightning Unplug this CAMCORDER from the wall outlet and refer storm or when it is left unattended and unused for long servicing to qualified service personnel under the following conditions: periods of time, unplug it from the wall outlet and disconnect...
- Page 5 Consult the dealer or an experienced radio/TV technician for hel and for additional suggestions. FEDERAL LAWS. For details see lamprecycle.org, eiae.org, or call 1-800-Samsung (7267864) The user may find the following booklet prepared by the Federal Communications Commission helpful : "How to Identify and Resolve Radio-TV Interference Problems."...
-
Page 6: Table Of Contents
[ ENGLISH Contents Setting the Clock (Clock Set) ..........30 Setting the Wireless Remote Control Acceptance (Remote) (SC-DC164/DC165 only) ........3t Setting the Beep Sound (Beep Sound) ......32 Features ................9 Setting the Shutter Sound (Shutter Sound) ......33 About Disc ................ - Page 7 [ ENGLISH Contents Using the Color Nite ............48 Deleting a Title (Delete) ........... Using the LED LIGHT (SC-DC165 only) ......49 Deleting a Section of a Title (Partial Delete) ...... 71 Cutting Off Wind Noise (Wind Cut) ........50 Creating a New Playlist (New Playlist) ......
- Page 8 L ENGLISH Contents " Setting the AV In/Out (SC-DC165 only) ......88 Printing Your Pictures-Using the PictBridge TM ....109 Viewing Recordings on TV ..........89 Connecting To a Printer (USB Connect) ....109 Copying a Disc onto a Tape..........91 Setting the Number of Prints ........
- Page 9 [ ENGLISH Contents Troubleshooting ..............120 Setting menu items............125 9" •...
- Page 10 I ENGLISH Notes and Safety instructions Please rotate the LCD Screen carefully as illustrated. Over-rotation may cause damage to the inside of the hinge that connects the LCD Screen to the DVD Camcorder. 1. Open the LCD Screen 90 degrees with your finger. 2.
- Page 11 I ENGLISH Notes and Safety instructions = Take care not to touch the recording side (the rainbow colored side) of the disc with fingers. Discs contaminated by fingerprints or foreign substances may not play properly. Use a soft cloth to clean the disc. Clean lightly from the center of a disc to the outside edge.
- Page 12 Television programs, video tapes, DVD titles, films, and other program materials may be copyrighted. Unauthorized copying of copyrighted material may be against the law. Atl the trade names and registered trademarks mentioned in this manual or other documentation provided with your Samsung product are trademarks or registered trademarks of their respective holders.
-
Page 13: Features
[ ENGLISH Getting to Know Your DVD Camcorder = DVD Disc Camcorder = Various Digital Effects DVD-VIDEO Title Production with 3 1/2inch (Scm) DVD- The Digital Effects allow you to give your recordings a RW/+RW/DVD-R/+R DL(Dual Layer) discs, special look. = High Power Zoom Lens = Back Light Compensation (BLC) -
Page 14: About Disc
I ENGLISH Getting to Know Your DVD Camcorder DVD-R / DVD-RW (31/2inch (Scm)) DVD+RW (3 l/2i_ch (8crn)) DVD÷f{eW_it aMe DVD+R DL (Dual Layer) (31/2inch (8cm)) OVD÷R DL You may not use 5inch (12cm) CD/DVD discs. Unplayable 3 1/2inch (8cm) Discs CD-R CD-RW DVD-ROM... -
Page 15: Disc Type Description
I ENGLISH Getting to Know Your DVD Camcorder DVD-R DVD+R DL DVD+RW Disc Type (31/2inch (Scm)) (3 lt2inch (Sere)) DVD-RW (31/2inch (8cm)} (31/2inch (Scm)) Mode VR (Video Recording) Video Capacity 1.4G 2.6G 1.4G 1.4G 1.4G Formatting a new disc :-page Auto Auto O ¢... -
Page 16: How To Use The Dvd Camcorder Easily
I ENGLISH Getting to Know Your DVD Camcorder You can record any desired image and edit and playback the disc on a DVD Camcorder, most DVD players, and PCs after finalizing the disc. Selecting the desired disc and disc formatting _page 41 You may edit only in DVD-RW (MR Mode). -
Page 17: Accessories Supplied With The Dvd Camcorder
11. Lens Cover Strap 12.3 1/2inch (8cm) DVD-RW Disc (SC-DC165 only) Optional Accessory ADSE-00148A AD39-00073A AD46-000E 1A AD46-00082A 13. Carrying Case 12 31/2inch (8cm) DI/D-RW Disc AD97110990A AD72100049A AD46-00088A Parts and accessories are available at your local Samsung dealer and service center. -
Page 18: Front & Left View
I ENGLISH Getting to Know Your DVD Camcorder 1. ACCESS Indicator 7. QUICK MENU Button 2. OPEN Switch 8. Joystick (Up/Down/Left/Right/OK) 5. EASY.Q Button 3. Lens 10. TFT LCB Screen 4. LED LIGHT 5. Remote Sensor (SC-DCI64/DC165 only} 6. Internal MIC 1. -
Page 19: Left Side View
I ENGLISH Getting to Know Your DVD Camcorder 1ME.UButton ¸¸¸¸ ¸¸ "_!i! 3ModeSw=to. B_sc_cARo k_ 1 JI ® \_\_ ,.ou,=o.,. If1 5. MF/AF/MULT[ D[SP. button _Mf/t=Ul/ 6. C.NITE/LBD LIGHT (SC=DC165 only). 6. COLOR NITB (SC=DC163/DC164 on i ....13. Function Buttons (below) 1. -
Page 20: Right & Top View
I ENGLISH Getting to Know Your DVD Camcorder 1. PHOTO Button 2. Focus Adjustment Knob 3. Viewfinder 4. External MIC Jack 5. Power Switch 9. Hand Strap 6. Start/Stop Button 1. PHOTO Button =page 97 Start/Stop Button 7. Zoom Lever Focus Adjustment Knob ".page 38 Viewfinder Disc Cover... -
Page 21: Rear & Bottom View
I ENGLISH Getting to Know Your DVD Camcorder 2. Tripod Receptacle 3. Memory Card Slot 4. Battery Release switch 1, Lithium Battery Cover 5. H a _ Hook Lithium Battery Cover Usabte Memory Cards Tripod Receptacle Memory Card Slot Battery Release switch Memory Stick Hand Strap Hook Memory Stick PRO... -
Page 22: Remote Control (Sc-Dc164/Dc165 Only)
10. _{_ I _,_.(Search) 4. ! (Stop). 11. I_ (Slow) 5. _ II (Play/Still) 12. Q-MENU 6. MENU 7. Up(,_,)lDown(v)/Left(< )lRight( >)/OK SAMSUNG 1. START/STOP PHOTO =page 97 DISPLAY _page 29 9. WIT(Zoom) =page 45 J_4/_l(Skip) 10. 44 / _,_(Search) 11. I_ (slow) [] (Stop) 12. -
Page 23: Using The Hand Strap & Lens Cover
I ENGLISH Preparation It is very important to ensure that the Hand Strap has been correctly adjusted before you begin your recording. The Hand Strap enables you to: Hold the DVD Camcorder in a stable, comfortable position. Press the [Zoom] lever and [Start/Stop] button without having to change the position of your hand. Hand Strap 1. -
Page 24: Lithium Battery Installation
i ENGLISH Preparation Lithium Battery Installation for the Internat Clock 1. Remove the Battery Pack from the rear of the DVD Camcorder. 2. Open the Lithium Battery Cover on the rear of the DVD Camcorder. 3. Position the Lithium Battery in the Lithium Battery Holder, with the positive (+) terminal face up. -
Page 25: Using The Lithium Ion Battery Pack
I ENGLISH Preparation *:o Use SB-LSM80 or SB-LSM160 Battery Pack only. °:o The Battery Pack may be charged a little at the time of purchase. Charging the Lithium Ion Battery Pack 1. Turn the [Power] switch to [Off]. 2. Attach the Battery Pack to the DVD Camcorder. 3. - Page 26 I ENGLISH Preparation Chargingp Recording Times based on Battery Type = if you close the LCD Screen, it switches off and the Viewfinder switches on automatically. • The continuous recording times given in the table below are approximations. Actual recording time depends on usage. •...
- Page 27 J ENGLISH Preparation Battery Level Dis I]_aj/ The battery bvel display indicatesthe amount of power remaining in the Battery Pack. a. Fully charged b. 20~40% used c. 40~80% used d. 80~95% used e. Completely used (Blinking) € (The DVD Camcorder will turn off soon, change the battery as soon as possible.) The Finalize/Format functions are not available at battery level 'd' and 'e' At battery level 'd' Each time you select Finalize/Format from menu, the message of <Please connect AC adapter>...
- Page 28 (25 ° C). The remaining battery time may differ from the approximate continuous recording times given in the instructions. We recommend only using the original Lithium ion Battery Pack that is available from your SAMSUNG retailer. When the Battery reaches the end of its life, please contact your local dealer.
-
Page 29: Connecting A Power Source
J ENGLISH Preparation + There are two types of power source that can be connected to your DVD Camcorder. - The AC Power adapter and AC Cord: used for indoor recording. - The Battery Pack: used for outdoor recording. Using a Household Power Source Connect to a household power source to use the DVD Camcorder without worrying about the battery power. -
Page 30: About The Operating Modes
I ENGLISH Preparation + The operating modes are determined by the position of the [Power] switch and the [Mode] switch. + Set the Operation Mode by adjusting [Power] switch and [Mode] switch before operating any functions. 4o Each time you move the [Power] switch downward, it toggles between [l_(Camera)] and [[J_(Player)] mode. -
Page 31: Using The Quick Menu
I ENGLISH Preparation + QUICK MENU is used to access DVD Camcorder functions by using the [QUICK MENU] button. + QUICK MENU provides easier access to frequently used menus without using the [MENU] button. Functions available using the QUICK MENU are as below: page 60 Program AE _page 53... -
Page 32: Osd (On Screen Display) In Camera Mode/Player Mode
I ENGLISH Preparation 1. Battery Level =page 23 21. Record Mode -page 42 Manual focus "=,page 52 * 22. Operating Mode EASY.Q =page 44 * 23. Zoom Position "*page 45 21 20 19 24. PB Zoom =page 66 DIS =page 60 Program AE -page 53 25. -
Page 33: Turning The Osd (On Screen Display) On/Off
I ENGUSH Preparation 1. Photo Quality '='page 95 CARD (Memory Card) Indicator Image Counter [Total number of f_llll 5s/0 _E] recordable photo images) / n/in Slide Slide Show '-page 99 Erase Protection Indicator =,page 100 No memo_ cad Print Mark '=,page 107 Folder Number-File Number ",page 94 / 2 00 AM JAN 01 2006... - Page 34 I ENGLISH initial Setting • System Menu Setting • :* Clock setup works in Camera Mode/Player Mode/M.Cam Mode/M.Player Mode. '=page 26 + The date/time is automatically recorded onto a disc. Before recording, please set the date/time. 1. Set the [Mode] switch to [DISC] or [CARD]. 2.
- Page 35 I ENGLISH Initial Setting • System Menu Setting *:* The Remote function works in Camera Mode/Player Mode/M.Cam Mode/M.Player Mode. _page 26 *:* The Remote function atlows you to enable or disable the remote control for use with the DVD Camcorder. 1.
-
Page 36: Setting The Beep Sound (Beep Sound)
I ENGLISH initial Setting • System Menu Setting *:* The Beep Sound function works in Camera Mode/Player ModelM.Cam Mode/M.Player Mode. _page 26 *:* You can turnthe Beep Sound on or off, when on, each press of a button sounds a beep. 1. -
Page 37: Setting The Shutter Sound (Shutter Sound)
I ENGLBH Initial Setting • System Menu Setting -:* The Shutter Sound function works only in M.Cam Mode. _'page 26 -:* You can turn the Shutter Sound on or off, when on, with each press of the [PHOTO] button the Shutter witl sound, 1. -
Page 38: Selecting The Osd Language (Language)
I ENGLISH Initial Setting • System Menu Setting *:* The Language function works in Camera Mode/Player Mode/M.Cam Mode/M.Player Mode. ",page 26 *:* You can select the desired language to display the menu screen and the messages. 1. Set the [Mode] switch to [DISC] or [CARD]. 2. -
Page 39: Viewing The Demonstration (Demonstration)
I ENGLBH Initial Setting • System Menu Setting + The Demonstration function may only be used in the Camera Mode with no disc insertedin the unit. ",page 26 + Before you begin: Make Sure that there is no disc inserted in the DVD Camcorder. _page 40 *:o Demonstration automatically shows you the major functions that are included with your DVD Camcorder so that you may use them more easily. -
Page 40: Adjusting The Lcd Screen (Lcd Bright/Lcd Color)
I ENGLISH Initial Setting • Display Menu Setting + Adjusting the LCD Screen works in Camera Mode/Player Mode/M.Cam Mode/M.Player Mode. '='page 26 + Your DVD Camcorder is equipped with a 2.5 inch(SC-DC163) / 2.7 inchwide (SC-DC164/DC165) color Liquid Crystal Display (LCD) Screen, which enables you to view what you are recording or playing back directly. + Depending on the conditions under which you are using the DVD Camcorder (indoors or outdoors for example), you can adjust;... -
Page 41: Displaying The Date/Time (Date/Time)
I ENGLISH InitiaJ Setting • Display Menu Setting -:* The Date/Time function works in Camera ModelPlayer Mode/M.Cam Mode/M.Player Mode. _page 26 • :* The date and time are automatically recorded on a special data area of the disc. 1. Set the [Mode] switch to [DISC] or [CARD]. 2. -
Page 42: Using The Viewfinder
I ENGLISH DVD Camcorder: Before Recording *:o In the [1_ (Camera)] or [[_(Player)] mode, the Viewfinder will work when the LCD Screen is closed. Ad'ustin the Focus The focus adjustment knob of the Viewfinder enables individuals with vision problems to see clearer images. 1. -
Page 43: Various Recording Techniques
I ENGLISH DVD Camcorder: Before Recording -:* In some situations, different recording techniques may be required for more dramatic results. 1. General recording. 2. Downward recording, Making a recording with a top view of the LCD Screen. 3. Upward recording. Making a recording viewing the LCD Screen from below. -
Page 44: Inserting And Removing A Disc
I ENGLISH DVD Camcorder: Before Recording + When inserting a disc or closing the disc cover, do not apply excessive force, tt may cause a malfunction. ***oYou cannot open the disc cover while loading. ***oSet the [Mode] switch to [DISC] and the [Power] switch to [_l_(Camera)] to view menus and messages displayed on the LCD Screen. - Page 45 I ENGLISH DVD Camcorder: Before Recording Fomlatting may be required if a new disc is inserted. Recognition of the disc will start. For a DVD-R/+R DL disc: Formatting wilt automatically begin. For a DVD-RW disc: You are prompted with the <Disc is not formatted. Format?> message. Video (Video Mode) : If the disc has been finalized, you will be able to Differences between play the disc on most DVD Players/Recorders.
-
Page 46: Selecting The Record Mode (Rec Mode)
I ENGLISH DVD Camcorder: Before Recording + The Record Mode function works in both Camera Mode and Player Mode. _-page 26 + This DVD Camcorder can film in the XP (extra play), the SP (standard play) and the LP (long play) modes. The SP mode is set as the factory default. -
Page 47: Making Your First Recording
I ENGLISH DVD Carncorder: Basic Recording 1. Connect a power source to the DVD Camcorder. '-pages 21_25 • (A Battery Pack or a AC Power adapter) • Insert a disc. '-*page 40 2. Remove the Lens Cover. 3. Open the LCD Screen •... -
Page 48: Recording With Ease For Beginners (Easy.q Mode)
I ENGLISH DVD Camcorder: Basic Recording + The EASY.Q function works onty in Camera Mode. "*page 26 4o The EASY.Q function allows a beginner to easily make good recordings. 1. Set the [Mode] switch to [DISC]. 2. Set the [Power] switch to till(Camera)]. 3. -
Page 49: Using External Microphone
I ENGLISH DVD Camcorder: Basic Recording Connect external microphone (not supplied) to the external microphone jack of this DVD Camcorder. Clearer sound can be recorded. *:o The Zoom function works in both Camera Mode and M.Cam Mode. -page 26 *:o Zooming is a recording technique that lets you change the size of the subject in a scene. *:- You can zoom using variable zoom speeds. -
Page 50: Using The Fade In And Out (Fade)
I ENGLISH DVD Camcorder: Basic Recording + The Fade function works only in Camera Mode. -page 26 *:* You can give your recording a professional look by using special effects such as fade in at the beginning of a sequence or fade out at the end of a sequence. -
Page 51: Using Back Light Compensation Mode (Blc)
I ENGLISH DVD Camcorder: Basic Recording + BLC works in both Camera Mode and M.Cam Mode. "page 26 4o Back lighting exists when the subject is darker than the background: - The subject is in front of a window. - The person to be recorded is wearing white or shiny clothes and is placed against a bright background;... -
Page 52: Using The Color Nite
I ENGLISH DVD Camcorder: Basic Recording 4. Color Nite function works only in Camera Mode. '=page 26 4o You can take a shot of an object in slow motion by controlling the shutter speed, or a brighter image in dark places without a compromise in colors. 1. -
Page 53: Using The Led Light (Sc-Dc165 Only)
I ENGLISH DVD Camcorder: Basic Recording + The LED LIGHT function works only in Camera Mode. ",page 26 *:* The LED LIGHT enables you to record a subject in dark places. *:° The LED LIGHT can be used with Color Nite function only. 1. -
Page 54: Cutting Off Wind Noise (Wind Cut)
I ENGLISH DVD Camcorder: Advanced Recording + The Wind Cut function works only in Camera Mode. "_page 26 + Use the Wind Cut when recording in windy places such as the beach or near buildings. -:o The Wind Cut function minimizes wind noise or other noise while recording. - When the Wind Cut is on, some low pitched tones are eliminated along with the sound of the wind. -
Page 55: Setting The Shutter Speed & Exposure (Shutter/Exposure)
I ENGLISH DVD Camcorder: Advanced Recording + The Shutter Speed function works only in Camera Mode. _,page 26 *:* The Exposure function works in both Camera Mode and M.Cam Mode. "page 26 *:o The Shutter Speed and Exposure functions can be set in the QUICK MENU. 1. -
Page 56: Auto Focus / Manual Focus
I ENGLISH DVD Camcorder: Advanced Recording + The Auto Focus/Manual Focus function works in both Camera Mode and M,Cam Mode. _page 26 ***oIn most situations, it is better to use the automatic focus feature, as it enables you to concentrate on the creative side of your recording. ***oManual focusing may be necessary under certain conditions that make automatic focusing difficult or unreliable. -
Page 57: Programmed Automatic Exposure Modes (Program Ae)
I ENGLISH DVD Camcorder: Advanced Recording + The Program AE function works only in Camera Mode, _page 26 4. The Program AE mode allows you to adjust shutter speeds and apertures to suit different recording conditions. ***oThey give you creative control over the depth of field. <Auto ([])>... - Page 58 I ENGLISH DVD Camcorder: Advanced Recording Settin the Pro ram AE 1. Set the [Mode] switch to [DISC]. 2. Set the [Power] switchto [l_(Camera)]. 3. Press the [MENU] button. • The menu list will appear. 4. Move the [Joystick) up or down to select <Camera>, then press the [Joystick(OK)]. 5.
-
Page 59: Setting The White Balance (White Batance)
I ENGLISH DVD Camcorder: Advanced Recording + The White Balance function works in both Camera Mode and M,Cam Mode. _page 26 -.'* The White Balance is a recording function that preserves the unique image color of the subject in any recording condition. *:* You may select the appropriate White Balance mode to obtain good quality image color. - Page 60 I ENGLISH DVD Camcorder: Advanced Recording the Custom White Balance _o You can adjust the white balance as you wish based on the recording environment. 1. Set the [Mode] switch to [DISC] or [CARD]. 2. Set the [Power] switch to [l_(Camera)]. 3.
-
Page 61: Applying Digital Effects (Digital Effect)
J ENGLISH DVD Camcorder: Advanced Recording -:* The Digital Effect function works only in Camera Mode. =page 26 -:* The Digital Effects enable you to give a creative look to your recording. *:o Select the appropriate Digitat Effect for the type of picture that you wish to record and the effect you wish to create. °:* There are 10 Digital Effect modes. - Page 62 I ENGLISH DVD Camcorder: Advanced Recording Setectin theDi itat Effects 1. Set the [Mode] switch to [DISC]. 2. Set the [Power] switch te [l_qCamera)]. _-Auto 3. Press the [MENU] button. i .A.to _orf = The menu list will appear. _-Off _-Off _-Off 4.
-
Page 63: Setting The 16:9 Wide Mode (16:9 Wide)
I ENGLISH DVD Camcorder: Advanced Recording + The 16:9 Wide function works only in Camera Mode. _page 26 + Select to record a picture to be played back on a 16:9 Wide TV. 1. Set the [Mode] switch to [DISC]. 2. -
Page 64: Setting The Digital Image Stabilizer (Dis)
I ENGLISH DVD Camcorder: Advanced Recording + The DIS function works only in Camera Mode. _page 26 *:* DIS (Digital Image Stabilizer) is a function that compensates for any shaking or hand movement while holding the DVD Camcorder (within reasonable limits). *:* It provides more stable pictures when: - Recording with the zoom (If the DIS is set, Digital Zoom mode wilt be released.) - Recording a small object close-up... -
Page 65: Zooming In And Out With Digital Zoom (Digital Zoom)
I ENGLBH DVD Camcorder: Advanced Recording 4. The Digital Zoom works only in Camera Mode. "*page 26 4o Zooming more than 30x (SC-DC163 only), 33x (SC-DC164/DC165 only) is achieved digitally, up to 1200x when combined with optical zoom. 4o The picture quality may deteriorate depending on how much you zoom in on the subject. Selecting the Digital Zoom 1. -
Page 66: "Title"List
I ENGLISH DVD Camcorder: What's Title List and Playlist + The Title List displays multiple titles (scenes) that have been recorded. Current TitleList/ *:* A title is created between the points where you start and stop a recording. Total TitleList Once deleted, you cannot recover the title again. -
Page 67: Playing Title Lists
I ENGLISH DVD Camcorder: Title List The recorded Title List scenes are displayed as a thumbnail index (multiple images) on the LCD Screen. You can find the desired scene quickly using this convenient index. If the LCD is closed, you can view the recording through the viewfinder. Use the Playback related buttons on the DVD Camcorder or on the remote control. -
Page 68: Various Functions While In Player Mode
I ENGLISH DVD Camcorder: Title List + These functions works only in Player Mode. _page 26 4o Play, Still, Stop Fast Forward Rewind, Forward Skip, and Reverse Skip functions are accessible using the remote control. (SC-DC164/DC165 only) 4o Slow function is accessible only using the remote control. (SC-DC164/DC165 only) Playback/Still •... - Page 69 I ENGLISH DVD Camcorder: Title List Slow Pla byback _Forward/ReverseMSC-DC164/DC165 only) = Press the [11_'] b utton on the remote control during playback. - To resume normal playback, press the [_ II ] button. ®®® ,,dl _MENU SAMSUNG...
-
Page 70: Zooming During Playback (Pb Zoom)
I ENGLISH DVD Camcorder: Title List _* The PB Zoom function works only in Player Mode. "*page 26 4o The PB Zoom function enables you to magnify the playback. 1. Set the [Mode] switch to [DISC]. 2. Set the [Power] switch to [l_(Player)]. 3. -
Page 71: Renaming A Title (Title Name)
I ENGLISH DVD Camcorder: Title List -:* Title Name function works only in Player Mode. _page 26 -:* The recording date automatically becomes the title name if date had been set in the system menu. '-',page 37 You can change the recording date to any desired title name. 1. -
Page 72: Title Information (Title Tnfo)
I ENGLISH DVD Camcorder: Title List *:* Title Info function works only in Player Mode. _page 26 *:* It shows you the title information. *:° You can view the Title name, Protect, Rec Date, Length, Rec Mode and Disc Format. 1. -
Page 73: Protecting A Title (Protect)
J ENGLISH DVD Camcorder: Title List -:* Protect function works only in Player Mode. '-*page 26 + You can set protection for a title so that the title cannot be deleted. 1. Set the [Mode] switch to [DISC]. 2. Set the [Power] switch to [[_(Player)]. = The Title List screen appears. -
Page 74: Deleting A Title (Delete)
J ENGLISH DVD Camcorder: Title List -:* Delete function works only in Player Mode. "*page 26 + Individual orAll Title scenes can be deleted. 1. Set the [Mode] switch to [DISC]. 2. Set the [Power] switch to [[_(Player)]. = The Title List screen appears. 3. -
Page 75: Deleting A Section Of A Title (Partial Delete)
I ENGLISH DVD Camcorder: Title List + Partial Delete function works only in Player Mode. _page 26 -:- ATitle scene can be partially deleted. -:o The editing function only works on a DVD-RW (VR Mode). You should format the DVD-RW to VR Mode before recording. ",page 41 1. -
Page 76: Creating A New Playlist (New Playlist)
[ ENGLISH DVD Camcorder: Playlist _ This function works only in Player Mode. _page 26 4o The editing function only works on a DVD-RW (VR Mode). You should format the DVD-RW to VR Mode before recording. '=page 41 1. Set the [Mode] switch to [DISC]. 2. -
Page 77: Renaming A Playlist (Playlist Name)
I ENGLISH DVD Camcorder: Playlist -:o Playlist Name function works only in Player Mode. ",page 26 P_y_,s: -:- The recording date automatically becomes the title name if date had been set in the system menu. You can change the recording date to any desired title name. *:o The editing function only works on a DVD-RW (VR Mode). -
Page 78: Playing The Playlist
I ENGLISH DVD Camcorder: Playlist _ This function works only in Player Mode. "*page 26 4o The Playlist scenes are displayed in the form of a thumbnail index on the LCD Screen. if the LCD is ciosed, you can view the recording through the viewfinder. Use the Playback related buttons on the DVD Camcorder or on the remote control. -
Page 79: Playlist Information (Playtist Info)
I ENGLISH DVD Camcorder: Playlist + Playlist Info function works only in Player Mode. "*page 26 *:* It shows you the Playlist information. You can view the Playtist Name, Protect, Rec Date, Length, Rec Mode and Disc Format. *:* The editing function only works on a DVD-RW (VR Mode). You should format the DVD-RW to VR Mode before recording. -
Page 80: Deleting A Playlist (Delete)
I ENGLISH DVD Camcorder: Playlist + Delete function works only in Player Mode. '-page 26 + IndMdua{ or alt undesired piaylists can be deleted. + The editing function only works on a DVD-RW (VR Mode). You should format the DVD-RW to MR Mode before recording. -
Page 81: Adding Scenes To Playlist (Edit Playlist-Add)
I ENGLISH DVD Camcorder: Playlist -:* This function works only in Player Mode. '-.page 26 *:o You can add more scenes in an existing Playlist. °:* The editing function only works on a DVD-RW (VR Mode). You should format the DVD-RW to VR Mode before recording. -
Page 82: Changing The Order Of Scene Playing Within A Playlist (Edit Playtist-Move)
I ENGLISH DVD Camcorder: Playlist *:* This function works only in Player Mode. ""page 26 + You can change the order of scene playing within a Playtist. *:o The editing function only works on a DVD-RW (VR Mode). You should format the DVD-RW to VR Mode before recording. -
Page 83: Deleting Scenes From Playlist (Edit Playtist-Detete)
I ENGLISH DVD Camcorder: Playlist *:* This function works only in Player Mode. ""page 26 4- You can delete the scenes from a Playlist. 4° The editing function only works on a DVD-RW (VR Mode). You should format the DVD-RW to VR Mode before recording. -
Page 84: Deleting A Section Of A Playtist (Edit Playtist - Partial Delete)
I ENGLISH DVD Camcorder: Playlist + This function works only in Player Mode. ",page 26 -:* Your can delete a part from a Playlist. -:o The editing function only works on a DVD-RW (VR Mode). You should format the DVD-RW to VR Mode before recording. - Page 85 I ENGLISH I DVD Camcorder: Playlist 10. Press the [ I_ / _,!_1 ] or [I_ II ] to search the starting point of deletion. 11. Press the [_ II] button to pause the screen at the starting point of deletion, then press the [Joystick(OK)] = The <End>...
-
Page 86: Disc Information (Disc Info)
I ENGLISH DVD Camcorder: Disc Manager + This function works in both Camera Mode and Player Mode. -page 26 + It provides disc information. 1. Set the [Mode] switch to [DISC]. 2. Set the [Power] switch to [1_ (Camera)] or [[]_(Player)]. 3. -
Page 87: Editing The Disc Name (Disc Info-Rename)
I ENGLISH I DVD Camcorder: Disc Manager -:* This function works in both Camera Mode and Player Mode. ",page 26 Camera Mode -:* You can specify a disc name. Disc FmaEize 1. Set the [Mode] switch to [DISC]. D_r Folm_t 2. - Page 88 I ENGLISH DVD Camcorder: Disc Manager *:* This function works only in Camera Mode. '-',page 26 + You can format a recorded disc to be used again• By formatting, altexisting data wilt be deleted• 1. Set the [Mode] switch to [DISC]• 2.
- Page 89 I ENGLBH DVD Camcorder: Disc Manager + This function works only in Camera Mode. '=,page 26 -:- To play the contents of a DVD-RW on other DVD players you must finalize the disc. When finalizing, there should be enough power in the batteries. If an the AC Power adapter is to be use& make sure that the jack is properly connected. A power cut during finalizing may disrupt the disc from replaying.
-
Page 90: Playing Back On A Pc With Dvd Drive
I ENGLISH DVD Camcorder: Disc Manager + The DVD disc can be played on a PC with a DVD running media (DVD drive). 1. Turn on your PC. 2. insert a finalized disc into the DVD drive of the PC. = Starts DVD playback application software and the disc will play. -
Page 91: Unfinalizing A Disc (Disc Unfinalize)
I ENGLISH DVD Camcorder: Disc Manager *:* This function works only in Camera Mode. "-,page 26 *:* If a DVD-RW disc had been finalized in the VR mode or Video mode, you can unfinalize the disc for further recording. 1. Set the [Mode] switch to [DISC]. 2. -
Page 92: Setting The Av In/Out (Sc-Dc165 Only)
I ENGLISH DVD Camcorder: Connection *:* AV In/Out function works only in Player Mode. '-'page 26 -:- AV In/Out setting enables you to record signal from external sources and display it on LCD Screen. Also, you can send your video or image to external devices to record or play back. 1. -
Page 93: Viewing Recordings On Tv
I ENGLISH DVD Camcorder: Connection + The Playback function works only in Player Mode. ",page 26 back on a TV Monitor *:* To play back a disc, the television must be NTSC compatible. ",page 119 *:- We recommend that you use the AC Power adapter as the power source for the DVD Camcorder. Connectinq to a TV which has AudioNideo input Jacks... - Page 94 I ENGLISH DVD Camcorder: Connection a TV which has no Audio/Video InJ_ut Jacks *:* You can connect your DVD Camcorder to a TV through a VCR. 1. Connect the DVD Camcorder to your VCR with the Multi-AV cable. • The yellow jack: Video •...
-
Page 95: Copying A Disc Onto A Tape
I ENGLISH DVD Camcorder: Connection *:* The copying function works only in Player Mode. ",page 26 *:* Connect your DVD Camcorder to a VCR using the AV/S jack to dub the recording from a disc onto a VCR tape. 1. Set the [Mode] switch to [DISC]. 2. -
Page 96: Onto A Disc (Sc-Dc165 Only)
I ENGLISH DVD Camcorder: Connection + The Recording (Copying) function works only in Player Mode. _page 26 -:* Connect your DVD Camcorder to a VCR or a TV using the AV/S jack to record a TV program or copy a video tape to a disc. Set the AV In/Out before Recording (Copying). -
Page 97: (Not Supplied)
I ENGLBH Digital Still Camera Mode + The Memory Card stores and manages Photo/Moving Terminals-- images recorded by the DVD Camcorder. *:o Before inserting or ejecting the Memory Card, set the [Power] switch to [Off] and open the LCD Screen. Memory Card Functions <MMC/SD>... -
Page 98: Structure Of Folders And Files On The Memory Card
The data stored on the Memory Card may be changed or lost as a result of misuse, static electricity, electric noise or repair. Save important images separately. Samsung is not responsible for data loss due to misuse. = The DVD Camcorder supports 2GB SD/MMC and lower. SD/MMC above 2GB may not record or play properly. -
Page 99: Selecting The Photo Quality (Photo Quality)
I ENGLISH Digital Still Camera Mode + Photo Quality function works in both Player Mode and M.Cam Mode. _page 26 _* You can select the quality of a photo image to be recorded. _"Sllper Fne Select the photo Quality 1. Set the [Mode] switch to [DISC] or [CARD]. 2. -
Page 100: Setting The File Number (File No.)
I ENGLISH Digital Still Camera Mode + File Number setting works only in M.Cam Mode. ",page 26 + File Numbers are given to images in the order they were recorded when they are stored on the Memory Card. *:o File numbers may be set as follows: - <Series>: When there are existing files, the new image witl be named as the next number in the sequence. -
Page 101: Taking A Photo Image (Jpeg) On The Memory Card
I ENGLISH Digital Still Camera Mode 4. You may take photo images while in M.Cam Mode and store the images on the Memory Card. '_page 26 4. You can take photo images using the remote controI.(SC-DC164/DC165 only) 4* Audio will not be recorded with a photo image on to the Memory Card. 4o Please check the protection tab setting on your memory card before recording. -
Page 102: Viewing Photo Images (Jpeg)
I ENGLISH Digital Still Camera Mode + This function works only in M.Player Mode. _',page 26 + You can piayback and view photo images recorded on the Memory Card. 1. Set the [Mode] switch to [CARD]. 2. Set the [Power] switch to [[J_(Player)]. •... - Page 103 I ENGLISH Digital Still Camera Mode 1. Use the [Joystick] to select a desired photo image, then press the [Joystick(OK)]. 2. Press the [_,'II(S.SHOW)] button in the single image display mode. • All images will be played back consecutively for 2~3 seconds each. •...
-
Page 104: Protection From Accidental Erasure (Protect)
J ENGLISH Digital Still Camera Mode -:* The Protect function works only in M.Player Mode. _page 26 -:* You can protect importantimages from accidental erasure. If you execute format, all images including protected imageswilt be erased. 1. Set the [Mode] switch to [CARD]. 2. -
Page 105: Images And Moving Images (Delete)
I ENGLISH Digital Still Camera Mode *:* The Delete function works only in M.Player Mode. ".page 26 *:* You can erase the photo images and moving images recorded on the Memory Card. *:o If you want to delete protected images, you must first deactivate the image protection. *:* An image which has been deleted cannot be recovered. - Page 106 I ENGLISH Digital Still Camera Mode Deletin All Irna es at Once M PEayer Mode 6. Move the [Joystick] up or down to select <Delete All>, then press the [Joystick(OK)]. • A message <Delete all?> is displayed. Protect 7. Move the [Joystick] left or right to select <Yes> or <No>, then press the [Joystick(OK)] _Move _Select...
- Page 107 I ENGUSH Digital Still Camera Mode *:o The Format function works only in M.Player Mode. ",page 26 + You can use the Format functions to completely Delete All images and options on the Memory Card, including protected images. + The Format function restores the Memory Card to its initial state. + If you execute the Format function, all images will be erased completely and erased images cannot be recovered.
-
Page 108: Recording Moving Images (Mpeg) On The Memory Card
I ENGLISH Digital Still Camera Mode + You can record moving images while in M.Carn Mode. '-,page 26 *:* You can record moving images with audio on the Memory Card. *:o The screen format of the moving image to be recorded is 720x480. Saving Moving Images... -
Page 109: Playing The Moving Images (Mpeg) On The Memory Card
I ENGLISH Digital Still Camera Mode 4. The Moving images playback function works only in M.Player Mode. '-'page 26 4. You can play the moving images on the Memory Card. Stereo audio is played back at the same time. 4° The Moving images will look better when played back on a PC. 1. -
Page 110: Recording Still Images Onto A Memory Card During Dvd Playback
I ENGLISH Digital Still Camera Mode _ This function works only in Player Mode. "page 26 4o tfyou press the [PHOTO] button during DVD disc playback, the disc stops and the image on the DVD is saved on the Memory Card. 1. -
Page 111: Marking Images For Printing (Print Mark)
I ENGLISH Digital Still Camera Mode + The Print Mark function works only in M.Player Mode. ",page 26 + This DVD Camcorder supports the DPOF (Digital Print Order Format) print format. 4o You can automatically print images recorded on a Memory Card with a printer supporting DPOR + Setting the Print Mark is only available when using a memory card. - Page 112 ENGLISH Digital Still Camera Mode Removing the Print Mark To remove all Print Marks, select <All Off>. To remove individual file's Print Mark, select the fite and set <This File> to <000>. It operates identically in Single Display. You can directly access the Print Mark function by using the [QUICK MENU] button. '-',page 27 If the Print Mark is set to This File, you can set the number of copies from 000 to 999.
-
Page 113: Printing Your Pictures-Using The Pictbridge Tm
I ENGLISH PictBridge -:* PictBridge function works onty in M,Player Mode. _page 26 -:* By connecting the DVD Camcorder to printers with PictBridge support (sold separately), you can send images from the Memory Card directly to the printer with a few simple operations. -:* With the PictBridge Support, you can control the printer directly through your DVD Camcorder in order to print out stored pictures. -
Page 114: Setting The Number Of Prints
I ENGLISH PictBridge the Number of Prints S ..............1. Move the [Joystick] up or down to setect <Copies>, then press the [Joystick(OK)] 5'/0 2. Move the [Joystick] up or down to set the number of prints, then press the [Joystick(OK)] Settin the Date/Time... -
Page 115: Using Usb Interface
I ENGLISH USB interface Tran_t haUSBConnection *:* The DVD Camcorder supports both USB 1.1 and 2.0 standards. (Depends on the PC specification) *:o You can transfer a recorded file in memory Card to a PC via a USB connection. *:* If you transfer data to a PC, you need to install the software (DV Driver, Video Codec, DirectX 9.0) supplied with the DVD Camcorder. - Page 116 ENGLISH USB interface On a slower PC than recommended, movie playback may not be smooth or video editing may take a long time. On a slower PC than recommended, movie playback may skip frames or operate unexpectedly. Intel® Pentium 111TM or Pentium 4TMis a trademark of the Inte{ Corporation. Windows®...
-
Page 117: Selecting The Usb Device (Usb Connect)
I ENGLISH USB interface + The USB Connect function works only in M.Player Mode. ",page 26 + Using the USB cable, you can connect your DVD Camcorder to a computer to copy your moving images and photo images from the Memory Card, or to a printer to print your images. 1. -
Page 118: Installing Dv Media Pro Program
[ ENGLISH USB interface *:* You need to install DV Media PRO Program to play back movie files recorded by the DVD Camcorder on your PC. + Turn on your PC. Exit all other applications running. *:o insert the provided CD into the CD-ROM drive. The setup screen appears automatically soon after the CD was inserted. -
Page 119: Ulead Video Studio
I ENGLISH USB interface 1. Click <Photo Express> on the Setup screen. , It is a photo editing tool that allows users to edit images. 1. Click <Quick Time> on the Setup screen. , QuickTime is Apple's technology for handling movie, sound, animation, graphics, text, music, and even 360-degree virtual reality (VR) scenes. -
Page 120: Connecting To A Pc
I ENGLISH USB interface 1. Connect a USB cable to the USB jack on the PC. 2. Connect the other end of the USB cable into the USB jack on the DVD Camcorder. (USB jack) • If a PC is connected to the DVD Camcorder with a USB cable, only [Power] switch, [Mode] switch, [Zoom] lever can be operated. -
Page 121: Using The Pc Camera Function
I ENGLISH USB interface _the PC Camera Function -:* This function works only in Camera Mode. "',page 26 -:o To use the PC Camera function, the DV Driver, Video Codec and DirectX 9,0 programs mast be installedin the PC. -:- You can use this DVD Camcorder as a PC Camera. -:o When you connect to a Web site that provides video chatting functions, you can use your DVD Camcorder for such functions. -
Page 122: Using The Usb Streaming Function
[ ENGLISH USB interface Using the USE} Streaming Function -:* This function works in both Camera and Player Modes. _page 26 -:o To use USB streaming, the DV Driver, Video Codec and DirectX 9.0 programs must be installed in the PC. -:- You can view DVD Camcorder video on your PC using USB streaming. -
Page 123: Using Your Dvd Camcorder Abroad
[ ENGLISH Maintenance + Each country or region has its own electric and color systems. *:* Before using your DVD Camcorder abroad, check the following items. Power sources = You can use your DVD Camcorder in any country or area with the supplied AC Power adapter within 100V to 240V, 50/60 = Use a commercially available AC jack adapter, if necessary, depending on the design of the local walt outlet. -
Page 124: Troubleshooting
J ENGLISH Troubleshooting + Before contacting a Samsung authorized service center, perform the following simple checks. They may save you the time and expense of an unnecessary call. Self Diagnosis Display in <Camera/Player> Modes Slow The Battery Pack is almost discharged. - Page 125 I ENGLISH Troubleshooting Self Diaqn_n<M.CamlM.Player> Modes No memory card! Slow (M.Cam) There is no Memory Card in Insert a Memory Card. the DVD Camcorder. (M.Player) Slow Memory card full! There is not enough memory Change to a new Memory Card. to record.
- Page 126 I ENGLISH Troubleshooting *:* If these instructions do not solve your problem, contact your nearest Samsung authorized service center. _i_!iii_;_!i_!_:i_!_iiii_i!!ii_ii _ii _ii _ii_ii _ii _ii _ii _ii _ii _ii_ii _ii _ii _ii _ii _ii _ii _ii_ii _ii _ii _ii _ii _ii _ii_ii...
- Page 127 I ENGLISH Troubleshooting Check the [Power] switch is set to [1_ [Camera)]. There is not enough free space in the disc. Replace the disc with a new one or format the disc. Pressing the [Start/Stop] button Disc was finalized. does not start recording. Make the disc writable to record additional pictures.
- Page 128 i ENGLBH Troubleshooting Playback screen interrupted = Check the Power supply (Battery Pack or AC Power Adapter) unexpectedly. is properly connected and stable. A disc with data that had been recorded using other devices may not properly work with this DVD Camcorder. Cannot play back recorded Only DVD-RW disc DVD-RW/+RW/-R/+R DL disc...
- Page 129 I ENGLISH Troubleshooting Program AE Selecting the Program AE Function White Balance Setting White Balance Digital Effect Setting the Digital special effect Camera 16:9 Wide Setting the 16:9 Wide mode Selecting the Digital Image Stabilizing Digital Zoom Selecting Digital Zoom Rec Mode Selecting the recording speed Record...
- Page 130 I ENGLISH Troubleshooting Clock Set Setting the time Remote e Using the remote control Beep Sound Setting the aeep sound "/ System Shutter Sound Setting the Shutter sound USB Connect Selecting the USB device Language Selecting the OSD language Demonstration Demonstration o: SC-DC164/DC165 only MEMORY STICK_...
- Page 131 I ENGLISH Specifications ..................Video signal NTSC Picture Compression format MPEG-2 Audio Compression format DOLBY' DIGITAL STEREO CREATOR Recording Quality XP (about 9Mbps), SP (about 8Mbps), LP (about 3Mbps) Image device CCD (Charge Coupled Device) (880k pixe]s) Lens F18 3Ox (SC-D0183), 33x (SC-DC164/DC165) (Optical), 1200x(Digital) Electronic zoom lens Filter diameter Size/dot number SC-DC163:2 5inchs 112k / SC-DC164/DC165:2...
- Page 132 [ ENGLISH index Function buttons ....... 15 Playlist ..........62 Power Source ........25 Accessories ........13 Print Mark ........107 Add ............ 77 Hand Strap ........19 Program AE ........53 AF/MF ..........52 Protection ........69,100 AV in/Out ........... 88 information ......
- Page 133 SAMSUNG LIMITED WARRANTY SAMSUNG Electronics America Inc. (SEA), warrants that this product is free from defective material and workmanship. SEA further warrants that if product fails to operate properly within the specified warranty period and the failure is due to improper workmanship or defective material, SEA wilt repair or replace the product at it's option.
- Page 134 I ENGLISH Contact SAMSUNG WORLD WIDE If you have any questions or comments relating to Samsung products, please contact the SAMSUNG customer care center. Cl_stun er Care Center Web Site Req o_/Count,s/ CANADA 800 SAMSUNG (726 7864) www samsung comica...
- Page 135 [ ENGLISH THiS DVD CAMCORDER IS MANUFACTURED if you have any questions or comments relating to Samsung products, ptease contact the SAMSUNG customer care center Samsung Electronics America, inc. 1-800-SAMSUNG (726-7864) www.samsung.com RollS compliant Our product complies with "The Restriction Of the use of certain...