Table of Contents
Advertisement
RYOBI
OPERATOR'S
MANUAL
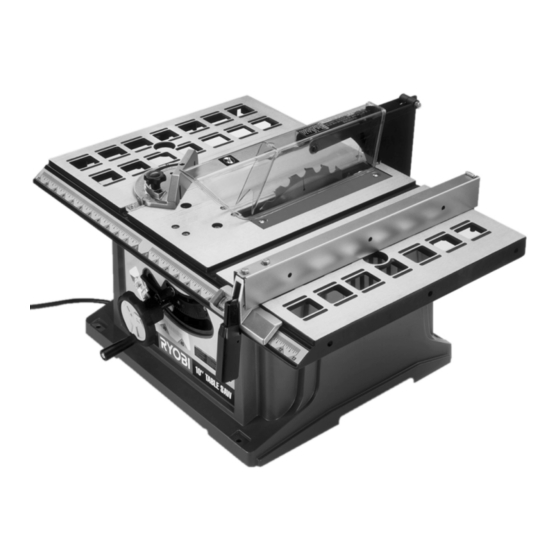
10 in. (254 mm) TABLE SAW
Model BTS10
THANK YOU FOR BUYING A RYOBI TABLE SAW.
Your new Table Saw has been engineered and manufacturedto Ryobi'shigh standardsfor dependability,ease of operation,
and operator safety. Properly cared for, it will give you years of rugged, treuble-free performance.
[_k
through
operator's
using your new table saw.
I
CAUTION: Carefully read
this entire
manual before
Pay close attentionto the Rules for Safe Operation, Warnings, and Cautions. If you use yourtable saw pmpedy and onlyfor
what it is intended, you will enjoy years of safe, reliable service.
Please fill out and return the Warranty RegistrationCard so we can be of future service to you.
Thank you again for buying Ryobi tools.
Advertisement
Table of Contents

Related Manuals for Ryobi BTS10


Summary of Contents for Ryobi BTS10
- Page 1 Model BTS10 THANK YOU FOR BUYING A RYOBI TABLE SAW. Your new Table Saw has been engineered and manufacturedto Ryobi'shigh standardsfor dependability,ease of operation, and operator safety. Properly cared for, it will give you years of rugged, treuble-free performance. CAUTION: Carefully read...
-
Page 2: Table Of Contents
Table of Contents ................................... Rules for Safe Operation ..............................Specific Safety Rules for the BTS1O Table Saw ........................ Glossary of Woodworking Terms ............................Unpacking and Checking Contents ............................List of Loose Parts ................................Features ....................................Assembly ..................................10-11 Tools Needed ................................. Assembling the Blade Control Handle ........................... -
Page 3: Rules For Safe Operation
Servicing requiresextreme care and knowledgeand should be performed only by a qualified service technician. For Do not attempt to operate this tool until you have read service we suggestyou retum thetoolto yournearest RYOBI thoroughly and understand completely all instructions, AUTHORIZED SERVICE CENTER for repair. - Page 4 Ryobi Service Center. The conductor with insulation having an outer surface that is green with or without 10. Dress properly. Do not wear loose clothing, gloves, yellow stripes is the equipment-grounding conductor.
-
Page 5: Specific Safety Rules For The Bts1O Table Saw
When servicing, use only identical Ryobi replacemen turn switchoff immediately if blade binds or stalls. parts. Use of any other parts may create a hazard or cause product damage. -
Page 6: Glossary Of Woodworking Terms
• Never perform any operation freehand, which means • Check with a qualified electrician if grounding using onlyyourhands to supportor guide the workpiece. instructionsare not completelyunderstoodor if in doubt Always use either the rip fence or the miter guide to as to whetherthe tool is properlygrounded. - Page 7 Heel Rip Fence Misalignment oftheblade, Adjustable guide used in ripping cuts to keep the workpiece Kerf parallelto the saw blade. The amount of material removed by the blade in a through- Riving Knife cut, or the slot produced by the blade in non-through or partial Also known as a separatoror spreader.A metal piece slightly cut.
-
Page 8: Unpacking And Checking Contents
Your Model BTS10 Table Saw is shipped complete in one WARNING: carton and includes rip fence, miter gauge, blade guard, accessory storage brackets, wrenches, Operator'sManual, To avoid risk of serious personal injury, do not attemptto and warranty information. assemble the table saw, plug in the power cord, or turn When you get your new table saw home, unpack the box to the power switch on until all damaged or missing parts make sure all information and accessories are included. -
Page 9: Features
WARNING: • Bevel indicator to set the exact angle of the blade, with locking lever. Before attempting to use your new Ryobi table saw, familiarize yourself with all the safety requirements listed • Adjustable miter gauge. in this Operator's Manual and the operating features •... -
Page 10: Assembly
Do not connect to power supply until assembly is _ WARNING: complete. Failure to comply could result in accidental starting and possibleserious personal injury. TOOLS NEEDED Fig. 4 Assemble the internal tooth lock washer, flat washer, and external tooth lock washer onto the 1/4-20 x 2-1/4" socket head bolt. -
Page 11: Install Miter Gauge
Attach blade guard assembly to support bracket with M6 x 19 mm carriage bolt. Secure with a 1/4" flat washer, external tooth lock washer and wing nut. NOTE: Before tightening wing nut, make sure there is at least 1/8" (3 mm) between the end of the table and blade guard assembly. -
Page 12: General Information
ON/OFF SWITCH Your Ryobi table saw is equipped with an on/off switch key that, if removed, prevents the saw from being turned on. The key must be in place to turn the saw on. If the key is removed during operation, the saw may be turned off but may not be turned on again until the key is replaced. -
Page 13: Adjustments
AND ADJUSTING YOUR BEVEL ADJUSTMENTS Your Ryobi Table Saw has a rack and pinion bevel control WARNING: that allowsyou to make angled cuts from 90 ° to 45 °. NOTE: A 90 ° cut has a 0 ° bevel and a 45 ° cut has a 45 °... -
Page 14: Toadjust The 45 ° Positive Stop
For through-cuts, place the workpiece to be cut flush against the blade. Set the blade so that the tips of the uppermost tooth are about an 1/8" (3 mm) higher than the workpiece and the valley between the teeth (gullet) is lower than the workpiece as in Figure 13. -
Page 15: Operation
MAKING CUTS There are seven basic types of cuts: Bevel Rip Cut Cut made along the grain with the blade tilted. Straight Cross Cut Cut made across the grain. Fig. 1£ Compound Miter Cross Cut Fig. 1_ Cut made with an angled blade on wood that is angled to the blade. -
Page 16: Cutting "13Ps
This section deals with the proper procedures for making If ripping a piece larger than 36" long, place a support these seven basic cuts. the same height as the table surface behind the saw for the cut work. CUTTING TIPS Make sure that all loose items have been removed from The kerf (the cut made by the blade in the wood) will be the table surface and that the workpiece is not in contact... -
Page 17: To Make A Miter Cross Cut
5. Position the workpiece flat on the table with the edge workpiece toward the blade. Stand slightly to the side of flush against the miter gauge. Let the blade build up to the wood as it contacts the blade to reduce the chance full speed before feeding the workpiece into the blade. -
Page 18: To Make A Bevel Rip Cut
TO MAKE A BEVEL RIP CUT TO MAKE A COMPOUND MITER CROSS It is recommended that you place the piece to be saved on It is recommended that you place the piece to be saved on the right side of the blade and that you make a test cut on the left side of the blade and that you make a test cut on scrap wood first. -
Page 19: Push Sticks
1. Remove the wing nut and carriage bolt holding the blade PUSH STICKS guard assembly to the blade guard support bracket. See A push stick is a device used to safely push a workpiece Figure 24. Remove the blade guard assembly. through the blade instead of using your hands. -
Page 20: Safety Considerations
SAFETY CONSIDERATIONS TO AVOID KICKBACK AVOIDING KICKBACK 1. Always use the correct blade depth setting. The top of the blade teeth should clear the workpiece by 1/8" to Kickback can occur when the blade stalls or binds, kicking 1/4". the workpieca back toward the front of the saw with great Inspectthe workpieca for knots or nails before beginning force and speed. -
Page 21: Maintenance
GENERAL MAINTENANCE SPECIFIC TABLE MAINTENANCE To remove or change the blade WARNING: Raise the blade to the maximum height. Remove the two screws holding the throat plate in place Always begin maintenance procedure and remove the throat plate. See Figure 26. disconnecting the saw from the power supply to avoid risk of serious personal injury. -
Page 22: Troubleshooting
3. Align the rip fence. See page 14. 4. Wood is warped. 4. Replace wood. 5. Blade is heeling. 5. Call Ryobi Technical Service at 1-800-525-2579 Wood edges away from rip fence 1. Rip fence is misaligned. 1. Check and adjust the rip fence. - Page 23 Page 23...
-
Page 24: Parts Ordering / Service
RYOBI oPE ToR's MA.UA, 10 in. (254 mm) TABLE SAW Model BTS10 EXTENSION CORD CAUTION **Ampere rating (ontcoldatap_ate) 0-2.0 2,1-3.4 3.5-5.0 5.1-7,0 7.1-12.0 12.1-t6.0 IVhen usinga power toolat a considerabledistancefrom a power source, be sure to use an extension cord that has the capacity Cord Length Wire Size (A.W.G.)