Advertisement
Available languages
Available languages
Quick Links
®
293 Wright St., Delavan, Wl 53115
Phone:
1-800-468-7867
1-800-546-7867
Fax:
1-800-390-5351
OWNER'S
MANUAL
Convertible
Deep Well
Jet Pumps
NOTICE
D'UTILISATION
Pompe
_ _jecteur
transformables
pour puits profonds
MANUAL
DEL
USUARIO
Bombas
Convertibles
tipo
"Jet"
para
Pozos Profundos
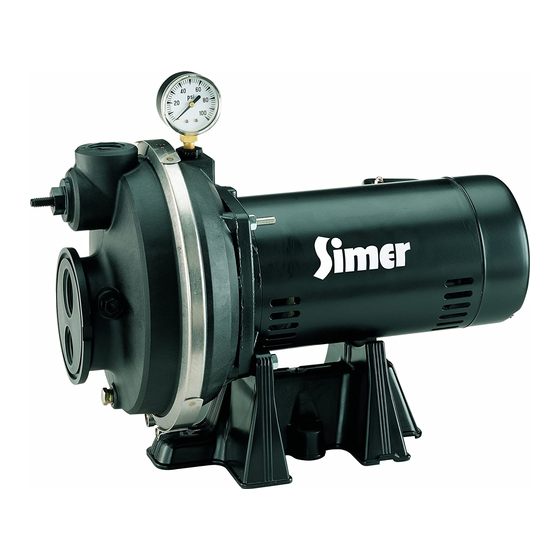
Models 3305P, 3307P, 3310P
Installation/Operation
For further operating, installation,
or maintenance assistance:
Call 1-800-468-7867
English ..............
Pages 2-16
Installation/Fonctionnement
Pour plus de renseignements
concernant
I'utilisation,
/'installation
ou /'entretien,
Composer
le I (800) 468-7867
Fran_ais .........
Pages 1 7 h 31
I nstalaci6n/Operaci6n
Para mayor informacidn sobre el
funcionamiento,
instalacidn o
mantenimiento de la bomba:
l_lame al 1-800-468-7867
Espafiol ...........
Paginas 32=47
@2006
SIM313 (4/18/06)
Advertisement

Related Manuals for Simer 3307P


Summary of Contents for Simer 3307P
- Page 1 OWNER'S MANUAL Convertible Deep Well Jet Pumps ® NOTICE D'UTILISATION Pompe _ _jecteur transformables 293 Wright St., Delavan, Wl 53115 Phone: 1-800-468-7867 pour puits profonds 1-800-546-7867 Fax: 1-800-390-5351 MANUAL USUARIO Bombas Convertibles tipo "Jet" para Pozos Profundos Models 3305P, 3307P, 3310P Installation/Fonctionnement I nstalaci6n/Operaci6n Installation/Operation...
- Page 2 Safety READ AND FOLLOW ELECTRICAL SAFETY SAFETY INSTRUCTIONS! Icapadtor [_WARNING voltage may be hazardous. To discharge motor capacitor, hold insulated handle screw- This is the safety alert symbol. When you see this driver BY THE HANDLE and short capacitor terminals symbol on your pump or in this manual, look for together.
- Page 3 Retail outlet or to SIMER as soon as possible ariel" the dis- covery of any alleged defect. SIMER will subsequently take corrective...
- Page 4 Replacing an Existing Pump NOTICE: Your old ejector (in the well) may not be DEEP WELL properly matched to your new pump. If the pump I_WARNINGIHazardous voltage. Disconnect power to does not perform properly, we recommend that you pump before working on pump or motor. install ejector kit FP4800 or 29660.
- Page 5 New Shallow Well |nstalladon tight. If the suction pipe can suck air, the pump cannot WELL POINT INSTALLATION (Figure 5) pull water from the well. If one well point does not 1. Install the control valve and pressure gauge in the supply enough water, consider connecting two or three pump body (see Figure 1).
- Page 6 New Shallow Well |nstalladon possible fittings - especially elbows - as fittings Assemble a foot valve and suction pipe (see Figure increase friction in the pipe. The suction pipe should 9). Make sure that the foot valve works freely. Use teflon tape or a teflon-based pipe joint compound on be at least as large as the suction port on the pump.
- Page 7 New Deep Well Installation 4" OR LARGER WELL (Figure 10) WELL (Figure 1 1) 1. Install the control valve and pressure gauge in the Install the control valve and pressure gauge in tile pump body. See Figure 7. pump body. See Figure 7. Mount the pump as close to the well as possible.
- Page 8 Discharge Pipe and Pressure Tank Connections PRE-CHARGE TANK CONNECTION STANDARD TANK CONNECTION (Figure 12) (Figure 13) Install a close nipple and a tee in the pump discharge 1. Install a close nipple and a tee in the pump discharge port (see Figure 12). The pipe size must be at least as port.
- Page 9 Electrical Disconnect power before working on pump, motor, pressure switch, or wiring. MOTOR SWITCH SETTINGS NOTE: 1/2 HP motors are wired for 115 volts only, and have no motor wiring to change. 3/4 HP or 1 HP motor termina] boards (located under the motor end cover) shou]d ]ook like the one below.
- Page 10 Electrical Connection Procedure: IZ_WARNING I Hazardous voltage. Can shock, burn, or kill. Connect ground wire before connecting power sup- Step 1. Connect the ground wire first as shown in Figure ply wires. Use the wire size (including the ground wire) 14.
- Page 11 Preparing to Start Pump - Deep Wei[ 3. Power on! Start the pump and watch the pressure I_ CAUTION ] Never run pump dry. Running pump with- gauge. The pressure should build rapidly to 50 PSi as out water may cause pump to overheat, damaging seal the pump primes.
- Page 12 Preparing to Start Pump - Shallow Well Replace all fill plugs. Leave the control valve open I_l_ ] Never run pump dry. Running pump with- CAUTION (in a shallow well installation, the control valve out water may cause pump to overheat, damaging seal always stays open).
- Page 13 Troubleshooting SYMPTOM POSSIBLE CAUSE(S) CORRECTIVE ACTION Motor will not run Be sure switch is on. Disconnect switch is off Replace fuse or reset circuit breaker. Fuse is blown or circuit breaker tripped DISCONNECT POWER; Replace starting switch. Starting switch is defective Wires at motor are loose,...
- Page 14 Repair Parts Mode[ and HP 3305P 3307P 3310P Part 1/2HP 3/4H P Description Motor J218-577PKG J218-590PKG ]218-596PKG TC21 O4 TC21 O4 TC21 O4 Pressure Gauge L1 76-47P L1 76-47P L1 76-47P Pump Body (Back Half) Seal & Gasket [<it * FPP15OO FPP15OO FPP15OO...
- Page 15 Ejector Package Ejector Packages are available for either shallow well or pumping requirements. Note that the nozzle comes pre- deep well operation. Pump owners manual describes installed ill ejector body and works with both shallow conditions that define shallow well and deep well oper- well and deep well venturis.
- Page 16 Ejector Package Deep Well |nsta[lafion FP4840 or 29670 4" Double Pipe Kit FP4800 or 29660 2" Single Pipe Kit _----- 1927 0895 Part Part Part Part Number Number Description Description Venturi N40-92 J32P-24 Ejector Body Venturi Nozzle (#51) J34P-41 J32P-18 Nozzle (#52) J34P-42...
- Page 17 S curit s cUriT , LIRE TOUTES CES iNSTRUCTiONS cONcERNANT L'ELECTRIcITE ET LES SUivRE! [_AVERTISSEMENT] ka tension du condensateur peut _tre _iCe symbole indique qu'il faut 6tre prudent. dangereuse. Pour d6charger le condensateur du moteur, Lorsque ce symbole apparait sur la pompe ou dans tenir un tournevis 5 manche isol6 PAR LE MANCHE et cette Notice, rechercher une des mises en garde qui mettre en court-circuit...
- Page 18 6tranger se serait introduit dans le syst_me ou aux produits ayant d'autres qui varient d'une province _'_I'autre. SIMER ® 293 Wright St. , Delavan, 53115 T_I. 1 800 468-7867/1 800 546-7867 • T_l_c. 1 800 390-5351...
- Page 19 Remplacement d'une pompe existante PU|TS PROFONDS NOTA : L'ancien 6jecteur (ce]ui qui est dans ]e puits) ne s'assortira peut-6tre pas bien avec ]a nouve]]e pompe. Si ]e rendement de ]a nouve]]e pompe n'est pas ad6quat, nous recommandons de poser [_kAVERTISSEMENT] Tension dangereuse. Couper J'arriv6e de courant...
- Page 20 |nsta[[ation sur un nouveau puits peu profond INSTALLATION DE LA fournit pas suffisamment d'eau, consid6rer brancher deux ou trois pointes fi]trantes sur un m6me tuyau d'aspiration. POINTE FILTRANTE (Figure 5) Le branchement de cette pompe _ 6jedeur neuve pour puits profonds sur [a tuyauterie du puits est maintenant terrain6.
- Page 21 Installation sur un nouveau puits peu profond sur ]es raccords fi]et6s. Supporter ]e tuyau de fa£:on qu'i] ne soit pas Assembler le clapet de pied et le tuyau d'aspiration (voir la Figure cintr6 afin qu'i] n'exerce pas de contraintes sur ]e corps de ]a 9).
- Page 22 Installation sur un nouveau puits profond PU|TS DE 4 POUCES DE D|AMETRE PU|TS DE 2 POUCES (Figure 1 1) OU PLUS GRAND (Figure Poser ]a vanne de r6glage et ]e manom_tre dans ]e corps de ]a pompe (voir ]a Figure Poser ]a vanne de r6glage et ]e manom_tre...
- Page 23 Branchements du tuyau de refouJement et sur un r&servoir sous pression BRANCHEMENT SUR UN RESERVO|R BR.ANCHEM.ENT SUR UN RI'SERVO|R PRECHARGE (Figure STANDARD (Figure Poser un raccord court et un t6 dans I'orifice de refoulen/ent de la Poser un raccord court et en t6 dans ]'orifice de retoulement de ]a pompe...
- Page 24 Electricit& D6brancher le courant 6[ectrique avant d'intervenir sur la pompe, le moteur, le manostat ou le c_blage. REGLAGES DE L'INTERRUPTEUR DU MOTEUR REMARQUE :Les moteurs de 1/2 ch sont c_bl6s pour fonctionner sur un courant de 115 volts seulement; il ne faut donc changer aucun c_ble.
- Page 25 I lectricit& M_thodes de connexion AVERTISSEMENT I Tension dangereuse. Risque de secousses Brancher tout d'abord le fil de raise _ la terre, comme il est _[ectriques, de hr_lures, voire [a mort. Brancher [e fi[ de terre avant illustr6 ._ ]a Figure 14.
- Page 26 Pr¶tions avant le d&marrage de la pompe - Puits profond Etablir ]e courant] D6marrer ]a pompe et survei]]er ]e manom_tre. ATTENTIONj Ne jamais faire fondionner ]a pompe h sec. Faire Au fur et _ mesure que ]a pompe s'amorce, ]a pression dolt fon_tionner ]a pompe...
- Page 27 Pr6parafions avant le d6marrage de la pompe - Puits peu profond Reposer tous]es bouchons filet6s. Laisser ]a vanne de r6glage ® mENTIONj Ne ja ais faire fondionner Ka p ompe sec Faire ouverte (dans ]es puits peu profonds, ]a vanne de r6g]age reste tonctionner...
- Page 28 Diagnostic des pannes SYMPTOMES CAUSES PROBABLES REMj:DES Le sectionneuF est ouvert S'assurer le sectionneur est enclench_. rnoteul" tOUl'ne Le fusible est saut6 ou le disjoncteur Rernplacer le fusible r6enclencher le disjoncteur. est d_clench_ L'interrupteur de d6marrage est d6_fectueux COUPER L'ARRIVEE DE CC)URANT;...
- Page 29 Pi&ces de rechange ModUle et puissance en ch 3305P 3307P 3310p 1 ch 1/2 ch 3/4 ch D_signafion des pi_ces R_f. Moteur ]218-577PKG J218-590PKG J218-596PKG Manom_tre TC21 O4 TC21 O4 TC21 O4 L1 76-47P L1 76-47P L1 76-47P Corps de [a pompe (moiti6.
- Page 30 Ensemble &jecteur Un ensemble d'6jecteur est livrable pour les puits peu pompage. II est _ noter que le gicleur est d6j_ install6 dans profonds ou profonds. La Notice d'ufilisafion de la pompe le corps de I'injecteur et qu'il fonctionne aussi bien avec d6crit les conditions qui d6finissent le fonctionnement des venturis pour puits peu profonds que profonds.
- Page 31 Ensemble &jecteur installation dans un puits profond Trousse pour tuyaux jume[_s, 4 pouces, FP4800 ou 29660 Trousse pour tuyau× simpies, 2 pouces, FP4840 ou 29670 _----- 1927 0895 Num_ro D_signation D_signation NU_eFO R_f. R_f. des pi_ces des pi_ces des pi_ces des pi_ces N40-92 Venturi...
- Page 32 Seguridad LEA Y S|GA LAS |NSTRUCCIONES SEGURIDAD ELEcTRIcA DE SEGURIDAD! [_ ADVERTENCIA ] El voltaje del capacitor puede ser peligroso. Para descargar el capacitor del motor, tome un Este es el simbolo de aierta de seguridad. Cuando usted vea este dmbolo en su bomba o en este manu- desatornillador con mango aislado POP, EL MANGO...
- Page 33 SIMER a la brevedad Si dentro de los doce (I 2) meses a partir de la fecha de la compra original por el con-...
- Page 34 Reempiazo de una Bomba E×istente POZO PROFUNDO AVISO: Es posible que el eyector viejo (on el pozo) no est6 conectado adecuadamer_te a su nueva bomba. Si ]a bomba no funciona adecuadamente, ]e recomer_damos insta]ar el kit de eyector FP4800 ADVERTENCIA I Voltaje peEigroso.
- Page 35 Instalaci6n de un Pozo Nuevo de Poca Profundidad |NSTALACION DEL PUNTO DE POZO Usted acaba de realizar la cone×i6n de tuberfa de succi6n para su nueva bomba tipo "jet" para pozo poco profundo. Por favor pase a ]a (Figura 5) P_gina 38 para rea]izar [as conexiones...
- Page 36 Instalaci6n de un Pozo Nuevo de Poca Profundidad de ]a bombay con el prop6sito de que no se incline ]igeramente Instale una v41vu]a de retenci6n y ]a tubeffa de succi6n (yea ]a hacia arriba desde el pozo hacia ]a bomba dos puntos altos pueden Figura 9).
- Page 37 |nstalaci6n De Un Pozo Nuevo Profundo POZO DE 2" (F|GURA POZO DE 4" 6 MAS (Figura 10) Instale ]a wilvuJa de control y el medidor de presi6n en el cuerpo 1. Instale ]a wiivula de control y el n/edidor de presi6n en el cuerpo de la bomba.
- Page 38 Tuberia de Descarga y Conexiones del Tanque de Presi6n CONEX|ON PARA TANQUE ESTg, NDAR CONEX|ON DE TANQUE DE PRE- (Figura 13) CARGA (Figura Instale una boquilla de cierre y una "T" en el orificio de descarga 1. Insta]e una boqui]]a de cierre y una "T"...
- Page 39 Eiectricidad Desconecte [a corriente antes de trabajar en [a bomba, e[ motor, e[ conmutador a presi6n, o los cables. CONFIGURACIONES DEL INTERRUPTOR DEL MOTOR NOTA: Los motores de 1/2 HP vienen cableados s61o para 115 voltios y no tienen cables que se puedan cambiar.
- Page 40 El&ctrJcas y a TJerra Procedimiento para las conexiones: ADVERTENCIA ITensi6npdigrosa. Puede causarchoques, quemaduras o muerte. Conecte eJ Mambre de puesta a tierra antes de 1. Conecte e] a]ambre de puesta a tierra primero segOn se ilustra en ]a conectar Jos aJambres de suminMro de corriente.
- Page 41 Preparaci6n Pare Arrancar La Bornba - Pozo Profundo Despu6s de 2 6 3 minutes, el medidor debe indicar ]a presi6n. PRECAUCION] Nunca ponga a fundonar [a bomba en seco. no, pare ]a bomba, retire ]os tapones de ]]enado, vue]va a abrir Poner a funcionar ]a bomba sin agua...
- Page 42 Preparaci6n ParaArrancar La Bomba - Pozo Poco Profundo Vuelva a co]ocar todos los tapones de ]]enado. Deje abierta PRECAUCION] Nunca ponga a fundonar [a bomba en seco. wi]vu]a de contro] (en una insta]aci6n para pozo poco profundo, Poner a funcionar ]a bomba sin agua puede...
- Page 43 So[uci6n de Prob[emas SINTOMA' CAUSA(S) PROBABLE(S) . ACCION CORRECTIVA El motor no funciona El interrupter de desconexi6n est_i apagado Verifique el interruptor est_ encendido. El fusible esbi quernado o el disyunter se abri6 Reemplace el fusible o reposicione el disyuntor. El interrupter de encendido est4 defectuoso...
- Page 44 Refacciones Modelo y HP 3305P 3307P 3310P C_ave 1/2 HP 3/4 HP Descripci6n de la Parte Motor J218-577PKG J218-590PKG J218-596PKG Medidor de Presi6n TC2104 TC2104 TC2104 L176-47P L176-47P L176-47P Cuerpo de la Bomba (Mitad trasera) FPP1500 FPP1500 FPP1500 Kit de Sello y Empaque* Unidad de la abrazadera en V...
- Page 45 Paquete eyector importante leer el manual con atenci6n para determinar Se dispone de paquetes de eyector para operaciones sus requisitos de bombeo. Observe que la tobera ya viene pozos profundos o poco profundos. El manual del propi- instalada en la unidad del eyector y funciona tanto con etario de la bomba describe las condiciones que definen venturi para pozos profundos como poco profundos.
- Page 46 Pacluete eyector |nstalad6n en pozos profundos 29660 Kit de tuberia sencilla de 2" FP4840 o 29670 tuberia doble 4" 4800 _----- 1927 0895 N_mero de Namero de Chve Clave Descripci6n Descripci6n de la Parte de [a Parte repuesto repuesto N40-92 Criba Unidad de eyector J32P-24...