Table of Contents
Advertisement
Advertisement
Table of Contents

Related Manuals for RCA RT2370


Summary of Contents for RCA RT2370
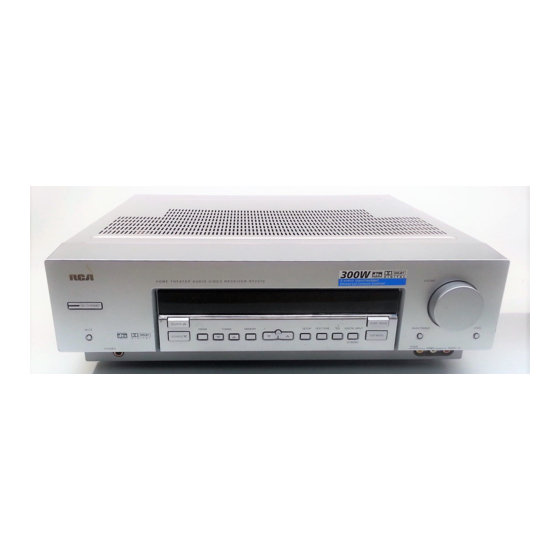
- Page 2 J, Applicable at the date the warranty included in this Guide manufacture. Technical Specification Product: Dolby Digital Audio video receiver Brand: RCA Model: RT2370 Electrical c urrent consumption Power Supply: 120V ~ 60Hz THE E×CLA_._ATION LIGHTNING CAUTION: TO REDUCE POINT WITHIN THE...
- Page 3 ..Test Tone / Channel Balance ..TV Codes ......Connecting for Power ....Satellite Receivers ....Using Headphones ....Audio (RCA only) ....Factory Setting ..... Laser disc Players ....Limited Warranty (U.S.) ..Operating your Receiver Receiver Controls ....
-
Page 4: Unpacking The Speakers
_ _ ,_ ,, connectors; • one instruction book; One RCA Universal • one safety leaflet; Remote Control • one Quick Connection Guide Un packing The Speakers • one set of speakers nc ud ng 2 front... -
Page 5: Inserting Batteries Into Remote Control
Inserting Batteries into Remote Control Insert AA(R6) batteries according to the + and - signs on the battery compartment. To use the remote control, point it directly at your receiver. Whenever button is pressed, a red indicator will light up on the remote control. -
Page 6: Digital Connection
When S-Video cable is used, select the corresponding digital input source !!!!!!!!!!!!!!!!!!!!!!!!!!!!!!!!!!!!!!!!!!!!!! composite video (yellow RCA connector) cable Note: Optical and coax cables carry only the audio portion of the signal A video !!!!!!!!!!!!!!!!!!!!!!!!!!!!!!!!!!!!!!!!!!!!!i must also be connected for VCR recording... -
Page 7: Digital Connections
Digital Connections Read instructions carefully when connecting compo- nents to the receiver. Digital In Jacks can accept Dolby Digital (AC-3), or PCM signals when compatible components connected. "_iii iii Connecting the Antennas The AM and FM antennas connect to the AM terminals on the system's back panel. -
Page 8: Speaker Wires
Speaker wires 1 for each speaker, is needed connection• Twist the stripped ends speaker cord about 2/3 inch (15 ram). Press down FRONT SPEAKERS the tab to open the terminal and insert the wire. Release tab to lock wire in the terminal. -
Page 9: Positioning Your Speaker
Positioning your speaker Left, Right (Front Speakers) They carry primarily music and sound effects Center In surround mode, the center speaker carries much the dialogue as well as music and effects. It should set between left and right speakers. Surround (Rear Speakers) Their overall sound... -
Page 10: Surround Placement
Advanced Setting Alternative Surround Placement Rear wall If rearwall mounting isthe onlychoice, aim the speakers at each other (A), towards the front (B) or even towardsthe sidewalls (C, D), Experiment with placement until surround sounds seem to envelop i_i_i_i_i_i_i_i_i_i_i_i_i_i_i_i_i_i_i_i_i_i_i_i_i_i_i_i_i_i_i_i_i_i_i_i_i_i_i_i_i_i_i_i_i_i_i_i_ you, ratherthancomingfrombehindyou. -
Page 11: Test Tone / Channel Balance
Test Tone / Channel balance Channel balance Your receiver is equipped with a test signal generator for balancing the channels, As the signal "travels" from channel to channel, adjust the level controls until each channel plays at the same loudness level. - Page 12 © 9. TUNING Press for about 2 seconds to search for next station. Pressonce to review all preset stations in preset mode. In normal mode, press to increase/decrease tuner frequencies. 10. SURR. MODE Press repeatedly to select the surround mode you want. ( refer to "Advanced Sound Control"...
-
Page 13: Your Remote Control
Your Remote Control Please be sure you have inserted the batteries into the remote control (see relevant section on page 3.) You can test it by pressing any button. If it works, the red LED will light. < ::._ I®®® @o@o@1 _o@ _6 '_ RgCORD... -
Page 14: Display
• Speaker Icons. SLEEP • Unit in Sleep mode. MEMORY • Unit in Memory or Preset mode. • Tuner frequency unit. • EQ effect activated. -
Page 15: Switching On/Off
Switching on/off • To switch on the receiver, press ON/STANDBY button once, or any source button on the remote control. • Standby: when the receiver is on, press the ON/STANDBY button once to activate the standby mode. • To switch off the unit completely, unplug the power cord from the socket... -
Page 16: Using The Remote To Control Additional Components
(like CD, TV, DVD, TAPE, etc.). What need is to encode them in advance (not necessary recent RCA & Proscan models). 1. Turn on the component to be programmed. 2, Look up the brand and corresponding code num- ber in the code... - Page 17 Once your _emote is encoded, you Canpress ON/OFF on the remote once to turn off the component and then followed by the Second time quickly to turn off the receiver (Le. this Unit), If you only want the receiver tO be turned off, select FM/ AM while the unit is ON before pressing ON!OFF.
- Page 18 5- Tune the stations by pressing TUNING DOWN repeatedly until the desired station is found. Alternatively, can press and hold TUNING UP or DOWN about one second to activate automatic SEARCH function. In this mode the receiver will automatically tune frequencies until it finds a station 1.
-
Page 19: Storing Radio Stations
Storing radio stations: The receiver can store up to 40 radio stations memory. You can enter every single radio station yourself or the receiver can store all available radio station automatically in an ascending order. Automaticpreset storing: (FMonly) 1. Select the band by pressing FM/AM... - Page 20 Stereo The Stereo mode uses the two main channel outputs from the front speakers. Use this mode if you have connected the front speakers only. DSP (Digital Sound Processor) These digital sound effects resemble sounds in a real environment such as (STADIUM / THEATER / CONCERT ! CLUB / CHURCH...
-
Page 21: Fine Setting Of The Components
Fine Setting of the Components The receiver has pre-selectecl surround mode once you turn on the unit by pressing the Source Buttons (like DVD, SAT, CD) directly. The default surround modes for different components are listed in the table below. If you decide to change... -
Page 22: Advanced Setting
4. Press LEVEL again to save your setting. S. Repeat step 3 to adjust other speaker volume lev- els. To adjust the level of a!l speakers (center and surround speakers), you must select Pro Logi c mode first by pressing the SURROUNDkey Advanced Setting Factory defaulted Advance setting indication from VFD... - Page 23 • The sub-woofer selection will always be YES when the main speakers are set to small (SML). • For the subwooferphase setting, it will be affected by how you locate the subwoofer_ Try both + and - settings and select the one that has better bass effect.
-
Page 24: Equipment Specifications
TAPE OUTand RECOUTdo not operate in VCRmode. • Check to make sure the unit is not in 6-channel direct input mode. Cleaningthe Exterior • Disconnect the system from AC power before cleaning the exterior of the system with a soft dust cloth, with a slightly clamp leather... -
Page 25: Important Battery Information
Disconnect theaudio system f rom thepower source before performing any maintenance. Cleaning Clean the exterior of the system using a soft dust cloth. Important battery information • Remove the batteries to avoid leakage if you do not use your remote control for more than one month. -
Page 26: Codes
VCR CODES ADMIRAl_ 2131 ADVENTURA 2026 AIKO 2027 AIWA 2026 2002, AKAI 2003, 2004, 2005, 2007, 2008, 2111, 2112, 2113 AMERICAN HIGH 2021 2013 ASHA AUDIO DYNAMICS 2010 2009, AUDIOVOX 2014 BELL & HOWELL 2011 BEAUMARK 2013 BROKSONIC 2025 2012, CALIX 2014 CANDLE... - Page 27 MEMOREX 2002, 2011, 2013, 2014, 2021, 2023, 2026, CODES 2104, 2131 2029,2065,2113 ABEX MGN TECHNOLOGY 2013 ADMIRAL MIDLAND 2053 MINOLTA ADVENTURA 2055,2056,2107 MITSUBISHE 2029, 2055, 2056, 2065, 2066, 2067, 2069, 2070, 2071, 2072, 2073, 2074, 2106, 2113, ALLERON 2123 MONTGOMERY WARD AMTRON 2075,2131...
-
Page 28: Receivers
5056,5057 DRAKE 5058,5059 GE SATELLITE RECEIVER 5000, 5001 GENERALINSTRUMENTS 5060,5061,5062 PANASONIC SATELLITE RECEIVER 5075 PRIMESTAR 5076 PROSCAN SATELLITE RECEIVER 5000, 5001 RCA SATELLITE RECEIVER 5000, 5001 REALISTIC 5063 SONY SATELLITE RECEIVER 5072 STS1 5064 STS2 5065 STS3 5066 STS4 5067... - Page 29 What will • Pay any Authorized RCA Audio Service Center the labor charges to repair your unit. • Pay any Authorized RCA Audio Service Center for the new or, at our option, refurbished...
- Page 30 Limitation of Warranty: • THE WARRANTY STATED ABOVE IS THE ONLY WAR- RANTY APPLICABLE TO THIS PRODUCT. NO VERBAL OR WRITTEN INFORMATION GIVEN BY THOMSON MULTI- MEDIA LTD., ITS AGENTS OR EMPLOYEES SHALL CRE- ATE A GUARANTY OR IN ANY WAY INCREASE THE SCOPE OF THIS WARRANTY.