Table of Contents
Advertisement
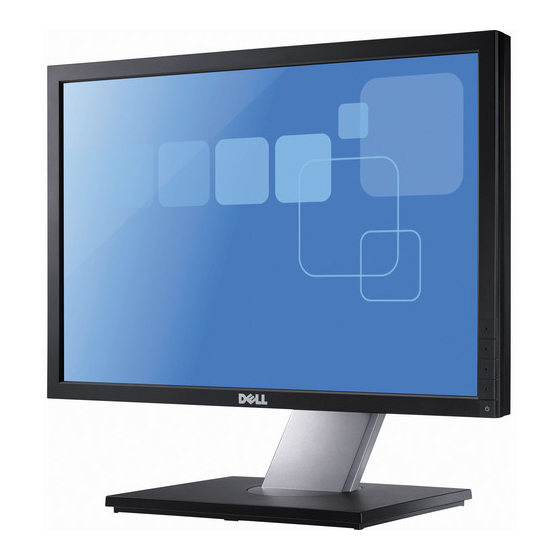
Dell™ P1911 Flat Panel Monitor User's Guide
About Your Monitor
Setting Up the Monitor
Operating the Monitor
Troubleshooting
Appendix
Notes, Notices, and Cautions
NOTE:
A NOTE indicates important information that helps you make better use of your monitor.
CAUTION:
A CAUTION indicates either potential damage to hardware or loss of data and tells you how to avoid the problem.
WARNING:
A WARNING indicates a potential for property damage, personal injury or death.
Information in this document is subject to change without notice.
© 2010 Dell Inc. All rights reserved.
Reproduction of these materials in any manner whatsoever without the written permission of Dell Inc. is strictly forbidden.
Trademarks used in this text: Dell and the DELL logo are trademarks of Dell Inc; Microsoft a n d Windows are either trademarks or registered trademarks of Microsoft Corporation in
the United States and/or other countries, Intel is a registered trademark of Intel Corporation in the U.S. and other countries; and ATI is a trademark of Advanced Micro Devices,
Inc. ENERGY STAR is a registered trademark of the U.S. Environmental Protection Agency. As an ENERGY STAR partner, Dell Inc. has determined that this product meets the
ENERGY STAR guidelines for energy efficiency.
Other trademarks and trade names may be used in this document to refer to either the entities claiming the marks and names or their products. Dell Inc. disclaims any
proprietary interest in trademarks and trade names other than its own.
Model P1911b, P1911t.
AUG 2010 Rev. A00
Advertisement
Table of Contents

Related Manuals for Dell P1911


Summary of Contents for Dell P1911
- Page 1 ENERGY STAR guidelines for energy efficiency. Other trademarks and trade names may be used in this document to refer to either the entities claiming the marks and names or their products. Dell Inc. disclaims any proprietary interest in trademarks and trade names other than its own.
-
Page 2: About Your Monitor
Back to Contents Page About Your Monitor Dell™ P1911 Flat Panel Monitor User's Guide Package Contents Product Features Identifying Parts and Controls Monitor Specifications Plug and Play Capability Universal Serial Bus (USB) Interface Maintenance Guidelines Package Contents Your monitor ships with the components shown below. Ensure that you have received all the components and contact Dell if something is missing. -
Page 3: Front View
Product Features The Dell Professional P1911 flat panel display has an active matrix, thin-film transistor (TFT), liquid crystal display (LCD). The monitor features include: ■ 48.26 cm (19 inches) viewable area display (Measured diagonally) . ■ 1440x900 resolution, plus full-screen support for lower resolutions. -
Page 4: Back View
(Behind attached base plate) Security lock slot To help secure your monitor. Dell Soundbar mounting brackets To attach the optional Dell Soundbar. Stand Release Button To press to release the stand. Cable management slot To organize cables by placing them through the slot. -
Page 5: Side View
Monitor rear view with pull-out card inserted back to provide a clean back view. Label Description Barcode serial number label To contact Dell for technical support. Regulatory label Lists the regulatory approvals. NOTE: The regulatory rating label and barcode serial number label is revealed when plate is pulled out from USB compartment. -
Page 6: Bottom View
Left view Right view Label Description USB downstream ports Bottom View Bottom view Label Description AC power cord connector Dell Soundbar power connector DVI connector VGA connector USB upstream port USB downstream ports Monitor Specifications Flat Panel Specifications... - Page 7 1000:1 (typical) Dynamic contrast ratio 50,000:1 (max.) Faceplate coating Antiglare with hard-coating 3H Backlight CCFL (2) edgelight system Response Time 5 ms typical Color Gamut 80%* *[P1911] color gamut (typical) is based on CIE1976 (80%) and CIE1931 (72%) test standards.
-
Page 12: Fcc Notices (U.s. Only) And Other Regulatory Information
NOTE: If you do not have an active Internet connection, you can find contact information on your purchase invoice, packing slip, bill, or Dell product catalog. Dell provides several online and telephone-based support and service options. Availability varies by country and product, and some services may not be available in your area. - Page 13 Back to Contents Page Help on PowerNap Installation To install PowerNap succesfully, follow these steps:- ® ® 1. Check Operating System Requirements Windows XP, Windows Vista , Windows 2. Install Entech API Install 3. Install PowerNap Software Install Back to Contents Page...
-
Page 14: Setting Up Your Monitor
Back to Contents Page Setting Up Your Monitor Dell™ P1911 Flat Panel Monitor If you have a Dell™ desktop or a Dell™ portable computer with internet access 1. Go to http://support.dell.com, enter your service tag, and download the latest driver for your graphics card. 2. After installing the drivers for your Graphics Adapter, attempt to set the resolution to 1440 X 900 again. NOTE: If you are unable to set the resolution to 1440 x 900, please contact Dell™ to inquire about a Graphics Adapter that supports these resolutions. Back to Contents Page... -
Page 15: If You Have Non Dell™ Desktop, Portable Computer, Or Graphic Card
Back to Contents Page Setting Up Your Monitor Dell™ P1911 Flat Panel Monitor If you have non Dell™ desktop, portable computer, or graphic card In Windows XP: 1. Right-click on the desktop and click Properties. 2. Select the Settings tab. 3. Select Advanced. 4. Identify your graphics controller supplier from the description at the top of the window (e.g. NVIDIA, ATI, Intel etc.). -
Page 16: Operating The Monitor
Using the Front Panel Controls Using the On-Screen Display (OSD) Menu PowerNap Software Setting the Maximum Resolution Using the Dell Soundbar (Optional) Using the Tilt, Swivel, and Vertical Extension Rotating the monitor Adjusting the Rotation Display Settings of Your System Using the Front Panel Controls Use the control buttons on the front of the monitor to adjust the characteristics of the image being displayed. -
Page 17: Accessing The Menu System
Use the Power button to turn the monitor on and off. The Blue LED indicates the monitor is on and fully functional. An amber LED indicates DPMS power save mode. Power (with power light indicator) Using the On-Screen Display (OSD) Menu Accessing the Menu System NOTE: If you change the settings and then either proceed to another menu or exit the OSD menu, the monitor automatically saves those changes. The ... - Page 18 Submenus Energy Gauge This meter shows the energy level being consumed by the monitor in real time. When the meter is green, it indicates the monitor is consuming low energy level. When the energy consumed increases, the meter will change to yellow and subsequently red. Brightness/Contrast Use this menu to activate Brightness/Contrast adjustment.
- Page 24 AUTO ADJUST Even though your computer recognizes your monitor on startup, the Auto Adjustment function optimizes the display settings for use with your particular setup. Auto Adjustment allows the monitor to self-adjust to the incoming video signal. After using Auto Adjustment, you can further tune your monitor by using the Pixel Clock and Phase controls under Displays Settings.
- Page 25 NOTE: In most cases, Auto Adjust produces the best image for your configuration. NOTE: AUTO ADJUST option is only available when you are using the analog (VGA) connector. INPUT SOURCE Use the INPUT SOURCE menu to select between different video signals that may be connected to your monitor. Auto Select Select Auto Select to scan for available input signals.
- Page 26 When you select Video, you can choose Movie, Game, Sports, or Nature: Movie: Loads color settings ideal for movies. This is the default preset mode. Game: Loads color settings ideal for game. Sports: Loads color settings ideal for sports. Nature: Loads color settings ideal for nature.
- Page 27 Display Setting submenu for DVI-D input Wide Mode Adjust the image ratio as 4:3 or full screen. Horizontal Position Use the buttons to adjust image left and right. Minimum is '0' (-). Maximum is '100' (+). NOTE: When using a DVI source, the Horizontal Position setting is not available.
- Page 28 Language Language option to set the OSD display to one of eight languages (English, Espanol, Francais, Deutsch, Brazilian Portuguese, Russian, Simplified Chinese or Japanese). Menu Transparency This function is used to change the OSD background from opaque to transparent. ...
- Page 29 Back to Contents Page Setting Up Your Monitor Dell™ P1911 Flat Panel Monitor Setting the display resolution to 1440 X 900 (maximum) For maximum display performance while using the Microsoft Windows operating systems, set the display resolution to 1440 X 900 pixels by performing the...
-
Page 30: User Guide
ENERGY STAR guidelines for energy efficiency. Other trademarks and trade names may be used in this document to refer to either the entities claiming the marks and names or their products. Dell Inc. disclaims any proprietary interest in trademarks and trade names other than its own. -
Page 31: Setting Up The Monitor
Back to Contents Page Setting Up the Monitor Dell™ P1911 Flat Panel Monitor User's Guide Attaching the Stand Connecting the Monitor Organizing Your Cables Attaching the Soundbar (optional) Removing the Stand Wall Mounting (Optional) Attaching the Stand NOTE: The stand is detached when the monitor is shipped from the factory. -
Page 32: Connecting The Blue Vga Cable
Connecting the blue VGA cable NOTE: The Graphics are used for the purpose of illustration only. Appearance of the computer may vary. Connecting the USB cable After you have completed connecting the DVI/VGA cable, follow the procedure below to connect the USB cable to the computer and complete your monitor setup: 1. -
Page 33: Removing The Stand
Attaching the Dell Soundbar CAUTION: Do not use with any device other than Dell Soundbar. NOTE: Soundbar Power Connector +12V DC output is for optional Dell Soundbar only. Working from the rear of the monitor, attach the Soundbar aligning the two slots with the two tabs along the bottom rear of the monitor. -
Page 34: Wall Mounting (Optional)
To remove the stand: 1. Rotate the stand to allow access to the stand release button. 2. Press and hold the Stand release button. 3. Lift the stand up and away from the monitor. Wall Mounting (Optional) (Screw dimension: M4 x 10 mm). Refer to the instructions that come with the VESA-compatible base mounting kit. -
Page 35: Troubleshooting
Troubleshooting Your Monitor Built-in Diagnostics Common Problems Product Specific Problems Universal Serial Bus Specific Problems Dell Soundbar Problems CAUTION: Before you begin any of the procedures in this section, follow the Safety Instructions Troubleshooting Your Monitor Self-Test Feature Check Your monitor provides a self-test feature that allows you to check whether your monitor is functioning properly. If your monitor and computer are properly connected but the monitor screen remains dark, run the monitor self-test by performing the following steps: 1. -
Page 36: Common Problems
Cycle power on-off. has spots Pixel that is permanently off is a natural defect that can occur in LCD technology. For more information on Dell Monitor Quality and Pixel Policy, see Dell Support site at: support.dell.com. Stuck-on Pixels LCD screen Cycle power on-off. -
Page 37: Product Specific Problems
Restart the computer in the safe mode. Safety Related Visible signs Do not perform any troubleshooting steps. Issues of smoke or Contact Dell immediately. sparks Intermittent Monitor Ensure that the video cable connecting the monitor to the computer is connected properly and is secure. Problems malfunctions Reset the monitor to Factory Settings. - Page 38 No Sound No power to Soundbar - the Turn the Power/Volume knob on the Soundbar clockwise to the middle position; check if power indicator is off the power indicator (Blue LED) on the front of the Soundbar is illuminated. Confirm that the power cable from the Soundbar is plugged into the adapter. No Sound Soundbar has power - power Plug the audio line-in cable into the computer's audio out jack.