Table of Contents
Advertisement
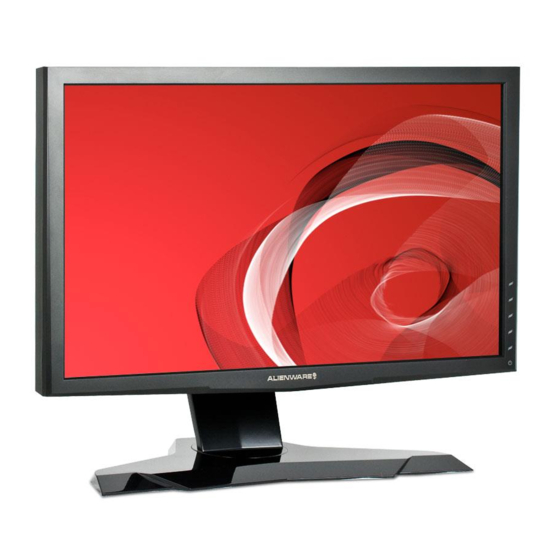
Alienware OptX™ AW2210 User's Guide
About Your Monitor
Setting Up the Monitor
Operating the Monitor
Troubleshooting
Appendix
Notes, Cautions, and Warnings
NOTE:
A NOTE indicates important information that helps you make better use of your monitor.
CAUTION:
A CAUTION indicates either potential damage to hardware or loss of data and tells you how to avoid the problem.
WARNING:
A WARNING indicates a potential for property damage, personal injury or death.
Information in this document is subject to change without notice.
© 2009 Dell Inc. All rights reserved.
Reproduction of these materials in any manner whatsoever without the written permission of Dell Inc. is strictly forbidden.
Trademarks used in this text: Alienware is a trademark or registered trademark of Alienware Corporation; Dell and the DELL logo are trademarks of Dell Inc; Microsoft, Windows, and
Windows Vista are either trademarks or registered trademarks of Microsoft Corporation in the United States and/or other countries. ENERGY STAR is a registered trademark of the
U.S. Environmental Protection Agency. As an ENERGY STAR partner, Dell Inc. has determined that this product meets the ENERGY STAR guidelines for energy efficiency.
Other trademarks and trade names may be used in this document to refer to either the entities claiming the marks and names or their products. Dell Inc. disclaims any
proprietary interest in trademarks and trade names other than its own.
Model AW2210t
August 2009 Rev. A03
Advertisement
Table of Contents

Related Manuals for Alienware AW2210


Summary of Contents for Alienware AW2210
- Page 1 U.S. Environmental Protection Agency. As an ENERGY STAR partner, Dell Inc. has determined that this product meets the ENERGY STAR guidelines for energy efficiency. Other trademarks and trade names may be used in this document to refer to either the entities claiming the marks and names or their products. Dell Inc. disclaims any proprietary interest in trademarks and trade names other than its own.
-
Page 2: About Your Monitor
Back to Contents Page About Your Monitor Alienware OptX™ AW2210 User's Guide Package Contents Product Features Identifying Parts and Controls Monitor Specifications Universal Serial Bus (USB) Interface Plug and Play Capability Maintenance Guidelines Package Contents Your monitor ships with the components shown below. Ensure that you have received all the components and contact Dell if something is missing. -
Page 3: Product Features
Safety Information Product Features The Alienware OptX™ AW2210 has an active matrix, thin-film transistor (TFT), liquid crystal display (LCD), and LED backlight. The monitor features include: ■ 21.5-inch (546.86 mm) viewable area display. 1920 x 1080 resolution, plus full-screen support for lower resolutions. ■ Wide viewing angle to allow viewing from a sitting or standing position, or moving side-to-side. -
Page 4: Side View
Stand removal button Press to release the stand. Barcode serial number label Refer to this label if you need to contact Dell for technical support. Cable management slot Use to organize cables by placing them through the slot. Side View Left view... -
Page 5: Monitor Specifications
Up to 80,000 : 1 (max) Faceplate coating Antiglare with hard-coating 3H Backlight 4 CCFL Response Time 2ms typical (Grey to Grey) Color gamut (Typical) 85%* * AW2210 color gamut (typical) is based on CIE1976 (85%) and CIE1931 (72%) test standards. -
Page 6: Resolution Specifications
Resolution Specifications Model AW2210 Horizontal scan range 30 kHz to 83 kHz (automatic) Vertical scan range 56 Hz to 75 Hz (automatic) Maximum resolution 1920 x 1080 at 60 Hz Video Supported Modes Model AW2210 Video display capabilities (DVI playback) 480i/480p/576i/576p/720p/1080i/1080p (Support HDCP) Preset Display Modes... -
Page 7: Electrical Specifications
Electrical Specifications Model AW2210 Video input signals Digital DVI-D TMDS, 600 mV for each differential line, positive polarity at 50 ohm input impedance HDMI TMDS, 600 mV for each differential line, positive polarity at 50 ohm input impedance or 100 Ohm per differential pair... -
Page 8: Environmental Characteristics
Environmental Characteristics Model AW2210 Temperature Operating 5° to 35°C (41° to 95°F) Storage: -20° to 60°C (-4° to 140°F) Non-operating Shipping: -20° to 60°C (-4° to 140°F) Humidity Operating 10% to 80% (non-condensing) Storage: 5% to 90% (non-condensing) Non-operating Shipping: 5% to 90% (non-condensing) Altitude Operating 3,657.6 m (12,000 ft) max Non-operating 12,192 m (40,000 ft) max 256.08 BTU/hour (maximum) -
Page 9: Pin Assignments
If you have VESA's DPM™ compliance display card or software installed on your computer, the monitor can automatically reduce its power consumption when not in use. This is referred to as Power Save Mode*. If the computer detects input from keyboard, mouse, or other input devices, the monitor automatically resumes functioning. The following table shows the power consumption and signaling of this automatic power saving feature: VESA Modes Horizontal Sync Vertical Sync... -
Page 10: Dvi Connector
DVI Connector 24-pin Side of the Connected Signal Cable Number TMDS RX2-... -
Page 11: Fcc Notices (U.s. Only) And Other Regulatory Information
NOTE: If you do not have an active Internet connection, you can find contact information on your purchase invoice, packing slip, bill, or Dell product catalog. Dell provides several online and telephone-based support and service options. Availability varies by country and product, and some services may not be available in your area. -
Page 12: Setting Up Your Monitor
Back to Contents Page Setting Up Your Monitor Alienware OptX™ AW2210 If you have an Alienware™ desktop or an Alienware™ portable computer with internet access 1. Go to http://support.dell.com, enter your service tag, and download the latest driver for your graphics card. 2. After installing the drivers for your Graphics Adapter, attempt to set the resolution to 1920X1080 again. NOTE: If you are unable to set the resolution to 1920x1080, please contact Dell™ to inquire about a Graphics Adapter that supports these resolutions. Back to Contents Page... - Page 13 Back to Contents Page Setting Up Your Monitor Alienware OptX™ AW2210 If you have a non Alienware™ desktop, portable computer, or graphics card In Windows XP: 1. Right-click on the desktop and click Properties. 2. Select the Settings tab. 3. Select Advanced. 4. Identify your graphics controller supplier from the description at the top of the window (e.g. NVIDIA, ATI, Intel etc.).
-
Page 14: Operating The Monitor
Back to Contents Page Operating the Monitor Alienware OptX™ AW2210 User's Guide Using the On-Screen Display (OSD) Menu Setting the Maximum Resolution Using the Tilt, Swivel, and Vertical Extension Using the On-Screen Display (OSD) Menu Using the OSD Controls Use the controls on the front of the monitor to select a Shortcut Key function, to navigate the OSD menu and to adjust the characteristics of the image being displayed. -
Page 15: Navigating The Menu
Navigating the Menu 1. Select to launch the menu. 2. Select to move between the setting options. As you move from one icon to another, the option name is highlighted. See Menu Options for a complete list of all the options available for the monitor. 3. -
Page 16: Menu Options
8. Select again to return to the Main menu. 9. Select to exit from the On-screen Display menu. Menu Options Icon Menu and Submenus Description BRIGHTNESS/CONTRAST Use this menu to activate Brightness/Contrast adjustment. ... - Page 17 Brightness Brightness adjusts the luminance of the backlight. Contrast Adjust Brightness first, and then adjust Contrast only if further adjustment is necessary. The Contrast function adjusts the degree of difference between darkness and lightness on the monitor screen. INPUT SOURCE Use the INPUT SOURCE menu to select between different video signals that may be connected to your monitor.
- Page 18 DVI-D Select DVI-D input when you are using the Digital (DVI) connector. HDMI Select HDMI input when you are using the HDMI connector. COLOR SETTINGS Use the Color Settings to adjust the color setting mode and color temperature. There are different color setting sub-menus for DVI-D and Video input. Input Color Format Allows you to set the color format of the video input signal to: RGB: Select this option if your computer, DVD player or Game Console using the HDMI or DVI cable to connect to the display.
- Page 19 Graphics: Select this mode if your monitor is connected to your computer. Video: Select this mode if you are enjoying video movies on your display. For DVD playback, selecting this mode gives a better viewing experience. NOTE: Depending upon the Display Mode you select the Preset Modes available for your monitor changes. ...
- Page 20 Decrease the value of the Saturation, increases the monochrome appearance of the video image. Increase the value of the Saturation, increases the colorful appearance of the video image. NOTE: Saturation adjustment is available only for video input. Reset Color Settings Resets your monitor's color settings to the factory defaults.
- Page 21 Response Time This function improves the response time in Multimedia preset, gaming preset, sports preset and theatre presets. Reset Display Settings Reset the image to the original factory setting. AUDIO SETTINGS Line out source Use the LINE OUT SOURCE menu to select between different video signals that may be connected to your monitor. ...
- Page 22 Language Language option to set the OSD display to one of six languages (English, Espanol, Francais, Deutsch, Japanese, or Simplified Chinese). Menu Transparency This function is used to change the OSD background from opaque to transparent. Menu Timer This function is used to change the slider in 1 second increments, from 5 to 60 seconds.
- Page 24 Back to Contents Page Setting Up Your Monitor Alienware OptX™ AW2210 Setting the display resolution to 1920X1080 (maximum) For maximum display performance with Microsoft® Windows® operating systems, set the display resolution to 1920X1080 pixels by performing the following steps: In Windows XP: 1. Right-click on the desktop and click Properties.
- Page 25 U.S. Environmental Protection Agency. As an ENERGY STAR partner, Dell Inc. has determined that this product meets the ENERGY STAR guidelines for energy efficiency. Other trademarks and trade names may be used in this document to refer to either the entities claiming the marks and names or their products. Dell Inc. disclaims any proprietary interest in trademarks and trade names other than its own.
-
Page 26: Setting Up The Monitor
Back to Contents Page Setting Up the Monitor Alienware OptX™ AW2210 User's Guide Attaching the Stand Connecting the Monitor Organizing the Cables and Attaching the Cable Cover Removing the Stand Wall Mounting (Optional) Attaching the Stand NOTE: The stand is detached from monitor when it is shipped from the factory. -
Page 27: Connecting The Usb Cable
NOTE: You can connect your Alienware display to an Xbox, PlayStation or DVD player. CAUTION: The graphics are used for the purpose of illustration only. Appearance of the computer may vary. Connecting the USB cable Connect one end of the USB cable that shipped with your monitor to the USB upstream port (see Bottom View) on your monitor, and the other end to an availble USB port on your computer/device. -
Page 28: Removing The Stand
Attach the cable cover to the monitor after making the required cable connections to the monitor. Removing the Stand NOTE: To prevent scratches on the LCD screen while removing the stand, ensure that the monitor is placed on a clean surface. To remove the stand: 1. Press and hold the stand release button. 2. Lift the stand up and away from the monitor . Wall Mounting (Optional) (Screw dimension: M4 x 10mm). - Page 29 NOTE: For use only with UL Listed Wall Mount Bracket with minimum weight/load bearing capacity of 4.36 kg. Back to Contents Page...
-
Page 30: Troubleshooting
Back to Contents Page Troubleshooting Alienware OptX™ AW2210 User's Guide Troubleshooting Your Monitor Common Problems Product-Specific Problems Universal Serial Bus Specific Problems WARNING: Before you begin any of the procedures in this section, follow the Safety Instructions Troubleshooting Your Monitor Self-Test Feature Check Your monitor provides a self-test feature that allows you to check whether your monitor is functioning properly. -
Page 31: Common Problems
Shortcut Key 1 (Preset Modes) Shortcut Key 2 (Brightness/Contrast) Shortcut Key 3 (Input Source) Menu Exit Power On/Off 4. Carefully inspect the screen for abnormalities. 5. Touch the D control on the front panel again. The color of the screen changes to red. 6.