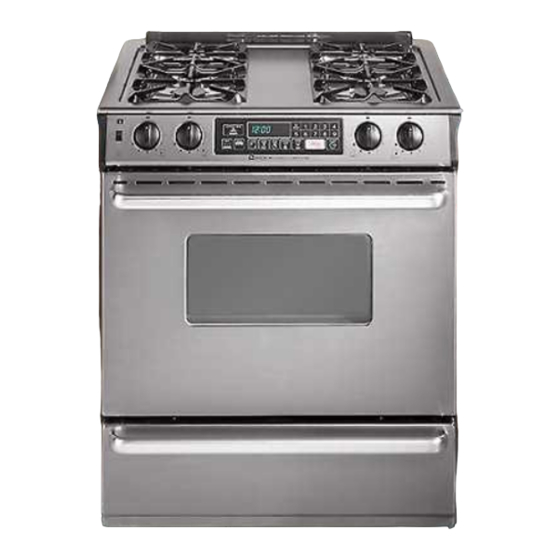
Maytag MGS5770 User Manual
Hide thumbs
Also See for MGS5770:
- User manual (28 pages) ,
- User manual (29 pages) ,
- User manual (28 pages)
Table of Contents
Advertisement
!:..Z5
_,.
,_
ON_E .-_ _.
:..-,-
\\ clcome
Safety
instnictlon_
l--1
(_onuols
at a Glance
...
5-8
Surface
CooMng
....
.
. .
...
Ba "kang and Roasting
.
Oven Fans
.
. .
BaMng Chart
.....
....
9-10
9
''"
10
11-16
11-12
1l
:
12
13
14
;
15
!
Oven CooMng
16
('are and Cleaning..
.
17-20
Oven ...........
17-18
•
Chart,. ........................
1%20
"_
Maintenance
...,,':....,: ...................
21-23
........
24-26
Warranty ....... . ..............................
27
;
=
_
MAYI'AG
Advertisement
Table of Contents

Related Manuals for Maytag MGS5770


Summary of Contents for Maytag MGS5770
-
Page 1: Table Of Contents
!:..Z5 ON_E .-_ _. :..-,- \\ clcome Safety instnictlon_ l--1 at a Glance (_onuols 9-10 Surface CooMng ..''" Surface Contlols Cooktop. 11-16 Oven Operation 11-12 Ba "kang and Roasting Oven Fans BaMng Chart ..Oven \rent & Light Oven Racks Broiling .. - Page 2 MGS5870 Welcome....IMPORTANT SAFETY INSTRUCTIONS..Congratulations on your choice ofa Maytag gas range. Your complete satisfaction is very important to us. Read and follow all instructions before using this ap- Read this user's guide carefully. It is intended to help you pliance to prevent the potential risk of fire, electric shock, operate and maintain your new range.
- Page 3 General Instructions To eliminate the hazard of reaching over hot surface burn- ,d_WARNING ers, cabinet storage should not be provided directly above a unit. If storage is provided, it should be limited to items • ALL RANGES CAN TIP AND CAUSE INJURIES which are used infrequently and which are safely stored...
- Page 4 IMPORTANT SAFETY INSTRUCTIONS (continued)..About YourAppliance NEVER heat an unopened container on the surface burner or in the oven. Pressure build-up may cause container to burst resulting in serious personal injury or damage to the NEVER use appliance as a space heater to heat or warm a room to prevent potential appliance.
- Page 5 Self-Clean Oven Be sure utensil is large enough to properly contain food and avoid boilovers. Pan size is particularly important in deep fat frying. Be sure pan will accommodate the volume of food that Clean only parts listed in this guide. is to be added as well as the bubble action of fat.
- Page 6 The control panel is designed for ease in programming. The display window on the electronic control shows time of day, timer and oven functions. Indicator words flash to prompt your programming steps. CONVECTBAKE ] NOTE: Styling and features may differ slightly depending on the model. Control panel shown above includes Convect Bake feature.
- Page 7 COOK TIME/STOP TIME Pads Setting the Timer Use to program the oven to start and stop automatically. Use to set and then signal the completion of a time period up to 99 hours and 59 minutes (99:59). 1. Press BAKE or CONVECT BAKE (select models) pad.
- Page 8 Controls at a Glance (continued)......Control Options Timer Beep Options Setting Clock Controlled Oven Cooking Beeps You have a choice of three "end of timer" reminder I. Press COOK TIME and CANCEL pads at the same signals: time and hold for several seconds. Option 1: One beep at the end of the timer operation, then, one beep every 30 seconds for the next five minutes or tmtil •...
- Page 9 Oven Temperature Adjustment Option If you think the oven should be hotter or cooler, you can adjust • Ifthe oven temperature was previously adjusted, the it yourself. To decide how much to change the oven tempera- change will be displayed. For example, if the oven ture, set the temperature 25°F higher or lower than the tempera- temperature was reduced by 15°, the display will...
-
Page 10: Surface Contlols
Surface Controls Push in and turn the knob counterclockwise to the CAUTIONS: LIGHT setting. • A clicking (spark) sound will be heard and the burner • If fiame should go out during a cooking operatinn, turn the burner off. Ifa strong gas odor is detected, open a will light. -
Page 11: Cooktop
Cooktop Burner Grates To prevem the cooktop from discoloring or Staining: C!ean €ook!°P after each use" The grates must be prop ..'J ,x,-._ _-" wipe acid or sugar spills as soon asthe _ktop has ] erly positioned before /_l[_\ cooking. - Page 12 Pilotless Ignition 3. Press the PRESET (0) pad to set 350°F automatically. When convection cooking, 325°F will be automati- Your range is equipped with pilotless ignition. With this type cally set when PRESET (0) is pressed. Or press the of ignition system, the gas automatically shuts offand the oven appropriate number pads for the desired oven tempera- will not operate during a power failure.
- Page 13 NOTES... Cooking Chart for Convenience Foods ConveetBake OvenNot Preheated • Press the BAKE or CONVECT BAKE pad to recall Frozen Rack the preselected temperature during preheat. Convenience Foods Position Temp.° F Minutes * Fish Sticks 400 ° 13-i8 • To change oven temperature during cooking, press the French Fries 450 °...
-
Page 14: Oven Operation
Oven Operation (continued)........ Oven Vent Oven Light When the oven is in use the area near the vent may feel The oven light automatically comes on when the warm or hot to the touch. Never block the vent opening. oven door is opened. When the door is closed, press the rocker switch on the control panel to turn the On free-standing ranges, the oven vent is located at the base... -
Page 15: Oven Racks
Oven Racks ROASTING POSITION: CAUTION: Do not attempt to Change the rack posi- Used for roasting taller cuts of i_€ ° tion when the oven is hot. meat or turkey. Place both oven racks, one abovetheother, Convection ranges are equipped with three racks. Conventional the raised sides of the oven bot- I¢_;g/_4'ff_\_ ranges are equipped... -
Page 16: Broiling
Oven Operation (continued)........ Broiling For best results, use a pan designed for broiling. 4. Place foodinoven. Close ovendoorandcookaccording to the following Broiling Chart. For additional broiling tips, refer to the "Cooking Made Simple" booklet. 5. Press CANCEL pad. Remove food and broiler pan from the oven. -
Page 17: Clock Controlled
Clock Controlled Oven Cooking 4. Press appropriate number pads to enter cooking hours and NOTES: minutes. EXAMPLE: If cooking time selected for baking is 2 hours and 30 minutes, the display will show: Highly perishable foods such as dairy products, pork, poultry or seafood are not recommended for delayed... -
Page 18: Self-Clean Oven
Self-Clean Oven Wipe up excess grease or spillovers from the oven bot- ,_k Self-Clean CAUTIONS: tom to prevent excessive smoking, flare-ups and flam- ing during the clean cycle. • It is normal for parts oft.he range to become hot during Wipe up sugary and acid spillovers such as sweet pota- a clean cycle. - Page 19 After Self-Cleaning To Cancel Self-Clean Cycle: About one hour after the end of the clean cycle, the LOCK Press CANCEL pad. indicator word will turn off. At this point, the door can If the indicator word LOCK is NOT displayed, open be opened.
-
Page 20: Cleaning Chart
Care & Cleaning (continued)......CAUTIONS: • Cleaning To prevent staining or discoloration, clean appliance Be sure appliance is off and all parts are cool before • handling or cleaning• This is to avoid damage and after each use. possible burns• If a part is removed, be sure it is correctly replaced. - Page 21 Cleaning Chart -- continued Parts Cleaning Procedure Porcelain may discolor or craze if overheated. This is normal and will not affect cooking performance. Drip Pans, • When cool, wash after each use, rinse and dry to prevent staining or discoloration. May be washed in porcelain the dishwasher.
- Page 22 Oven Door Cleaning Products Because of the many new cleaning products introduced in the CAUTIONS: marketplace each year, it is not possible to list all products that Do _ot place excessive weight on or stand on an can be safely used to clean this appliance. Listed below are just open oven door.
- Page 23 )ven Light edge of the oven bottom clears the oven front frame. CAUTIONS: Remove oven bottom from oven. Disconnect power to range before replacing light To replace: Fit the front edge of the oven bottom into the bulb. oven front frame. Lower the rear of the oven bottom and slide the two catches back to lock the oven bottom in place.
- Page 24 Proportional Valve Adjustment Leveling Legs for Surface Burners CAUTION: The LOW setting should pro- Be sure anti-tip bracket secures one of the rear leveling duce a stable flame when legs to the floor. This bracket prevents the range from turning the knob from HIGH accidentally tipping.
- Page 25 13efore You Call For Service ....Check to be sure plug is securely inserted into receptacle. Part or all of the appliance does Check or re-set circuit breaker. Check or replace fuse. work. Check power supply. Check if surface and!or oven controls have been properly set.
-
Page 26: Before You Call For Service
Before You Call For Service (continued)....• Food too close to flame. See page 15 for more information. Oven smokes • Broiler insert covered with aluminum foil. exeesslvely during broiling• • Excess fat not trimmed from meat prior to broiling. •... - Page 27 (next page) for further information on owner's responsibilities for warranty service. If the dealer or service company cannot resolve the problem, write to Maytag Appliances Sales Company, Attn: CAIR sMCenter, P.O. Box 2370, Cleveland, TN 37320-2370, or call 1-800-688-9900, USA or 1-800-688-2002, CANADA.
- Page 28 Maytag Range Warranty ....... Full One Year Warranty - Parts and Labor For one (1) year from the original retail purchase date, any part which fails in normal home use will be repaired or replaced free of charge. Limited Warranties...