LG WM2455H Series User's Manual & Installation Instructions
Hide thumbs
Also See for WM2455H Series:
- User's manual & installation instructions (41 pages) ,
- Service manual (38 pages) ,
- Specifications (2 pages)
Table of Contents
Advertisement
Available languages
Available languages
WASHING
USER'SGUIDE&
INSTAHMION INSTRUcTiONS
Before
beginning
installation,
read these
Instructions
carefully.
This wll simplify
installation
and ensure
that the washer
is installed
correctly
and safely. Leave these
instructions
near the
washer
after
installation
for future
reference.
/AVADORA TRO
CUIA DE[ USUARiOE
INSTRUCciONES DE INSTA[AclON
Antes
de comenzar
la instalacion,
lea atentamente
estas
instrucciones.
Esto simplificara
la instalacion
y asegurara
que la lavadora
esta instalada
en forma
correcta
y segura.
Conserve
estas instrucciones
cerca de la lavadora
luego
de la instalacion
para futuras
consultas.
Model/Modelo
WM2455H*
Designed
specially
to use only
HE (High-Efficiency)
detergent
Diseflada
especificamente
para
usar con el detergente
tipo
HE
(Alta eficiencia)
To contact LG Electronics, 24 hours a day,
7 days a week:
1 =800=243=0000
Or visit us on the Web at: us.lge.com
NQmero telef6nico de LG Electronics, las 24
horas del dia, 7 dias a la semana:
1-800-243-0000
0 visitenos
en la Web
en: us.lge.com
Advertisement
Chapters
Table of Contents

Related Manuals for LG WM2455H Series


Summary of Contents for LG WM2455H Series
- Page 1 To contact LG Electronics, 24 hours a day, 7 days a week: 1 =800=243=0000 Or visit us on the Web at: us.lge.com NQmero telef6nico de LG Electronics, las 24 horas del dia, 7 dias a la semana: 1-800-243-0000 0 visitenos en la Web en: us.lge.com...
-
Page 2: Table Of Contents
Key Parts and Components ........welcome to the family, INSTALLATION INSTRUCTIONS Choose the Proper Location ........Your new LG washing machine Clearances............. Flooring ..............combines the most advanced Installations With Optional Pedestal Base or Stacking Kit ............ Unpacking and Removing Shipping Bolts ... 11... - Page 3 ! PORTANTSAFETY iNSTRUcTiONS READ ALL iNSTRUCTiONS BEFORE USE _WARNING For y our s afety, theinformation inthis man.al re.stbe followed to minimize the risk of fire or explosion, electric shock, or to prevent property damage, personal injury, or loss of life. Your Safety and the safety...
-
Page 4: Basic Safety Precautions
I PORTANTSAFETY INST UcTIONS RSAD ALL iNSTRUCTiONS BSFORE USS WARNliNG For y our s afety, theinformation inthis manual must be followed to minimize the risk of fire or e×plosion, electric shock, or to prevent property damage, personal injury, or loss of life. BASIC SAFETY PRECAUTIONS 4_I_WARNING: To reduce the risk of fire, electric shock, or injury t o persons when using this... - Page 5 ! PORTANTSAFETY iNSTRUCTIONS RSAD ALL iNSTRUCTiONS BSFORE USB WARNING For y o.rsafety, theinformation inthis manual re.stbe followed to minimize the risk of fire or explosion, electric shock, or to prevent property damage, personal injury, or loss of life. SAFETY iNSTRUCTiONS FOR iNSTALLATiON ,WARNING: To reduce the risk of fire, electric shock, or injury to persons when using this appliance, follow basic precautions, including the following.
- Page 6 I PORTANTSAFETY INST UcTIONS RSAD ALL iNSTRUCTiONS BEFORS US_ , WARNING For y o,rsafety, theinformation inthisman,al re.stbe followed to minimize the risk of fire or explosion, electric shock, or to prevent property damage, personal injury, or loss of life. SAFETY INSTRUCTIONS FOR USE, CARE AND CLEANING, AND DISPOSAL , WARNING: To reduce the risk of fire, electric shock, or injury to persons when using this appliance, follow basic precautions, including the following.
-
Page 7: Partsand Features
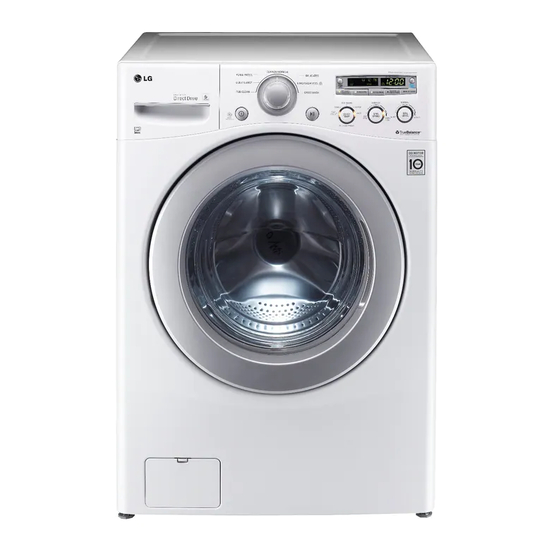
PARTSAND FEATURES SPECIAL FEATURES DETERGENT DISPENSER DRAWER This four-compartment drawer provides separate dispensers for prewash and main wash detergent, liquid bleach, and liquid fabric softener. EASY-ACCESS LOCKING DOOR Extra-large door locks during operation and features a delay to prevent the door from being opened until the washer interior has cooled and the water level has lowered. -
Page 8: Key Parts And Components
PARTSAND FEATURES KEY PARTS AND COMPONENTS In addition to the special features and components outlined in the Special Features section, there are several other important components that are referenced in this manual. LARGE-CAPACITY STAINLESS STEEL DRUM The large capacity stainless steel drum offers extreme durability and is tilted to improve efficiency and allow easier access for large items. -
Page 9: Choose The Proper Location
INSTALLATION CHOOSE THE PROPER LOCATION WARN|NG • Do not remove ground prong. Do not use an adapter or extension cord. Plug into a • Washer is heavy! Two or more people grounded 3-prong outlet. Failure to follow this are required when moving and unpacking warning can cause serious injury, fire, electrical the washer. -
Page 10: Flooring
iNSTALLATiON FLOORING • To minimize noise and vibration, the washer NOTE: Please note that the floor must be strong MUST be installed on a solidly constructed floor. and rigid enough to support the weight of the See the NOTE at right. washer when fully loaded, without flexing or bouncing. -
Page 11: Unpacking And Removing Shipping Bolts
INSTALLATION UNPACKING AND REMOVING SHIPPING BOLTS When removing the washer from the carton base, be sure to remove the foam tub support in the middle of the carton base. If you must lay the washer down to remove the base packaging materials, always lay it carefully on its side. -
Page 12: Connecting The Water Lines
iNSTALLATiON CONNECTING THE WATER LINES • IMPORTANT: Use new hoses when installing Water Hose the washer. Do NOT reuse old hoses. Rubber Seal (to water inlet Water supply pressure must be between 14.5 PSI and 116 PSI (100-800 kPa). If the water supply pressure is more than 116 PSI, a pressure reducing valve must be installed. -
Page 13: Connecting The Drain Line
INSTALLATION CONNECTING THE DRAIN LiNE Option 1: Standpipe • The drain hose should always be properly secured. Failure to properly secure the drain hose can result in flooding and property Elbow damage. • Do not install the end of the drain hose higher than 96 in. -
Page 14: Leveling The Washer
INSTALLATION LEVELING THE WASHER The drum of your new washer spins at very high speeds, up to 1,200 RPM. To minimize vibration, noise, and unwanted movement, the floor must be a perfectly level, solid surface. NOTE: Adjust the leveling feet only as far as necessary to level the washer. -
Page 15: How To Use
OW TO USE SORTING WASH LOADS Fabric Care Labels Grouping Similar Items Most articles of clothing feature fabric care labels For best results, sort clothes into loads that can that include instructions for proper care. be washed with the same wash cycle. Different fabrics have different care requirements. -
Page 16: Selecting Detergent
OW TO USE SELECTING DETERGENT iMPORTANT: Your washing machine is iMPORTANT: Do not place or store laundry designed for use with only High-Efficiency products, such as detergent, bleach, or liquid (HE) detergents. HE detergents are formulated fabric softener, on top of your washer or dryer. specifically for front-load washers and contain Wipe up any spills immediately. -
Page 17: Loading The Dispenser
OW TO USE LOADING THE DISPENSER Prewash Detergent Compartment Liquid Bleach Compartment Add liquid or powdered detergent to this This compartment holds liquid chlorine bleach, compartment when using the Prewash option. which will be dispensed automatically at the Always use HE (High- Efficiency) detergent with proper time during the wash cycle. -
Page 18: Control Panel Features And Cycle Guide
OW TO USE cONTROL PANEL FEATURESmWM2455H SANITARY POWER ON/OFF BUTTON CYCLE SETTINGS BUTTONS Press to turn the washer ON. Press again to turn Use these buttons to adjust the desired cycle the washer OFR options for the selected cycle. NOTE: Pressing the ON/OFF button during a cycle will cancel that cycle and any load settings DELAY BUTTON will be lost. - Page 19 OW TO USE cYcLE GUIDEmWM2455H The cycle guide below shows the options and recommended fabric types for each cycle. ExtraHot/Cold High(=) Normal tleav+ly soHeo ExtraHigh(_--=-) Heavy Sanitary underwear,work NoSpin (+) Light clothes, diapers,etc. Low(---) Medium(--) Normal Warm/Cold Low (---) Bulky/ Largeitems such as Warm/Warm Medium(--)
-
Page 20: The Time And Status Display
OW TO USE THE TiME AND STATUS DISPLAY The time and status display shows the cycle progress and estimated time remaining, cycle options, and other status messages for your washer. DOOR LOCK iNDiCATOR ESTIMATED TiME REMAiNiNG Indicates that the door is locked. The washer When the START/PAUSE button is pressed, the washer automatically detects the wash load... -
Page 21: Operating The Washer
OW TO USE OPERATING THE WASHER once you have loaded the washer and added laundry products (detergent, bleach, and/or fabric softener): Press the START/PAUSE button to begin Press the ON/OFF button to turn on the washer. The lights around the cycle the cycle. -
Page 22: Cycle Setting Buttons
OW TO USE CYCLE SETTING BUTTONS SPIN SPEED Each cycle has preset settings that are selected automatically. You may also customize the The washer drum spins at up to 1,200 RPM. This settings using the cycle setting buttons. Press the extracts more water from button for that setting until the indicator light for clothes, reducing drying time... -
Page 23: Custom Program
HO TO USE CUSTOM PROGRAM CUSTOM PROGRAM allows you IMPORTANT: If you press and hold the CUSTOM to store a customized wash cycle PROGRAM button for 3 seconds, you will for future use. It allows you to save overwrite any previously stored CUSTOM PROGRAM. -
Page 24: Cycle Option Buttons
OW TO USE CYCLE OPTION BUTTONS Your washing machine features several additional RINSE+SPIN cycle options to customize cycles to meet your Select this option to rinse and spin a individual needs. Certain option buttons also load separately from a regular cycle. feature a special function (see the following page This can be helpful in preventing fresh for details) that can be activated by pressing and... -
Page 25: Special Functions
OW TO USE SPEciAL FUNCTIONS The option buttons also activate special functions, including CHILD LOCK, TUB CLEAN, and SPINSENSE TM. Press and hold the option button marked with the special function for 3 seconds to activate. LOAD SIZE SPINSENSE At the beginning of the cycle, the washer tumbles SPINSENSE can be used to help reduce or the load and detects the weight of the eliminate vibrations, especially on wood... -
Page 26: Care And Cleaning
CA E AND c[EANINc REGULAR CLEANING WARN|NG', = Unplug the washer before cleaning to avoid the risk of electric shock. Failure to follow this warning can cause serious injury,fire, electrical shock or death. • Never use harsh chemicals, abrasive cleaners, or solvents to clean the washer. -
Page 27: Cleaningthe Washer
CAREAND clEANING CLEANING THE WASHER Cleaning the Dispenser The dispenser should be cleaned periodically to remove buildup from detergent and other laundry products......Remove the inserts from the drawer, and Pull out the dispenser drawer until it stops. clean them with warm water and a soft cloth Press the button in the center of the drawer or brush to remove any residue or buildup. -
Page 28: Maintenance
IMPORTANT: Use extreme care when removing and cleaning the filters. If the filters cannot be cleaned or are damaged, do NOT operate the washer without the inlet filters. Contact LG Customer Service or a qualified LG servicer. Inlet Filter Turn off both water taps completely. Unscrew... -
Page 29: Maintenance
CAREAND clEANING MAINTENANCE (cont.) cleaning the Drain Pump Filter Lint and other objects may acCUmulate and clog the drain pump filter. If the washer fails to drain properly, unplug the washer and allow the water to cool, if necessary, before proceeding. Drain Unclip the drain hose and pull it out. -
Page 30: Normal Sounds You May Hear
TROU [ES OOTING NORMAL SOUNDS YOU MAY HEAR The following sounds may be heard while the washer is operating. They are normal. Clicking: Humming or gurgling: Drain pump pumping water from the washer at Door lock relay when the door locks and unlocks. the end of a cycle. - Page 31 T OU [ESHOOTING BEFORE CALLING FOR SERVICE (cont.) Water in the washer • Drain hose is bent, pinched, • Make sure the drain hose is free of clogs, kinks, etc., drains slowly or not and is not pinched behind or under the washer. or clogged.
- Page 32 TROU [ES OOTING BEFORE CALLING FOR SERVICE ccont.) • Load is too small. • Add 1 or 2 similar items to help balance the load. • Load is out of balance. • Rearrange items to help balance the load. • The washer has an imbalance detection and correction system.
-
Page 33: Specifications/Optional Accessories
Max. Spin Speed 1,200 RPM 1- Per IEC 60456, washes the equivalent to a 4.0-cu.-ft. agitator washer. OPTIONAL ACCESSORIES For these and other LG products, contact your local LG dealer, or visit our Web site at us.lge.com..Pedestal Stacking... -
Page 34: Pedestal Installation
OPTIONAL ACCESSORIES PEDESTAL ACCESSORY The pedestal accessory includes: To ensure safe and secure installation, please thoroughly follow the instructions below. • Pedestal base • Eight (8) screws One (1) drawer divider • Wrench WARNiNG Four (4) brackets • incorrect installation can cause serious accidents. -
Page 35: Pedestal Installation
OPTIONAL ACCESSORIES PEDESTAL iNSTALLATiON (cont.) f,,7 Make sure the side surface of the appliance Position the bracket as shown. The bent part is clean and dry. Remove paper backing from of the bracket should rest along the edge the tape on the bracket. of the pedestal, and the holes in the bottom part of the bracket should align with the holes in the pedestal. -
Page 36: Stacking Kit Installation
OPTIONAL ACCESSORIES STACKING KIT To ensure safe and secure installation, please observe the following instructions. WARNING This stacking kit includes: • Two (2) side rails • incorrect installation can cause serious accidents. • One (1) front rail • Four (4) screws •... -
Page 37: Stacking Kit Installation
OPTIONAL ACCESSORIES STACKING KiT iNSTALLATiON (cont.) Washer Insert the front rail between the bottom of Place the dryer on top of the washer by fitting the dryer feet into the side brackets as the dryer and the top of the washer. Push the front rail toward the back of the washer until it illustrated. - Page 38 NOTES...
-
Page 39: Product Registration Information
Your LG Washing Machine will be will repaired or replaced, at LG's option, if it proves to be defective in material or work- manship under normal use, during the warranty period ("Warranty Period") set forth below, effective from the date ("Date of Purchase") of original consumer purchase of the product. - Page 40 Piezas y compenentes clave ........ y bienvenido a la familia INSTRUCCIONES PARA LA INSTALAClON Escojaellugar adecuado ........Su nueva lavadora LG combina Espaciosde instalaci6n ........Tipo de piso ............Instalaciones con la base pedestal la tecnologia de lavado o kit de apilado opcionales ........
- Page 41 INST UcCIONES IMPORTANTEDE SEGUP, IDAD LEA TODAS LA |NSTRUCC|ONIES ANTES DiE USAR _ADVERTENC|A po_ s. s_g._id_d, d_b_ _eg.ir , ai_for_aci6_ i.dic_d_ en este manual para minimizar el riesgo de incendio o explosi6n, descarga el_ctrica, o para prevenir daSos a la propiedad, lesiones personales o muerte.
- Page 42 INST UCCIONES IMPORTANTEDE SEGURIDAD LEA TODAS LA |NSTRUCC|ONES ANTES DE USAR ADVSRTSNC|A gu.da¢ lainfo maci6n indicada en este manual para minimizar el riesgo de incendio o explosi6n, descarga el_ctrica, 0 para prevenir dahos a la propiedad, lesiones personales o muerte. INSTRUCCIONES BASiCAS DE SEGURIDAD o para prevenir...
- Page 43 INST UcCIONES IMPORTANTEDE SEGURIDAD LEA TODAS LA |NSTRUCC|ONIES ANTES DiE USAR ADVERTENCiA Pot s . seg.ridad, debe eg.i ,ainfom .ci6n i.dic d en este manual para minimizar el riesgo de incendio o explosi6n, descarga el_ctrica, o para prevenir dahos a la propiedad, lesiones personales o muerte.
- Page 44 INST UCcIONES IMPORTANTEDE SEGU IDAD LEA TODAS LA |NSTRUCC|ONES ANTES DE USAR _ADVERTBNC|A Pot s , seg,ridad, debe _eg,i_ l ai,fo_m_ci6, i,dic_d_ en este manual para minimizar el riesgo de incendio o explosi6n, descarga el_ctrica, o para prevenir dahos a la propiedad, lesiones personales o muerte.
-
Page 45: Caracter
PIEZAS Y cA AcTE ISTIcAS CARACTER|STICAS ESPECIALES CAJON DE DEPOSITO DE DETERGENTE Este caj6n de cuatro secciones provee dep6sitos separados para el prelavado y detergente principal de lavado, asi como suavizante liquido de telas. COMPUERTA DE SEGURIDAD DE FACE ACCESO La compuerta extra-grande se asegura durante el funcionamiento... -
Page 46: Piezas Y Compenentes Clave
PIEZAS Y CARACTE ISTICAS PIEZAS Y COMPONENTES CLAVE AdemAs de los componentes y las caracteristicas descritos en la seccidn de Caracterfsticas especiales, hay varios componentes importantes adicionales a los cuales se hace referencia en este manual. TAME}OR DE ACERO INOXIDABLE DE ULTRA CAPAClDAD El tambor de aoero inoxidable ultra ofreoe... -
Page 47: Escojaellugar Adecuado
INSTALACION ESCOJA EL LUGAR ADECUADO ADVBRTENCIA = No elimine eJ cable de cone×i6n a tierra. No • La lavadora Se necesitan dos pesada. use un adaptador o prolongador. Enchufe en o m_s personas para instaJar y trasJadar el un tomacorriente con conexi6n a tierra de 3 eiectrodom_stico. -
Page 48: Tipo De Piso
INSTA[ACION TIPO DE PBO • Para minimizar el ruido y vibraci6n, se DEBE NOTA: Tome en cuenta que el piso debe ser instalar la lavadora en un piso s61idamente Io suficientemente fuerte y rigido para soportar construido. Ver la NOTA a la derecha. el peso de la lavadora cuando se encuentra completamente cargada, sin flexionarse ni... -
Page 49: Desembalaje Y Retiro De Los Pernos De Embalaje
INSTALACION DESEMBALAJE Y RETIRO DE LOS PERNOS DE EMBALAJE AI retirar la lavadora de la base de cart6n, asegurese de quitar el soporte de base de espuma colocado en la mitad de la base de cart6n. Si debe asentar la lavadora hacia abajo para quitar los materiales de embalaje de la base, hAgalo siempre cuidadosamente sobre su parte... -
Page 50: Conexi6N De Las Tuberias De Agua
INSTA[ACION CONEXION DE LAS TUBER|AS DE AGUA * IMPORTANTE: Cuando instale la lavadora Manguera de agua (a use mangueras nuevas. NO reutilice Sello de caucho la conexi6n de agua mangueras viejas. en la lavadora) o La presion de suministro de agua debe estar entre 14,5 libras por pulgada cuadrada y 116 libras por pulgada cuadrada (100-800 kPa). -
Page 51: Conexi6N De La Tuberia De Drenaje
INSTALACION ¢ONEXION DE LA TUBER|A DE DRENAJE Opcion 1: Tubo vertical • La manguera de drenaje siempre debe estar asegurada adecuadamente. No asegurar adecuadamente la manguera de drenaje puede resultar en inundaci6n o da_os a la propiedad. brazadera • No instalar el extremo de la manguera a una altura de mAs de 2,44 m (96 pulgadas) sobre la parte inferior de la lavadora. -
Page 52: Nivelaci6N De La Lavadora
INSTA[ACiON NIVELACION DE LA LAVADORA El tambor de su nueva lavadora centrifuga a velocidades muy altas, de hasta 1.200 r.p.m. Nivelador Para minimizar la vibraci6n, el ruido y movimiento no deseados, el piso deberA ser una superficie perfectamente nivelada y s61ida. NOTA: Fije las patas niveladoras solo en la medida necesaria para nivelar la lavadora. -
Page 53: Clasificaci6N De Las Cargas De Lavado
cO o usaR CLASIFICACl0N DE LAS CARGAS DE LAVADO Etiquetas de cuidado de las telas Agrupamiento de prendas similares La mayoria de las prendas de vestir tienen Para obtener los mejores resultados, clasifique las prendas en cargas que puedan lavarse con etiquetas de cuidado de las telas para Iograr un el mismo ciclo de lavado. -
Page 54: Seleccion De Detergente
cO o usa SELECCION DE DETERGENTE JMPORTANTE: Su lavadora estA dise_ada para JMPORTANTE: No coloque o almacene usarse exclusivamente con detergentes de alta productos de lavado como detergente, eficiencia (HE). Los detergentes de alta eficiencia blanqueador o suavizante liquido en la parte estAn formulados especificamente para las superior de su lavadora o secadora. -
Page 55: Carga Del Deposito
cO o usaR CARGA DEL DEPOSITO ¢ompartimiento de detergente ¢ompartimiento para prelavado blanqueador I[quido Agregue el detergente liquido o en polvo a este Este compartimiento alberga blanqueador liquido, compartimiento cuando se usa la opci6n de que se suministrarA automAticamente en el momento adecuado del ciclo de lavado. -
Page 56: Caracterfsticas Del Panel De Control
cO o usa CARACTERJSTICAS DEL PANEL DE CONTROLmWM2455H SANITARY O Bot0n DE ENCEnD DO/APAGADO @ BOTONES DE PROGRAMACl0N DE CICLOS Apriete el bot6n para ENCENDER la lavadora. Utilice estos botones para seleccionar las Apriete nuevamente para APAGAR la lavadora. opciones de ciclo deseadas para el ciclo seleccionado. -
Page 57: Guia De Ciclos
cO o usaR GU|A DE ClCLOS WM2455H* La guia de cicIos indicada m_s abajo muestra las opciones y tipos de telas reoomendadas para cada cicIo. Extra caliente/Fda Alta (=) Normal Hopainterior muy sucia, Extraalto (__-) Sanitario ropa de trabajo, Sin giro (.) paMles, etc. -
Page 58: Pantalla De Hora Y Estado
cO o usa LA PANTALLA DE HORA Y ESTADO La pantalla de hora y estado muestra el progreso del ciclo y el tiempo restante estimado, opciones de ciclos y otros mensajes del estado actual de su lavadora. _]_ ESTIMATED TiME REMAiNiNG (TEMPO INDICADOR DE SEGURO DE LA COMPUERTA RESTANTE ESTIMADO) -
Page 59: Funcionamiento De La Lavadora
cO o usaR FUNCIONAMIENTO DE LA LAVADORA Una vez que ha cargado la lavadora y a_adido los productos de lavado (detergente, blanqueador y/o suavizante): Apriete el bot6n de ENCENDIDO/APAGADO Apriete el bot6n de INICIO/PAUSA para iniciar el ciclo. La compuerta se para encender la lavadora. -
Page 60: Botones De Ajuste De Ciclo
cO o usa BOTONES DE AJUSTE DE ClCLO Cada ciclo tiene ajustes preprogramables que se WASH/RINSE (lavado/enjuague) seleccionan automAticamente. Tambi6n puede Selecciona la combinaci6n de temperatura personalizar los ajustes utilizando los botones de lavado y enjuague para el programaci6n de ciclos. Presione el bot6n para ciclo seleccionado. -
Page 61: Programa Personalizado
cO o uSa PROGRAMA PERSONAUZADO El PROGRAMA PERSONALIZADO IMPORTANTE: Si presiona y sostiene el boton le permite guardar un ciclo de lavado PROGRAMA PERSONALIZADO durante 3 segundos, personalizado para velvet a usarlo. Le sobrescribira cualquier PROGRAMA PERSONALIZADO permite grabar la temperatura, velocidad que haya almacenado previamente. -
Page 62: Botones De Opcion De Ciclo
cO o usa BOTONES DE OPClON DE ClCLO Su lavadora dispone de varias opciones de ciclo DELAY (demora) adicionales, las cuales personalizan los ciclos Una vez que haya seleccionado para cumplir con sus necesidades individuales. el ciclo y otros ajustes, apriete este Ciertos botones de opci6n tambi6n incorporan bot6n para demorar el inicio del ciclo de una funci6n especial (vea la siguiente pAgina para... -
Page 63: Funciones Especiales
cO o usaR FUNCIONES ESPEClALES Los botones de funci6n tambien activan funciones especiales, incluyendo CHILD LOCK (seguro infantil), TUB CLEAN (LIMPIEZA DEL LAVADERO), e SPINSENSF M. Apriete y mantenga apretado el bot6n de opcion marcado con la funci6n especial pot 3 segundos para activar. -
Page 64: Mantenimientoy Limpieza
ANTENi lENTO Y /I PIEZA LIMPIEZA REGULAR ADVBRTENCiA: • Desenchufe la lavadora antes de limpiar la misma para evitar el riesgo de descargas el_ctricas. Si no se cumple con esta advertencia se podrAn producir heridas graves, incendios, descargas el6ctricas o muerte. •... -
Page 65: Limpieza De La Lavadera
ANTEN! lENTO Y [IMPIEZA LIMPIEZA DE LA LAVADORA Limpieza del deposito Se debe limpiar el dep6sito peri6dicamente para eliminar la acumulaci6n de detergente y otros productos de lavanderia............ Quite los insertos del caj6n, y ffmpielos Tire del caj6n de dep6sito hasta que se con agua caliente y un trapo o cepillo detenga. -
Page 66: Mantenimiento
P6ngase en contacto con el Departamento de Atenci6n al Cliente de LG o Ilame a un t6cnico de mantenimiento calificado de LG. Filtro de entrada Quite cuidadosamente los filtros de las Cierre ambas Ilaves de agua completamente. - Page 67 ANTEN! lENTO Y [IMPIEZA MANTENIMIENTO (cont.) Limpieza del filtro de la bomba de drenaje Se pueden acumular pelusas y otros objetos y taponar el filtro de la bomba de drenaje. Si la lavadora no drena adecuadamente, descon6ctela y deje enfriar el agua, de ser necesario, antes de continuar. Desenganche la manguera de drenaje y Abra el filtro del panel de acceso de la tirela hacia fuera.
-
Page 68: Sonidos Normales Que Podr
ESOLUCiON E PROBLE AS SONIDOS NORMALES OUE PODRiA ESCUCHAR Se pueden escuchar los siguientes sonidos mientras la lavadora se encuentra funcionamiento. Son normales. Zumbido o gorgoteo: Chasquido: La bomba de drenaje bombea agua de la El seguro de la compuerta se vuelve a colocar lavadora al final de un ciclo. - Page 69 ESOLUCION DE P 0 [EMAS ANTES DE LLAMAR A MANTENIMIENTO (cont.) El agua en la • La manguera de drenaje est,. • Asegt_rese de que la manguera de drenaje este libre lavadora drena doblada, apretada o taponada. de taponamientos, dobladuras, etc., y no esta apretada demasiado lento o debajo de la lavadora.
- Page 70 ESOLUCION E PBOBLE AS ANTES DE LLAMAR A MANTENIMIENTO <conto) La pantalla muestra: La carga es demasiado • A5ada 1 6 2 prendas similares para ayudar a peque_a. balancear la carga. I II- La carga esta desbalanceada. Vuelva a acomodar las prendas para ayudar a balancear la carga.
-
Page 71: Dimensiones Y Especificaciones Clave
Si no se dispone de espacio, Incremente el desempe_o de su lavadora utilice este kit para apilar de LG con los pedestales de 35,5 cenfimetros manera segura su lavadora de (14 pulgadas) de alto correspondientes. carga frontal y secadora LG. -
Page 72: Instalaci6N Del Pedestal
ACCESORiOS OPCIONA[ES INSTALACION DEL PEDESTAL Para asegurar la instalaci6n segura, siga El accesorio de pedestal incluye: cuidadosamente las siguientes instrucciones. • Base de pedestal • Ocho (8) tornillos • Llave Un (1) divisor de caj6n ADV RTBNC|A Cuatro (4) abrazaderas •... - Page 73 ACCESO lOS OPCIONALES INSTALA¢ION DEL PEDESTAL ccont.) Asegurese de que la superficie lateral de la Coloque la abrazadera la manera indicada. lavadora est6 limpia y seca. Quite el papel de La parte doblada de la abrazadera deberA respaldo de la cinta en la abrazadera. reposar en todo el borde del pedestal, y los orificios en la parte inferior de la abrazadera deberAn alinearse con los orificios en el...
-
Page 74: Instalaci6N Del Kit De Apilado
ACCESOOS OPCiONA[ES INSTALACION DEL KiT DE APILADO Para asegurar la instalaci6n segura, siga las Este kit de apilado incluye: siguientes instrucciones. • Dos (2) deles laterales. ADVERTENCiA + Un (1) riel frontal. + Cuatro (4) tornillos. + La instalaci6n incorrecta puede causar accidentes graves. - Page 75 ACCESORIOS OPCIONA[ES INSTALACl0N DEL KiT DE APILADO {cont.) Secadora Lavadora Coioque la secadora sobre la lavadora Insterte el riei frontal entre la parte inferior haciendo coincidir las patas en las de la secadora y la parte superior de la abrazaderas laterales como se indica. lavadora.
-
Page 76: Informaci6N De Registro Del Producto
Su mAquina lavadora LG serA reparada o reemplazada, a discreci6n de LG, si se comprueba que existe un defecto en el material o la mano de obra bajo condiciones de uso normales, durante el periodo de garantia ("Periodo de garantia') establecido mAs abajo, vigente desde la fecha ("Fecha de compra') de la compra del cliente original de producto. - Page 77 NOTES• NOTAS...
- Page 78 NOTES • NOTAS...
- Page 79 P/No. MFL31245113...