Table of Contents
Advertisement
Advertisement
Table of Contents

Related Manuals for Pfaff creative 2134


Summary of Contents for Pfaff creative 2134
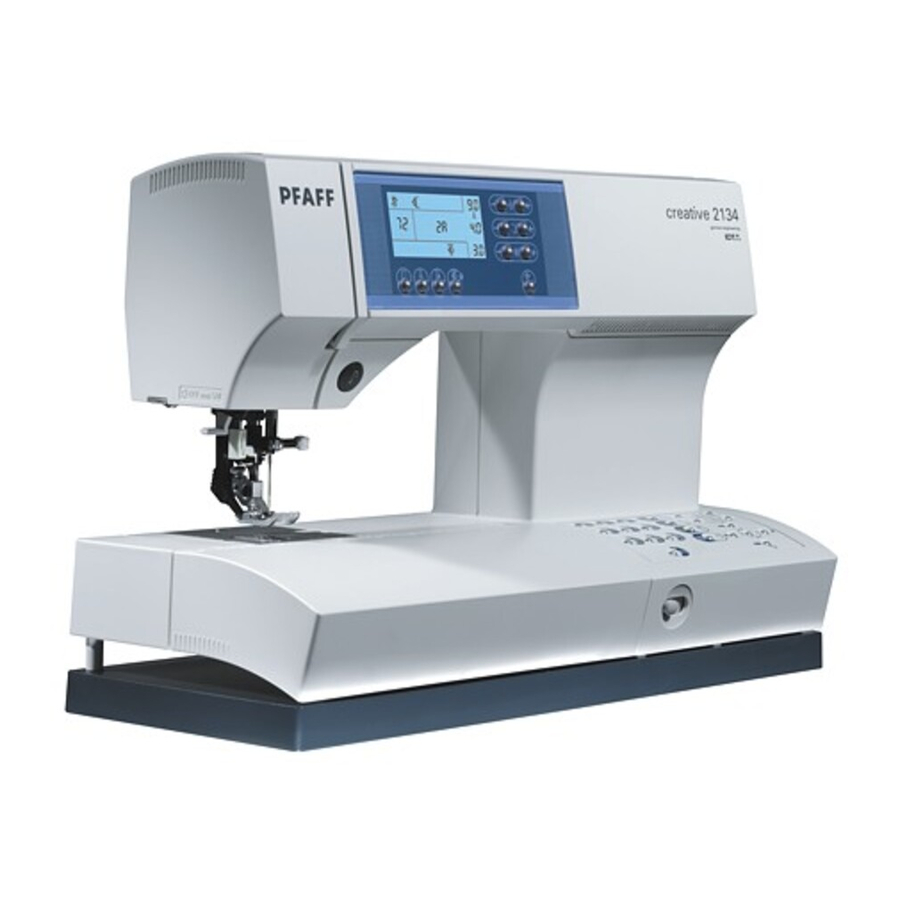
- Page 1 creative 2134 O w n e r ´ s m a n u a l...
-
Page 2: Important Safety Instructions
This household sewing machine is designed to comply with IEC/EN 60335-2-28 and UL1594 IMPORTANT SAFETY INSTRUCTIONS When using an electrical appliance, basic safety precautions should always be followed, including the following: Read all instructions before using this household sewing machine. DANGER - To reduce the risk of electric shock: •... - Page 3 Before you start, please spend some time reading these operating instructions. You will soon discover how easy it is to use your Pfaff creative 2134. But we do not want to keep you any longer. Give a free rein to your...
-
Page 4: Table Of Contents
Table of content Hoop selection table Introduction Embroidery Stitch chart Attaching the embroidery foot Parts of the sewing machine 1:13 Attach the embroidery unit Parts of the embroidery unit 1:14 Remove the embroidery unit Parts of the embroidery hoop 1:14 Attach the hoop on the embroidery unit 3:3 Carrying case 1:15... - Page 5 Decorative Sewing General notes on decorative sewing Changing the pattern width Combined Borders Twin needle Stitch sequences Stitch sewing sequence guide Quilting Nostalgia /Heirloom 5:10 Cross Stitch 5:11 Free-motion Sewing 5:11 Gathering with straight stitch 5:12 Feather stitch - No 47 5:12 Cross-hem Knit stitch - No 12 5:13...
-
Page 6: Hoop Selection Table
Hoop selection table Hoop no. Size 225x140 mm, 250x225 mm 120x115 mm (rectangular/circular) 80x80 mm, circular 180x100 mm 100x80 mm (with hoop adapter) 80x80 mm, rectangular (with hoop adapter) -
Page 7: Introduction
Introduction... -
Page 8: Stitch Chart
Stitch chart Utility stitches Stitch Application Button sewing For applying two-hole or four-hole buttons. program Straight stitch with For all straight stitch and topstitching jobs, stitch length can be increased up to 6 mm. 19 needle 19 needle positions positions are available, for edge fi nishing or sewing in zippers. Stretch triple straight For reinforced seams, particulary on stretch fabrics, e.g. - Page 9 Introduction Stitch Application Stretch triple zigzag Elastic stitch for decorative hems and topstitching. stitch Basting stitch For basting project pieces together. When the feed dog is lowered the machine sews one stitch at each step on the foot control. With the feed dog in up position the machine sews the stitch continuously.
-
Page 10: Quilt Stitches
Quilt stitches The thread tension is preset high to get a hand sewn look. Sew the stitches with a monofi lament thread on top and colored thread in the bobbin. To use the quilt stitches as normal application stitches you need to lower the thread tension. Antique Hand Embroidery Hem stitches Cross stitches... -
Page 11: Decorative Stitches
Introduction Decorative stitches Block Alphabet 1:11... - Page 12 1:12...
-
Page 13: Parts Of The Sewing Machine
Introduction Parts of the sewing machine Front panel with display and control buttons Carrying handle Handwheel Base panel with control buttons Connection socket, "lead cord" Connection socket, "foot control" Main switch Slide for lowering the feed dog Base plate 10. Removable accessory tray 11. -
Page 14: Parts Of The Embroidery Unit
Parts of the embroidery unit 33. Release button for removing the embroidery unit 34. Under arm guide 35. Fastening latch for attaching to the machine 36. Connection plug to the machine 37. Rotating table for the embroidery arm 38. Metal guide for attaching the embroidery hoop 39. -
Page 15: Carrying Case
Introduction Carrying case Place the enclosed lead cord, the foot control and Owner’s manual into the storage compartment of the carrying case. Open the lid upwards. The stitches of the sewing machine are illustrated on the inside of the lid. 1:15... -
Page 16: Accessories
Accessories Embroidery unit With the embroidery unit comes four clips, the embroidery foot, the hoop (225x140), the embroidery booklet and the embroidery smart card 300s. Accessory tray / Free arm In order to sew using the free arm, swing the acces- sory tray to the left and lift it upwards out of the hole. - Page 17 Introduction Standard presser feet and accessories for Pfaff creative 2134 Bobbins Order No: 412 76 79-01 Bulb remover/Needle plate changer Order No: 82 02 92-096 Medium spool cap Order No: 93-035 050-44/000 Small spool caps Order No: 93-036 048-44/000 Large spool cap Order No: 93-036 049-44/000 Edge guide, No.
-
Page 19: Preparations
Preparations... -
Page 20: Voltage Switch
Voltage Switch 220 - 240 V / 120 V The sewing machine is set to the voltage 220 - 240 V. To change the voltage to 120 V (US/Canada), you must set the voltage switch on the underside of the machine to 120 V. If you are unsure of the correct voltage for your country, please check with your authorized sewing machine dealer or local electrical authori- ties before plugging in your machine. -
Page 21: Main Switch
Preparations Main switch When the main switch (7) is switched on (switch function I) the sewing bulb lights up and stitch No. 1 is indicated in the creative 2134 window. The sewing machine is now ready to function. "0" = OFF "I"... -
Page 22: Changing The Presser Foot
Changing the presser foot Switch off the main switch Snap off the presser foot Press the front part of the presser foot upwards and at the same time the rear part downwards until it disengages from the presser foot holder (11). Snap on the presser foot Place the presser foot under the presser foot holder (11), so that when the presser foot lifter is lowered, the pins of the foot snap onto the... -
Page 23: The Idt (Integrated Dual Feed)
Preparations The IDT (Integrated Dual Feed) For sewing any fabric precisely Pfaff provides the ideal solution: the Integrated Dual Feed, IDT system. As on industrial machines, the IDT feeds the fabric from the top and bottom at the same time at the same stitch length. The fabric is fed precisely. -
Page 24: Lowering The Feed Dog 2:6
For certain sewing work such as free-motion quilting or darning or when embroidering, the feed dogs must be lowered. On your Pfaff creative 2134 there are two different methods for lowering the feed dogs, one on the outside of the machine and one inside the bobbin door. -
Page 25: Changing The Needle
Place an empty blue bobbin on the bobbin winder aligning the small rectangular hole on the bottom side of the bobbin with the small pin on the bobbin winder. The Pfaff logo is facing up. Push the bobbin to the right. - Page 26 Winding the bobbin from the spool pin Place the sewing thread on the spool pin. Slide a spool cap fi rmly against the spool. Three different spools caps to accomodate any type of thread spool are included with your machine. Choose a spool cap that is the same size or slightly larger in diameter than the spool.
- Page 27 Preparations Winding from the second spool pin Insert the second spool pin in the hole provided. Place the thread on the second spool pin. Threading Place the thread into guide A from the front and pull it counter clock- wise around the pre-tension device B. Make sure the thread is pulled securely inside the pre-tension device for correct thread tension.
- Page 28 The Pfaff logo is facing up. Push the bobbin to the right. Wind the thread tail clockwise several times around the bobbin.
-
Page 29: Inserting The Bobbin And Bobbin Case 2:11
Inserting the bobbin Insert the full bobbin (with the Pfaff logo facing towards the bobbin case) in the bobbin case. When doing so, pull the thread through slot A, then under tension spring B until it rests in the opening (see arrow). -
Page 30: Threading Your Creative 2134
Threading your creative 2134 Raise the presser foot. Place the thread on the spool pin and fi t a spool cap, either the same size or slightly larger than the spool, on top of the spool. Using both hands, pull the thread into thread guide A from the front. - Page 31 Preparations Integrated Needle Threader In order to make threading the needle easier and quicker, use the Pfaff Integrated Needle Threader. Lower the presser foot. Press the threader down with the handle. Threader hook F swivels through the needle eye. Bring the thread under the thread hook E and back past the front of the needle eye.
-
Page 32: Bringing Up The Bobbin Thread
Bringing up the bobbin thread Raise the presser foot. While holding the end of the needle thread, press the foot control so the needle moves down and up one time. Pull the needle thread to draw up the bobbin thread. Close the bobbin door and pull the top and bobbin threads under the presser foot to the left. -
Page 33: Threading The Twin Needle
Preparations Threading the twin needle Replace the sewing needle with a twin needle. Insert the second spool pin and place one spool of thread on each of the spool pins. On the vertical spool pin, place a spool cap and a felt pad underneath the spool of thread. -
Page 34: Control Panel Overview
Control Panel overview Control Panel buttons on the front of the machine 47. Tie-off/basting button 48. Needle down button 49. Sew slow button 50. Mirror/keypad lock button 51. Stitch/design width, + and - buttons 52. Stitch/design length, + and - buttons 53. -
Page 35: Window Indications
Preparations Window indications Twin needle warning Reverse sewing activated Single pattern activated Monochrome activated Bobbin thread warning Upper thread warning Presser foot warning Embroidery card indication Park position 10. Presser feet recommendation 11. Stitch or design number 12. Edit mode for sequencing 13. -
Page 36: Correct Thread Tension
Correct thread tension This machine will automatically preset the tension for different types of stitches. Depending on what type of fabric and threads you are using, manual adjustments might be needed. If you fi nd that the bobbin thread is visible on the top side of the fabric or that the top thread is visible on the underside of the fabric, you need to adjust the thread tension. -
Page 37: Getting Started
Preparations Getting started To begin sewing on your new Pfaff creative 2134, do a straight stitch fi rst. When you turn on your machine, the straight stitch is automatically selected. The preset stitch length, tension and presser foot recommen- dation is shown on the window. Take a piece of fabric, fold it and place it under the presser foot. -
Page 39: Embroidery
Embroidery... -
Page 40: Attaching The Embroidery Foot
Attaching the embroidery foot Remove the standard presser foot. Carefully loosen the screw (A) until the cross-hole (B) is accessible. Squeeze the embroidery foot gently together and guide the pin of the foot into the cross hole of the presser foot holder as far as it will go. -
Page 41: Remove The Embroidery Unit
Embroidery Remove the embroidery unit Switch off the main switch. Press release lever (33) and remove the embroidery unit with a back- ward movement away from you, holding it parallel to the machine. Note: Make sure that you have removed the hoop and placed the embroidery arm in the park position, before removing the embroidery unit. -
Page 42: Hooping The Fabric
Hooping the fabric One rectangular embroidery hoop (140x225 mm) is supplied with your machine. Embroidery hoops in other formats and sizes are available as optional accessories. For better embroidery results, place a layer of stabilizer beneath the fabric and hoop both the stabilizer and the fabric. The fabric and stabilizer must sit smooth and be securely hooped. -
Page 43: Function Buttons For Embroidery
Embroidery Function buttons for embroidery This section contains the function buttons active when the machine is in embroidery mode (the embroidery unit is on). Park position The park/cut position button (65) is used for put- ting the embroidery unit in the correct position for storage or placing it in the embroidery case (optional accessory). -
Page 44: Hoop Select Button
Hoop select button When embroidering on your Pfaff creative 2134, you need to choose a hoop for your embroidery. There are 6 different hoop sizes available. To select a hoop, press the hoop select button (68) to jump between the hoops. For best embroidery results, the machine always recommends the smallest possible hoop size when loading a design. -
Page 45: Rotating Button
Embroidery Rotating button This function makes it possible to rotate a design in 90° steps. When pressing the rotating button (73) an arrow will be added inside the hoop icon to show how you have rotated your design. A design is rotated from its centre around the centre of the hoop as shown on the picture (A). -
Page 46: Mirror Button
Sew slow button When pressing the sew slow button (49) the speed will be reduced and the sew slow symbol will be shown on the window. The sew slow button can be helpful when sewing with special threads such as metallic threads, or when sewing on thin fabrics. -
Page 47: Monochrome Button
Embroidery Monochrome button If you activate the monochrome function (54) your selected design will be stitched out without stop- ping at color changes. When pressing this button the monochrome symbol will be shown on the window. To deactivate the function press the monochrome button again. -
Page 48: Reverse/Start-Stop Button
Reverse/start-stop button In the embroidery mode the reverse sewing button (14) becomes a start-stop button.. Use the button when you want to start your embroi- dery and when you want to stop. Keep the button depressed in order to start the embroidery. Note: You can also use the foot control to start embroidering. -
Page 49: Messages While Embroidering
Embroidery Messages while embroidering Select hoop When the hoop symbol fl ashes you should press the hoop selection button (68) to let the machine calibrate the embroidery unit. Insert the embroidery smart card When the embroidery card fl ashes, you should insert an embroidery card. -
Page 50: Embroidery Position
Cut the thread When you have sewn a few stitches your Pfaff creative 2134 stops and fl ashes with the cut symbol, telling you to cut the thread tail. When you have cut the thread, press the reverse/start-stop button again, and the machine will continue to embroider. - Page 51 Embroidery Upper thread warning When the top thread is broken the machine stops and this icon is fl ash- ing in the window. Rethread the top thread and press the reverse/start- stop button again to continue to embroider. Bobbin thread warning When the bobbin thread is low the machine stops and this icon is fl...
-
Page 52: Get Started To Embroider
Get started to embroider Attach the embroidery foot. Attach the embroidery unit and put the presser foot in the up position. Lower the feed dog. Turn on your machine. The machine prompts you to press the hoop selection button (68) so that the machine can calibrate the embroidery unit. -
Page 53: How To Embroider Words
Embroidery How to embroider words The creative 300 s-card is included with your Pfaff 2134. On the 300 s- card there are 17 designs and 2 different fonts, Block and Monogram. Attach the embroidery foot and thread the machine. Attach the embroidery unit and put the presser foot in the up posi- tion. -
Page 54: Appliqué Embroidery
Appliqué embroidery To embroider an appliqué design, place a stabilizer underneath the fabric and hoop all the layers. Start to embroider. A straight stitch outline is stitched around the appliqué design. When the machine stops and you see an A in the display, place the appliqué fabric on top. Start your machine again, and the machine will sew a straight stitch outline around the appliqué... -
Page 55: Sewing
Sewing... -
Page 56: Function Buttons For Sewing
If you have pressed the button while sewing, your Pfaff creative 2134 will tie-off the stitch and stop automatically. Needle Down button... -
Page 57: Keypad Lock Button
Sewing Keypad lock button If you press the mirror button for more than 1 sec. the key pad lock is activated, locking the lower key panel. The keylock symbol will appear on the window. To unlock, press the mirror button again for more than 1 sec. -
Page 58: Stitch Width
Stitch width The width of a stitch is shown in mm (A). Change the stitch width by pressing the + and - buttons (51). The stitch width can be changed in 0.5 mm steps, from 0 mm to 9.0 mm. When you have reached the limit you will hear a beep. -
Page 59: Edit/Sew Sequences
Sewing Edit/Sew sequences This button toggles between normal sewing mode and the different modes for editing and sewing sequences. If you press the button once the machine enters the mode for editing sequences. The edit icon (A) and memory number (B) is shown on the window. The fi... -
Page 60: Buttonhole Length
Buttonhole mode button The Buttonhole mode button is used for toggling between slit length (A), density (B) and balance (C) mode when a buttonhole is selected. If the buttonhole will be sewn manually only the balance and density modes are available. Use the stitch length buttons (52) to change the set- tings in the currently active mode. - Page 61 Stitch/design selection buttons On your Pfaff creative 2134 you can choose between 100 different stitches and 50 letters/symbols. To choose a stitch, press the direct selection buttons on your keypad. For stitches with a two or three- fi...
-
Page 62: Messages While Sewing
Messages while sewing Twin needle warning When the twin needle warning appears, you should not sew with a twin needle. Otherwise the needle can break and the presser foot can be damaged. Note: The twin needle warning is set for a twin needle with 2.0 mm needle spacing. -
Page 63: Straight Stitch
6 mm. Change the needle position of the straight stitch to sew in a zipper or topstitch along the edge of a collar. Your Pfaff creative 2134 has 19 needle positions that can be adjusted with the stitch width -/+ buttons (51). -
Page 64: Overlock Stitches
Overlock stitches For elastic, knits, woven and stretch fabrics, your Pfaff creative 2134 provides a selection of overlock stitches. These stitches join multiple layers of fabric and overcast them in one operation. These stitches can stretch and are more durable than standard stitches. -
Page 65: Basting Stitch - No 14
This stitch is used for sewing seams where strength is needed, such as under arm and crotch seams. The heavier the fabric, the longer the stitch length required. Your Pfaff creative 2134 has 19 needle positions that can be adjusted with the stitch width buttons (51). -
Page 66: Blindhem Stitch - No 5
Blindhem stitch – No 5 The blindhem stitch is used to make invisible hems on skirts, trousers and home decorating. • Finish the edge of the hem. • Fold and press the hem allowance to the wrong side. • Fold the hem back on itself so approximately 3/8" (1 cm) of the fi... -
Page 67: Buttonholes 4:13
Sewing Buttonholes Your Pfaff creative 2134 has the perfect buttonhole for every fabric and garment. Whether you wish to sew buttonholes on jackets, pants (trousers), blouses or stretch fabrics, 4 different buttonholes give your garments the professional touch. Your Pfaff creative 2134 is equipped with the Sensormatic buttonhole guide and sensor technology to ensure that every buttonhole is sized accurately. - Page 68 How to sew an automatic buttonhole Insert the sensormatic buttonhole guide and attach the buttonhole foot no. 5A. Choose the buttonhole you wish to sew. Always test sew on scraps fi rst before you sew on your garment. Press the stitch length buttons (52) to set the length of the button- hole slit in mm.
-
Page 69: Buttonhole With Gimp Thread
Sewing Buttonhole with gimp thread Buttonholes that are sewn with gimp cord under the satin stitch col- umns are more stable, durable and have a professional appearance. Use pearl cotton or regular gimp thread. Insert the senormatic buttonhole guide. Place the center of a length of gimp cord over the metal hook extending from the center back of the buttonhole foot. -
Page 70: Sewing On Buttons - No 0
Buttonhole tips Buttonholes that are to be sewn very close to a reinforced edge, may sometimes not feed optimally with the buttonhole foot because of the bulk at the edge of the fabric. In this case, use presser foot 1 with the Integrated Dual Feed engaged. -
Page 71: Sewing In Zippers - No 1
Sewing Sewing in zippers – No 1 There are different ways to sew in zippers. Follow the directions included with your pattern for best results. For all types of zippers it is important to sew close to the teeth of the zipper. - Page 72 Free-motion darning Attach darning foot no. 6. Make sure the needle is at its highest posi- tion. With thumb and index fi nger press the darning foot together. Insert the pin of the darning foot as far as it will go into the hole of the presser foot holder.
- Page 73 Decorative Sewing...
-
Page 74: General Notes On Decorative Sewing
General notes on decorative sewing To enhance your own home textiles or garments your Pfaff creative 2134 offers you a wide variety of fancy and decorative stitches. Create a greater variety of embellishments by combining different patterns, colors and sizes. Use specialty decorative threads to enhance the lovely stitching. -
Page 75: Combined Borders
Decorative Sewing Combined Borders Create borders of any width by combining different decorative stitches. Place stabilizer under fabric. Mark the center of your fabric with a fabric marking pen/pencil. Sew stitch no. 64; stitch width 6 mm along your line. Next press the mirror button (50). -
Page 76: Stitch Sequences
Stitch sequences Your Pfaff creative 2134 offers you the possibility to store stitch and alphabet sequences in the memories of the machine. You can store up to 30 stitches or letters in each of the 5 memories. Position Create a stitch sequence Press the edit/sew sequence button (65). -
Page 77: Stitch Sewing Sequence Guide
Decorative Sewing Stitch sewing sequence guide Position Stitch No. Use the Stitch sewing sequence guide for an easy way to create your stitch sequences. Write down Stitch/ the stitch sequence you wish to create and note the Letter stitch number above each stitch. Now you can easily Position keep track of which stitch number to store in each position in the sequence. -
Page 78: Quilting
Traditionally patchwork was sewn by hand. Today your creative ideas can be realized in a much shorter time with your Pfaff creative 2134. A quilt consists of three layers, two layers of fabric with a layer of bat- ting sandwiched between. - Page 79 Stitch-in-the-Ditch method of quilting. Stitching-in-the-Ditch means following the seams in the quilt blocks. • Set your Pfaff creative 2134 with a straight stitch (no. 1), stitch length 2.5, center needle position and the IDT engaged. • Begin by pin basting your quilt through all layers with safety pins –...
-
Page 80: Free-Motion Stippling
• Set your Pfaff creative 2134 for stippling with a Straight Stitch (1) and lower the feed dogs. Attach the free-motion quilting foot (extra accessory). Lower the pressser foot lift to the free-motion position. -
Page 81: Quilt Appliqués
There are many different ways of applying appliqués to a quilt. One way is to add the appliqué to the block before the quilt is put together. • Set your Pfaff creative 2134 with stitch no. 3, stitch length 0.5, stitch width 4-6 mm, presser foot no. 2. •... -
Page 82: Nostalgia /Heirloom
Twin needle Pintucks are created by placing a twin needle in your Pfaff creative 2134. Mark the fi rst line of stitching with a fade away or wash away fabric pen. Continue to mark lines or use one of the optional Pfaff Pintuck feet to easily guide your rows where needed. -
Page 83: Cross Stitch
With Free-motion Sewing you can create the most fantastic work. It is possible to sew just as you would draw with a pencil, using the various types of threads that are on the market today and your Pfaff creative 2134. You can also vary the shade of your Free-motion sewing by sewing in different directions or patterns. -
Page 84: Gathering With Straight Stitch
Gathering with straight stitch A straight stitch can be used to gather sleeves, cuffs, skirts or valances. To obtain neat and even gathers you should sew two or three rows of gathering stitches. • Set your stitch length to 6.0 mm. Lower thread tension to 3. •... -
Page 85: Cross-Hem Knit Stitch - No 12
Decorative Sewing Cross-hem Knit stitch - No 12 This highly elastic stitch is very suitable for decorative hems. • Fold the hem allowance to the reverse side. • Stitch the hem from the right side of the fabric. Trim any excess hem fabric up to the stitching. -
Page 86: Rolled Hem With Foot No. 7
Rolled hem with foot No. 7 Use the rolled hem foot no. 7 to fi nish the edges of blouses, scarves, or ruffl es without having to iron the edges beforehand. Hemming pre- vents the edges from fraying and produces a neat and durable edge fi... - Page 87 Maintenence...
-
Page 88: Changing The Needle Plate
Changing the needle plate Switch off the main switch Removal • Raise the presser foot. Position the needle plate changer (light bulb changer) as shown and press the needle plate up on the right, then on the left. It can now be easily removed. Replacing •... -
Page 89: Changing The Light Bulb
Remove the light bulb changer from the bulb. The bulb will be held firmly so you can remove it safely. Bulbs can be purchased from your Pfaff dealer. -
Page 90: Sewing Problems And Their Solutions
Sewing problems and their solutions Problem/Cause Remedy The machine skips stitches The needle is not properly inserted Push needle fully upwards. Flat side facing the back. Wrong needle is in use Use needle system 130/705 H. Needle is bent or blunt Insert a new needle. - Page 91 • If problems remain contact an authorized Pfaff dealer. • Have your Pfaff creative 2134 serviced regularly by your authorized Pfaff dealer. • When leaving the machine, even for only a short time, switch off the main switch. This is important if there are any children nearby.
-
Page 92: Index
Index Accessories 1:16–1:17 Color stepping Accessory tray 1:16 Combined Borders Alphabet 1:11 Connecting the foot control Antique Hand Embroidery stitches 1:10 Connection socket, ”foot control” 1:13 Appliqué and cutwork stop 3:12 Connection socket, ”lead cord” 1:13 Appliqué embroidery 3:16 Connection socket for the embroidery unit 1:13 Attaching the embroidery foot Control Panel overview... - Page 93 Free-motion stippling Needle Down button Front panel 1:13 Needle holder with retaining (set) screw 1:13 Function buttons for embroidery Needle plate 1:13 Function buttons for sewing Nostalgia/Heirloom 5:10 Gathering with straight stitch 5:12 Orbiting button Overlock stitches 1:9, 4:10 Handwheel 1:13 Hemstitching 5:10...
- Page 94 Utility stitches Sequence end button Sew slow button 3:8, 4:2 Shell edging 5:13 Single stitch Voltage Switch Slide for lowering the feed dogs 1:13, 2:6 Spool holder 1:13 Window indications 2:17 Start-stop/reverse button 1:13, 3:10 Stitch/design selection buttons 3:9, 4:7 Wing Needle 5:10 Stitch chart...
-
Page 95: Technical Data
Package contents Sewing machine Carrying case Foot control Lead cord Accessories package Owner’s manual Embroidery unit Embroidery hoop Embroidery clips Quick start embroidery kit Intellectual property PFAFF, creative and IDT (image) are registered trademarks or trademarks of VSM Group AB. - Page 96 Some fabrics have a lot of excess dye which can cause discoloration on other fabric but also on your sewing machine. This discoloring may be very difficult or impossible to remove. Fleece and denim fabric, especially red and blue, often contain a lot of excess dye. If you suspect that your fabric/ready-to-wear garment contains a lot of excess dye, always pre-wash it before sewing to avoid the discoloring.
- Page 97 We reserve the right to change the machine equipment and the ass ort ment of accessories without prior notice, or make modifications to the performance or design. Such modifications, however, will always be to the benefit of the user and the product. Please note that on disposal, this product must be safely recycled in accordance with relevant National legislation relating to electrical/electronic products.
- Page 98 VSM Group AB • SE-561 84 Huskvarna • SWEDEN www.pfaff.com...