Table of Contents
Advertisement
Advertisement
Table of Contents

Related Manuals for Pfaff hobbyblock 794


Summary of Contents for Pfaff hobbyblock 794
- Page 1 Instruction manual...
- Page 2 C) The maximum approved wattage of watts. the light bulb is 15 D) The drive belt must never be adjusted by anyone but an authorized Pfaff agent.
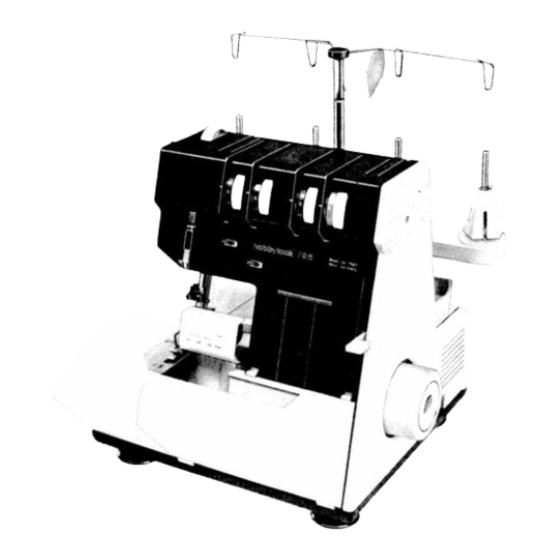
- Page 5 _______________________________________ Controls of the sewing machine 1 Foot pressure regulating dial 2 Thread guide 3 Carrying handle 4 Left needle thread tension dial 5 Right needle thread tension dial 6 Right looper thread tension dial 7 Left looper thread tension dial cover 11 Presser foot lifter lever 12 Hand wheel and feed regulator...
- Page 9 Opening and closing looper cover and work support Push looper cover lever to the right, swing cover in the direction of the arrow and lower it. To close the looper cover, push the cover until it locks. To open the work support, push it to the left.
- Page 11 Threading the left looper: Insert the left looper thread in sequence 1 to 10 and pull approximately 10 cm (4) of thread through the looper eye (the thread path is marked orange).
- Page 12 Threading the right needle: Thread the right needle in sequence 1 to 7 and pull approximately 5 cm of thread through the eye of the needle. (The thread path is marked green.) Make sure to thread point 4 with special care;...
- Page 13 Now close the work support (1), push the handle down (2) and close the looper cover (3). Inserting the lint box: Insert the tabs of the lint box into the slots (4) of the front cover. Push the lint box up against the front cover until it snaps in place.
- Page 16 (1/2’)
- Page 19 ____...
- Page 20 Thread chart Material Thread Stitch length Light materials: Organdy, light-knit Cotton No. 80—100 2.0 to 4.0 mm fabric, Taffeta, silk, Silk No. 80—100 lining materials. Synthetic thread No. 70—140 Medium-heavy materials: Cotton No. 60—100 2.0 to 4,0 mm Silk Cotton, tricot, No.
- Page 21 Setting the stitch length on 796 Open lateral swivel table 15. Press stop of main feed dog (see arrow) fully downwards and hold it there. Turn handwheel 12 in the direction indicated by the arrow until it snaps into place. Set the required stitch length at mark A by continuing to turn handwheel 12 forwards or backwards, as may be...
- Page 22 —...
- Page 24 Adjusting seam width: Standard setting is 3.5 mm. The seam width can be changed from 2.5 to 6.5 mm. according to fabric type and seam requirements. Note: Before adjusting the stitch width, always disengage the upper knife. To disengage upper knife, open looper cover.
- Page 28 Changin g needles Removin g needle: Unplug the machine . Turn the hand wheel counter- clockwis e to raise the needle bar to its highest position . Loosen the needle clamp screw with the allen wrench and pull the needle Out. Inserting needle: When the needle bar is at the highest position , insert a new needle in the...
- Page 29 _______ __ —...
- Page 32 6uipo sAo’ ueep :aulLpew ptie eUiq3eW ioud 6u!IiO Ajuo sdoip p006 4!Ienb seDeld buiMes aulLpew PoeoiPu! &j) eouis s5uiqsnq peeueJdw! peeu Peilo Aiuo e3!M O!d) quow...
- Page 34 /__• • 9—14) • •...
- Page 36 PFAFF-HANDELSGESELLSCHAFT für Haushaltnäh maschinen m b. H Sube to aftratons in design West Germany 7500 Karlsruhe 41 0288 No. 30068...