
Related Manuals for Electrolux EI23BC56IS3


Summary of Contents for Electrolux EI23BC56IS3
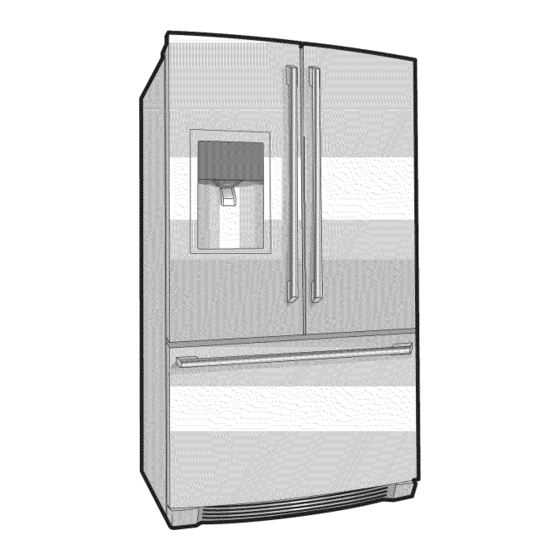
- Page 1 Use Et Care Guide French Door Bottom Freezer/Refrigerator Guia de Uso y Cuidado Refrigerador congelador inferior de puerta doble Guide d'utilisation et d'entretien R_frig_rateur 5 portes fran_aises/Cong_lateur en has...
-
Page 2: Finding Information
Keep a [@COld quick Installation ............reference Removing the Doors ..........^ nn "in "h W" r^ 1" ecl gle ale _uppy ........c0.tro_s ............Electrolux model number Aut0maticlce&WaterlVlaker/Dispenser....__nu--_='b_er St0rageFeatures ..........Changing the Water and Air Filters ......i!_!_i!i_ii_!i!_!_i!i_ii_!i!_!_i!i_ii_!i!_!_i!i_ii_!i!_!_i!i_ii_!i!_!_i!i_ii_!i!_!_i!i_ii_!i!_!_i!i_ii_!i!_!_i!i_ii_!i!_!_ii_i... - Page 3 take the precautions listed below. i_i!_!_i!i_ii_!i!_ Proper Disposal of Refrigerators/Freezers...
- Page 4 Safety E ectrical information = The refrigerator must be plugged into its own dedicated 115 Volt, 60 Hz, AC-only non-GFCl electric outlet. The power cord of the appliance is equipped with a three-prong grounding plug for your protection against electrical shock hazards. it must be plugged directly into a properly grounded three-prong receptacle.
- Page 5 i_i!_!_i!i_ii_!i!
-
Page 6: Installation
Installation Required Tools You will need the following tools: Tools Necessary: Components Provided: Top Hinge Top Hinge Cover Front Cover Rear S ..Phillips'" Head sge_e _oow_ #2 Square Drive Socket 3/8" Fixed Screw_ Head Wrench Set Wrench This Use & Care Guide provides general installation and operating instructions for your model. - Page 7 loosen four(4)drawer s crews (two(2)oneach touching thecabinet onallfoursides andthat i_i!_!_i!i_ii_!i!_ side)toallowdrawer t orotate,...
- Page 8 Installation To adjust the door stop: Re-tighten screw. Door stop is adjustable between 85 to 145 degrees. Screw Re=tighten Screw Ensure door stops in desired location before resuming normal use. To level the doors using the adjustable lower hinge (select models): Remove all food items from door bins on door Adjustable Door Stop being adjusted.
- Page 9 i_i!_!_i!i_ii_!i!
- Page 10 !_i_i_i!_!!i_!_i!i_!_i!!_!;_i_!i_i_!i!i_!!i_i!i_i!i!_!_i_ii_iiii_!_i_i_!_i_i!ii_!_!i!i_i_!!i_!!!_i_;_i!_;_i!_i_!_!;!i_;_!_!:_ Removing the Doors Gettin throu h narrow s aces Toremovetherefrigeratordoors" ," Ifyourrefrigeratorwillnotfitthroughanentrancearea, 1 Tracelightlyaroundthedoorstophingeswitha youcan removethedoors. Checkfirstbymeasuringthe pencil.This makes reinstallationeasier. entrance. To preparefor removing the doors: 1 Make sure the electrical power core is unplugged fromthewalloutlet. -"--..20penthefreezerdraw, erandremovethetoe grille(see"Installation section).
-
Page 11: Removing The Doors
Removing the Doors Installing Freezer Drawer 1 With lower slides pulled out, hang drawer onto slide brackets ensuring pins on each side are fully inserted into slots on each side. Unscrew the three (3) lower hinge screws and i-..,iii hinge if necessary. - Page 12 !_i_i_!i!_i!i_i_!i_i_!!_!;_i_ii_;!_!;!_!_;!_!i!_i_;_i_;_:_:i_!_!_ii_iii;ii!_i_!i_:_i_:_!_!i_i_!_i!_ii!i_i_i_i_i!i_!_!i_iii Installin Door andles Door Handle Instructions p,,=_ Remove handles from protective packaging. Position fresh food handle _ e'_ (e<_ end caps (A)overupper and lower pre-installed shoulder bolts (a) that are fastened into door ==-==-z_"--=l r==-- ensuring the holes for --XI i/"/_ the set screws are fac ng...
- Page 13 Connecti the Water Suppl To connect water supply line to ice maker inlet valve: Disconnect refrigerator from electric power source. Place end of water supply line into sink or bucket. Turn ON water supply and flush supply line until water is clear. Turn OFF water supply at shutoff valve.
- Page 14 Controls i!_!_i!i_ii_!i!_!_i!i_ii_!i!_!_i!i_ii_!i!_!_i!i_ii_!i!_!_i!i_ii_!i!_!_i!i_ii_!i!_!_i!i_ii_!i!_!_i!i_ii_!i!_!_i!i_ii_!i!_!_ii_i i!_!_i!i_ii_!i!_!_i!i_ii_!i!_!_i!i_ii_!i!_!_i!i_ii_!i!_!_i!i_ii_!i!_!_i!i_ii_!i!_!_i!i_ii_!i!_!_i!i_ii_!i!_!_i!i_ii_!i!_!_ii_i...
- Page 15 Controls WaveoTouch TM (select modeJs) Your refrigerator is equipped with a Wave=Touch TM control panel display. It is only necessary to gently touch the glass. There are three (3) levels of display, 1"t Level: Sleep Mode 3 'd Level: User Variable Options Sleep Mode displays only the WATER, CUBES and Touching the options icon displays the following options: CRUSHED options.
- Page 16 Controls Setting cooling temperatures "Sabbath Mode" Touch the glass panel to illuminate the 2 ndlevel of display. The Sabbath Mode is a feature that disables portions of Select the options icon. the refrigerator and its controls for both Wave-Touch Plus (+) and minus (-) and IQ-Touch% in accordance with observance of indicators will appear on the weekly Sabbath and religious holidays within the...
- Page 17 Controls IQoTouch (seJect modeJs} Sabbath Mode and the Perfect Temp TMDrawer The Perfect Drawer should be turned off for the Temp TM Sabbath/Holidays. Before putting the refrigerator into the Sabbath mode, turn the Perfect Temp TMDrawer off by pressing the drawer on/off button. The display will show "OFF"...
- Page 18 Controls mute sounds Alarms Tonesemitted by each keypress can be turned off basedon user preference.The sounds are muted when the red indicator is fit. Warning signals will stay active. factory defauJt Resetsall refrigerator settings such astemp, temp display and ring tones to their factory default settings.
- Page 19 Automatic ice & aker/Dispenser Priming the water supply system Begin filling the tank by pressing and holding a drinking glass against the water dispenser paddle. Keep the glass in this position until water comes out of the dispenser. It may take about 11/2minutes.
- Page 20 Automatic ice & Water aker/Dispenser Remove and empty the ice bin if: ice maker/dispenser tips • If your refrigerator is not connected to a water An extended power failure (one hour or longer) supply or the water supply is turned off, turn off causes ice cubes in the ice bin to melt and freeze the ice maker by holding the On/Off soft-touch together, jamming the dispenser mechanism.
-
Page 21: Storage Features
Storage Features Your refrigerator includes a variety of storage drawers. These drawers are located in fixed positions at the bottom of the fresh food compartment. Crispers Crisper drawers are designed for storing fruits, vegetables, and other fresh produce. Your refrigerator includes SpillSafe TM glass shelves that are designed to catch and hold accidental spills. - Page 22 Storage Features To remove the Crisper Drawer for cleaning: Special It Rack ---_. Pull the drawer out until it stops. Lift the front slightly and remove the drawer. Dell keeper select models) Some models are equipped with a meat keeper drawer for short-term storage of bulk meat items.
- Page 23 Storage Features To change the position of an adjustable door bin: Before adjusting a bin, remove all food. 2 Grip the bin firmly with both hands and lift it upward. Remove the bin. Place the bin just above desired position. Lower the bin onto supports until locked in place.
- Page 24 Storage Features To reinstall upper and middle baskets (select models), Dairy compartment position basket onto the retainer clips making sure Use the dairy compartment, at the top of the fresh food the front of the basket rests in the retainer clips on the compartment door, for short-term storage of cheese, stabilizer bar.
- Page 25 i_i!_!_i!i_ii_!i!
- Page 26 Refer to the "Controls" section for procedures on should be frozen. i!_!_i!i_ii_!i!_!_i!i_ii_!i!_!_i!i_ii_!i!_!_i!i_ii_!i!_!_i!i_ii_!i!_!_i!i_ii_!i!_!_i!i_ii_!i!_!_i!i_ii_!i!_!_i!i_ii_!i!_!_ii_i temperature settings, i!_!_i!i_ii_!i!_!_i!i_ii_!i!_!_i!i_ii_!i!_!_i!i_ii_!i!_!_i!i_ii_!i!_!_i!i_ii_!i!_!_i!i_ii_!i!_!_i!i_ii_!i!_!_i!i_ii_!i!_!_ii_i...
-
Page 27: Normal Operating Sounds
Normal perating Sounds Perfect Temp TM drawer fan Turns off when door Understanding the sounds opens or Perfect Temp TM drawer is turned off. may hear Your new, high-efficiency refrigerator may introduce unfamiliar sounds. These sounds normally indicate your refrigerator is operating correctly. Some surfaces on floors, walls, and kitchen cabinets may make these sounds more noticeable. - Page 28 the housing and discard it. or of unknown quality without adequate disinfection ..iiiilililili_:i_:iiiiiiii:i:_iiiiili_iiiiiiii_ii_i_i_ii_iiii_i ¸ Unpack the new filter cartridge and remove the i!_!_i!i_ii_!i!_!_i!i_ii_!i!_!_i!i_ii_!i!_!_i!i_ii_!i!_!_i!i_ii_!i!_!_i!i_ii_!i!_!_i!i_ii_!i!_!_i!i_ii_!i!_!_i!i_ii_!i!_!_ii_i before or after the system, Systems certified for cyst two (2) protective caps covering the inlet and exit i!_!_i!i_ii_!i!_!_i!i_ii_!i!_!_i!i_ii_!i!_!_i!i_ii_!i!_!_i!i_ii_!i!_!_i!i_ii_!i!_!_i!i_ii_!i!_!_i!i_ii_!i!_!_i!i_ii_!i!_!_ii_i...
-
Page 30: Care And Cleaning
Care and Cleaning Protecting your investment Keeping your refrigerator clean maintains its appearance and prevents odor build-up. Wipe up any spills immediately and clean the freezer and fresh food compartments at least twice a year. • Never use metallic scouring pads, brushes, abrasive cleaners, or strong alkaline solutions on any surface. •... - Page 31 Handles steel. • Stainless steel (Stainless Steel • Clean stainless steel front and handles with non-abrasive soapy water i_i!_!_i!i_ii_!i!_ cleaners and a dishcloth. Rinse with clean water and a soft cloth. Models Only) v,v,v,v,v,v,v,v,v,v,v,v,v,v ¸...
- Page 32 Care and C Replacing LED Lights (s÷ ÷ot modo s) Both the freezer and fresh food compartments of your refrigerator include LED lights. Always use Electrolux parts for replacement. To replace light bulbs: To replace LED Lights: Unplug your refrigerator's power cord.
- Page 33 slower than normal. i_i!_!_i!i_ii_!i!_...
- Page 34 i!_!_i!i_ii_!i!_!_i!i_ii_!i!_!_i!i_ii_!i!_!_i!i_ii_!i!_!_i!i_ii_!i!_!_i!i_ii_!i!_!_i!i_ii_!i!_!_i!i_ii_!i!_!_i!i_ii_!i!_!_ii_i...
-
Page 36: Solutions To Common Problems
:_:_i_i:_;_i_i_i_i_!i_iiii_i_iii_!_!!ii!_i_!_!_!i!i_i_;S_i!;!_i!_!_i!i_!_i_i_!_ii_iiii_!_!_!_!i!;i_i_!!_i!i!i_!i!_!_i_i!!!_i_! Solutions to Common Problems Temperaturein the ,, Temperaturecontrol is set too warm. ,, Adjust temperature control to a colder setting. Deli Drawer or Perfect Temp Drawer is too warm (select models). P,obiern LCa,se [Cor,ec, io, :::: sect ::: :: Water has an odd taste •... -
Page 37: Warranty
Warranty Information Your appliance is covered by a one year limited warranty. For one year from your original date of purchase, Electrolux will repair or replace any parts of this appliance that prove to be defective in materials or workmanship when such appliance is installed, used, and maintained in accordance with the provided instructions.