Table of Contents
Advertisement
Advertisement
Table of Contents

Related Manuals for Crosley Music Writer CR24-003A


Summary of Contents for Crosley Music Writer CR24-003A
- Page 1 MusicWriter |flstmctiofl lliii Illll www. c ros Ieyrad io. corn...
- Page 2 PO TANT SAFETY STRUCT PLEASE READ CAREFULLY THE FOLLOWING iMPORTANT SAFEGUARDS THAT ARE APPLICABLE TO YOUR EQUIPMENT Read instructions - All the safety and operating instructions should be read before the product is operated. Retain instructions - The safety and operating instructions should be retained for future reference.
- Page 3 WARN ING: TO PREVENT FIRE OR SHOCK HAZARD, DO NOT EXPOSE THIS APPLIANCE TO RAIN OR MOISTURE. DO NOT REMOVE COVER. PILOT LAMPS SOLDERED IN PLACE. NO USER SERVICEABLE PARTS INSIDE. REFER SERVICING TO QUALIFIED SERVICE PERSONNEL. CAUT O CAUTION: TO REDUCE The lighting flash with The exclamation...
-
Page 4: Table Of Contents
Getting Started Thank you for purchasing the Crosley Music Writer (CR24-003A). Before operating this unit, please read this manual thoroughly and retain it for future Unpacking ......... reference. Power Source ......Control Locators ....... Basic Operation Instructions in this manual describe the control functions of the CR24-003A. -
Page 5: Getting Started Unpacking
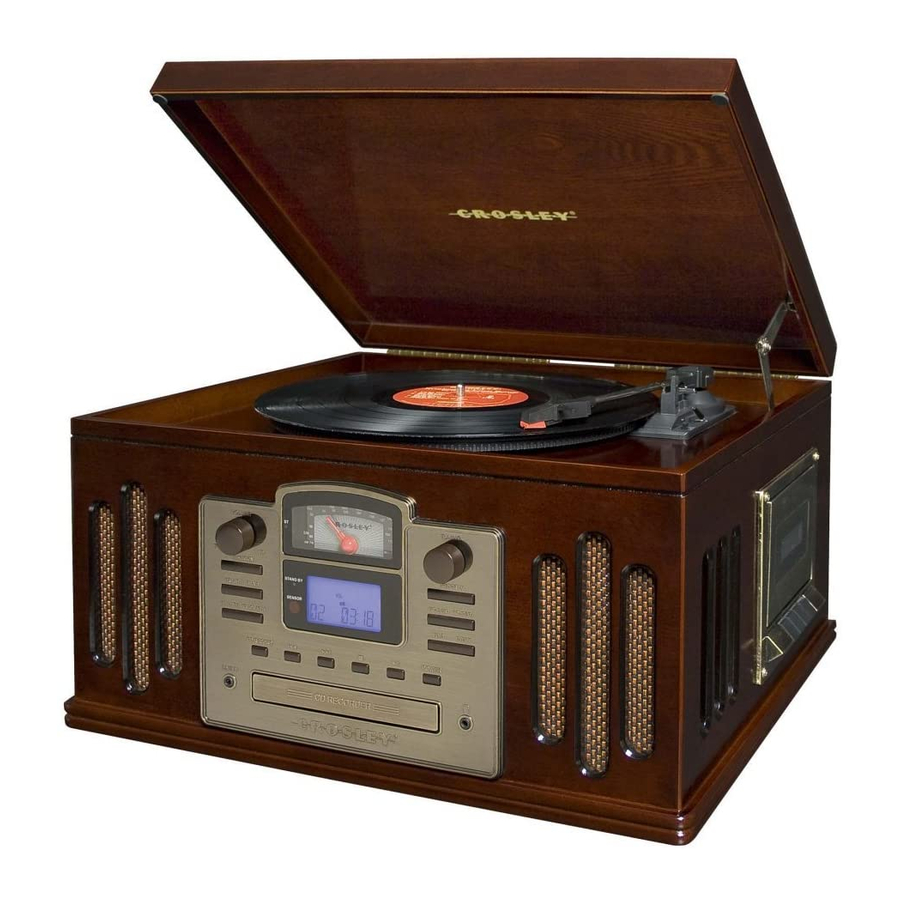
Power Source Unwind the AC POWER CORD (42) at the back Remove packing materials from unit. of the unit and connect it to a power outlet. NOTE: Save all packing materials. Plug A/C cord into appropriate outlet. Remove plastic bag covering radio. - Page 6 Speakers Function Button (CD/PHONO/RADIO/AUX) Erase Button Band Button(AM/FM) Finalize Button Track Split Button 27 26 25 24 23 Record Button Backward Skip Line In Jack CD Drawer Forward Skip Stop Button• Headphone Jack Play/Pause I_11 Power Button FIND Button Eject Button Folder- Button Folder+...
- Page 7 Aux In Jack Audio Output Jack AUDIO AUX IN AC Power Cord External antenna Adapter For 45 rpm Records OOOOOOO OOOOOOOOOO OOOOOOO OOOOOOOOOO OOOOOOO oooooooooo OOOOOOO oooooooooo OOOOOOO 0000000000 OOOOOOOOOO oooooooooo oooooooooo oooooooooo oooooooooo i_o ..,o_ oooooooooo ®® Power Button 43_._f..J'/_ I Xl Eject Button...
-
Page 8: Basic Operation General
Make sure the unit is plugged in correctly to an Antenna: for FM reception, the unit is provided with AC outlet. a FM WIRE ANTENNA (43), move the wire until the reception is clear and with no interferences. AM reception, the unit is provided with a directional Press the POWER button (15/45) to turn on the... -
Page 9: Turntable Operation
Turntable 0 Playing a Cassette Press the FUNCTION button (2/68) to set the While in Phono mode, press unit to Phono mode. STOP/EJECT(35) button on the cassette player to open the cassette door. Set the SPEED CONTROL SWITCH (32) to the correct speed (331/3,... -
Page 10: Playing A Cd
Playing a CD Random Play Press the FUNCTION button (2/68) to set the While playing a CD, press the RANDOM button unit to CD mode. (48) on the remote control. "Rand" will show on the LCD display. The unit will randomly select songs from the CD. -
Page 11: Playing Mp3 Cd's
Playing IViP3CD's Search Play This unit will play CD's recorded in MP3 format. MP3 CD's normally contain many files. By using the the controls and functions work the same as a regular search features described below, you can easily and CD. -
Page 12: Recording Records To Cd
_CD Recording Operation Recording Cassettes to Preparation This unit is designed to record CD-R and CD-RW Load a compatible blank CD-R or CD-RW into discs bearing the identification logo "Compact Disc the unit. Recordable" or "CD-Rewritable". If CD's do not conform to this standard, they may not record... -
Page 13: Erasing Cd=Rw Cd's
Manual Track Division Erasing a CD-RW If using a CD-RW, you can erase the whole CD and You can divide your recording into separate tracks rerecord it. Erase procedures are only possible with if you wish. By doing this, each song will have CD-RW discs. -
Page 14: Audio Connections
Audio Connections Aux Input Audio Output Using the Aux Input allows you to hook up additional external audio components and listen to them through your unit. Any component with an audio output such AUX IN as a Tuner, can be connected by using the correct cables... -
Page 15: Troubleshooting Guide
Troubleshooting There is no Power Make sure the radio is plugged in correctly. Check to make sure the unit is not in Standby mode by pressing the Standby button. There is no Sound Check the volume level by turning the volume knob. -
Page 16: Warranty
Please include a check or money order in the amount of $19.95, made payable to Crosley Radio, to cover handling and return shipping charges. Returned products will not be shipped to PO Boxes. Crosley Radio will not be responsible for delays or unprocessed...