Table of Contents
Advertisement
SHARS
Owner's Manual
Manual de Instrucciones
Manuel d'instructions
SEWING
MACHINE
MAQUINA
DE COSER
MACHINE A COUDRE
Model
}
Modelo
Mod61e
385.12318
CAUTION:
Before using this sewing
machine, read this manual
and follow all Safety Rules
and Operating Instructions.
• Safety Instructions
• Warranty
• Specifications
• Operation
".
• Care and Maintedance
• Troubleshooting
Sears,
Roebuck
and Co., Hoffman
Estates,
IL 60179
U.S.A.
Advertisement
Table of Contents

Related Manuals for Kenmore 385.12318


Summary of Contents for Kenmore 385.12318
- Page 1 SHARS Owner's Manual Manual de Instrucciones Manuel d'instructions SEWING MACHINE MAQUINA DE COSER Modelo 385.12318 Model MACHINE A COUDRE Mod61e CAUTION: • Safety Instructions • Warranty Before using this sewing • Specifications machine, read this manual • Operation ". and follow all Safety Rules •...
- Page 2 iMPORTANT SAFETY iNSTRUCTIONS Your sewing machine is designed and constructed only for HOUSEHOLD use. Read all instructions before using this sewing machine DANG ER-To reduce the risk of electric shock: 1. This sewing machine should never be left unattended when plugged in_Always unplug this sewing machine from the electdc outlet immediately after using and before clea_ing 2.
- Page 3 INSTRUCCIONES DE SEGURIDAD IMPORTANTES Su m&quina de coser est_ diseSada y construida s61o para uso dom_sticQ Lea todas las instrucciones antes de usar esta m&quina de cosero PELIGRO- Para reducir el riesgo de descarga el_ctdca: La m&quina nunca se debe desatender cuando se ha conectado_. Siempre debe desconectada de la toma el_ctr_ca tan pronto termine de usarla y antes de limpiada.
- Page 4 IMPORTANTES CONSIGNES DE S¢:CURITi Votre machine & coudre n'est con_ue et construite que pour l'usage domestique Lisez toutes ces consignes avant d'utiliser cette machine & coudre DA NG ER - Comment r6duire de choc risque _lectfique: 1o Une machine ne devrait jamais _tre laiss_e sans surveillance Iorsqu'elle est branch_eo D_branchez cette machine de la prise _lectrique imm_diatement apr_s ravoir utilis_e et avant d'entreprendre son entretien.
- Page 5 WARRANTY FULL 25 YEAR WARRANTY ON DEFECT IN MATERIAL OR WORKMANSHIP For 25 years from the date of purchase, Sears will, free of charge, repair defects in material or workmanship which appear in the internal mechanical part of the sewing machine. FULL TWO YEAR WARRANTY ON ELECTRICAL...
- Page 6 Machine Specifications Item Specification Sewing speed (Maximum): Over 730 r.p.m Stitch length: (Maximum) 4 mm Stitch width: 5 mm (Maximum) Stitch package (Stitch functions): (Built-in stitchs): Buttonhole: 4 step built-in buttonhole Machine dimensions: W 15,.4" (390 mm) x D 6o1" (155 mm) x H 11 .,4" (290 mm) Weight (Net): 13,5 Ibs (6.2kg) ...-..,..J...
-
Page 7: Table Of Contents
TABLE OF CONTENTS SECTION I, NAMES OF PARTS SECTION III. STRAIGHT STITCH SEWING Cabinets ................. (continued) Names of Parts ............2 Topstitching ..............Available Accessories and Attachments ..... 4 Zipper Sewing ..........34 - 36 • Fabric preparation ..........34 • To sew ..............SECTION II. - Page 8 INDICE SECCION IIi. COSTURA DE PUNTADA RECTA SECCION I° NOMBRE DE LAS PARTES Gabinete (continuaci6n) ..................... • Para terminar Ia costura ............. Nombre de ]as partes ..............Uso de las gu_as de costura ............. Acoesorios y refacciones disponibles ......5 Para girar en esquinas de &ngulo recto ......
- Page 9 TABLE DES MATIf=RES PARTIE L IDENTIFICATION DES PIECES PARTIE II1oCOUTURE AU POINT DROIT (suite) Utilisation de guides de couture ..........DE LA MACHINE Couture d'un angle droit ..........33 Maliette de transport ................. Surpiq,3re identification des pi_ces ................................ La couture des fermetures & glissi6re ....35 - 37 Accessoires disponibles ..............
-
Page 10: Section I, Names Of Parts
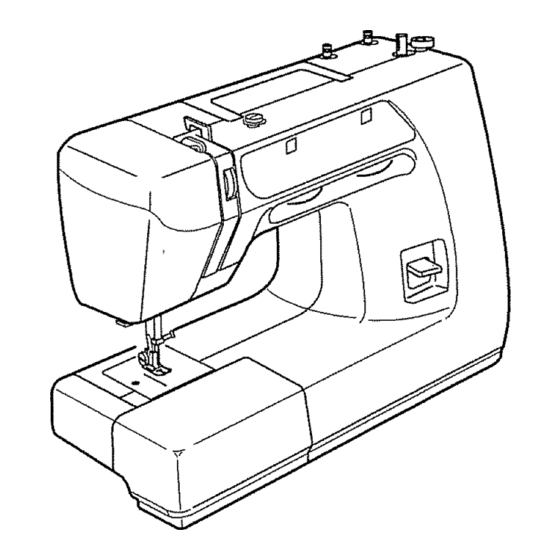
SECTION I. NAMES OF PARTS Cabinets A full line of sewing machine cabinets and Tote bags are available through the RSOS catalog at your nearest Sears retail store_ Names of Parts (_) Stitch selector (_) Reverse stitch control (_) Stitch pattern setting display (_ Stitch length control (_) Stitch length setting display (_) Bobbin winder spindle... -
Page 11: Gabinete
PARTIE 1. IDENTIRCATION DES Pii=CES DE SECCION 1. NOIVIBRE DE LAS PARTES LA MACHINE Gabinete Mallette de transport Usted encontrar& una Ifnea completa de gabinetes y bolsas de Vous trouverez dans les magasins Sears, ainsi que dans mano para su m&quina de coser in el cat&logo RSOS que est& notre catalogue g6n6ral, une gamme... -
Page 12: Available Accessories And Attachments
Available Accessories and Attachments "N A{I parts listed may be ordered from any Sears store or service center., WHEN ORDERING REPAIR PARTS, ALWAYS GIVE THE FOLLOWING INFORMATION: 1.,PART NUMBER 2_ PART DESCRIPTION 3. MODEL NUMBER 4, NAME OF ITEM (SEWING MACHINE) If the parts you need are not stocked locally, your order will be electronically transmitted to a Sears Repair Parts Distribution Center for expedited handling... -
Page 13: Accessoires Disponibles
Accesorios y refacciones disponibles Accessoires disponibles Todas las partes listadas se pueden erdenar de cualquisr Toutes cos pi_ces peuvent _tre commandoes dans un magasin tienda de Sears o centre de servicio de Seara_ un centre de r_paration Sears+ JOIGNEZ TOUJOURS ,&.VOTRE COMMANDE CUANDO ORDENE REPUESTOS,... -
Page 14: Connecting Machine To Power Supply
SECTnON U. GETTUNG READY TO SEW Connecting Machine to Power Supply (T) Power supply plug (_) Power switch (_) Outlet Machine socket (_) Machine plug (_) Light bulb Before connecting the power cord, make sure the voltage and frequency shown on the machine conform to your electrical power_ 1,. -
Page 15: Para Su Seguridad
SECCION |L PREPARACJON DE LA PARTIE H. PR_PAREZ-VOUS A COUDRE iVIAQUINA PARA COSER Branchez la machine Conexi6n de la mdquina a la red eldctrica (_ Ctavija de tome de corriente (_) Interrupter de corriente (_) Prise _tectrique (_) Interrupteur secteur (_) Red el_ctrica (_) Enchufede la m&quina (_) Prise de courant... -
Page 16: Setting Spool Pins
Setting Spool Pins (_ Spool pin The spool pins are used for holding the spools of thread when feeding thread to the machine° To use, pull up the spool pins. Push down for storage. Presser Foot Lifter (_ Presser foot lifter (_) Normal up position Highest position The presser foot lifter raises and lowers your presser foot. -
Page 17: Ajuste De Los Porta-Carretes
Ajuste de los porta-carretes Pose de ta broche b bobine Porta-carrete Broche & bobine Los porta-carretes se utilizan para sostener los carretes de hilo Les broches & bobinos servent ,_ retenir les bobines de fil y alimentar asf a la m&quina con el bile. en vue de preceder _ I'enfilage du fil sup_rieur.. -
Page 18: Free-Arm Sewing
Free-arm Sewing • For free-arm sewing: 1° Grip the extension table with your index finger and thumb. 2_ Pull gently to the left. The extension table will snap out, • For flat-bed sewing: 1° Insert the tab and the pin into their catches° 2, With your thumb and index finger, gently snap in, ¢- Changing Needle... -
Page 19: Brazo Para Costura Tubular
Brazo para costura tubular Utilisation du bras fibre • Para costura tubular: • Travaux sur |e brae libre: 1• Sujete _a extensi6n con los dedos pulgar e indices 1. Saisissez remboiture a raide de rindex et du pouce. 2. Deje suavemente hacia la izquierda_ La extensi6n 2oTirez soigneusement l'emboiture vers la gauche,r Uemboiture se deboite. -
Page 20: Presser Foot Types
Presser Foot Types , Zigzag foot Use this foot for both straight and zigzag stitching. For: Straight stitch (page 32) Topstitching (page 34) Basic zigzag (page 40) Bar tacking (page 44) Button sewing (page 44) Overcasting stitch (page 46) Blind hem stitch (page 46) Lace work (page 48) Multiple zigzag stitch (page 48) Box stitching (page 50) -
Page 21: Tipos De Prensatelas
Tipos de prensatelas pieds Diffdrents presseurs • Prensatelas para zig.zag • Pied zig-zag Uti]ice este prensateias para puntada recta y puntada de zig-zeg. Ce pied convient pour les points zig-zags et les points droits. Para: Puntada recta (p&gina 33) Pour: Point droit (page 33) Costura a {a vista (p&gina 35) SurpiqQre (page 35) Puntada de zig-zag (p_gina 41 ) -
Page 22: Selecting Needle And Thread
Selecting Needle and Thread For general sewing use needle size 11 or 14_ A fine thread and needle should be used for sewing lightweight fabrics so the fabric will not be marred.. Heavy fabrics require a needle large enough to pierce the fabric without fraying the needle thread In the needle set there is one each of size 11, 14, 16, 18 and a blue needle. - Page 23 aguja Selecci6n e hilo Pare la cestura general se utilizan agujas del tamaSo !1 o 14_ Los hiios y agujas detgados deber&n utilizarse pare coser tejidos ligeros evitando as( que _stos se puedan echar a perder. Los tejides gruesos con una aguja Io suficientemente gruesa come para que pueda penetrer el teiido sin que el hilo de la aguja se deshilache.
- Page 24 Choix de I'aiguille et du fil Pour les coutures normafes, utilisez une aiguille n°11 ou 14, On devrait utiliser du fit fin et une aiguille fine avec les tissus 16gets pour ne pas [es endommager. Les tissus Iourds n_cessitent une aiguille assez grosse pour percer le tissu sans effilocher le fil de i'aiguille. Dans un jeu d'aiguilles, il y a une aiguille de chaque grosseur 11, 14, 16, 18 et une aiguille _ bout bleu.
- Page 25 (blank page) (p&gina b lanca) (page blanche)
-
Page 26: Bobbin Winding
Bobbin Winding • Removing bobbin case Remove the extension table from the machine by pulling it to the lefto Open the shuttle cover _ by pulling down the em- bossed part on the left of the cover. Raise the needle to its highest position by rotating... -
Page 27: Retrait De La Porte-Canette
Embobinado de la canilla Remplissage de la canette . C6mo sacar el portacanillas • Retrait de la porte-canette Retire la extensi6n des!iz_ndola hacia la izquierda_ Abra Retirez I'emboffure du secle en la tirant vers la gauche. la tape lanzadera (Djalando hacia abajo la parte A I'aide de la prise situ_e &... -
Page 28: Bobbin Winding 1
Bobbin winding (continued) Push the bobbin to the right. With free end of the thread held in your hand, depress the foot control,, Stop the machine when it has made a few turns, and cut the thread close to the hole in the bobbin.. - Page 29 Remplissage de la canette (suite) Embobinado de la canilla (Continuaci6n) Poussez la canettevers la droite, Empuje la caniila a la derecha, En tenant I'extrSmit_ libra du fil & la main, appuyez Sujeta el final del hito con los dodos y pise e! pedal de sur la pSdale de contr61e, A rr_tez la machine apr6s control, Cuando haya dado unas cuantas vueltas, quelques tours, et coupez le ffl auras du trou dans...
-
Page 30: Inserting Bobbin
• Inserting bobbin Place a bobbin in the bobbin case making sure thread feeds clockwise coming from the bobbin. Draw the thread through the slot of case. Continue to draw the thread under the tension spring and through the opening. Pull out about 4"... - Page 31 oColocacidn de la canilla • insertion de la canette Cotoque la canilla en el portacanillas asegur&ndose que el Introduisez la canette dane le portecanette en prenant hilo se alimente en el sentido alas agujas del reloj y salga soin que le fil se d_rm_le vers la droite et qu'il sorte de de la bobina, la canette.
-
Page 32: Threading The Machine
Threading the Machine • Threading the machine Raise the thread take-up lever to its highest position by turning the handwheel counterclockwise, toward you. " Raise the presser foot lifter,r Place a spool on the spool pin, with thread coming off as shown_ Draw the end of thread around the upper thread guide. -
Page 33: Enhebrado Del Hilo De La Aguja
Enhebrado del hilo de la aguja Enfilage de la machine • Enhebrado del hilo de la aguja • Enfllage de la machine Suba el tirahilos hasta su posiciSn m&s alta girandoel volanteen Faites monter le lsvier releveur de fil le plus haut el sentido contrarioa tas agujasdel reloj, possible en tournant Is volant main en sans Levante la palancade elevaci6ndet prensatelas. -
Page 34: Adjust The Needle Thread Tension For Straight Stitch
Adjust the Needle Thread Tension Straight Stitch • Correct tension (_) Needle thread (Top thread) (E) Bobbin thread (Bottom thread) (_) To loosen (_ To tighten The ideal straight stitch has threads locked between two lay, ers of fabric, as illustrated (magnified to show detail)° If you took at the needle thread and bobbin thread of a seam, ®... -
Page 35: Tensi6N Correcta
Ajuste de la tensi6n del hilo de la aguja para puntada recta Rdglage de la tension du fil de raiguille pour le point droit • Tension correcte • Tensi6n correcta (i) Fil de I'aiguille (Fil sup6rieur) Hilo de ia aguja (Hilo superior) (_) Fil de la canette (Fil inf6rieur) (_) Hilo de Ia canilla (Hilo inferior) (_) Pour rel&cher la tension... -
Page 36: Adjust The Needle Thread Tension For Zigzag Stitch
Adjust the Needle Thread Tension for Zigzag Stitch For an ideal zigzag stitch, the bobbin thread does not show on the right side (top side) of the fabric and needle thread shows slightly on the wrong side (bottom side),, See the illustrations for correct appearance_ To match this appearance, adjust the needle tension •... -
Page 37: Tensi6N Correcta
Ajuste de la tensi6n del hilo de la aguja para puntada Rdglage de la tension du fil de I'aiguille pour le point zig-zag zig-zag En la puntada zig-zag ideal, el hilo de ta canilla no aparecer& en Ia Lorsqu'un point zig-zag est effectu6 correctement, le fil de la canette parte de arriba de ta tela y el hilo de la aguja se ver_ ligeramente ne parait jamais sur le c6t6 endroit du tissu et te fil de l'aiguille en la parte de abajo de la tela. -
Page 38: Stitch Selector
Stitch Selector Setting mark (_) Stitch selector The stitch selector not only determines the stitch you select, but also regulates the stitch width (except straight stitches),. NOTE : To avoid needle or fabric damage, make sure the needle is up and out of the fabric while selecting a stitch. -
Page 39: Selector De Patr6N
S_lecteur de point Selector de patr6n Rep_re de r_glage Marca de ajuste (_) S6tecteur de point (_) Selector de patr6n Gr&ce au s_lecteur de point, vous pouvez non seutement choisir te El sei_ctor de patr6n no s61odetermina ta puntada seleccionada, type de point d_sir_, mais aussi sa largeur torsque vous utilisez les sine que tambi_n regula et an€he de puntadas (excepto... -
Page 40: Section !11.Straight Stitch Sewing
SECTION III. STRAIGHT STITCH SEWING ® Straight Stitch PATTERN LENGTH Stitch selector: 1 or2 Red zone (_) Stitch length: Needle thread tension: 2to 6 (_) Presser foot: Straight stitch foot _) Presser foot: Zigzag foot NOTE: When using the straight stitch foot, make sure to set the stitch selector at I (Center needle position), Otherwise the needle may strike the sewing foot and possibly break°... -
Page 41: Seccion Ill Costura De Puntada Recta Puntada Recta 3
PARTIE I!1. COUTURE AU POINT DROIT SECCION IlL COSTURA DE PUNTADA RECTA Puntada recta Point droit (_ Selector do patr6n: 1 o 2 (_ S_lecteurde point: lou 2 (_) Control de la longitud: Zona roja (_) Longueurdu point: Zone rouge (_) Tensi6ndot hilo de la aguja: 2 a 6 (_) Tension du fi] sup6rieur: 2&6... -
Page 42: Topstitching
Topstitching ® 1 or2 (_) Stitch selector: Red zone (_) Stitch length: 2to 6 (_) Needle thread tension: (_) Presser foot: Straight stitch foot Zigzag foot (_) Presser foot: NOTE: When using the straight stitch foot, make sure to set the stitch selector at 1 (Center needle position). -
Page 43: Costura A La Vista
Costura a la vista Surpiq0re Selector de patr6n: 1 o 2 (_ S_lecteur de point: 1 ou 2 (_) Longueur du point: Zone rouge (_) Control de Ia Iongitud: Zone roja (_) Tensiondu fii sup_rieur: 2 _ 6 Tensi6n del hito de la aguja: 2 a 6 Pied presseur: Pied &... -
Page 44: To Sew
Zipper Sewing (Continued) ° To sew: (4/8" "_ O Zipper teeth ® Zipper tape ® Wrong side (Bottom side) of fabric Fold back the left seam allowance. Turn under the right seam allowance to form a 1/8" (0o3cm) fold.. Place the zipper teeth O next to this fold and pin in place. [] To sew the left side of the zipper, set the zipper foot on. -
Page 45: Costura De Cremalleras
Costura de cremalleras (continuaci6n) Couture des fermetures t_glissi_re (suite) - Pare coser o La couture Dientes de le cremallera (_) Dents de la fermetura (_) Cinta de ta crematlera (_) Ruben de la fermeture (_) Parte de abajo de la tela (_) C6t6 envere du tissu Doble la teta superior de la costura izquierda haole Repliez la ressource du c6t6 gauche°... -
Page 46: To Drop Or Raise The Feed Dogs
To Drop or Raise the Feed Dogs To drop the feed dogs, press the lever in the direction of the arrow as illustrated,, ® To raise the feed dogs, push the lever in the direction of the arrow as illustrated and turn the handwheel toward you, Feed dogs must be up for normal sewing -- ._,Ak,dk --... -
Page 47: C6Mo Bajar/Subir Los Dientes Del Transporte
C6mo bajar / subir los dientes del transporte Comment descendre ou monter griffes d'entralnement © Para bajar los dientes del transporte mueva la patanca Pour faire descendre les griffes d'entrainement, poussez le tevier dane te sens de la flbche comme illustr_. de mando an 1adirecciSn indicada per la flecha come se muestra en la ilustraci6n. -
Page 48: Zigzag Stitches
SECTION IV. ZIGZAG STITCHES ® Basic Zigzag Stitch selector: PATTERN LENGTH ® Stitch length: Red zone ® (_) Needle thread tension: 2to 5 Presser foot: Zigzag foot The zigzag stitch is one of the most common and versatile stitches° It can be a utility stitch for button sewing, buttonhole making, hemming, overcasting, mending and darning,. -
Page 49: Pied & Point De Bour Don
SECCION IV. PUNTADAS DE ZIG-ZAG PARTIE IV. POINTS ZIG-ZAG Puntada de zig-zag Zig-zag simple Selector de patr6n: S_lecteur de point: (_) Control de la Iongitud: Zona roja (_) Longueur du point: Zone rouge Tensi6n del hilo de la aguja: 2 a 5 (_) Tension du fil sup_rieur: 2 &... -
Page 50: Monogramming
Monogramming (D Stitch selector: PATTERN _ LENGTH (_) Stitch length: 0,5 to 1 (_) Needle thread tension: 1 to 4 1_ Presser foot: Satin stitch foot Attach a piece of stabilizer on the wrong side (bottom side) of the fabric. Draw letters on the fabric with tailor's chalk. -
Page 51: Monogramas
Monogramas Monogrammes Selector de patr6n: S_lecteur de point: 0,,5 & 1 (_) Control de la longitud: 0.5 a I (_) Lonqueur du point: 1&4 I_) Tensi6n del hilo de la aguja: 1 a 4 (_) Tension du fil sup_rieur: Prensatelas: Prensatelas para puntada Pied presseur: Pied &... -
Page 52: Bar Tacking
Bar Tacking ® (D Stitch selector: Stitch length: 0°5 to 1 LENGTH ® Needle thread tension: 1 to 4 ® Presser foot: Zigzag foot ® This is similar to a very short satin stitch and is used to reinforce points of strain such as corners, pockets and straps of lingerie. -
Page 53: Puntada De Refuerzo
Puntada de refuerzo Brides de renfort Selector de patr6n: (_) S_lecteur de point: (_) Control de la iongitud: 0.5 a 1 Longueur du point: 0.5 ,_ 1 (_) Tensi6n del hiIo de la aguja: 1 a 4 (_) Tension du fil supdrieur: 1 &... -
Page 54: Overcasting Stitch
Overcasting Stitch (_) Stitch selector: PATTERN _ LENGTH (_) Stitch length: 1 to 2 (_ Needle thread tension: 1 to 4 (_ Presser foot: Zigzag foot This is useful in garment construction and in finishing raw edges of any sewing projecL Start overcasting about 1/8"... -
Page 55: Puntada De Sobrehilado
Puntada de sobrehilado o remate Surfilage (_) S6tecteur de point: Selector de patrSn: (_) Longueur du point: 1 ,_ 2 (_) Control de la tongitud: 1 a 2 Tension du fil sup_rieur: 1 & 4 Tensi6n del hilo de la aguja: 1 a 4 (_) Pied presseur: Pied zig-zag (_) Prensatelas:... -
Page 56: Lace Work
Lace Work ® Stitch selector: PATTERN_ LENGTH (_) Stitch length: 1 to 3 ® Needle thread tension: 1 to4 (_ Presser foot: Zigzag foot Lace adds a fanciful, feminine touch to blouses and lingerie.. Table linens and pillows become more elegant when trimmed with lace. -
Page 57: Trabajos Con Encajes
Trabajos con encajes Dentelle S6lecteur de point: (_) Selector de patr6n: Longueur du point: 1 & 3 (_) Control de la tongitud: 1 a 3 (_) Tension du fii sup6rieur: 1 & 4 (_) Tensi6n del hilo de la aguja: 1 a 4 (_) Pied presseur: Pied zig-zag Prensatelas:... -
Page 58: Box Stitching
Box Stitching © ® (_) Stitch selector: ® Stitch length: (_) Needle thread tension: 1 to 4 PAl-FERN LENGTH (_ Presser foot; Zigzag foot ® Use this stitch to join heavy weight interlining, Overlap two raw edges together and use this stitch to join them. -
Page 59: Puntada De Caja
Puntada de caja Point de crdneau Selector de puntada: (_) S_tecteur de point: Longitud de puntada: (_) Longueur du point: Tensi6n del hilo superior: 1 a 4 Tension du ffi sup_rieur: 1 _ 4 Pr_nsatelas: Prensatelas para zig-zag (_) Pied presseur: Pied zig*zag Use esta puntada para unir telas gruesas o pesadaso Utilisez ce point pour coudre des morceaux de doublure _paisse_... -
Page 60: Shell Stitch
Shell Stitch Stitch selector: PATTERN [_ (_) Stitch length: 1 to 2 ® Needle thread tension: 3to 9 Presser foot: Satin stitch foot Use a lightweight fabric such as tricot,,Fold the fabric and stitch on the bias, You may need to increase the needle thread tension slightly, Allow the needle to just clear the folded edge of the fabric at zigzag stitches. -
Page 61: Puntada En Forma De Concha
Puntada en forma de concha Point coquiile S_Iecteur de point: Serector de patr6n: (_) Longueur du point: 1 & 2 (_) Control de la Iongitud: 1 a 2 (_) Tension du fil sup_rieur: 3 & 9 Tensi6n del hiio de la aguja: 3 a 9 Pied presseur: Pied &... -
Page 62: Stretch Stitches
SECTION VI. STRETCH STITCHES ® ® Straight Stretch '" t or2 Stitch selector: PATTERN LENGTH Gold stretch stitch position (_) Stitch length: 2to 6 (_ Needle thread tension: Presser foot: Straight foot (_) Presser foot: Zigzag foot NOTE: When using the straight stitch foot, make sure to set the stitch selector at t (Center needle position),, Otherwise the needle may strike the sewing foot and possibly break_... -
Page 63: Croquet Extensible
PARTIE VI. POINTS EXTENSIBLES SECCION PUNTADAS ELASTICAS Point droit extensible Puntada recta triple (D S61ecteur de point: (_) Selector de patr6n: Position or poiht extensible (_ Largeur du point: Control de la Iongitud: Pesfci6n ore de puntada 2&6 el_stica (_ Tension du fif sup6rieur: Pied &... -
Page 64: Overcast Stretch Stitching
Overcast Stretch Stitching ® (_) Stitch selector: (_) Stitch length: Gold stretch stitch position PATTERN LENGTH _] (_) Needle thread tension: 1 to 4 ® (_) Presser foot: Zigzag foot This stitch is for sewing a seam with an overcast finish, It i_ used when making swim wear, ski pants and other garments which require stretch.. -
Page 65: Para Coser
Puntada eldstica de sobrehilado Surjetage extensible (_) Selector de patr6n: (_) S_lecteur de point: (_) Control de la longitud: Posici6n oro de puntada (_) Longueur du point: Position or point extensible el&stica 1&4 Tension du fil sup_rieur: (_) Tensi6n del hilo de la aguja: 1 a 4 Pied presseur: Pied zig-zag Prensateias:... -
Page 66: Feather Stitch
Feather Stitch © ® (_) Stitch selector: Gold stretch stitch position PATTERN _-_ LENGTH [_ (_) Stitch length: 1 to4 (_) Needle thread tension: ® Presser foot: Zigzag foot • t= •/' This stitch is strong, useful and decorative. =%,/ •el•] It reinforces stretch and woven fabrics, You can use it to sew spandex undergarments... -
Page 67: Puntada De Pluma
Puntada de pluma Point d'dpines Selector de patron: (_) S_lecteur de point: (_) Control de la Iongitud: PosiciOn oro de puntada (_) Longueurdu point: Position or point extensible el&stica 1&4 Tension du ffi sup_rieur: Tensi6n del hilo de la aguja: 1 a 4 Pied zig-zag Pied presseur: Prensatelas:... -
Page 68: Decorative Stitch Pattern
Decorative Stretch Pattern ® Stitch selector: PATTERN [_ LENGTH [_ ® Stitch length: Gold stretch stitch position 2to 6 (_) Needle thread tension: ® (_) Presser foot: Zigzag foot Decorative stretch patterns are used for adding a creative and personalized touch to items. You can decorate children's clothes, women's blouses, curtains, etc. - Page 69 DiseSos decorativos eldstico Motifs de points ddcoratifs Selector de patr6n: S_lecteur de point: Control de }a longitud: Posiei6n oro de puntada Largeur du point: Position point extensible or eldstica Tension du ffi supdrieur: 2 & 6 TensiSn del hilo de la aguja: 2 a 6 Pied presseur: Pied zig-zag Prensate{as:...
-
Page 70: Buttonhole
SECTION Vii. BUTTONHOLE ® Buttonhole PATTERN [_ LENGTH _ (_ Stitch selector: Blue zone (_) Stitch length: 1 to5 (_ Needle thread tension: > Sliding buttonhole foot @ Presser foot: ® ® Depending on your preference, you may adjust stitch density within the blue zone on the stitch length control * For more density, turn the stitch length control toward"... -
Page 71: Ojal Incorporado
SECCION Vii. OJALES PARTIE VII. BOUTONNII_RE Boutonnibre Ojal incorporado S_[ecteur de point: Selector de patrSn: Longueur du point: Zone bleue Control de la longitud: Zona Azul Tension du fil sup6rieur: 1 & 5 Tensi6n del hilo de fa aguja: 1 a 5 Pied presseur: Pied _,boutonni_re Prensatelas:... - Page 72 Buttonhole (continued) Set the stitch selector at M, Sew four (4) to six (6) stitches, Stop sewing at a right stitch+ Set the stitch selector at 131.Sew until you reach the back marking of the buttonhole+ Stop sewing at a right stitch.
- Page 73 Ojal (continuaci6n) Boutonnibre (suite) Ajuste el selector de puntada a M Cosa de cuatro (4) a seis (6) R_grez re s_lecteur de point sur !_]+ Cousez quatre (4) & six (6) puntadas_ Termine cosiendo con una puntada derecha., points Arr6tez [a couture avec I'aiguille ta droite, Ajuste el selector de puntada a _, Cosa hasta que alcanee la R_glez te s_lecteur de point surt"!
-
Page 74: Care Of Your Machine
SECTION VIII. CARE OF YOUR MACHINE NOTE: Unplug the machine_ Do not dismantle the machine other than as explained in this section_ Do not store the machine in a high-humidity area, near a heat radiator or in direct sunlight. Clean the outside of the machine with a soft cloth and mild soap, Replacing the Light Bulb... -
Page 75: Limpieza De Los Dientes Del Transporte
SECClON VllL MANTENIMIENTO PARTIE VIII. ENTRETIEN DE VOTRE LA MAQUINA MACHINE REMARQUE: D6branchez ta machine NOTA: Desenchufe la m&quina,, No d_montez rien d'autre que co qui est d_crit darts No desmonte ia m_,quinade ningunaotra forma qua ta ce chapitre. explicada en esta secci6no N'entreposez pas la machine dans un endroit No guards ta m_quina en un lugar muy hL}medo, cerca... -
Page 76: Cleaning The Shuttle Race
Cleaning the Shuttle Race This area must be kept free of dust, lint and occasional tangled thread. Clean the shuttle race area about every three months. o Cleaning the shuttle area Bobbin case (_) Levers (_ Shuttle race cover (_ Shuttle (_) Shuttle race Center pin on the shuttle Shuttle driver... -
Page 77: Nettoyage De La Coursi_Re
Limpieza de la corredera de la lanzadera Nettoyage de la coursi_re Esta _rea debar& mantenerse/ibre de polvo, pelusa y de La navette dolt 6tre gard_e exempte de peussiSre, de ocas]onales hilos atorados Limpie el _rea de la corredara charpie et de bouts de fil emm6!6so Netteyez la navette a de la tanzadera,, Limpie la &tea de la corredera de la tous les trois mois. -
Page 78: Oiling The Machine
Oiling the Machine Oil the points as shown at least once a year. Use good quality sewing machine oilo One or two drops of oil is sufficient. Remove excess oil, otherwise it may stain fabric. in case machine is not used for an extended time, oit it before sewing, NOTE: Unplug the machine before oiling, , Oil behind... -
Page 79: Huilage De La Machine
Lubricaci6n de la mdquina Huilage de la machine Lubrique la m&quina, los puntos ilustrados por lo menos una Huilez la machine une fois par an minimum a tousles endroits vez al afio, Una o dos gotas de aceite ser& suficiente. Elimine montr_s sur cette page suivantes, sinon elle perdra son rendement el exceso de aceite, de otro modo podr_a manchar la telao d'origine et eIle cognera bruyamment.. -
Page 80: Troubleshooting
Troubleshooting Reference Cause Condition Page 24 The needle thread 1. The needle thread is not threaded properly., breaks. 2. The needle thread tension is too tight, Pages26,28 Page 10 3. The needle is bent or blunt. Page lO 4o The needle is incorrectly inserted_ 5., The needle thread and the bobbin thread are not set properly Page 24 under the presser foot when sewing is starting°... - Page 81 Soluciones para problemas de funcionamiento Causa Probable Condicion Referencia 1oEl hilo de ]a aguja no se ha enhebrado correctamente. P_gina 25 Se rompe el hilo de 2. La tensiSn del hilo de la aguja es excesiva. P&ginas 27, 29 ta aguja. 3.
- Page 82 En cas de probl_me Reference Cause Probl_me Page 25 I_ Le fil de l'aiguille n'ast pas enfile correctement,. Le fil de I'aiguille se Pages 27, 29 2. La tension du fii d'aiguiEle est trop forte. casse. Page 11 3. L'aiguille est terdue ou _mouss_e,, Page 11 4,=L'aiguille est maf instali_e, Page 25...
- Page 83 ,UUUl i1,,11111111111,111111111 In U.S.A or Canada for in-home service: major brand repair Call 24 hours days a week a day, 7 1-800-4-MY-HOME °" (1-800-469-4663) Para pedir servicio de reparacidn a domicilio - 1-800-676-5811 Au Canada pour tout le service ou les pi_ces - 1-800-469-4663 For the repair or replacement parts you need: Call 6 am - 11 pm CST, 7 days a week PartsDirect °°...