Table of Contents
Advertisement
Quick Links
Advertisement
Table of Contents

Related Manuals for JVC RV-NB10W


Summary of Contents for JVC RV-NB10W
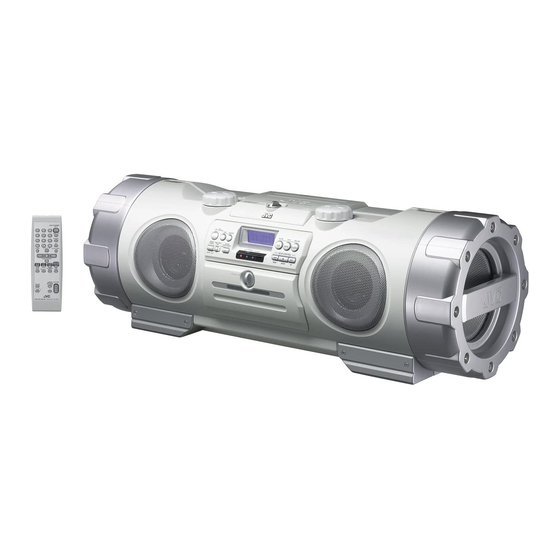
- Page 1 POWER WOOFE CD SYSTEM RV-N 1 DIGITAL AUDIO For Customer Use: INSTRUCTIONS Enter below the Model No. and Serial No. which are located either on the rear, bottom or side of the cabinet. Retain this information for future reference. Model No. Serial No.
- Page 2 Warnings, Cautions and Others Mises en garde, precautions et indications diverses For U.S.A. This equipment has been tested and found to comply with the limits for a Class B digital device, pursuant to part 15 of the FCC Rules. These limits are designed to provide reasonable protection against harmful interference in a residential installation.This equipment generates, uses, and can radiate...
- Page 3 iMPORTANT FOR LASER PRODUCTS CAUTION: CLASS 1 LASER PRODUCT Do not block the ventilation openings or holes. (If the CAUTmON: Do not open the top cover. There are no user ventilation openings or holes are blocked by a newspaper or serviceable parts inside the unit;...
- Page 4 Thank you for purchasing the JVC Powered Woofer CD System. Before operating this system, read this manual carefully and thoroughly to obtain the best possible performance from your system, and retain this manual for future reference. Here are some of the things that make your system both powerful and simple to use.
- Page 5 |.dex of parts and controls Display window See pages in parentheses for details. U_ REC indicator (19) UIII (_)/I ON/STANDBY button (7) Timer indicators (19) Shoulder strap hooks (4) • @ (timer), ON, OFF AUX button (3, 17) SLEEP indicator (I 9) .
- Page 6 See pages in parentheses for details. [1 j Number buttons (9, I 1, 17) SLEEP button (19) Multi control buttons 15, 18 " A GROUP UR V GROUP DOWN Source buttons (3, 9 , AUX, CD _/11, TAPE _1 I_, WIRELESS/FM/AM Pressing one of these buttons also turns on the unit.
- Page 7 _ Using the carrying handles _ Using the shoulder strap Be sure to hohl both handles when you carry the system. Attach the supplied shoulder strap (adjustable in length) to each If you carry the system by only one handle, because of the length end of the system...
- Page 8 CAUTION: Make al| connection before plugging system into an AC power ouUet,...
- Page 9 PHONES jack...
- Page 10 Basic operations @/I ON/STANDBY ooo9 H SUPERWOOFER_ _,,,_ ooo08_ ooo11 DISPLAY VOLUME+/- ___--VOLUME SOUND " STANDBY d,.[) / I ON/STANDBY- indicator oo%, SUPER WOOFER SOUND-- ACTIVE CLEAR- ACS ON/LEVEL ACS-- SOUND indicator _rning off the system Press (L)/I ON/STANDBY again, Note: The lighting condition...
- Page 11 Sound modes can be selected to enhance the type of music being played. During play, you can adjust the bass level between BASS (minhnum) and BASS 6 (maximum). Press SOUND to select the sound mode, Each time you press the button, the sound mode changes as Using system fonows:...
- Page 12 Listening to the radio _lvc Number buttons- _SET l<1<1- W,RE,ESS/FMJAM WIRELESS/ PRESET TUNING FM/AM You can listen to FM and AM stations. Stations can be tuned in manually, automatically, o1"from preset memory storage. @ Before listening to the radio, tully extend the FM telescopic antenna.
- Page 13 You can preset up to 30 FM stations and 15 AM stations. Press the n.mher h .ttensto selectthe preset number want. Note: Preset numbers may have been set to [uctory test S PressSeT. frequencies prior to shipment. This is not a malflmction. You can preset the stations you want into memory "STORED"...
- Page 14 Press i_< or _l to select the track you want to play during playback, a disc • Press I_1_1once to skip to the beginning of the next track. • Press I-_l-< to skip to the beginning of the track being played. 1.so, adisc.
- Page 15 The tracks will play in no special order when you use this mode. Using the Using remote control only remote control only :tliSet a disc. @ You can program up to 50 tracks in any desired order including the same tracks. N You can only make a program when @e system is stopped.
- Page 16 Playing back tapes TAPE < cp (D CD_ 144- --TAPE < MODE LOCK/RELEASE --I_ REVERSE With automatic tape direction, you can listen to type I or II tapes nee(] to change p|ayback without having to change any settings. direction, press TAPE <...
- Page 17 Recording CD _/ll TAPE -_ OD li_/ll m_ _TAPE < W,RE ESS REVERSE OOE 4/ BEAT CUT ONE TOUCH REC Things know before start recording You can record ally sound source to tape. V It should be noted that it may be unlawful to re-record The sources are disc, tuner, auxiliary...
- Page 18 4 Press ONE TOUt. REC o. thesystem. n.Cheese whether to havepa.sesbetween tracks. Tile _ indicator lights up and the system starts recording. • If nothing is done, a non-recorded pause o[ about four • If the tab of file cassette tape is removed to protect erasure...
- Page 19 Listening to auxi|iary equipment Number buttons_ --WIRELESS/ WIRELESS/ PRESET TUNING-- FM/AM FM/AM FM MODE You can listen to auxiliary equipment with the following methods: • Transmitting sound on FM wave . Connecting to the AUX IN jack Note: For operation of the auxiliary equipment, refer to its instructions.
- Page 20 Press WIRELESS/FM/AM to select WIRELESS as the source= You can preset tip to eight frequencies. The system tunes in to the last tuned frequency. The following int'ormation appears on the display. Using the remote control only There is a time limit in doing the following steps.
- Page 21 Using the microphone/guitar _ Adjust the VOLUME +/- control and the MIC/GUITAR LEVEL control, as you play the mJcPophone or the guitar. Using a microphone or a guitar (not supplied), you can mix its sound with a source soLIl]d. CAUTION: DO NOT connect a bass guitar...
- Page 22 CLOCK/T|MER again, so that timer indicator ( Q ) and OR indicator light tip. Use the sleep timer to turn the system off ai%r a certain number of The hour digit of the current ON time flashes on the display. minutes when it is playing.
- Page 23 8 B fo, tumi., o. system, p rep r To cancel the operation, press CLOCK/TIMER until the display returns to the original one. music source selected step page To cancel the timer, press CLOCK/TIMER once, then press TUNER: Tune in to the desired frequency (FM/AM/ CANCEL.
- Page 24 Moisture condensation Cassette deck Moisture may condense on the lens inside the , It" tile heads, capstans, or pinch-rollers of the cassette deck system ill the following cases: become dirty, the following may occur: , After turning on heating ill the room. Loss of sound quality Discontinuous sound...
- Page 25 Possible cause Action Symptom , Remove the obstruction. Unable to operate the remote control. , The path between the remote control and the sensor on the system is blocked. , The batteries have lost their charge. • Replace the batteries. Operations are disabled.
- Page 26 THiS JVC PRODUCT. WE WANT TO HELP YOU ACHIEVE A PERFECT EXPERIENCE. NEED HELP ON HOWTO HOOK UP? NEED ASSISTANCE ON HOW TO OPERATE? NEED TO LOCATE A JVC SERVICE CENTER? LiKE TO PURCHASE ACCESSORIES? HERE TO HELP! TOLL F : 1(800)252-5722 http://www.jvc.com...
- Page 27 "* during normal business hours at JVC authorized service centers. Parts used for replacement are warranted only for the _ remainder of the Warranty Period. All products may be brought to a JVC authorized service center on a carry-in basis. , , Color televisions with a screen size of 27"...
- Page 28 ,< ,< "o -< _;_ 2006 Victor Company of Japan, Limited 0106KMMMDWJEIN...