Advertisement
JENN-AIR
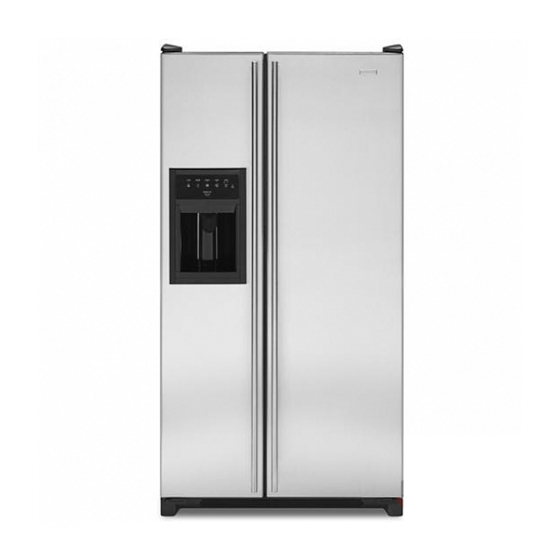
SIDE-BY-SIDE
REFRIGERATOR
TABLE
OF
CONTENTS
Important
Safety Instructions
........................................ 1-2
Installation .............................................................................
3-9
Controls ...................................................
10-12
Fresh Food Features .....................................................
13-15
Freezer Features ...................................................................
16
Ice and Water ..................................................................
17-19
Water Filter .......................................................................
20-22
Food Storage Tips ..........................................................
23-25
Care and Cleaning ........................................................
26-29
Operating
Sounds ................................................................
30
..............................................................
31-35
Warranty and Service ..........................................................
37
Guide d'utilisateur
et d'entretien .................................... 38
Guia de Uso y Cuidado ......................................................
76
Form No. C/11/04
Part No. 12842108
www.jennair.com
Printed in U.S.A.
_,2004 Maytag Appliances Sales Co.
Advertisement

Related Manuals for Jenn-Air JCB2285KEF


Summary of Contents for Jenn-Air JCB2285KEF
-
Page 1: Table Of Contents
JENN-AIR SIDE-BY-SIDE REFRIGERATOR TABLE CONTENTS Important Safety Instructions ........1-2 Installation ................Temperature Controls ........... 10-12 Fresh Food Features ............. 13-15 Freezer Features ..............Ice and Water ..............17-19 Water Filter ............... 20-22 Food Storage Tips ............23-25 Care and Cleaning ............ - Page 2 This appliance is equipped with a three-prong grounding plug for your protection against possible electrical shock hazards. It must be plugged into a grounding receptacle. Where a standard two-prong wall receptacle is encountered, it is the personal responsibility and obligation of the customer to have it What You Need to Know About replaced with a properly grounded...
- Page 3 SAVE TH ESE I NSTRUCTIONS...
- Page 4 • Use an appliance dolly when moving refrigerator. ALWAYS truck refrigerator from its side or Do not install refrigerator near oven, radiator or other back-NEVER from its front. heat source. Wf n ot possible, shield refrigerator with cabinet material. • Protect outside finish of refrigerator during transport by wrapping cabinet in blankets or inserting...
- Page 5 To Disconnect the Water Line: Door and Hinge Removal Push in white collar (A_)and hold. Some installations require door removal to get refrigerator to final location. Pull the door-side tube from the connector (B_). To Reconnect the Water Line: Firmly push tube _" into the connector. Use lines on the tube as a guide for full insertion.
- Page 6 Materials Needed Connecting the Water Supply Cselect models) • '/4"outer diameter flexible copper tubing • Shut-off valve (requires a '/4" hole to be drilled into water supply line before valve attachment) • Adjustable wrench • '/4" hex nut driver Note •...
-
Page 7: Installation
Handme installation Align bottom of handle with lower door tab. Press upper handle end to If not installed, the handle is located in the interior or door surface and firmly grasp lower attached to the back of your refrigerator. Remove and end of handle. - Page 8 Handle Extensions [select models) To Remove: To Install: Release top door trim (select models) by removing Phillips screws from top • Align and clip handle extension into position on the of fresh food door and retain screws handle. Press the extension over the door retainers. for later use.
- Page 9 Removing Front-Mounted Handles installing Front-Mounted Handles Stainless Steel Stainless Stee_ 1. Remove plastic button plug at 1. Loosen lower door clip on door with ¼" hex nut driver. base of handle with a very small flat-blade screwdriver. • Insert '/4" hex nut driver into predrilled hole to remove screw.
- Page 10 Turn both rear adjustment screws (B) clockwise raise and counterclockwise to lower the rear of the refrigerator. Using the carpenter's level, make sure front of refrigerator is '/4" (6 ram) or '/2bubble higher than back of refrigerator and that the refrigerator is level To enhance the appearance and maintain performance...
- Page 11 Touch Temperature Controls Adjusting the Controls • 24 hours after adding food, you may decide that one The controls are located at the top front of the or both compartments should be colder or warmer. If refrigerator compartment. so, adjust the control(s) as indicated in the Controm...
- Page 12 TEMPERATURE CONTROLS Speed Ice Triple Cool Climate Control When activated, Speed Ice reduces the freezer (select models) temperature to the optimum setting for 24 hours in order to produce more ice. Note: When the Speed The control is located at the top front of the fresh food Ice feature is in operation, the •...
-
Page 13: Temperature Controls
TEMPERATURE CONTROLS Press the Temp Alarm pad once to stop the audible 3. When changes are complete, press the Door Alarm alarm. The Temp Alarm light will continue to flash pad for three seconds OR close the Fresh Food door. the temperatures will alternate until the temperatures have stabilized. - Page 14 To Slide Out Elevator Shelf: • Grasp the front of the shelf and pull forward. • Push the shelf in to return to original position. To Adjust the Elevator Shelf: • Pull out the knob on the crank handle. • Rotate the crank clockwise to raise the shelf, and counterclockwise to lower the height of the shelf.
- Page 15 Door Storage Dairy Center The Dairy Center provides convenient ChillKeeper door storage for spreadaNe items such (select models) as butter and margarine. On select models, this compartment can be The ChillKeeper keeps beverages moved to several different locations to and other items colder than the rest accommodate storage needs.
- Page 16 Storage Drawers Temperat_ re-Controlled Drawer This drawer can be used for storage of Humidity-Controlled Crisper Drawers meats, deli or other miscellaneous items. The Crisper Drawers provide a higher humidity environment for fresh fruit and vegetable storage. The drawer features a control that Controls adjusts the amount of cold air allowed into the drawer.
-
Page 17: Freezer Features
FREEZER FEATURES Shelves and gaskets To UnstaH: Slide bin into railing below ice maker until bin locks Fixed Freezer SheRf into place. Drop ice maker arm to activate ice maker. To Remove Clip-mounted Shelves: UMPORTANT: Ice bin must be locked in place for proper ice dispensing. - Page 18 Automatic ice Maker Certain sounds may accompany the various cycles of the ice maker. The motor may have a slight hum, the (select modds} cubes will rattle as they fall into an empty storage pan and the water valve may click or "buzz" occasionally.
-
Page 19: Ice And Water
CE AN D WATE R Dispenser Features Water Dispenser Operation (:select models:) DISPENSER PANEL ACTUATOR SPILL _TRAY Note • During initial use of water dispenser, there will be Dispenser Light (select models) a one- to two-minute delay while water tank fills before water dispenses. - Page 20 Auto Light (semect models} Dispenser Contro_ (sdect modds) (contro_ features vary by modeO The Auto Light function activates the dispenser light at half-power when the Light Sensor detects Ice Dispenser Operation that the light leveb in room are low. To Dispense Uce and Water: To Activate Auto Light:...
- Page 21 Water FimterRe ova Replacing Water Filter installation (select mode s) IMPORTANT: Air trapped in system may cause water and cartridge to eject. Use caution when removing. 1. Turn filter counterclockwise until it releases from filter head. 2. Drain water from filter into sink, and dispose in normal household trash.
- Page 22 System Specification and Performance Data Sheet Refrigerator Water FHter Cartridge Mode U KF8OOIA×× Specifications Service Flow Rate (Maximum} ..........0.78 GPM (2.9 L/rain} PentaPure Rated Service Life UKF8001AXX-750 (Maximum} ..7 50 gallons!2838 liters Maximum Operating Temperature ........100 ° F/38 ° C 1000 Apollo Road Minimum Pressure Requirement ........
- Page 23 State of California Department of Health Services Water Treatment Device Certificate Number 1583 Date Issued: September 16, 2003 Date Revised; APril 22, 2004 Trademark/Model Designation Replacement Elements UKFS001AXX750 469006-750 67003523-750 Manufacturer: PentaPure Inc. The water treatment device(s) listed on this certificate have met the testing requirements pursuant to Section...
- Page 24 Fresh Food Storage Frozen Food Storage , The fresh food compartment of a refrigerator should , The freezer compartment of a refrigerator should be be kept between 34°-40 ° F 0°-/4 ° C] with an kept at approximately 0° F (-18 ° C]. To check the optimum temperature of 37 °...
- Page 25 Food Storage Chart Storage times are approximate and may vary depending on type of packaging, storage temperature, and the quality of the food when purchased. DAI RY PRODUCTS Butter 1 month 6 to 9 months Wrap tightly or cover. Milk and cream 1 week Not recommended Check carton date.
- Page 26 :i:i:i:i:i:i:i:i :i:i:i:i:i:i:i:i :i:i:i:i:i:i:i:i :i:i:i:i:i:i:i:i :i:i:i:i:i:i:i:i :i:i:i:i:i:i:i:i :i:i:i:i:i:i:i:i :i:i:i:i:i:i:i:i :i:i:i:i:i:i:i:i :i:i:i:i:i:i:i:i VEGETABLES Asparagus 1 to 2 days 8 to 10 months Do not wash before refrigerating. Store in crisper. Brussels sprouts, broccoli, 3 to 5 days 8 to 10 months Wrap odorous foods. cauliflower, green peas, Leave peas in pods.
- Page 27 Refrigerator Cleaning Chart Abrasive or harsh cleaners Use 4 tablespoons of baking soda dissolved Textured Doors and Exterior Ammonia in I quart (1 liter) warm soapy water. [select models) Rinse surfaces with clean warm water and Chlorine bleach Cabinet Interior Concentrated detergents or solvents dry immediately to avoid water spots.
- Page 28 Removing Odors From Energy Saving Tips . Avoid overcrowding refrigerator shelves. This reduces air circulation around food and causes refrigerator run longer. Avoid adding too much warm food to refrigerator one time. This overloads compartments and slows rate of cooling. , Do not use aluminum foil, wax paper, or paper toweling...
- Page 29 Lower Freezer Section Replacing Light Bulbs 1. Pinch both sides of light cover to remove. 2. Remove light bulb. Replace with appliance bulb ne greater than 40 watts. 3. Pinch both sides of the light cover to snap into place. Ice and Water Dispenser 1.
-
Page 30: Water Filter
Preparing for Vacation Upon Your Return: After a Short Vacation or Absence: For models with automatic ice makers or dispensers: , Reconnect the water supply and turn on supply valve (see page 4-5). , Monitor water connection for 24 hours and correct leaks if necessary. - Page 31 Improvements i n refrigeration designmayproduce soundsinyour newrefrigerator t hataredifferentor werenot presentin an oldermodel. T heseimprovements weremadeto createa refrigerator t hat is betterat preserving food, is moreenergyefficient, a ndis quieteroverall. B ecause newunitsrun quieter, s oundsmaybe detected thatwere presentin olderunits,butweremasked by highersoundlevels.Manyof thesesoundsarenormal.Please notethat the surfacesadjacent t o a refrigerator, suchas hardwalls,floorsandcabinetry maymakethesesounds seemeven louder.
-
Page 32: Troubleshooting
TROUBLESHOOTING Freezer control and Refrigerator is in defrost mode. Normal operation. lights are on, but Wait 40 minutes to see if refrigerator restarts. compressor is not operating Temperature- Control settings are too low. See pages 10,11 and 12 to adjust controls. controlled drawers Freezer controls are set too low. - Page 33 TROUBLESHOOTING Water droplets Door gaskets are not sealing properly. Clean according to the chart on page 26. form on outside Humidity levels are high. Normal during times of high humidity. of refrigerator Controls require adjustment. See pages 10,11 and 12 to adjust controls. Water droplets form Humidity levels are high or door has Reduce time door is open.
- Page 34 TROUBLESHOOTING Ice and Water No indicator lights Freezer door is not closed. Verify that freezer door is closed. Power is removed are lit on dispenser from the control when freezer door is opened. control Refrigerator is not plugged in. Plug in refrigerator. Fuse is blown, or circuit breaker needs to Replace any blown fuses.
- Page 35 TROUBLESHOOTING Ice and Water Ice maker is not Confirm ice maker arm is down. See Automatic Ice Ice maker arm is up. producing ice Maker page 1Z Household water supply is not reaching See Connecting the Water Supply pages 4 and 5. water valve.
- Page 36 TROUBLESHOOTING Water flow is Water pressure is too low. Water pressure must be between 35 to 100 pounds per slower than normal square inch to function properly. A minimum pressure of 35 pounds per square inch is recommended for refrigerators with water filters. Saddle valve not open completely.
- Page 38 U.S.A.and Canada. U.S.customersusing TTY for deaf, hearing impaired or speech impaired,call 1-800-688-2080. • User'sguides, servicemanualsand parts informationare availablefrom Maytag Services su,Jenn-Air CustomerAssistance. Note • When writing or calling about a service problem, please include the following information: a. Your name, address and telephone number;...