GE Spacemaker JVM1750 Owner's Manual
Hide thumbs
Also See for Spacemaker JVM1750:
- Owner's manual (192 pages) ,
- Technical service manual (34 pages) ,
- Owner's manual (48 pages)
Table of Contents
Advertisement
Advertisement
Table of Contents

Related Manuals for GE Spacemaker JVM1750


Summary of Contents for GE Spacemaker JVM1750
- Page 1 Models: JVM1750 EVM1750 HVM1750 LVM1750 Spacemaker Microwave Oven Owner's Manual Helpful Information 8_re If Something Goes Wrong Write the model and serial nmnbers here: Model# Serial# oll n ]_d)el insidu the oven. I:i_ld thcsu lmmbers go.corn DE68-03328A 49-40534 10-06 JR...
- Page 2 READ ALL SAA_2TY INFORMATION BEFORE USING ,_ WARNING! For yoursafety,the information in this manual mustbe followed tominimize the risk of fire or explosion, electric shock,or toprevent property damage,personal injury or loss of life. For your safiqy, dm intbrmafion in this manual mus/be tollowed to minimize...
- Page 3 I'.l • Read tk)ll()w the _i_ ii ! ! 9 ¸¸_i_!_!!_!_!!_!!!_ _!!_ ! !!!_ !_!_!_!_! Jl ..• I)o not o])erate this This microwave oven is specific "Precalltions appliance it:it has a ii intended for household A\ old Possible Exl)osure damaged power...
- Page 4 t_2AD ALL SAPETY INFORMATION BEFORE USING ®To reduce th( risk of fire ill '_Do not stor( this appliance • S(e door surthce cleaning instructions ill tile Care and this Ot/tdoors. rise Ot(II Caii|\: Cleaning s(c6on (s) of this prod/tct lleaF water J(_r Do llOt ov(rcook 1()o(/.
- Page 5 SPECIAL N07 2S ABOUF MICRO WAVING • Foil not n/olded to tood Arcing is the n/icrowave ternl lot sliarks in the (ut)turned edges act Hike oven. Arcing is caused antennas). • The metal shelf • Metal, suth as twist-ties, inchlded) not installed t)oultry pins or gold-...
- Page 6 SPECIAL N07 2S ABOUF MICRO WAVING SAFETYFACT o ,\\ old heating babx Ibod ® Do 1lot overtook in glass jars, ev(n with potatoes. They could SUPERHEATED WATER the lid off. Make sur( d(hvdrate and catch inlhnt lood is thoroughly fire, causing damage such as water, Liquids,...
- Page 7 I'.1 Make sure all cookware used K tile dish remains cool • Paper lowels, waxed tlaper and only tile water ill tile ¥O/IF l/Ill FowaVe ovell and plastic wrap Call be used to co_er dishes Sl/ilable tot n/icrowavhlg. cut) heats, then the dish is microwm e-sate.
- Page 8 SPECIAL N07 2S ABOUF MICRO WAVING ®Use loll only as * Plastic eookware--Plastic Follow these guidelines: dir( cted in this manual. eookware designed I L Ise microwm e-sale When /lsing loll in th_ microwave cooking plastics only and use microwave or<n, keep tile vet) usefld,...
- Page 9 Filler Panel Kits For installation between • \\ ailable at extra cost ti'om dX48WH--White cat)inets only; not /or _)ttr GE sut)l)lier, or see dX48BL--Black end-ol:cat)inet installation. (',E Service *mmbers. JX81A Ea(h kit contains ttst) ..When ret)lacing a 36"...
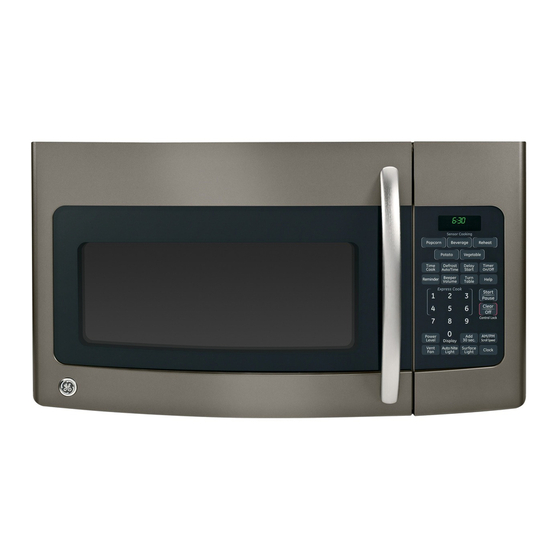
- Page 10 ii !i i Door Handle. Pull to Removable Turntable. Shelf. I.ets you microwave several ol)en the door. The a_J,(t supl)ort TurlJaable door must be se(urelv tends at once. Food must be in t)la(e hitched microgrooves best when when using the o_en. The tm:mable lm_v be microwaw...
- Page 11 The Controls on Your Microwave Oven Youcan microwave bytime, temperature,preset time andpower level or with the conveniencefeatures. DEFROST TIME COOK Time Features TimeCooking Press Enter TIME COOKI & II (Press once or twice) \mount of _ooking dine. DEFROST AUTO/TIME (Presstwice) _\mount of tizzies.
- Page 12 The Controls on Your Microwave Oven I'k_v,_,'koul lkis ma_tuat, jealun_ apFeara_ce va_3'j_ml 3 ur model. HELP GUIDE O r,J MICROWAVE GUIDES IN BOOK Press this pad Before you begin, check • Cooking feature pad for usage the guide located on the •...
- Page 13 \hriable power levels It) "equ;dize" or |rmlS/br t]exibilitv to microwave heal It) |he inside of lhe cooking. 1)ower levels fi)od. An exmnple of lllis IIli(rowav( + ovell (_lll is shown wi|h power level the de/i'os| (_clc. be (/)mt)ared to tile sur/a(e units on a range.
- Page 14 2 Enter cooking time. 5" Emer tile second (ook 3 Change power level time. ff you don't want full power. (Press POWER 0 Chai]ge the power l(vel LEVEL.Select a if y/m don't warn full desired power level power. (Press...
- Page 15 Cooking Guidejbr Time Cook I & II NOTE."Use power level High (10) unless otherwise noted. Vegetable Amount Time Comments Asparagus In 1V2-qt. oblong glass baking dish, (fi'cs!! spears) 1 lb. {) tO 9 IIlin., Med-I tigh pla(e 1/4 (up vvat{!r. 5 to 7 min.
- Page 16 Cooking Guide for 71me Cook I & II Coru di'ozen kernel, ] O-oz. package 5 to 7 rain. In l-qt. casserole, place 2 tab|esl)oon.s w_Her. Corn on the cob (li'esh 1 to 5 ears 3 to 4 rain. h/2-qt, oblong glass baking dish, place...
- Page 17 Time Features Mlows \ou to defrost tot tile Defrosting Tips length of time you select. See • I;oods [}'ozell in paper tile I)efl'osting C,uide tor plastic can be de/i:osted suggested times. tile package. Tighdy closed packages should be sliL Power hwel 3 is automaticall} pierced or \_:nted AFI'ER...
- Page 18 Defrosting Guide Food Time Comments Breads, Cakes Bread, hunsorrolls_] piece. | mh_. Sweetrolls dpprox. ]2 oz.. 3 m ", rain. Fish and Seafood Fillets, frozen (1 lb., _i m _ rain. Shellfish, smallpieces (1 lb.) 5 to 7 rain. ])hue 1)|ol k in (a.',seroh'. Turn o_('r mid break...
- Page 19 Time Features This is a quick way to set The t)ower level can be cooking time for 1-6 minutes. challged as thne is comning down. Press Press one of the Express POWER I ,E_2I _and Cook pads (/i'om 1 to 6) enter 1-10.
- Page 20 Custom Cooking (On some models) To custom cook when cook Custom Cooking lets you time and power level has cook Ibods you prepare ellen without needing been previously set: Press CLIST()M to stm:t. enter cook tilne alld pow(r level each time.
- Page 21 Convenience Features (On some models) The Smwks/i'ature 3 Ellter ll/llIlt)el? amomaticallv sets file items file tk)od weight in om_(es. microwaving times and t)ower levels to warm 4 Press START '_arietv of snack t_)ods. Hint:_i)u can press I Press SNACKS. I L9 and hold SNACKS 2 Select...
- Page 22 Convenience Features The De/i'ost Auto/Time Conversion Guide teature gives you ['_ro W_IVS AUTO/TIME !f the weight 0f fbod tO defi:ost /i'ozen/oods. stated i!l potlnds Press DEFR()ST OUlICeS_ tile OtltlCeS lllttSt AUT()/TIME once be converted to tenths Auto Defi'ost or twice lot (A) of a pound.
- Page 23 Sensor Features ; ..o.; + he. ::,,si.g the s..so. a '3 :: FeaturesA_ :: The Sensor Features Oe_e_ed detect t!le increasing ..off dishes so they dofft :: lmmiditY released mislead the sensor. • The t)roper (Olltainers during cooking: alld covel?s al?e essel/tial ::ove*_automatically...
- Page 24 20 seconds less cooking time. Pr('ss l _%_tinR) reduce cooldng tim( another I0 seconds 0otal 30 seconds kss time). Press BE\_2I_\GE to heat Drh_ks heated with the a cut/of colt('e or ()tiler Beverage feature lllay be beverage.
- Page 25 Some Foods Not How to Use the Reheat Recommended For Use Feature With Reheat 1 Place loud in covered d'_e o_en. Press I_ItEAE It is best to us(" Time Cook The oven sire:Is lor these/bods: (_ess _me _moreemet immediawly. • Bread products.
- Page 26 Sensor Features (On some models) If tood is mldercooked Sensor Cooking gi',es you _tJlt'F coHllt(towI/, [IS(' resuhs with (_{S?', _t,tltOl//_l|i( ot foods. Time Cook/or a ',arietv additional cooking time. Place coxered food How to Change the o'_ el/. Automatic Settings Press the C()()K pad.
- Page 27 (On some models) If tbod is tmdercooked Vegetable aJleF the Cotlntdown, rise 1 Place covered fi)od Time Cook Jbr additional the oven. Press the _bod Sensor Cooking gives you easy, cooking time. p_l(I. (For vegetables, automatic results with a variety How to Change the of foods (see the Cooking Guide...
- Page 28 Sensor Features (On some models) 1 Pierce potato skin wfth How to Change the tbrk and place potato Automatic Settings the oven. POTATO You can a(/just the cooking 2 Press P()TATO. time tbr all tbods to suit ovell starts immediately. yotlr persolla] Histe,...
- Page 29 Other Features Your Model May Have The t ]EI P pad disl)la}s tbature in/brmalion all(t hell)tiff hires. Press t ]EIP, then select a/bamre pad. To remind you that you ha_e/ood in the oven, oven will displ_y "F()()[) I),]J_A[W" and beep once minute mltil you either...
- Page 30 Other Features Your Model May Have The scroll speed of the display be (hanged. Press and hold AM/PM AM!I)M pad about SCROLL SPEED seconds to bring u I) the display. Sele(t 1-5/or slow to thst scroll speed. To turn the do(k, the (lo(k display "[b redisplay...
- Page 31 Timer ()n/()/1 operates When time is up, tile <)veil a mim/te timer and can be will signal. "Ib turn off tile used at any time, even timer signal, press TIMER ()N/()FF. when tile o_en is operating. NOTE: The timer I Press TIMER ()N/()FE indicator will be Hit whih'...
- Page 32 Other Features Your Model May Have To lock or unlock YoII IIl_lV lock tlle CO]ltrol panel to prevent controls, press and hold CI EAR!OFF/i)r about microwave/i'om being accidentally started three secoHds. When used 1)v children. control panel is locked, an "I" will be displayed the extreme right.
- Page 33 ()n some models, there Press |tlrn sHr{_l(e light on or off. a night light option. Press SLIRFA(]E I,IGIIT once lot bright light, twice /or the night light or three BRIGHT-NIGHT 0 FF times to turn the light ott. The beel)er sound level can be a(!justed.
- Page 34 Other Features Your Model May Have How to Use the Shelf Food iilicrowaves best When Microwa ring when placed on the tm:ntable or on the shelf in the lower 1)osifion. Only use the shelf when ////I I / / I I \ \ \ \_\ The shelf gives you the reheating...
- Page 35 • To reheat on 2 levels • To reheat 2 dishes on the lower level: Switch places after 1/2 time. I Multiply reheat time b_ 11/2. 2 Svvitc]l places atter l/,2 the time. Switch places after 1/2 time. • To reheat on 3 levels (on some models)
- Page 36 Microwave 7 ms Term Definition Arcing Arciu_ i_, th(' I/Ii(FOW_I'_(" t('I'lil /()F sp_lrks Ill(' oven. Ar,_-in_ (-_lilS('(t b'_ : • d_e mcml shell being instMlcd in(orr('(-lly m_(1 lou(-hing Ill(' u/i(rowa\c walls. • lll('t_+l or I()i] touchin_ lh(' ti(l(' oJ t])c O'_('lh •...
- Page 37 Care and Cleaning An o((asiona] thorough wiping with a so]ution baking soda and water keeps die inside fi:esh. NOTE: Be certain the power is off before cleaning any part of this oven. Window, Removable Turntable and Walls, Floor, Inside Metal and Plastic Parts on Turntable Support the Door To prevent...
- Page 38 Care and Cleaning Case blea(h t)rodil(tS (ontaining (hlorine Clean tile outside of file using cleaners with Stainless Steel tinishes. microwave with a sudsy ammonia or alcohol, CleanSteel cloth. Rillse then dry. as they can damage Wil)e the window clean Use a clean, soft, light and the appearance of the with a dam t) clofll.
- Page 39 (WB36X10003), tile bull) _g gently t)lug. available from your turning. Repla(e with tile ReIllO'_e s/rev¢ at ihe GE Supplier. same size and type bulb. left Ill(! light / o',,er alld Io'pver cover, 4 Ret)lace tile screw. Connect...
- Page 40 The Exhaust Feature The xent t_m has a metal Models that re(ir(ttlate Charcoal Filter 1)a(k illtO the roolI/also on some mooelsi r(usable grease fiher. use a (har(oal fiher. Reusable Grease FilteJ (on all models) For this reason, the filter The reusable grease filter traps...
- Page 41 (usually alter Part No. WBO2X9883 that helps renlove smoke 6-[ 2 months, depending frm, your GE supplier. alld odors. on hood usage). "()l/tional Kits," page ]()r l/lore inJ()rl//ation. 'lk) remove tile charcoal Remove the top grille...
- Page 42 Before You Call For Service Problem Possible Cause What to Do Oven will not A fuse in your home • Replace fllsc or reset circuit breaker. start may be blown or the circuit breaker tripped. Power surge. • Elnl)lug the microwave oven, then plug it back in.
- Page 43 I.,I • TV-radio imerl_rence • Mois[/ll e oH overt door and walls while might be noticed while cooking. Wipe tile tile /lSillg l//icFow?l\e. Similar to the imerf_'rence moisture off with a paper towel or sol1 cloth. caused l)x other small appliances, it does not •...
- Page 44 Notes...
- Page 45 Notes...
- Page 46 Owner's Manuals, apl)lian(e? Try dw (;E ge.com At)t)liances Wel)siw 24 hours Ol?(ter parts or e_.en schedllle service on-line. ()r call 800.GE.(2\RES Ext)ert C,E repair service is olJ,lv o_J,e step a'w;_yti'om (800.432.2737) (huing your door. (;et on-line ge.com I/()1_1//_11 1)/Isil/ess ho/ll?S.
- Page 47 Instructions contained hldivid uals qualified to service their in this manual cover _lppliances Cml have procedures to be ge.com t)m;ts or accessories Sellt performed by may user. directly to their home. Other servichlg generally 800.626.2002 should be referred (VISA, MasterCm:d...
- Page 48 [ SA.1€tile product [s located in an m>a where se_wiceby a GE Authorized Se_a'iceris llor avail_ahle. you nlay be responsible fbr a trip chmNe oryou mm b_ _quhvd ro bang tile p_duct m _ua Authorized GE Service Location _brseivice.