GE JKP90 Owner's Manual
27" and 30" double wall oven microwave cooking center
Hide thumbs
Also See for JKP90:
- Owner's manual (88 pages) ,
- Installation instructions manual (25 pages) ,
- Technical service manual (66 pages)
Table of Contents
Advertisement
Quick Links
ge.com
¢,J
°v=._
Safety Instructions
..........
2-9
Operating
Instrut_tions
Microwave
Control
Panel
....
] O, ] ]
Microwave
Oven
Controls
....
10-21
Lower Oven
Control
Panel
. . .22, 23
Lower Oven
Controls
........
22-34
Lower Oven
Thermostat
........
28
Sabbath
Feature
............
33, 34
Self-Cleaning
Lower
Oven
. . . 29, 30
Sensor
Controls
............
16, 17
Care and Cleaning
Door
. ......................
36
Light Bulb
...................
37
Microwa_ e O_en
..............
35
Racks
.......................
38
Troubleshooting
Tips
......
39-4]
Consumer
Support
Consumer
Support
............
46
Product
Registration
........
43, 44
X4'arrantv
....................
45
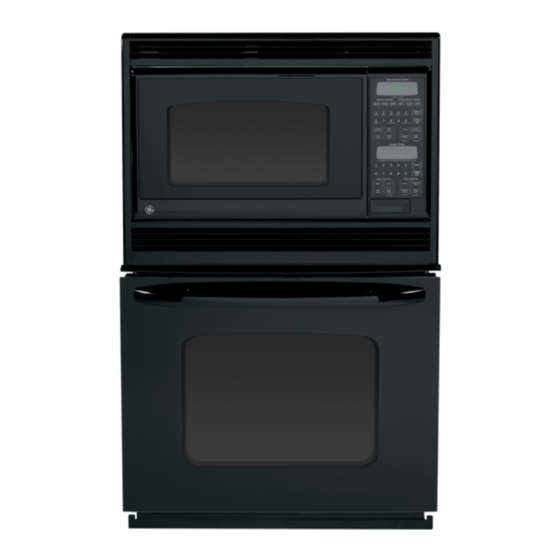
JKP90-2
7" Double
Wall ChJen
fFP90-
30" Double
Wall ChJen
The microwave
oven in this
cooking center is I000 watts.
©
©
Write the model and serial
numbers here:
Model #
Serial #
You can find them on a label inside
the upper oven on the lelt side.
49-80428 02-07 JR
Advertisement
Table of Contents

Related Manuals for GE JKP90


Summary of Contents for GE JKP90
- Page 1 Safety Instructions ..Operating Instrut_tions JKP90-2 7" Double Wall ChJen Microwave Control Panel ..] O, ] ] fFP90- 30" Double Wall ChJen Microwave Oven Controls ..10-21 Lower Oven Control Panel . . .22, 23 Lower Oven Controls ..
-
Page 2: Important Safety Information
IMPORTANT SAFETY INFORMATION. READALLINSTRUCTIONS BEFORE USING. WARNING'! For your safe_, the information in this manual must be followed to minimize the risk of fire or explosion, electric shock, or to prevent property damage, personal injury, or loss of fife. PRECAUTIONS TO AVOID POSSIBLE EXPOSURE TOEXCESSIVE MICROWAVE ENERGY Do not attempt... -
Page 3: Safety Precautions
SAFETY P RECAUTIONS When using electrical appfiances, basic safety precautions should be followed, including the following: WARNING This appliance should be serviced only Groundinglnstructions: 1)y qualified service personnel. Contact This appliance must be connected to a nearest authorized service thcilitv fox... - Page 4 IMPORTANT SAFETY INFORMATION. READALLINSTRUCTIONS BEFORE USING. WARNING'! SAFETY P RECAUTIONS Do not use water on grease fires. Never pick up a flaming pan. Smother flaming pan by covering pan completely with weft-fitting lid, cookie sheet or flat tray. Flaming grease outside a pan can be put out by covering with baking soda or, if ava#able, a multi-purpose dry chemical or foam-type fire extinguisher.
- Page 5 MICflOWA VEOVEN Read and follow the specific "Precautions to Avoid Possible Exposure to Excessive Microwave Energy" section in this manual Toreduce the risk of fire in the oven cavity: Some pioducts such as whole eggs and sealed containers for example,...
-
Page 6: Microwave-Safe Cookware
IMPORTANT SAFETY INFORMATION. READALLINSTRUCTIONS BEFORE USING. WARNING'! MICROWA V E-SAFE COOKWARE Make sure aft cookware used in your microwave oven is suitable for microwaving. Most glass casseroles, cooking dishes, measuring cups, custard cups, pottery or china dinnerware which does not have metallic trim or glaze with a metallic sheen can be used. Some cookware is labeled "suitable for microwaving."... - Page 7 Plastic cool<ware - Plastic cool<ware Follow these guidelines: designed for microwaxe cooking is xerv Use microwaxe-safe plastics only and useflfl, but should be used caIeflflly. use them in stlJct compliance with Exen microwaxe-safe plastic may not tile cool<ware manul_acturer's...
- Page 8 IMPORTANT SAFETY INFORMATION. READALLINSTRUCTIONS BEFORE USING. ALLTHESE THINGS A RENORMAL WITHYOUR MICROWAVE Steam or xapor escaping from around Some TV-radio inmrference might be tile dooI: noticed while using youi microwa_> oven. It's similar to the inmrference caused Light reflection around tile door oi tile other small app]iances...
- Page 9 WARNING! SELF-CLEANING LOWER OVEN Do not use aluminum foil to line oven bottoms, except as suggested in this manual. Improper installation of aluminum foil may result in a risk of electric shock or fire. Stand away flora file oven when opening Do riot use the oven to d U newspapers.
- Page 10 Usingthe microwave oven controls. Throughout this manual, features and appearance may vary from your model. Your model may have one of the following controls. Microwave Oven © Sensor Cooking Convenience Cooking € • t_JniSe_ Reminder Start Microwave Oven Guide Behind Door Convenience Cooking Sensor...
- Page 11 MicrowaveOvenControlFeatures and Settings Display Power Level Displays tile time during cooking Press to choose tile power level you want flmctions, tile power level being used, to set. Watch tile display while pressing tile Auto Codes, tile Auto Defrost t0od...
-
Page 12: Changingthe Microwave Power Level
Changingthe microwave power level. The power level may be entered or changed immediately after entering the feature time for time Cook, -time Defrost or Express Cook. The power level may also be changed during time countdown. Tochange the power level... ¢_Time T{me _1 Here are some examples of uses for... -
Page 13: Express Cook
Usingthe timedmicrowave features, gecom Time Cook I Allowsyouto microwave foranytime up to99 Press the Startl)ad. minutesand59seconds. _)u may open the door during Time Power level 10 (High) is a momaticall_ ())ok to check the ti)()(l. Close the but you may change it for more flexibility. - Page 14 Using the timed microwave features. Cooking Guide For Time Cool<.Use power level High (10) unless otherwise noted. Time Comments Amount Asparagus 7 to 10 min. (freshspears) 1lb. In 11½-qt.casserole, place 1/4 cup water. Med-High(7) (frozenspears) l O-oz. p ackage 5 to 8 min. In 1-qt.casserole.
-
Page 15: Defrosting Guide
A duff thumping noise may be heard during defrosting. This is normal when oven is not operating at High power. Time Defrost Allowsyouto defrostfora selected lengthof Defrosting Tips time.SeetheDefrosting Guide forsuggested Foods frozen in paperorplasticcanbe times. ( AutoDefrost e xplalbed b theAboutthe defrosted lb thepackage. -
Page 16: Sensor Cooking
Usingthe microwave sensorcooking features. The Sensor Features detect the increasing humidity released during cooking. The oven automatically adjusts the cooking time to various types and amounts of food. Sensor Cooking The proper containei_ and co',ei_ are essential for best sensor c()oking Mwavs use microwaxe-saie containe_... - Page 17 Reheat Some foods not recommended for use wi_ TheReheat f eature reheats singleserv/bgs of previously cooked foodsor a plateof leftovers. Reheat--it is best to use Time Cook for these foods: Place covered fi)od in the oven. 18SS[ImsI mlnrenmeJ Reheat pad.
- Page 18 Usingthe microwave convenience cooking features. Drinks heated with the Beverage feature may be very hot. Remove the container with care. Beverage P,e. the , ,eve,age t,, h e.t. '"l'' ,,tl, e, b e.e,. e Snacks Snacks Guide TheSnacksfeature automatically sets the microwaving tithes and power levels to warm a i ¸...
-
Page 19: Auto Defrost
Usingthe microwave auto feature, ge.oom The Defrost Auto/77me feature gives you two ways to defrost frozen foods. Press Auto Defrost once for Auto Defrost or twice for -time Defrost. Auto Defrost ( oof,.o,t and hsh Conversion Guide _A_to_ Auto Defrost for meat, poultry to 6 pounds.Use TimeDefrost for most other... -
Page 20: Display On/Off
Usingthe other microwave features. Cooking Complete Reminder: Toremind you that you have food in the oven, the oven will beep once a minute until you either open the oven door or press the Clear/Off pad. Clock Press toenterthetitheof flayor tocheckthetime of daywhilemicrowaving. - Page 21 Child Lockout Youmay lockthe control panel to prevent the an L _._q_en the control panel is locked, microwave from being accidentally started or will be displayed to the extreme right. usedby children. To lock or unlock the controls, press and hold the Clear/Off pad fin"...
-
Page 22: Usingthe Lower Oven Controls
Usingthe lower oven controls. Throughout this manual, features and appearance may vary from your model. Your model may have one of the following controls. Lower Oven +,+°con+, 8 Oven Cont+ls e--O°kO0+0 OocO i+,c_<l--e Hi/LO O--_+<o.O (-ov°,-] C,+_ch°,,Q o°,oy _"1__1 Cnem" _ _star;... - Page 23 LowerOvenControl,Clockand TimerFeatures and Settings Display Clear/OffPad Press to cancel ALL o',en operations Shows tile tiIne of day, oven teini)erature, except the clock and tiinei; whether the ()veil is in the bake, broil or self:cleaning mode and the tiines set fin.
-
Page 24: Usingthe Lower Oven
Usingthe lower oven. To avoid possible bums, place the racks in the desired posifion before you turn the oven on. Before you begin... The racks have stop-locks, so that when To replace, place tile end of tile rack placed correctly on the supports, they will (stop-locks) on tile SUl)port, flit up tile stop befin'e coming... -
Page 25: How To Set The Oven For Broiling
How to Set the Oven for Broiling Close the doox: Always broil wi_ the door Press the Broil Hi/Lo pad once fi)r closed. HI Broil To change to LO Broil, press the Place meat or fish on a broiler Broil Hi/Lo pad again. -
Page 26: To Set The Clock
Usingthe lower oven clock and timer. ToSet the Clock The clock must be set to the correct Press the Clock pad. [iI/le tk)r tile atltOi/latic ox, en Press the numl)er pads. tinting flmcfions to work properly: time of dm cannot be chanoed_ during Press the Start pad until the time of Make sure the clock is set to the... - Page 27 Usingthe lower oven timed baking and masting features.(on some m odels) ge.com NOTE: Foods that spoil easily-such as milk, eggs, fish, stuffings, poultry and pork-should not be allowed to sit for more than 1hour before or after cooking. Room temperature promotes the growth of harmful bacteria. Be sure that the oven light is off because heat from the bulb will speed harmful bacteria growth.
- Page 28 Adjust the lower oven thermostat--Do it yourself! Youmay find that your new oven cooks differently than the one it replaced. Use your new oven for a few weeks to become more familiar with it If you still think your new oven is too hot or too cold, you can adjust the thermostat yourself.
- Page 29 Usingthe self-cleaning lower oven. geoom The oven door must be closed and all controls must be set correctly for the cycle to work properly. Before a Clean Cycle IMPORTANT'. health of some birds reconm/end ".enting )our kitchen with an open window is extremely sensitive...
- Page 30 Usingthe self-cleaning lower oven. The oven door must be closed and all controls must be set correctly for the cycle to work properly. How to Delay the Start of Cleaning (available on only) JKP86 models C- Self--') Tile door locks automadcally: Tile display lean) Press the SeffClean pad.
- Page 31 Special features of your lower oven control ge.com Yournew touch pad control has additional features that you may choose to use. The following are the features and how you may activate them. The special feature modes can only be activated while the display is showing the time of day. They remain in the control's memory until the steps are repeated.
-
Page 32: Cook And Hold
Special features of yourlower oven control Tonesat the End of a Timed Cycle At theendof a timedcycle, 3 shortbeepswill Press tile Kitchen timer On/Off soundfo//owed by onebeepevery 6 seconds pad, Tile display shows CON BEEP untiltheClear/Off pad/s pressedTh/s (continuous beep). Press tile conflbuous 6-second beepmaybecance/ec_ Kitchen timer On/Off pad again. -
Page 33: Usingthe Sabbathfeature
Usingthe SabbathFeature. (Designed for use on the Jewish Sabbath and Holidays.) (on some models) ge.com The Sabbath feature can be used for baking/roasting only. It cannot be used for broiling, self-cleaning or Delay Start cooking. NOTE: The oven light comes on automatically(on some models) when the door is opened and goes off when the door is closed. - Page 34 Using the SabbathFeature. (Designed for use on the Jewish Sabbath and Holidays.) (on some models) How to Set Sabbath Feature for Timed Baking/Roasting - Immediate Start and Automatic Stop NOTE:Tounderstand h ow theovencontrol AJ'ter a random (lela) period [ sto,_j works, p racticeuslbgregular (non-Sabbath) approximately 30 seconds...
-
Page 35: Microwave Oven
Careand cleaning of the cooking center, ge.com Be sure electrical power is off and aft surfaces are cool before cleaning any part of the cooking center. How to Remove Protective Shipping Film and Packaging Tape Careflllly grasp a corner of the protective... - Page 36 Careand cleaning of the cooking center. Lift-Off Oven Door The door is very heavy. Be careful when To replace the door: removing and lifting the door. Fimfl) grasp both sides of the door Do not lift the door the handle. at the top.
- Page 37 Lower Oven Light Bulb (onsome models) NOTE: Theglass cover (onsome models)should To replace: be removedonly when cold Weanw /ate;(g/oves Put in a new 40-watt appliance bulb. may offer a better grip. Place the tabs of the glass cover into the grooves of the socket.
-
Page 38: Control Panel
Careand cleaning of thecooking center. Oven Racks (lower o ven) Clean the oven racLs with an abrasi',e To make racks slide more easily, cleanser or steel wool, _Mter cleaning, aI)ply a small amotmt of vegetable oil or NOTE:The oven racks maybe rinse racks with... -
Page 39: Troubleshooting Tips
Before YouCall For Service... ge.com Troubleshooting -tips Save time and money! Review the charts on the following pages first and you may not need to call for service. Possible Causes What To Do Controlpanelon You forgot to press the • Press the Startpad. - Page 40 Before YouCall For Service... Troubleshooting tips Possible Causes What To Do "F-- and a number or Yon have a function • Press Clear/Offpad. _Mlow the oven to cool for one letter" flash in the error code. houL the oxen back into operation.
- Page 41 Possible Causes What To Do Lower oven light does Light bulb is loose or defective. * Tighten or replace the bulb. work Pad operating light is broken. • Call h)r set\ice. Lower oveo will * See the Using the self-cleaning Iower oven section.
- Page 42 Notes_...
- Page 43 GE Service Protection Plus '_' GE, a imme recog_fized v, orld_kle for qlmliry ai_d depei_dabiliry, offers )ol_ Ser_he --comprehe_s_xe app_iai_ces-- Protecti(m t h_s protectio_ }our No Matter What Brand[ Benefits Include: We Ti Corot Any Applianco. # Backed by GE Anywhoro.
- Page 44 FAILI 5RE TO COMPLETE AN[) RE'F[ 7RN Tt tlS CMa.D DOES NOT DIMINISt t Y( )l JR General Electric Company VMa.R\N'[Y RIGI ITS. Louisvill< KY40225 For more intin malion about (;15\'s priva(y and data usage poll( 3, go to ge.com and click on ge.com "Privacy Poli_y" or call 800.626.2224.
- Page 45 USA. If the product is located in an area where service by a GEAuthorized Servicer is not available, you may be responsible for a trip charge or you may be required to bring the product to an Authorized GE Service location for service.
- Page 46 Caution must be exercised, since improper servicing may cause unsafe operation. ContactUs ge.com If you are not satisfied with the service you receive fi'om GE, contact us on our Website with all the details including your phone wlJte to: General Manage_;...