Table of Contents
Advertisement
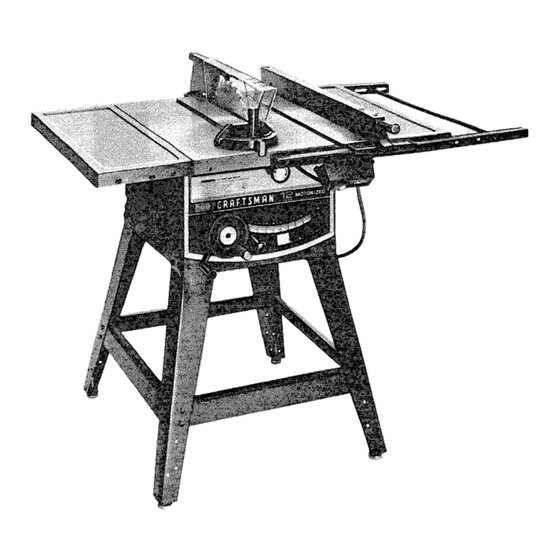
Serial
Number
Model and serial
number may be found
at the rear
of the base.
You should record both
model and serial number
in a safe place for
future use.
CAUTION:
Read
GENERAL
and
ADDITIONAL
SAFETY
iNSTRUCTiONS
carefully
12-iNCH
MO TORIZED
TABLE SAW
• assembly
e operating
• repair
parts
Sold by SEARS,
ROEBUCK
AND
CO.,
Chicago,
IL. 60684
U.S.A.
Part No. 62732
Advertisement
Table of Contents

Related Manuals for Craftsman 113.24250


Summary of Contents for Craftsman 113.24250
- Page 1 Serial Number Model and serial number may be found at the rear of the base. You should record both model and serial number in a safe place for future use. 12-iNCH MO TORIZED CAUTION: TABLE SAW Read GENERAL • assembly ADDITIONAL SAFETY e operating...
- Page 2 FULL ONE YEAR WARRANTY ON CRAFTSMAN TABLE SAWS If within one year from the date of purchase, this Craftsman Table Saw fails due to a defect in material workmanship, Searswill repair it, free of charge. Warranty service is available by simply contacting...
- Page 3 ADDITIONAL SAFETY iNSTRUCTiONS FOR TABLE SAWS contact rear revolving blade WARNING: YOUR SAFETY, thrown back at the operator at excessive speed. This OPERATE YOUR SAW UNTIL iT IS COMPLETELY can usually be avoided by keeping the guard ASSEMBLED AND INSTALLED ACCORDING TO THE spreader...
- Page 4 17. Always maintain control of the workpiece -- DO NOT B. Never use grinding wheels, abrasive cut-off wheels, "let go" the workpiece until the cutting tool has come friction wheels (metal slitting blades) wire wheels or to a stop. buffing wheelS. 18.
- Page 5 supply circuit) when supply circuit WARNING: PROPERLY GROUNDED THiS extremely tong. Always check connections, load POWER TOOL INCUR POTENTIAL HAZARD supply circuit when motor fails perform ELECTRICAL SHOCK, PARTICULARLY WHEN satisfactorily. Check wire sizes and lengths with USED DAMP LOCATIONS, PROXIMITY table in the next...
- Page 6 UNPACKING AND CHECKING CONTENTS CAUTION: Never use gasoline, naptha or similar highly TOOLS NEEDED volatile solvents. Apply a coat of automobile wax to the table. Hammer Medium Screwdriver Wipe all parts thoroughly with a clean, dry cloth..Small Screwdriver WARNING: YOUR SAFETY,...
- Page 7 ASSEMBLy STLFFENER ATTACHING LEGS SIDE STIFFENER 1. Turn the saw upside down. NOTE: DO NOT LAY IT ON THE FLOOR AS THIS MAY SCRATCH THE TABLE SURFACE. PLACE IT ON STRIPS OF WOOD OR PARTS OF THE PACKING MATERIAL. From among the loose parts, find the following...
- Page 8 CHECKING BLADE SQUAR ENESS TOTABLE TILT CLAMP KNOB 1. Loosen ELEVATION LOCK by pulling KNOB forward. 2. Turn ELEVATION handwheel clockwise until blade is as high up as it will go. IMPORTANT: BLADE must be SQUARE (90 ° ) to TABLE, in order to ALIGN rip fence.
- Page 9 REAR FENCE GUIDE on table as a straightedge. If outer edge of extension is higher or lower than table surface; Slightly loosen nuts holding bracket to extension using 7/16 in. wrench. Move end of extension up or down until outer edge is even with table surface...
- Page 10 Hold rod with one hand and with a 7/16 in. wrench pliers start screwing on ONE of the nuts only ,A TURN OR TWO screw on other nut the same way. 10. Using TWO 7/16 in. wrenches or pliers tighten both of the nuts.
- Page 11 ALiGNiNG RIPFENCE fence should slide easily along bars and always remain in alignment (parallel to sawblade and miter gauge grooves). alignment is maintained a spring underneath fence which bears against the front guide bar. To move the fence, loosen the lock handle and grasp the fence with one hand at the front.
- Page 12 If the fence does not slide easily along the bars. the pressure of the spring can be R EDUCED. 1. Loosen the screws. SPRING Move spring slightly toward rear of fence . .. tighten screws. SCREWS _ HEX SCREWS The rip fence must be PARALLEL with the sawblade and Miter Gauge grooves ...
- Page 13 Slide support onto SUPPORT until PIN in rod fits into notch in support insert THUMB SCREW tighten Loosen setscrew in end of SPREADER using 5/32 in. setscrew wrench. Slide guard to right until end of rod is even with bar. Make sure blade is square to table and raised as high as...
- Page 14 KNOW YOUR SAW GETTING TO 6 RiP FENCE 11 EXACT-I-CUT 7 MITER GAUGE 8 BLADE GUARD ON-OFF SWITCH TILT LOCK K.NOB TABLE INSERT ELEVATION LOCK HANDLE TILT CRANK ELEVATION HANDWHEEL ON-OFF SWITCH CAUTION: Before turning switch on, make sure the blade guard is correctly installed and operating properly.
- Page 15 ELEVATION HANDWHEEL . . . elevates or lowers pieces, Be positive facing does interfere with blade. Turn clockwise to elevate counterclockwise proper operation of the sawblade guard. to lower. Select a suitable piece of smooth straight wood . - - drill two holes through it and attach it with...
- Page 16 REMOVING AND INSTALLING SAWBLADE / ,, WARNING: FOR YOUR OWN SAFETY, TURN SWITCH "'OFF" REMOVE PLUG FROM POWER SOURCE Q,UTLET BEFORE REMOVING INSTALLING SAWB LAD E. A. Remove insert. B. Place ARBOR wrench on flat surfaces of saw ARBOR ARBOR wrench on nut ...
- Page 17 BASIC SAW OPERATION WORK HELPERS Before cutting wood on your saw, study all of the "Basic Saw Operations". Notice that order make some cuts, necessary to use certain devices "Work Helpers" like Push Stick, the Push Block and the Auxiliary Fence/Work 4.5°...
- Page 18 CROSSCUTTING CROSSCUTTING is known as cutting wood across the grain, at 90 °, or square with both the edge and the flat side of the wood. This is done with miter gauge set at "0". The graduations on the miter gauge provide accuracy for average woodworking, some cases where extreme...
- Page 19 1. NEVER USE THERIPFENCE ASA LENGTH S TOP BECAUSE THE CUTOFF PIECECOULD BIND BETWEEN THEFENCE A ND THE BLADE CAUSING BLOCK A KICKBACK. 2. When making r epetitive cutsshorter than 6in.,clamp a block of wood 2 in, long tothetable toactas alength stop.Donotclamp directly to thebottom edge of the table...
- Page 20 USING THE RiP FENCE into the workpiece and HOLD it... the pawls RIPPING, BEVEL RIPPING, RESAWING must be SHARPENED. See "Maintenance" section. RABBETING are performed using the RIP FENCE together Have blade extend approximately 1/8 in. above top of with the AUXILIARY FENCE/WORK SUPPORT, PUSH...
- Page 21 When "WIDTH RIP" is 2 in. to 6 in. wide USE THE PUSH STICK to feed the work. When WIDTH RIP is NARROWER than 2 in., the push stick CANNOT be used because the guard will interfere... AUXILIARY FENCE/WORK SUPPORT PUSH BLOCK.
- Page 22 RESAWING RESAWING is known as ripping a piece of wood through thickness, attempt resaw BOWED WARPED material. NOTE: RESAW a piece wood wider than 3-9/16 in ..it will be necessary to remove blade guard and use the AUXILIARY FENCE/VVORK SUPPORT.
- Page 23 ADJUSTMENTS (Not previously noted) LOCK KNOB WARNING: FOR YOUR OWN SAFETY, TURN SWITCH "OFF" REMOVE PLUG FROM POWER SOURCE STOP OUTLET BEFORE MAKING ANY ADJUSTMENTS. MITER GAUGE NOTE: The holes for the stop pin and the graduations are manu-[actured to very close tolerances which provide accuracy for average woodworking, in some caseswhere...
- Page 24 If tooth does not touch Front and Rear... the mechanism underneath must adjusted make blade PARALLEL to GROOVE. NOTE: Make sure TI LT CLAMP KNOB is tightened. Lay the saw on its LEFTSIDE. Loosen He×. Head screw "A" between turn, using a 5/8 in, socket wrench...
- Page 25 If blade ISSQUARE totable; A. Check p ointer If POINTER DOES NOTpointto the "0""markonthe bevel scale; B. Loosen s crew and adjust pointer ... using m edium screwdriver. POI NTER If blade is NOT SQUARE to table.., the 90 ° stop screw must be ADJUSTED.
- Page 26 _ns,de the saw cabinet and the motor. Frequently clean your cutting tools with Craftsman and Pitch Remover. A coat of automobile-type wax applied to the table and the rip fence guide bar will help to keep surfaces dear_ and...
- Page 27 Lay the saw on its LEFT SIDE. GUARD Clean following parts with Craftsman Pitch Remover; BEVEL GEARS, ELEVATION WORM TEETH, TILT WORM TEETH. Lubricate these parts and other...
- Page 28 TROUBLE SHOOTING WARNING: FOR YOUR OWN SAFETY, TURN SWITCH "OFF" AND ALWAYS REMOVE PLUG FROM POWER SOURCE OUTLET BEFORE TROUBLESHOOTING. TROUBLE SHOOTING -- GENERAL TROUBLE PROBABLE CAUSE REMEDY Excessivevibration, balance. 1. D iscard Blade and use a different blade. 2. Failure to tighten 2.
- Page 29 TROUBLE SHOOTING -- MOTOR (Continued) TROUBLE PROBABLE CAUSE REMEDY 1. Low voltage will not Motor starts slowly 1. Request voltage check from the power company. trip relay. or fails to come up 2. Windings burned out 2. Have motor repaired or replaced. to full speed.
- Page 30 PARTS LIST FOR CRAFTSMAN 12-INCH MOTORIZED TABLE SAW MODEL NUMBER 113.24250 Figure...
- Page 31 PARTS LIST FOR CRAFTSMAN 12-INCH MOTORIZED TABLE MODEL NUMBER 113.24250 Always order by Part Number -- not by Key Number FIGURE 1 PARTS LIST Part Part Description Description STD 541025 *Nut, Hex 1/4-20 62710 Tape, Fence STD 551225 * Lockwasher, External 1/4...
- Page 32 PARTS LIST FUR CRAFTSMAN 12-INCH MU I UHI.,'_U I A_L_ _,vv MODEL NUMBER 113,24250 i'T\ '- ,, ,, '_ I _.. j 72...
- Page 33 PARTS LIST FOR CRAFTSMAN 12-INCH MOTORIZED TABLE SAW MODEL NUMBER 113.24250 FIGURE 2 PARTS LIST Key I Part Part Description Description 62459 STD 522506 *Screw, Hex, Hd. 1/4-20 x 5/8" Motor Assembly (See Fig. 4) 30494 Collar 62332 Knob Assembly, Pull...
- Page 34 PARTS LIST FOR CRAFTSMAN "12-1NCH MOTORIZED TABLE SAW MODEL NUMBER 113.24250 FIGURE 3 - 62705 FENCE ASSEMBLY Part Description Fence Assembly, R ip 62705 62693 Plug, Button 62692 Knob (Includes Key No. 1) STD 551031 *Washer, 21/64 x 1/2 × 1/32...
- Page 35 PARTS L IST FOR CRAFrSMAN 12-INCH MOTORIZED TABLE S AW MODEL NUMBER 113.24250 TO SWITCH O ANY ATTEMPT TO REPAIR THIS MOTOR MAY CREATE A HAZARD UNLESS REPAIR IS DONE BY QUALI FI ED SERVICE TECHNICIAN. REPAIR SERVICE IS AVAILABLE AT YOUR NEAREST SEARS STORE.
- Page 36 PARTS LIST FOR CRAFTSMAN 12-INCH MOTORIZED TABLE SAW MODEL NUMBER 113.24250 12 !!,- t_t < _ _.e..,.--- SEE WILING DIAGRAM, PAGE 5 FIGURE 5 -- SWITCH ASSEMBLY Part Description 62466 Bracket, Housing STD 601103 Screw, Type 23, 10-32 x 3/8", Pan Hd.
- Page 37 PARTS LIST FOR CRAFTSMAN 12-INCH MOTORIZED TABLE SAW MODEL NUMBER 113.24250 FIGURE 6 -- 62704 MITER GAUGE ASSEMBLY Description 62704 +Gauge Assembly, Miter 62693 Plug, Button 62692 Knob, Miter Gauge (Includes Key No. 1) STD 551031 *Washer, Plain, 21/64 x 1 x 1/16"...
- Page 38 PARTS LIST FOR CRAFTSMAN 12-INCH MOTORIZED TABLE SAW MODEL NUMBER 113.24250 FIGURE 7 - 62594 GUARD ASSEMBLY Part Description 62594 Guard Assembly, Saw 60297 Nut, Push 62391 Pin 1/4 x 1-1/2" 62395 Support, Guard 62389 Guard, Saw 62390 Pin, 1/4 x 1-3/4...
- Page 39 PARTS LiST FOR CRAFTSMAN 12-INCH MOTORIZED TABLE SAW MODE L NUMBER 113.24250 FIGURE 8 - 62589 TABLE EXTENSION Key - Part Description 62589 Extension Assembly, Complete 60323 Screw, Serrated Truss Hd., 1/4-20 x 1" 62590 Extension 62549 Bracket, Corner Support No. 2 62548 Bracket, Corner Support No.
- Page 40 12 INCH MOTORIZED TAB LE SAW SERVICE Now that you have purchased your 12-inch table saw, should a need ever exist for repair parts or service, simply contact Sears Service Center and most Sears, Roebuck and Co. stori_. Be sure to provide all pertinent facts when you call or visit.