Table of Contents
Advertisement
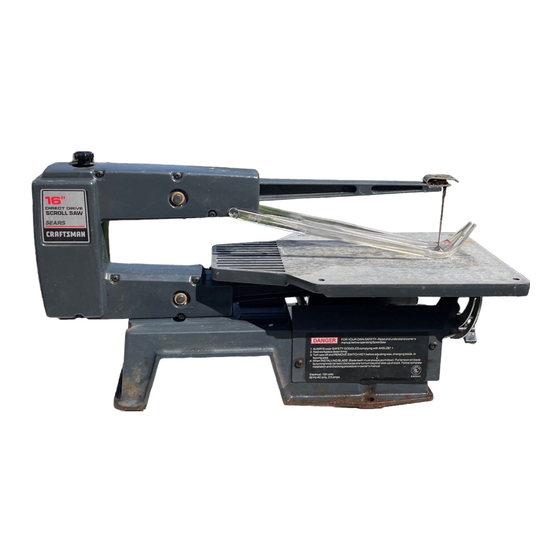
Save This Manual For
Future Reference
MODEL NO.
113.23611t
Serial
Number
Mod_l and seria_numbermay be found
attached to the undersicle of the
worktable.
You
shoutd
record
both
model
and
serial number
in a safe place for future
use.
FOR YOUR
SAFETY:
Read ALL
INSTRUCTIONS
carefully.
i
,,: ............... i
.JJ
/
16 iNCH SCROLL SAW
oassembly
o operating
° repair parts
Sold by SEARS,
ROEBUCK
AND CO., Chicago_ _L. 60684 U.S.A.
Part No. SP5496
_:'r ti!d _!_,,,__ _,_
Advertisement
Table of Contents

Related Manuals for Craftsman 113.23611t


Summary of Contents for Craftsman 113.23611t
- Page 1 Save This Manual For Future Reference MODEL NO. 113.23611t Serial Number Mod_l and seria_numbermay be found attached to the undersicle of the worktable. shoutd record both model serial number in a safe place for future use. 16 iNCH SCROLL SAW FOR YOUR oassembly SAFETY:...
-
Page 2: Warranty Information
THIS WARRANTY APPLIES ONLY WHILE THiS PRODUCT IS USED IN THE UNITED STATES. This warranty gives you specific legal rights, and you may also have other rights which vary from state to state. SEARS, ROEBUCK AND CO., D1817WA Hoffman Estates. IL 60195 safety instructions for scroin saw - Put the saw on a firm level surface where there is Safety is a combination of common sense, staying alert... - Page 3 CHECK DAMAGED PARTS. Check for: Use this scroll saw to cut only wood, wood like products, plastics and non-ferrous metals. . Alignment of moving parts, Binding of moving paris, CAUTION: This saw is NOT designed for cutting ferrous metals like iron or steel When cutting •...
- Page 4 Before starting your cut, watch the saw while it runs. !t it: makes an unfamiliar noise or vibrates a lot, stop immediately. Turn the saw off. Unplug the saw. Do not restart until finding and correcting the problem. KEEP CHILDREN AWAY. Keep all visitors a safe Properly s upport r ound material distance from the saw, Make sure bystanders are clear...
-
Page 5: Motor Specs And Electrical Information
motor specifications and electricam requirements This machine isequipped with, a 1725 RPM motor. It is terminals of plugs when installing or removing wired for operation on 120 volts, 60 Hz, alternating t WARNING: Do not permit fingers to touch the I current. -
Page 6: Table Of Contents
g ossary of terms for woodwork=rig t. Kerr - the slot cut by the blade° 5. Blade Tooth Set - the distance that the edge of the 2. Leading Edge- the edge of the workpiece which is sawblade tooth is bent (or set) outward from the s de pushed into the blade first, of the blade. -
Page 7: Assembly
DO NOT LIFT SAW BY THIS ARM LIFT HERE LIFT HERE assembly WARNING: For your own safety, never connect plug to power source outlet until all assembly steps are comptete, and you have read and un- derstand the safety and operational instructions. 1. -
Page 8: Setting Table For Hodzontal Or Bevel Cutting
assembly SETTING THE TABLE HORIZONTAL OR BEVEL CUTTING 1, The scroll saw work table can be tired to the left for bevel curtingup to 450from the 0 oor horizontal cutting position, 2. A bevel scale is provided under the work table as a convenient reference for setting the approximate table angle for bevel cutting, When greater precision is required, make practice... - Page 9 2. Use a small square to set the table at 90 ° to the blade. If there istoo much space between the square and the blade, the table must be adjusted. 3. When the space between the square and the blade is minimal, tighten the bevel lock knob.
-
Page 10: Removing And Installing Blades
removing and installing blades TENSION KNOB ing, always turn switch OFF_ and remove switch WARNING: TO avoid Injury from accidental start- I key before removing or replacing the blade. 1. Loosen tension on blade by turning tension knob counterclockwise (F'_) about two full turns. - Page 11 4. Locate the blade guard and carefully install it onto the saw as shown. Lightly spread apart the blade guard so pins will go into holes in frame. 5. In order to cut, and to avoid uncontroUable lifting of the workpiece, the teeth of the blades used on the scroll saw should always point downward when installed on the scroll saw.
-
Page 12: Mounting The Scroll Saw
mount ng the scroll =saw to a bench 1. When mountingthis sawto aworkbench a solidwood bench ispreferred over a plywood benchwhere noise and vibration will be more noticeable. SCROLL SAW BASE 2. Hardware to mount this saw to a workbench is suppliedwith the saw. -
Page 13: Getting To Know Your Scroll Saw
gettUng to know your scroll saw TENSION KNOB 2, BLADE HOLDER I. BLADE GUARD 4. AUXILIARY HOLES 5,ON-OFF SWITCH 8, BEVEL SCALE 6. TABLE LOCK KNOB BEVEL POINTER PREVENT UNAUTHORIZED AND POSSIBLY HAZ- 1. TENSION KNOB... Tightening the knob (clockwise) ARDOUS USE BY CHILDREN AND OTHERS. - Page 14 getting to know your scroll 2_ To turn machine"ON", place finger under switch lever and pull end of switch out. 3. TO turn machine "OFF", PUSH lever in. Never leave the machine unattended until It has come to a complete stop. PUSH PULL 4.
-
Page 15: Operation
operatUon of your scrolJ saw blades' tendency to follow the wood grain as you are PLEASE, read and understand _he following items about your scroll saw before attempting to use the saw. cutting. 9. This scroft saw is intended to cut wood or wood 1. - Page 16 Make surethere are no nails or foreign objects inthe part of the workpiece to be cut. PLAN AHEAD TO PROTECT YOUR EYES, HANDS, FACE, EARS Use extra caution with large, very stoa!! or awkward workp_eces: KNOW YOUR SAW. Read and understand the owner's •...
-
Page 17: Making Interior Cuts
KEEPCHILDREN AWAY. Keepall visitors a safe Turn switch "OFF'. distance f romthe saw.Make surebystanders areclear Remove switch key. ofthesawandworkpiece. ° Unplug saw. DON'T FORCE TOOL.Itwilldothejobbetter a ndsafer • Wait for all moving parts to stop. at itsdesigned rate. Feed theworkpiece i ntothesaw blade only fast enough to let it cut without bogging down o With a fiat blade screwdriver, turn the motor by ha_,_d... -
Page 18: Maintenance
basic saw operations MOUNTING ANAUXiLiARY WORK TABLE [WARNING: To avo_ tool tipping or support ]failure, auxiliary work surface should not ex- 1_ Fourholesareprovidedinthework:table i easily:attach an auxiliary work surface to the saw if soyoucan Xl/4", ; your needs require. At least a 1/4 hole w_ll be needed in the auxiliary 21 Mounting an auxiiia_ table can allow you to bu lda surface to insert blades. -
Page 19: Wiring Diagram
SWITCH wiring diagram BLACK WARNING: To avoid fire or shock, use only recommended service parts and reassemble ex- actly as origlna!ly assembled. recommends the following accessories Item Sears Number Sears may recommend other accessories not Iisted in Leg Set ............9-22244 manual. -
Page 20: Repair Parts
repair parts .,10 4O 51 Figure 1... - Page 21 PARTS LIST FOR CRAFTSMAN 16-iNCH MOTORBZED SCROLL MODEL NO. 113.236111 FnGURE 1 u ....i l_ev No. I Description Description I No. _4J4,--...--4., ..1 I 816203-1 46-58624-3 + Housing, (Includes Key #6) 2 ! 66043 820379-4 Bumper Screw, Hex Soc. Cap 3 i 820378 M5 x &8-25...
- Page 22 !6 iNCH SCROLL SAW' SERVnCE Now th at you have purchased you r Scroll Saw, should a need ever exist for repair parts or service, simply contact any Sears Service Center and most Sears, Roebuck and Co. stores. Be sure to provide pertinent facts when you call or visit.