Table of Contents
Advertisement
i
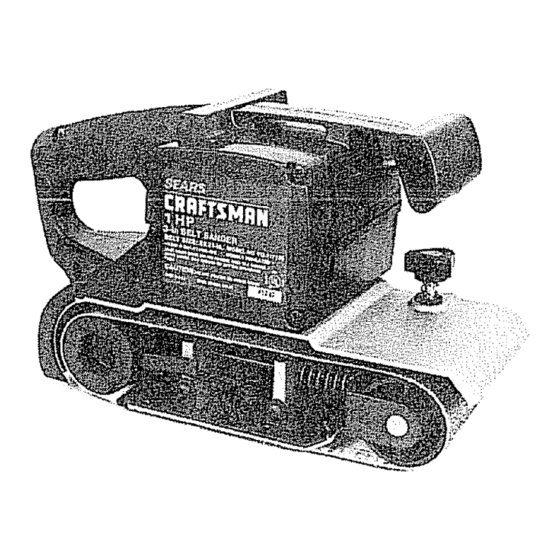
SEAl, S
OWNERS
MANUAl.
MODEL
NO.
315.! 1713!
CAUTION:
Read Rules for
Safe Operation
and Instructions
Carefully
SAVE THIS
MANUAL
FOR
FUTURE REFERENCE
£
3
DOUBLE
SANDER
INSULATED
Warranty
Introduction
Operation
Maintenance
Repair Parts
Designed exclusively
for and sold only by
SEARS, ROEBUCK AND CO,, Sears Tower, Chicago, lL 60684
6_2_47
525
PRINTED
IN U S A
1 _J0
Advertisement
Table of Contents

Related Manuals for Craftsman 315.117131


Summary of Contents for Craftsman 315.117131
- Page 1 SEAl, S OWNERS MANUAl. MODEL 315.! 1713! £ CAUTION: Read Rules for Safe Operation and Instructions SANDER Carefully DOUBLE INSULATED Warranty Introduction SAVE THIS MANUAL Operation Maintenance FUTURE REFERENCE Repair Parts Designed exclusively for and sold only by SEARS, ROEBUCK AND CO,, Sears Tower, Chicago, lL 60684 6_2_47 PRINTED IN U S A...
- Page 2 FULL ONE YEAR WARRANTY ON CRAFTSMAN BELTSANDER If this Craftsman Belt Sander faits to give complete satisfaction wtthin one year from the date of pur- chase RETURN1TTO THE NEARESTSEARS SERVICECENTER/DEPARTMENT THROUGHOUTTHE UNITED STATESand Sears will free of repair charge tf this bett sander is used for commercial or rental purposes this...
- Page 3 RULESFORSAFEOPERATION (Continued) W EAR PROPER APPAREL, NO loose clothing or jewelry to get caught in moving parts.. Rubber gloves and non-skid footwear are recommended when working outdoors, Also, wear protective hair covering to contain long hair. 11. USE SAFETY GLASSES with all tools Also face or dust mask if sanding opera- tion is dusty 12 DON'T ABUSE CORD.
- Page 4 OPERATION REAR TRACKING HAN DLE'-..._,.. SCREW Make sure power supply is 110-120 volts, 60 HZ, AC only. HANDLE Before attempting to use your Sander, familiarize yourself with all operating features (See Figure and safety requirements. _,,IG Fig PULLEY BELT LOCK "ON" SWITCH BUTTON The switch...
- Page 5 OPERATION Selecting the correct size and type sanding beit is an important step in achieving a high quality sanded LIFT TENSION RELEASE LEVER TO REMOVE finish. Standard 3 inch x 21 inch sanding belts made SANDING BELT ' of alumt'num oxide, silicone carbide, and other syn- thetic abrasives are best for power sanding,...
- Page 6 OPERATgON ALWAYS WEAR SAFETY GOGGLES OR SAFETY ..'..SAN DING GLASSES WiTH SIDE SHIELDS WHEN OPERATING BELT YOUR SANDER adust sanding belt, connect Sander to power supply Place Sander in upside down position as shown in Figure 7, NOTE: This position is for adjustments...
- Page 7 MAINTENANCE TIMING BELT REPLACEMENT TIMING BELT SMALL PULLEY DISCONNECT SANDER FROM POWER SUPPLY BEFORE SERVICING WHEN REPLACING TIMING BELT. REPLACE, MENT BELT NUMBER 989368.,000 ONLY See Key Number 5 on Parts Mst, Page 11 Remove sanding belt from sander See installing adjusting sanding belt,...
- Page 8 CORD REPLACEMENT DISCONNECT THE SANDER FROM POWER SUPP- BEND LY WHILE REPLACING PARTS OR MAKING JUSTMENTS. Remove handle cover and screws as described on Page 7, Note the locations of all wiring in the handle end how each connection is made to the cord, Connections and wid.ng position must be...
- Page 9 THE FOLLOWING RECOMMENDED ACCESSORIES ARE CURRENT AND ..WERE AVAILABLE AT THE TIME THIS MANUAL WAS PRINTED. CORD LOCK Cat, No,.-9 2595 CLOTH BACKED SANDING BELTS POLYESTER BACKED SANDING BELTS CARRYING CASE Cat, No, 9 22304-X..Fine Cat. No. _9 23201,X, Fine Cat.
- Page 10 CRAFTSMAN 3 INCH BELT SANDER -- MODEL NUMBER 315.117131-- SEE NOTE 'W" PAGE 11 For Parts List -- See Page 11 Page 10...
- Page 11 AN 3 INCH BELT SANDER -- MODEL NUMBER 315.117131 mention the Model Number in all correspondence regarding your CRAFTSMAN SANDER I The Model Number wil_ be found on a plate attached to the End Cap ot your Sander. Always when...
- Page 12 3 raNCH OWNERS ELT SANDER MANUAL DOUBLE iNSULATED SERVICE Now that have purchased your Belt Sander, should a need ever exist for repair parts or service, simply contact any Sears Service Center and most Sears, Roebuck and Co. stores Be sure to provide all pertinent facts when you caII or visiL MODEL NO.