Table of Contents
Advertisement
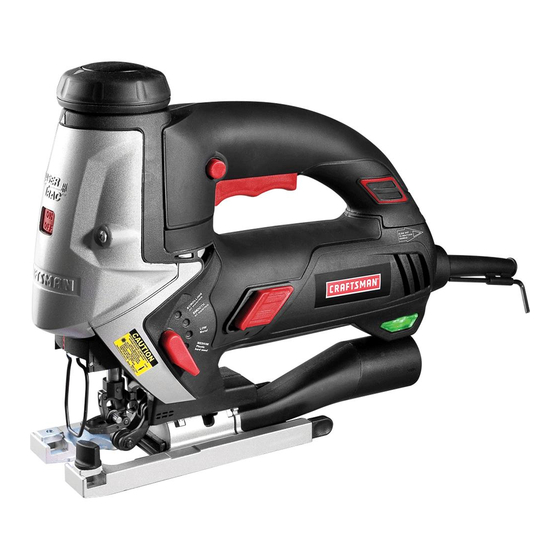
6 Amp 2-in-1 Jig Saw
Model No. 320.28223
WARNING:
To reduce
the risk of
injury, the user must read and
understand
the Operator's
manual
before
using this product.
• WARRANTY
• SAFETY
• UNPACKING
• DESCRiPTiON
• OPERATION
• MAINTENANCE
• TROUBLESHOOTING
• ESPANOL
Sears Brands Management Corporation, Hoffman Estates, IL 60179 U.S.A.
www,cfaftsman,com
Advertisement
Table of Contents

Related Manuals for Craftsman 320.28223


Summary of Contents for Craftsman 320.28223
- Page 1 6 Amp 2-in-1 Jig Saw Model No. 320.28223 • WARRANTY • SAFETY • UNPACKING WARNING: To reduce the risk of • DESCRiPTiON injury, the user must read and • OPERATION understand the Operator's manual • MAINTENANCE before using this product. •...
- Page 2 For warranty coverage details to obtain free replacement, visit the web site: www.craftsman.com This warranty does not cover blades and bulbs, which are expendable parts that can wear out from normal use within the warranty period.
- Page 3 We recommend a Wide Vision Safety Mask for use over eyeglasses or standard safety glasses with side shields, available at Sears Stores or other Craftsman outlets. Always use eye protection that is marked to comply with ANSI Z87.1 28223...
- Page 4 Some of these following symbols may be used on this tool. Please study them and learn their meaning. Proper interpretation of these symbols will allow you to operate the tool better and safer. SYMBOL NAME DESIG NATION/EXPLANATION Volts Voltage Amperes Current Hertz Frequency...
- Page 5 WARNING: Be sure to read and understand all instructions in this manual before using the jig saw. Failure to follow all instructions may result in hazardous radiation exposure, electric shock, fire, and/or serious personal injury. WARNING: Do not attempt to operate this tool until you have thoroughly read all instructions, safety rules, and warnings.
- Page 6 • Be sure the laser beam is aimed at a workpiece (such as wood or rough coated surfaces) that does not have a reflective surface. Do not use on surfaces such as sheet steel that have a shiny, reflective surface. The shiny surface could reflect the beam back at the operator.
- Page 7 • Do not expose power tools to rain or wet conditions. Water entering a power tool will increase the risk of electric shock. Do not abuse the cord. Never use the cord for carrying, pulling or unplugging the power tool Keep cord away from heat, oil, sharp edges or moving parts.
- Page 8 Disconnect the plug from the power source and/or the battery pack from the power tool before marking any adjustments, changing accessories, or storing power tools. Such preventive safety measures reduce the risk of starting the power tool accidentally. Store idle power tools out of the reach of children and do not allow persons unfamiliar...
- Page 9 SPECiFiC SAFETY RULES FOR JIG SAW DANGER: Keep hands away from cutting area and blade. Keep your second hand on the auxiliary handle or motor housing. If both hands are holding the saw, the blade cannot cut them. CAUTION: Blades coast after saw is switched off.
- Page 10 ADDITIONAL RULES FOR SAFE OPERATION WARNING: Be sure to read and understand all instructions. Failure to follow all instructions listed below may result in electric shock, fire and/or serious personal injury. • Know your power tool. Read operator's manual carefully. Learn the applications, as well as the specific...
- Page 11 If any of the items mentioned is missing, (refer to "PARTS LIST" illustration), return the jig saw to the Craftsman outlet from which it was purchased to have it replaced. WARNING: If any parts are broken or missing, do not attempt to assemble the jig saw, plug in the power cord, or operate the saw until the broken or missing parts are replaced.
- Page 12 KNOW YOUR JIG SAW (Fig. 2) Fig. 1 On/Off Trigger switch Scrolling control knob Power Lock-on button Top handle Release button LaserTrac button Power cord Tool-less "Live tool blade clamp indicator" light Push-on switch Blade storage Base plate Bevel Angle scale Scrolling/Orbit control lever...
- Page 13 Before attempting to use this jig saw, familiarize yourself with all of its operating features and safety requirements. This Jig Saw has the following features: • 2-in-1 design: use it with the top handle or remove the handle and use it as a barrel-grip saw.
- Page 14 PRODUCT SPECIFICATIONS Input 6 Amps Laser Diode Type Red Laser Diode 650 nm Laser Class Class Ilia, power output<2.5 No load Speed 800-3000 Rating 120 volts, 60Hz AC Cutting angle range 0-45 ° left and right Cutting depth in wood 3-3/8"...
- Page 15 ATTACHING TOP HANDLE ONTO JIG SAW (Fig. 4) Unplug the saw and put the Fig. 4 push-on switch on the saw body in the off position. Hold the handle so that the curve in the front of the handle corresponds with the curved surface of the saw body and the lower part of...
- Page 16 ADJUSTING THE CUTTING SPEED WITH THE VARIABLE SPEED DiAL (FIG. 6) The variable speed feature of this jig saw allows you to match the proper cutting speed to the material being cut, enhancing the overall performance of your saw and helping to save the blades from undue wear. The variable speed dial is used to adjust the speed of I Fig.
-
Page 17: Tool-Less Blade Installation
TOOL=LESS BLADE iNSTALLATiON (Fig. 7a, 7b) The tool-less blade change Fig. 7a control allows you to remove and replace the saw blade quickly and easily without use of additional tools. Unplug the saw. Turn the saw upside down so you can access the blade clamp. - Page 18 _IL CAUTION: The blade guide Fig. 8a Blade guide rollers support the rollers support the blade when blade when cutting in all cutting cutting. The blade guide rollers modes except scrolling must rest against the back of the back edge of the blade. The ......
- Page 19 USING THE LASER TRAC Fig. 9a LIGHT FEATURE (Fig. 9a) Your jig saw has a built-in laser light. To activate the laser, plug in your jig saw. WARNING: Laser light. Laser radiation. Avoid direct eye exposure. Do not stare into beam.
- Page 20 SCROLMNG/ORBITAL CONTROL LEVER This jig saw is equipped with an orbital control lever that enables you to select the type of orbital action best suited for your purpose and workpiece material. Shift the lever to one of the positions described below prior to starting your cut.
- Page 21 CUTTING WiTH ORBITAL ACTION The foot must be all the way in the forward position: Unplug the saw. Turn the tool upside down. Use the hex key to loosen the hex screw securing the saw base. Move the base of the saw forward. Re-tighten the hex screws.
- Page 22 IMPORTANT: When you are manually scroll cutting always hold the saw handle in one hand and rotate the scrolling knob with your other hand, while applying pressure to the front of the saw so it does not jump out of the workpiece. NOTE: When scroll cutting intricate designs, we recommend that you use a scroll cutting blade.
- Page 23 ON BOARD BLADE STORAGE (Fig. 14} A convenient feature on the saw is the blade storage compartment. The blade storage compartment is located on either side of the shoe. To open: pull the blade storage cover out. To close: push the cover in with your thumb or finger.
- Page 24 CUTTING METAL When cutting metal, always clamp down the metal workpiece to a stable surface and use a metal cutting blade. Be extremely careful to move the saw very slowly as you cut. Use the low speeds (position 1,2 or 3 on the variable speed dial). Also use the LOW position on the orbital control lever.
- Page 25 WARNING: Do not let familiarity with your saw make you careless. Remember that a careless fraction of a second is sufficient to cause severe injury. WARNING: Always wear safety goggles or safety glasses when operating this tool. PLUNGE CUTTING (Fig. 16) Plunge cutting is useful and time-saving...
- Page 26 TO ADJUST BASE PLATE FOR BEVEL CUTTING (Figs. 18 19) AL_ CAUTION: Always remove the blade before adjusting the cutting angle. ,_k CAUTION: To prevent damage to the tool when angle or bevel cutting, the scroll mechanism must be locked in place with the cutting edge of the blade facing the front of the tool.
- Page 27 USING AN EDGE GUIDE (sold separately) (Fig. 20) An edge guide (sold separately) Fig. 20 is used for straight cutting: WARNING: Always unplug the saw from the power source before making any adjustment or attaching accessories. Unplug the saw. Insert the bar of the edge guide through the slots in the base of the jig saw (Fig.19).
- Page 28 NOTE: To make a hole, cut from inside the circle; to make wheels or discs, cut from the outside. GENERAL MAINTENANCE WARNING: When servicing, use only identical Craftsman replacement parts. Use of any other parts may create a hazard or cause product damage. To ensure safety and reliability, all repairs should...
- Page 29 JIG SAW MAINTENANCE Periodic maintenance of your jig saw allows for long life and trouble-free operation. The saw can generate considerable quantities of cutting residue. A cleaning and maintenance schedule should be maintained. As a common-sense and preventive maintenance practice, follow these recommended steps:...
- Page 30 The following recommended accessories are currently available at Sears stores and other selected Craftsman outlets.. WARNING: The use of attachments or accessories that are not recommended might be dangerous and could result in serious injury. EXTENSION CORDS: The use of any extension cord will cause some loss of power.
- Page 31 PROBLEM CAUSE SOLUTION Laser line is not Laser is not turned on, or Make sure that the tool projected, the tool is not plugged is plugged in, and press Laser ON/OFF button to turn laser on. Laser line is hard to Working condition is too...
- Page 32 6A Jig Saw MODEL NUMBER 320.28223 The Model Number will be found on the Nameplate. Always mention the Model Number when ordering parts for this tool. 28223 ManuaLRevised_10 0310 Page 32...
- Page 33 6A Jig Saw MODEL NUMBER 320.28223 The Model Number will be found on the Nameplate. Always mention the Model Number when ordering parts for this tool. 3320601000 Left Housing Assembly 3420338000 Left Alum Cover 3125316000 Push Button 3121037000 Cord Guard 4810002000 Power Cord &...
- Page 34 3320103000 Knob Set 3320104000 _ Knob Assembly 3551339000 Bush 3420351000 Alum Cover 5610022000 i Tapping Screw 3120477000 Bearing Holder 3520055000 i Aligning Bearing 5610106000 i Tapping Screw 3420946000 Drive Bracket 3520057000 Lower Sliding Bearing 3420129000 Sliding Bearing Support 5610021000 i Tapping Screw 5650001000 Plain Washer...
- Page 35 3700226000 Washer 3700184000 Washer D 2820588000 Bearing Support Assembly 5700045000 Steel Ball 3120016000 Spring Tube 5620064000 Screw 3700227000 Washer 3550201000 Located 2822593000 Roller Support 3400175000 Knob 5610079000 Thread Forming Screw 3123859000 Switch Actuator 3123858000 Lever 3660051000 Spring 3123855000 Link 2750897000 Rotor 3700164000 Square Nut...
- Page 36 3124066000 Blade Storage 3421084000 Base Plate 3124065000 Base Plate Cover 3700236000 Clamp Washer 5620013000 Hexagon Socket Screw 3320602000 Right Housing Assembly 2822242000 Blowing Knob 3420339000 L Right Alum Cover 3650099000 Wire Guard 3123507000 i Transparent 4360001000 2780030000 Laser Set 4890523000 PCB Assembly 5700011000 Ball Bearing...
- Page 37 28223 ManuaLRevised_lO 0310 Page 37...
- Page 38 28223 ManuaLRevised_lO 0310 Page 38...
- Page 39 28223 ManuaLRevised_lO 0310 Page 39...
- Page 40 Your Home For troubleshooting, product manuals and home solutions advice: manage home www.managemyhome.com For repair - in your home - of all major brand appliances, lawn and garden equipment, or heating and cooling systems, no matter who made it, no matter who sold it! For the replacement parts, accessories owner's...