Table of Contents
Advertisement
Advertisement
Table of Contents

Related Manuals for Diamondback APEX R8


Summary of Contents for Diamondback APEX R8
-
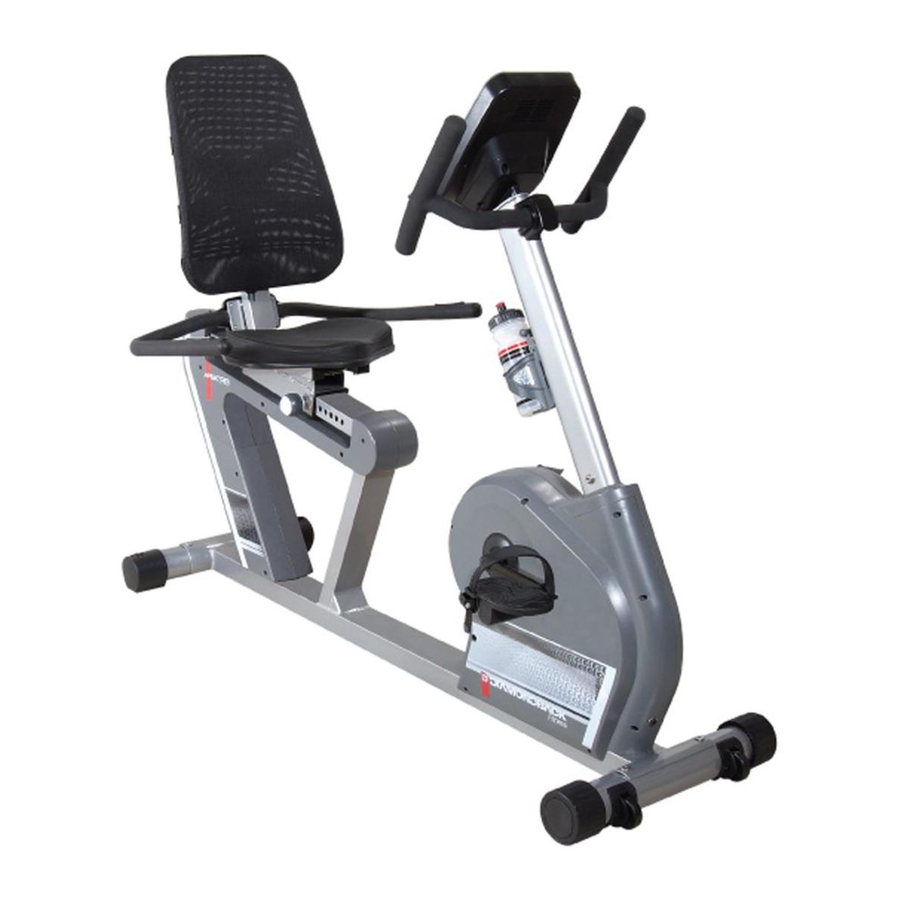
Page 2: Purchaser's Reference Information
PURCHASER'S REFERENCE iNFORMATiON Product Name Diamondback Fitness Apex R8 Upright Serial Number: Record the serial number here. Serial Number Location The serial number will be located on the right side of the lower main frame, just forward of the rear stabilizer (see figure to the right). - Page 3 Diamondback Fitness Apex Owner's Manual Release v.2 (11/2009)
-
Page 4: Table Of Contents
TABLE OF CONTENTS PURCHASER'S REFERENCE INFORMATION ..............Serial Number: ..................INTRODUCTION ..................APEX R8 ASSEMBLY ..................Assembly Instructions ................. SAFETY INSTRUCTIONS & WARNINGS ................ WORKOUT GUIDELINES ................... Good Health is an Exercise in Common Sense ............. Body Mass Index ..................Heart Rate is an Important Key to Your Exercise ............ -
Page 5: Introduction
This trend still continues today, twenty years later, as the strong Diamondback brand resonates with both the boomers grew up with the bicycles, as well as the younger generations riding them today. -
Page 6: Apex R8 Assembly
Part Description A ..Front Stabilizer [Quantity11 APEX R8 ASSEMBLY B ..RearStabilizer [11 C ..HexBolt- M8 x 1.25 x 16 mm (6 mm socket) [4] D ..LevelingFoot/ EndCap [2] E1 ..Pedal- Left [1] E2 ..Pedal- Right [1] F1 .. -
Page 7: Assembly Instructions
Assembly instructions Apex R8 Assembly Hardware Kit DP #22-10-1040 ABen Wrench Allen Bolt Bushing MT,io__,.,,.m m7_,00120_40.,,. m Flat Washer Lock Washer H_ndleb_r Clamp io7o.,r._4 ioTo m .,_2_ Pedal Wrench / Screwdriver (1 } Crank Bolt & Nut Wrench / Screwdriver _"_"_"_"_"_"_"_"_"_"_"_"_"_"_"_"_"_ Notes: Remove the hex fixing bolts (B) from the front stabilizer... - Page 8 Remove the four (4) hex fixing bolts (F1) and flat washers (F2) from the seat slide assembly. Align holes in the seat back (G) mounting plate with the holes in the seat slide and ° D reinstall the four (4) sets of F1 & F2. Align the fixing holes in the underside of seat base (L) with...
- Page 9 FINAL SETUP & INSTALLATION Move into Position. Move the unit into final position with the help of the front transport rollers. Carefully lift and support the rear end of the unit until both transport wheels touch the ground. Slowly roll into position unit into place.
-
Page 10: Safety Instructions & Warnings
SAFETY iNSTRUCTiONS & WARNINGS Every piece of Diamondback Fitness equipment is built for maximum safety and meets or exceeds all This Class C product is rated applicable domestic and international standards. However, certain precautions need to be taken when home... - Page 11 Use thehandlebars when getting onandofftheApexR8unit. Never o perate t heunitif it isdamaged or broken. Contact yourlocal a uthorized Diamondback Fitness D ealer forservice. Please u nplug theunitafterexercising. Donotremove t hecovers orothercomponents. Only Authorized Diamondback Fitness D ealers orAuthorized Technicians should perform service o ntheunit.
-
Page 12: Workout Guidelines
WORKOUT GUiDELiNES Good Health is an Exercise in Common Sense In the study titled, "The Surgeon General's Call To Action To Prevent and Decrease Overweight and Obesity," the surgeon general indicates that 61% of American adults are either overweight or obese. The study indicates that being overweight increases the risk of health problems, such as heart disease, certain types of cancer, as well as Type-2 diabetes among other afflictions. -
Page 13: Heart Rate Is An Important Key To Your Exercise
It is however, difficult to count your own pulse during exercise, mainly because one cannot count fast enough to accurately track the rate. The Diamondback Fitness Apex R8 is equipped with two systems for monitoring your heart rate. -
Page 14: Your Estimated Maximum Heart Rate & Target Training Zone
Ingeneral, awireless h eart r atechest s trapisa more accurate m ethod ofdetecting o ne's heart r ate.Theuserisnotrequired t o gripthetouchheart r atesensors a ndoffers more flexibility astheunitwillcontinuously display t heuser's heart r atenomatter where thehands areplaced. Your Estimated Maximum Heart Rate &... -
Page 15: Workout Quality And Quantity
Physical activity should be initiated slowly and the intensity should be increased gradually. You should select activities that you enjoy and can fit into your daily life. Having Diamondback Fitness equipment at home offers you the opportunity to work out without going to the gym. - Page 16 • Afteranaerobic w orkout ofroughly 2 0-30 minutes, spend 10minutes g radually reducing y ourheart r atewitha lower resistance level. NOTE: Start slow, with intensity low until you build up endurance and strength. Always consult your physician before beginning any exercise program.
-
Page 17: Console Layout
CONSOLE LAYOUT NOTE: It is advised that new users read this entire section prior to beginning their first workout session. Time Tracks the time of the current workout program. Heart Symbol Indicates that a heart rate is detected by either the touch heart rate sensors, or the wireless heart rate receiver. - Page 18 Anacronym forRevolutions-Per-Minute, thenumber ofcomplete r evolutions a single pedal m akes e very 60seconds. Thedisplay f orRPM willalternate w ithSPEED e very five(5)seconds. Load Displays the current resistance level applied to the workout. The maximum resistance load is 16. Distance The estimated total distance (in miles) traveled since the beginning of the workout.
-
Page 19: Buttons And Keys
Buttons and Keys RESET The reset button will return the programming to the Program Selection menu. Holding the RESET key down for two seconds restarts the system and enters the User Set-Up mode. START / QUICK START / STOP When powering up the unit, it is possible to bypass all data entry and enter the Quick Start program. -
Page 20: Quick Keys
Manual, Target Heart Rate, Classic Programs, User Programs, Watt Trainer Quick Keys The Apex R8 console feature Quick Keys which offer the user access the program selection menu without keying through the main menus. Fitness Test At the end of a program, pressing the FITNESS TEST button once will launch the Fitness Test program. -
Page 21: Programs
PROGRAMS - Get Ready to Work Out When the Apex R8 is plugged into an electrical outlet, an audible beep will sound, confirming power has reached the console. All segments of the display will light up for two seconds. "USER" will flash in the Alpha-Numeric Message Bar. -
Page 22: Program Select Mode
• Pressing t heENTER k eywilllaunch theProgram Select m ode. ,, Load / resistance may be adjusted via the UP or DOWN keys. To end the program, press START / QUICK START / STOP or simply stop pedaling. Program Select Mode The Program Select mode allows the user to choose their desired program and customize the data and information... -
Page 23: Target Heart Rate
Press START to launch the program. Target Heart Rate Diamondback Fitness's Target Heart Rate programs can also be described as heart rate contro/programs. Heart rate control programs automatically increase and decrease the load during the workout to stay within four (4) BPM (Beats-Per-Minute) the target. -
Page 24: Classic Programs
userprofile to provide a safeandeffective w orkout. The usermustselect a userprofile which contains t hecorrect agevalue. T o return to theUser S et-Up mode andupdate theageentry, p ress andholdtheRESET k eyfortwoseconds. S elect a userprofile 1through 4 andupdate anyinaccurate values. Seethesection "User S elect Mode and User Set-Up Mode"... -
Page 25: User Program
• Select a program andprofile bypressing E NTER, adjust t heworkout Time withtheUP / DOWN keys, and press the START/ QUICK START/STOP button to launch the program, Start the desired program immediately by pressing the START/QUICK START/STOP key. The workout timer will display 0.00 and count up indefinitely until the user ends the program. -
Page 26: Maintenance
Locating a small spray bottle and towel near the unit will help ensure that your Diamondback Fitness Apex R8 looks new for many years. NOTE: Perspiration... -
Page 27: Warranty Information
Registration. Registration is available online at www.diamondbackfitness.com. Alternatively, a warranty card may be mailed to Diamondback Fitness. (See page 30) Proof of Purchase Proof of purchase from a Diamondback Fitness Authorized Dealer will be required if the Warranty card is not registered... - Page 28 The expected lifetime of the Diamondback Fitness Apex R8 is five (5) years from the date of purchase although other factors can extend this period.
- Page 29 This warranty gives the original owner specific legal rights. Other additional rights may vary from state to state. © 2009 Diamondback Fitness 6004 South 190th Street, Suite 101 Kent Washington 98032 Ph: 1.800.776.7642 Fax: 1.800.776.2073...
-
Page 30: Warranty Registration Card
WARRANTY REGiSTRATiON CARD Please return the completed warranty registration card to Diamondback Fitness within 15 days of purchase. Failure to comply may void the warranty. You may register your product at www.diamondbackfitness.com. Name (last, first) Address s ,oq z, oo oDqNrq... - Page 31 FULL ONE (1) YEAR WARRANTY Your Home Diamondback Fitness stands behind every product we sell. If this For repair--in your home--of all major brand appliances, lawn Apex exercise bike fails due to a defect in material or workmanship and garden...