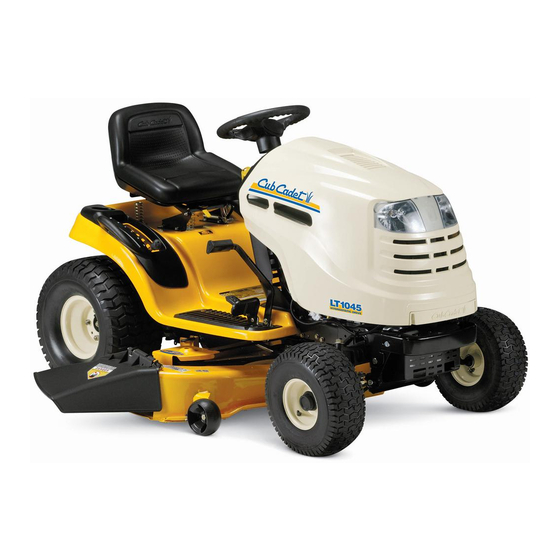
Cub Cadet LT1045 Operator's Manual
Hydrostatic lawn tractor
Hide thumbs
Also See for LT1045:
- Operator's manual (72 pages) ,
- Illustrated parts manual (53 pages) ,
- Parts manual (29 pages)
Table of Contents
Advertisement
Available languages
Available languages
Advertisement
Table of Contents

Related Manuals for Cub Cadet LT1045


Summary of Contents for Cub Cadet LT1045
- Page 1 Safe Operation Practices • Set-Up • Operation • Maintenance • Service • Troubleshooting • Warranty PERATOR S ANUAL Hydrostatic Lawn Tractor m LT1045 CUB CADET LLC, P.O. BOX 361131 CLEVELAND, OHiO 44136-0019 PrintedIn USA FormNo.769-03399A (November 2 1,2007)
- Page 2 Visit us on the web at www.cubcadetcom Call a Customer Support Representative at (800) 965-4CUB Locate your nearest Cub Cadet Dealer at (877) 282-8684 Write us at Cub Cadet LLC • P.O. Box 361131 • Cleveland, OH • 44136-0019...
- Page 3 importantSafeOperation Practices WARNING: This symbol points out important safety instructions which, if not followed, could endanger the personal safety and/or property of yourself and others. Read and follow all instructions in this manual before attempting to operate this machine. Failure to comply with these instructions may result in personal injury.
- Page 4 12. Amissing ordamaged discharge cover can cause blade Slope Operation contact orthrown o bject injuries. Slopes are a major factor related to loss of control and tip-over 13. Stop t heblade(s) when crossing gravel drives, walks, or accidents which can result in severe injury or death. All slopes roads a nd while notcutting g rass.
- Page 5 Children Use only an approved gasoline container. Never fill containers inside a vehicle or on a truck Tragic accidents can occur if the operator is not alert to the or trailer bed with a plastic linen Always place presence of children. Children are often attracted to the...
- Page 6 Check the blade(s) and engine mounting bolts at frequent Notice Regarding Emissions intervals for proper tightness. Also, visually inspect blade(s) Engines which are certified to comply with California and federal for damage (e.g., excessive wear, bent, cracked). Replace EPA emission regulations for SORE (Small Off Road Equipment) the blade(s) with the original...
- Page 7 Sight and hold this level with a vertical tree... or a corner of a building... ¢N 15 ° Usethis page as a guide to determine slopeswhere you may not operate safely. WARNING: Do not operate your lawn mower on such slopes. Do not mow on inclines with a slope in excess of 15 degrees (a rise of approximately 2-1/2 feet every 10 feet).
- Page 8 Assembly & Set-Up Contents of Crate One Lawn Tractor One Oil Drain Tube One Deck Wash Hose Coupler One Lawn Tractor Operator's One Kohler Engine Operator's One Product Registration Card Manual Manual Shipping BraceRemoval Tractor Set-Up Moving The Tractor Manually off, set the parking brake and remove the ignition...
- Page 9 Attaching the Negative Battery Cable Setting the DeckGaugeWheels NOTE:The positive battery terminal is marked Pos. (+). The Move the tractor on a firm and level surface, preferably negative battery terminal is marked Neg. (-). pavement, and proceed as follows The positive cable (heavy red wire) is secured to the positive Select the height position...
- Page 10 Adjusting the Seat To adjust the position of the seat forward or backward, move the seat adjustment lever to the left and slide the seat forward rearward. See Fig. 3-5. WARNING! Before operating the tractor, make sure the seat is engaged in the seat-stop.
- Page 11 Controls a nd Features Systems indicator Monitor ignition Switch Module Throttle Control Brake Pedal Choke Control Drive Pedal Parking Brake Cruise Control Lever Lever Deck Lift Lever Seat " ..Adjustment Lever " Fuel Tank Cap Holder Figure 4-1 Lawn Tractor controls and features are illustrated in Fig 4-1 and described on the following...
- Page 12 ThrottleControl Lever The throttle control lever is located the left side of the tractor's dash panel. This lever controls the speed of the engine. When set in a given position, the throttle will maintain a uniform engine speed. Normal Driving NOTE:When operating the tractor with...
- Page 13 Charge the battery as instructed in the Service section of this manual or have the charging system checked by your Cub Cadet dealer. PTO / Blade EngageKnob When the ignition key is rotated out of the STOP position but not...
- Page 14 CruiseControl Lever ParkingBrakeLever The cruise control lever is located in the center of the tractor's Located in the center of the tractor's dash panel below the steering wheel, the parking brake lever is used to engage dash panel. Engaging the cruise control allows the tractor to parking brake.
- Page 15 Doing so will result in a "rich" fuel mixture and cause the malfunction, do not operate the tractor. Contact your Cub Cadet engine to run poorly. dealer. Stopping the Engine The safety interlock system prevents the engine from...
- Page 16 ReverseCaution Mode Driving TheTractor The REVERSE CAUTION MODE position of the key switch module allows the tractor to be operated in reverse with the blades (PTO) and sudden stops. engaged. ARNING! Avoid sudden starts, excessive speed NOTE:Mowing in reverse is not recommended. Lightly press the brake pedal to release the parking brake.
- Page 17 Driving OnSlopes Setting TheCruiseControl Refer to the SLOPE GAUGE on page 7 to help determine slopes where you may operate the tractor safely. while traveling in reverse. ARNING! Never engage the cruise control lever excess of 15 degrees (a rise of approximately 2-1/2 i_ll WARNING!
- Page 18 FAST (rabbit) position for the most efficient use of the cutting Mulching deck or other (separately available) attachments. Cub Cadet Series 1000 tractors are equipped with a mulch kit which incorporates special blades, already standard on your tractor, in a process of recirculating...
- Page 19 Maintenance& Adjustments Maintenance Remove the oil fill cap/dipstick from the oil fill tube. Push the oil drain hose (packed with this manual) onto the WARNING! Before performing any maintenance oil drain port. Route the opposite end of the hose into an repairs, disengage PTO, set parking brake, stop...
- Page 20 Remain in the operator's position with the cutting deck Cleaningthe Tractor engaged for a minimum of two minutes, allowing Any fuel or oil spilled on the machine should be wiped underside of the cutting deck to thoroughly rinse. promptly. Do NOT allow debris to accumulate around the cooling Move the tractor's...
- Page 21 PivotPoints& Linkage Adjustments Lubricate all the pivot points on the drive system, parking brake WARNING! Shut the engine off, remove the and lift linkage at least once a season with light oil. ignition key and engage the parking brake before DeckWheels making adjustments.
- Page 22 Leveling the Deck(Sideto Side) Steering Adjustment if the cutting deck appears to be mowing unevenly, a side to side If the tractor turns tighter in one direction than the other, or if adjustment can be performed. Adjust if necessary as follows: the ball joints are being replaced due to damage...
- Page 23 MaintenanceSchedule Before Prior Every Every Every Every Eachuse I0 Hours 25 Hours 50 Hours I00 Hours toStoring CleanHood/Dash Louvers Check EngineOil Level _" Check Air Filterfor Dirty,Looseor Damaged Parts _" CleanandRe-oilAir Filter's FoamPredeaner _" Replace Air Filter Element Change EngineOiland Replace Oil Filter _"...
- Page 24 Maintenance Log Please keep a record of the maintenance performed on your tractor. Date HourMeter Maintenance PerformedBy SECTION 6 -- MAINTENANCE & ADJUSTMENTS...
- Page 25 Service Cutting DeckRemoval To remove the cutting deck, proceed as follows: Place the PTO/Blade Engage knob in the disengaged (OFF) position and engage the parking brake. Lower the deck by moving the deck lift lever into the bottom notch on the right fender. Remove the deck belt.
- Page 26 Move the deck lift lever into the top notch to raise the deck Cutting fllades lift arms up and out of the way WARNING? Shut the engine off and remove Gently slide the cutting deck toward the front of the ignition key before removing the cutting...
- Page 27 To properly sharpen the cutting blades, remove equal Battery amounts of metal from both ends of the blades along the CALIFORNIA PROPOSiTiON 65 WARNING: cutting edges, parallel to the trailing edge, at a 25 °- to 30 ° angle. Always grind each cutting blade edge equally Battery posts, terminals, and related...
- Page 28 See your Cub Cadet dealer to have the transmission drive belt replaced Figure 7-7 Loosen, but not remove, the two idler pulleys. See Fig. 7-7.
- Page 29 © © \\\\ © © Figure 7-8 SECTION 7 -- SERVICE...
- Page 30 Troubleshooting Problem Cause Remedy Engine fails to start 1. PTO/Bhde Engage knob engaged. 1. Place knob in disengaged (OFF) position. 2. Parking brake not engaged. 2. Engage parking brake. 3. Spark plug wire disconnected. 3. Connect wire to spark plug. 4.
- Page 31 Replacement P arts Component Part Number and Description 759-3336 Spark Plug (Champion RC12YC) KH-20-883-02-$1 Kohler Air Filter Element and Precleaner KH-52-050-02-S Kohler Oil Filter KH-25-050-22-$1 Kohler Fuel Filter 754-04] 53 Drive Belt (Mowing Deck) 942-04125 3-in-1 Deck Blade (Outer) 942-04124 3-in-1 Deck Blade (Center) 918-0660 Deck Spindle...
- Page 32 Component Part Number and Description 734-04155 Deck Wheel (Front) 734-0973 Deck Wheel (Rear) 925-1707D Battery 951-3124B Fuel Tank Cap Choke Control/Cable 746-04121 746-1087 Throttle Control/Cable 725-2054A Ignition 931-1032B Discharge Chute Assembly Phone (800) 965-4CUB to order replacement parts or a complete Parts Manual (have your full model number and serial number ready).
- Page 33 Attachments & Accessories The following attachments and accessories are compatible for Cub Cadet LT1045. See your Cub Cadet dealer or the retailer from which you purchased your tractor for information regarding price and availability. attachments (e.g. tiller or moldboard plow). Use of this type of equipment WILL void the tractor's warranty.
- Page 34 Notes...
- Page 35 CALIFORNIA EMISSION CONTROL WARRANTY STATEMENT YOUR WARRANTY RIGHTS AND OBLIGATIONS The CaliforniaAir ResourcesBoardandMTDConsumerGroupInc are pleasedto explainthe evaporativeemissioncontrolsystemwarrantyon your 2007lawn mower.In California,new lawnmowermust be designed,builtand equippedto meet the State'sstringentanti-smogstandards.MTDConsumerGroupInc must warrantthe EECSon yourlawn mowerfor the periodof time listedbelow providedthere has beenno abuse,neglector impropermaintenanceof your lawnmower. Your EECSmay includeparts such as the carburetor,fuel-injectionsystem,the ignitionsystem,catalyticconverter,fuel tanks,fuel lines,fuel caps, valves, canisters,filters,vapor hoses,clamps,connectors,and otherassociatedemission-related components.
- Page 36 To obtain warranty coverage owner must present an original proof of purchase and applicable maintenance records to the Check your Yellow Pages, or contact Cub Cadet LLC at P.O. Box 361131, servicing dealer. Please see the operator's manual for information on Cleveland, Ohio 44136-0019, call 1-877-282- 8684 required maintenance and service intervals.
- Page 37 • Configuraci6n • Funcionamiento • Mantenimiento • Servicio • Soluci6n de problemas • Garantia EL OPE ANUAL Tractor Corta Cdspecl Hiclrost_tico m LT104S CUB CADET LLC, P.O. BOX 361131 CLEVELAND, OHiO 44136-0019 FormularioNo.769-03399A Impresoen Estados UnidosdeAmerica (13de Noviembrede 2007)
- Page 38 Visite nuestro sitio web en www.cubcadet.com Llame al representante de Atenci6n al Cliente al (800) 965-4CUB Localice a su distribuidor Cub Cadet mSs cercano Ilamando al (877) 282-8684 Escribanos a Cub Cadet LLC • P.O. Box 361131 • Cleveland, OH • 44136-0019...
- Page 39 Medidas importantesdeseguridad ADVERTENCIA: La presencia de este simbolo indica que se trata de instrucciones importantes de seguridad que se deben respetar para evitar poner en peligro su seguridad personal y/o material y la de otras personas. Lea y siga todas las instrucciones de este manual antes de poner en funcionamiento esta m_quina.
- Page 40 Una cubierta de descarga faltante o da_ada puede provocar Fund0namient0 en pendientes el contacto con la cuchilla o lesiones pot objetos arrojados. Las pendientes son un factor importante relacionado Detenga la(s) cuchilla(s) cuando atraviese senderos, sendas o accidentes pot derrape y vuelcos que pueden producir lesiones...
- Page 41 Ni_0s Utilice s61o los recipientes para gasolina autorizados. Nunca Ilene los recipientes en el interior Pueden ocurrir accidentes tr_igicos si el operador un vehiculo o cami6n o caja de remolque est,1 atento a la presencia de ni_os. Pot Io general, los recubrimiento pl_istico.
- Page 42 Avisoreferidoa emisiones Revise los pernos de montaje de la(s) cuchilla(s) y del motor a intervalos frecuentes para verificar que est_n bien apretados. Adem_is, inspeccione visualmente la(s) Los motores que est_in certificados y cumplen con las cuchilla(s) en busca de da_os (pot ejemplo, desgaste regulaciones de emisiones...
- Page 43 Mirey mantengaestenivelconun _rb0lvertical ¢N £ 15 ° Useesta p&gina como guia para determinar en qu_ pendientes no puede operar el tractor de manera segura. ADVERTENClA: No opere la cortadora de c_sped en dichas pendientes. No corte en inclinadones mayores de 15 grados (elevad6n aproximada de 2 1/2 pies por cada 10 pies).
- Page 44 Montajey Configuraci6n Contenido dei caj6n Un tractor corta c6sped Un acoplador de manguera para Un tubo de drenaje de aceite lavado de plataforma Un Manual del operador del tractor Un Manual del operador del motor Una tarjeta para registrar el Kohler corta c_sped producto...
- Page 45 Instalad6ndel cablenegativode la bateria Ajustede lasruedasde calibraci6n de la plataforma NOTA: El borne positivo de la bateria est,1 marcado como Pos (+). Mueva el tractor a una superficie firme y nivelada, El borne negativo de la bateria est,1 marcado como Neg (-). preferentemente sobre el pavimento, y realice Io siguiente.
- Page 46 Ajustedel asiento Para ajustar el asiento hacia adelante o hacia atr_s, deslice la palanca de ajuste del asiento hacia la izquierda y deslice el asiento hacia delante o hacia atr_s. Vea la Fig. 3-5. IADVERTENCIA! Antes de operar el tractor, asegurese de que el asiento est_ enganchado...
- Page 47 Controles y Caracter sticas Monitor indicador de sistemas M6dulo del interruptor de encendido Perilla de potencia de arranque (PTO) Control del (enganche de cuchilla) regulador Pedal de Control del freno obturador Palanca de freno Palanca de control de mano de crucero Palanca de elevaci6n de la Palanca de ajuste...
- Page 48 Palancade control dei M6dulo dei interruptor d eencendido R_pido==_ regulador La palanca de control del regulador est_ ubicada del lado izquierdo panel de instrumentos del tractor. Esta palanca controla la velocidad del motor. Cuando se Io coloca en una posici6n determinada, el regulador mantiene...
- Page 49 Servicio de este manual o haga que el sistema de carga LCD (pantalla de cristalliquid0) sea verificado por su distribuidor Cub Cadet. Cuando la llave de encendido serota fuera de la posici6n...
- Page 50 Palancade freno de rnano Palancade control de crucero La palanca de freno de mano, ubicada en el centro del tablero La palanca de control de crucero est_ ubicada en el centro del control del tractor, debajo del volante, se utiliza para enganchar tablero de instrumentos del tractor.
- Page 51 P6ngase en cebador. contacto con su distribuidor Cub Cadet. NOTA: NO deje el control del cebador activado mientras opera el El sistema de bloqueo de seguridad...
- Page 52 Conducci6ndei tractor Modode precaud6nen marcha atr s La posici6n MODe DE PRECAUCION EN MARCHA ATRAS del m6dulo del interrupter de Ilave permite operar el tractor en marcha atr_s desarrollar excesiva velocidad y detenerse con las cuchillas (toma de fuerza - PTO) enganchadas. IADVERTENCIA! Evite arrancar subitamente, repente.
- Page 53 Activaci6n dei control de crucero Operaci6n en pendientes Consulte la secci6n INDICADOR DE PENDIENTE en la p_igina 7 para determinar en qu6 pendientes puede operar el tractor de control de crucero mientras se desplaza en marcha atr_is. ADVERTENCIA! Nunca enganche la palanca manera segura.
- Page 54 Los tractores de la serie 1000 de Cub Cadet vienen equipados con un kit para abono que incluye cuchillas especiales, incorporadas otros accesorios (disponibles pot separado).
- Page 55 Cambie el filtro de aceite segOn las instrucciones ser llevadas a cabo por un distribuidor de Cub Cadet. Manual Propietario Kohler. Cambi0 de aceite del motor Vuelva a llenar el motor con aceite nuevo. Consulte Manual del Propietario...
- Page 56 Permanezca en la posici6n del operador con la plataforma Lirnpieza del tractor de corte enganchada durante dos minutos como minimo, Si se derrama combustible o aceite sobre la m_iquina, debe permitiendo que el lado inferior de la plataforma de corte se lave a rondo.
- Page 57 Puntosde pivote y varillaje Ajustes Lubrique todos los puntos de pivote del sistema de impulsi6n, el freno de mano y el varillaje de elevacidn al menos una vez por de encendido y coloque el freno de mano antes de temporada con aceite ligero.
- Page 58 Consulte Detr_is del eje, mida la distancia horizontal desde el interior con su distribuidor Cub Cadet para realizar un ajuste correcto de la Ilanta izquierda hasta el interior de la Ilanta derecha. freno. Anote la distancia.
- Page 59 Calendado de mantenimiento Antesde Cada Cada Cada Cada Antesde cadauso 10horas 25 horas 50 horas lOOhoras almacenar Umpie el cap6/Iosrespiraderos Inspecdone el nivelde aceitedel motor Controleelnitro de airepara vet si haypiezas .f" sucias, s ueltasoda_adas Limpiey vuelva a lubricarel depuradorde espumadelfiltro de aire Reemplace el elemento delfiltro de aire Cambieel aceitedel motor y reemplace elfiltro...
- Page 60 Registro de mantenimiento Lleve un registro del mantenimiento realizado a su tractor. fabricaci6n Medidorhorario Mantenimiento Realizadopot AJUSTES SECCION MANTENIMIENTO...
- Page 61 Servkio Deslice suavemente la plataforma de corte hacia la parte Extracci6nde ia plataforma de torte delantera del tractor y con cuidado guie los ganchos de la Para extraer la plataforma de corte, proceda de la siguiente plataforma para extraerlos de la varilla estabilizadora de la manera: plataforma.
- Page 62 Para afilar las cuchillas de corte de forma adecuada, Cuchillasde torte extraiga cantidades iguales de metal de ambos extremos IADVERTENCIA! Apague el motor y extraiga de las cuchillas a Io largo de los bordes cortantes, de forma Ilave de contacto antes de retirar las cuchillas de paralela al borde de caida, a un _ngulo de 25 °...
- Page 63 Solicite a su distribuidor Cub Cadet que realice el reemplazo de la PRECAUCION: Cuando cargue la bateria de su tractor, utilice correa de transmisi6n.
- Page 64 IVota:Si hay demasiada tensi6n sobre la correa y esto (arnbiode ia correade ia plataforrna impide la extracci6n de la misma f_icilmente del embrague IADVERTENCIA! Apague el motor y extraiga la de la potencia de arranque el_ctrica, sujete con cuidado Ilave de contacto antes de retirar las cuchillas de polea Ioca y girela hacia el lado izquierdo del tractor para aflojar la tensi6n...
- Page 65 Figura 7-7 SECCION 7 -- SERVlCiO...
- Page 66 Soluci6nde Problemas Problema Causa Soluci6n El motor funciona de 1. La unidad est_ fundonando con el CEBADOR Presione el control del cebador. manera err_tica activado. 2. Los cables de la bujia est_n flojos. Conecte y ajuste los cables de la bujJa. 3.
- Page 67 Piezas de reemplazo Componente N_mero de pieza y Descripci6n 759-3336 Bujia (Champion RC12YC) KH-20-883-02-$1 Depurador y elemento de filtro de aire Kohler KH-52-050-02-S Filtro de aceite Kohler KH-25-050-22-$1 Filtro de combustible Kohler 754-04153 Correa de transmisi6n (plataforma de corte) 942-04125 Cuchilla de plataforma (exterior) 942-04124...
- Page 68 Componente N_mero de pieza y Descripci6n 734-04155 Rueda de plataforma (delantera) 734-0973 Rueda de plataforma (trasera) 925-1707D Bateria 951-3.124B Tap6n del dep6sito de combustible Control/cable del cebador 746-04121 746-1087 Control/Cable del regulador 725-2054A Llave de encendido 931-1.032B Conjunto de canal de descarga Llame pot tel_fono al (800) 965-4CUB para solicitar piezas de reemplazo...
- Page 69 Aditamentos y Accesorios Los siguientes aditamentos y accesorios son compatibles con la unidad Cub Cadet LT1045. Consulte con su distribuidor Cub Cadet o con el representante al cual le ha comprado el tractor para obtener m_s informaci6n con respecto a precios y disponibilidad.
- Page 70 Notas...
- Page 71 DECLARAClON DE GARANTJA DE CONTROL DE EMISIONES DE CALIFORNIA DERECHOS Y OBLIGACIONES DE SU GARANTJA El Departamento de los Recursosde Aire de Californiay MTDConsumerGroupInc,se complacenen explicarla garantiadel sistemade controlde emisionespot evaporaci6nde su cortadorade cesped 2007.En California,lasnuevas maquinaspara cortarcespedse debendiseSar,construiry equiparde modo de cumplir con las rigurosasnormascontrala poluci6ndel estado.MTDConsumerGroupInc debe garantizarel sistemade control de emisionespor evaporaci6n(EECS) de su cortadorade cespedpot el periodode tiempo in@ado m_s abajo, siemprey cuandono exista uso incorrecto,negligenciao mantenimientoinadecuadode dicha m_quina.
- Page 72 Cub Cadet. El recurso exclusive es reparar o reemplazar el producto seg_n Io anteriormente Bastidory eje frontal- Cub Cadet garantiza el bastidor, y eje de pivote de hierro fundido frontal contra defectos en los materiales y mane de obra establecido.
- Page 73 Safe Operation Practices • Set-Up • Operation • Maintenance • Service • Troubleshooting • Warranty PERATOR S ANUAL Hydrostatic Lawn Tractor m LT1045 CUB CADET LLC, P.O. BOX 361131 CLEVELAND, OHiO 44136-0019 PrintedIn USA FormNo.769-03399A (November 2 1,2007)
- Page 74 Visit us on the web at www.cubcadetcom Call a Customer Support Representative at (800) 965-4CUB Locate your nearest Cub Cadet Dealer at (877) 282-8684 Write us at Cub Cadet LLC • P.O. Box 361131 • Cleveland, OH • 44136-0019...
- Page 75 importantSafeOperation Practices WARNING: This symbol points out important safety instructions which, if not followed, could endanger the personal safety and/or property of yourself and others. Read and follow all instructions in this manual before attempting to operate this machine. Failure to comply with these instructions may result in personal injury.
- Page 76 12. Amissing ordamaged discharge cover can cause blade Slope Operation contact orthrown o bject injuries. Slopes are a major factor related to loss of control and tip-over 13. Stop t heblade(s) when crossing gravel drives, walks, or accidents which can result in severe injury or death. All slopes roads a nd while notcutting g rass.
- Page 77 Children Use only an approved gasoline container. Never fill containers inside a vehicle or on a truck Tragic accidents can occur if the operator is not alert to the or trailer bed with a plastic linen Always place presence of children. Children are often attracted to the...
- Page 78 Check the blade(s) and engine mounting bolts at frequent Notice Regarding Emissions intervals for proper tightness. Also, visually inspect blade(s) Engines which are certified to comply with California and federal for damage (e.g., excessive wear, bent, cracked). Replace EPA emission regulations for SORE (Small Off Road Equipment) the blade(s) with the original...
- Page 79 Sight and hold this level with a vertical tree... or a corner of a building... ¢N 15 ° Usethis page as a guide to determine slopeswhere you may not operate safely. WARNING: Do not operate your lawn mower on such slopes. Do not mow on inclines with a slope in excess of 15 degrees (a rise of approximately 2-1/2 feet every 10 feet).
- Page 80 Assembly & Set-Up Contents of Crate One Lawn Tractor One Oil Drain Tube One Deck Wash Hose Coupler One Lawn Tractor Operator's One Kohler Engine Operator's One Product Registration Card Manual Manual Shipping BraceRemoval Tractor Set-Up Moving The Tractor Manually off, set the parking brake and remove the ignition...
- Page 81 Attaching the Negative Battery Cable Setting the DeckGaugeWheels NOTE:The positive battery terminal is marked Pos. (+). The Move the tractor on a firm and level surface, preferably negative battery terminal is marked Neg. (-). pavement, and proceed as follows The positive cable (heavy red wire) is secured to the positive Select the height position...
- Page 82 Adjusting the Seat To adjust the position of the seat forward or backward, move the seat adjustment lever to the left and slide the seat forward rearward. See Fig. 3-5. WARNING! Before operating the tractor, make sure the seat is engaged in the seat-stop.
- Page 83 Controls a nd Features Systems indicator Monitor ignition Switch Module Throttle Control Brake Pedal Choke Control Drive Pedal Parking Brake Cruise Control Lever Lever Deck Lift Lever Seat " ..Adjustment Lever " Fuel Tank Cap Holder Figure 4-1 Lawn Tractor controls and features are illustrated in Fig 4-1 and described on the following...
- Page 84 ThrottleControl Lever The throttle control lever is located the left side of the tractor's dash panel. This lever controls the speed of the engine. When set in a given position, the throttle will maintain a uniform engine speed. Normal Driving NOTE:When operating the tractor with...
- Page 85 Charge the battery as instructed in the Service section of this manual or have the charging system checked by your Cub Cadet dealer. PTO / Blade EngageKnob When the ignition key is rotated out of the STOP position but not...
- Page 86 CruiseControl Lever ParkingBrakeLever The cruise control lever is located in the center of the tractor's Located in the center of the tractor's dash panel below the steering wheel, the parking brake lever is used to engage dash panel. Engaging the cruise control allows the tractor to parking brake.
- Page 87 Doing so will result in a "rich" fuel mixture and cause the malfunction, do not operate the tractor. Contact your Cub Cadet engine to run poorly. dealer. Stopping the Engine The safety interlock system prevents the engine from...
- Page 88 ReverseCaution Mode Driving TheTractor The REVERSE CAUTION MODE position of the key switch module allows the tractor to be operated in reverse with the blades (PTO) and sudden stops. engaged. ARNING! Avoid sudden starts, excessive speed NOTE:Mowing in reverse is not recommended. Lightly press the brake pedal to release the parking brake.
- Page 89 Driving OnSlopes Setting TheCruiseControl Refer to the SLOPE GAUGE on page 7 to help determine slopes where you may operate the tractor safely. while traveling in reverse. ARNING! Never engage the cruise control lever excess of 15 degrees (a rise of approximately 2-1/2 i_ll WARNING!
- Page 90 FAST (rabbit) position for the most efficient use of the cutting Mulching deck or other (separately available) attachments. Cub Cadet Series 1000 tractors are equipped with a mulch kit which incorporates special blades, already standard on your tractor, in a process of recirculating...
- Page 91 Maintenance& Adjustments Maintenance Remove the oil fill cap/dipstick from the oil fill tube. Push the oil drain hose (packed with this manual) onto the WARNING! Before performing any maintenance oil drain port. Route the opposite end of the hose into an repairs, disengage PTO, set parking brake, stop...
- Page 92 Remain in the operator's position with the cutting deck Cleaningthe Tractor engaged for a minimum of two minutes, allowing Any fuel or oil spilled on the machine should be wiped underside of the cutting deck to thoroughly rinse. promptly. Do NOT allow debris to accumulate around the cooling Move the tractor's...
- Page 93 PivotPoints& Linkage Adjustments Lubricate all the pivot points on the drive system, parking brake WARNING! Shut the engine off, remove the and lift linkage at least once a season with light oil. ignition key and engage the parking brake before DeckWheels making adjustments.
- Page 94 Leveling the Deck(Sideto Side) Steering Adjustment if the cutting deck appears to be mowing unevenly, a side to side If the tractor turns tighter in one direction than the other, or if adjustment can be performed. Adjust if necessary as follows: the ball joints are being replaced due to damage...
- Page 95 MaintenanceSchedule Before Prior Every Every Every Every Eachuse I0 Hours 25 Hours 50 Hours I00 Hours toStoring CleanHood/Dash Louvers Check EngineOil Level _" Check Air Filterfor Dirty,Looseor Damaged Parts _" CleanandRe-oilAir Filter's FoamPredeaner _" Replace Air Filter Element Change EngineOiland Replace Oil Filter _"...
- Page 96 Maintenance Log Please keep a record of the maintenance performed on your tractor. Date HourMeter Maintenance PerformedBy SECTION 6 -- MAINTENANCE & ADJUSTMENTS...
- Page 97 Service Cutting DeckRemoval To remove the cutting deck, proceed as follows: Place the PTO/Blade Engage knob in the disengaged (OFF) position and engage the parking brake. Lower the deck by moving the deck lift lever into the bottom notch on the right fender. Remove the deck belt.
- Page 98 Move the deck lift lever into the top notch to raise the deck Cutting fllades lift arms up and out of the way WARNING? Shut the engine off and remove Gently slide the cutting deck toward the front of the ignition key before removing the cutting...
- Page 99 To properly sharpen the cutting blades, remove equal Battery amounts of metal from both ends of the blades along the CALIFORNIA PROPOSiTiON 65 WARNING: cutting edges, parallel to the trailing edge, at a 25 °- to 30 ° angle. Always grind each cutting blade edge equally Battery posts, terminals, and related...
- Page 100 See your Cub Cadet dealer to have the transmission drive belt replaced Figure 7-7 Loosen, but not remove, the two idler pulleys. See Fig. 7-7.
- Page 101 © © \\\\ © © Figure 7-8 SECTION 7 -- SERVICE...
- Page 102 Troubleshooting Problem Cause Remedy Engine fails to start 1. PTO/Bhde Engage knob engaged. 1. Place knob in disengaged (OFF) position. 2. Parking brake not engaged. 2. Engage parking brake. 3. Spark plug wire disconnected. 3. Connect wire to spark plug. 4.
- Page 103 Replacement P arts Component Part Number and Description 759-3336 Spark Plug (Champion RC12YC) KH-20-883-02-$1 Kohler Air Filter Element and Precleaner KH-52-050-02-S Kohler Oil Filter KH-25-050-22-$1 Kohler Fuel Filter 754-04] 53 Drive Belt (Mowing Deck) 942-04125 3-in-1 Deck Blade (Outer) 942-04124 3-in-1 Deck Blade (Center) 918-0660 Deck Spindle...
- Page 104 Component Part Number and Description 734-04155 Deck Wheel (Front) 734-0973 Deck Wheel (Rear) 925-1707D Battery 951-3124B Fuel Tank Cap Choke Control/Cable 746-04121 746-1087 Throttle Control/Cable 725-2054A Ignition 931-1032B Discharge Chute Assembly Phone (800) 965-4CUB to order replacement parts or a complete Parts Manual (have your full model number and serial number ready).
- Page 105 Attachments & Accessories The following attachments and accessories are compatible for Cub Cadet LT1045. See your Cub Cadet dealer or the retailer from which you purchased your tractor for information regarding price and availability. attachments (e.g. tiller or moldboard plow). Use of this type of equipment WILL void the tractor's warranty.
- Page 106 Notes...
- Page 107 CALIFORNIA EMISSION CONTROL WARRANTY STATEMENT YOUR WARRANTY RIGHTS AND OBLIGATIONS The CaliforniaAir ResourcesBoardandMTDConsumerGroupInc are pleasedto explainthe evaporativeemissioncontrolsystemwarrantyon your 2007lawn mower.In California,new lawnmowermust be designed,builtand equippedto meet the State'sstringentanti-smogstandards.MTDConsumerGroupInc must warrantthe EECSon yourlawn mowerfor the periodof time listedbelow providedthere has beenno abuse,neglector impropermaintenanceof your lawnmower. Your EECSmay includeparts such as the carburetor,fuel-injectionsystem,the ignitionsystem,catalyticconverter,fuel tanks,fuel lines,fuel caps, valves, canisters,filters,vapor hoses,clamps,connectors,and otherassociatedemission-related components.
- Page 108 To obtain warranty coverage owner must present an original proof of purchase and applicable maintenance records to the Check your Yellow Pages, or contact Cub Cadet LLC at P.O. Box 361131, servicing dealer. Please see the operator's manual for information on Cleveland, Ohio 44136-0019, call 1-877-282- 8684 required maintenance and service intervals.
- Page 109 • Configuraci6n • Funcionamiento • Mantenimiento • Servicio • Soluci6n de problemas • Garantia EL OPE ANUAL Tractor Corta Cdspecl Hiclrost_tico m LT104S CUB CADET LLC, P.O. BOX 361131 CLEVELAND, OHiO 44136-0019 FormularioNo.769-03399A Impresoen Estados UnidosdeAmerica (13de Noviembrede 2007)
- Page 110 Visite nuestro sitio web en www.cubcadet.com Llame al representante de Atenci6n al Cliente al (800) 965-4CUB Localice a su distribuidor Cub Cadet mSs cercano Ilamando al (877) 282-8684 Escribanos a Cub Cadet LLC • P.O. Box 361131 • Cleveland, OH • 44136-0019...
- Page 111 Medidas importantesdeseguridad ADVERTENCIA: La presencia de este simbolo indica que se trata de instrucciones importantes de seguridad que se deben respetar para evitar poner en peligro su seguridad personal y/o material y la de otras personas. Lea y siga todas las instrucciones de este manual antes de poner en funcionamiento esta m_quina.
- Page 112 Una cubierta de descarga faltante o da_ada puede provocar Fund0namient0 en pendientes el contacto con la cuchilla o lesiones pot objetos arrojados. Las pendientes son un factor importante relacionado Detenga la(s) cuchilla(s) cuando atraviese senderos, sendas o accidentes pot derrape y vuelcos que pueden producir lesiones...
- Page 113 Ni_0s Utilice s61o los recipientes para gasolina autorizados. Nunca Ilene los recipientes en el interior Pueden ocurrir accidentes tr_igicos si el operador un vehiculo o cami6n o caja de remolque est,1 atento a la presencia de ni_os. Pot Io general, los recubrimiento pl_istico.
- Page 114 Avisoreferidoa emisiones Revise los pernos de montaje de la(s) cuchilla(s) y del motor a intervalos frecuentes para verificar que est_n bien apretados. Adem_is, inspeccione visualmente la(s) Los motores que est_in certificados y cumplen con las cuchilla(s) en busca de da_os (pot ejemplo, desgaste regulaciones de emisiones...
- Page 115 Mirey mantengaestenivelconun _rb0lvertical ¢N £ 15 ° Useesta p&gina como guia para determinar en qu_ pendientes no puede operar el tractor de manera segura. ADVERTENClA: No opere la cortadora de c_sped en dichas pendientes. No corte en inclinadones mayores de 15 grados (elevad6n aproximada de 2 1/2 pies por cada 10 pies).
- Page 116 Montajey Configuraci6n Contenido dei caj6n Un tractor corta c6sped Un acoplador de manguera para Un tubo de drenaje de aceite lavado de plataforma Un Manual del operador del tractor Un Manual del operador del motor Una tarjeta para registrar el Kohler corta c_sped producto...
- Page 117 Instalad6ndel cablenegativode la bateria Ajustede lasruedasde calibraci6n de la plataforma NOTA: El borne positivo de la bateria est,1 marcado como Pos (+). Mueva el tractor a una superficie firme y nivelada, El borne negativo de la bateria est,1 marcado como Neg (-). preferentemente sobre el pavimento, y realice Io siguiente.
- Page 118 Ajustedel asiento Para ajustar el asiento hacia adelante o hacia atr_s, deslice la palanca de ajuste del asiento hacia la izquierda y deslice el asiento hacia delante o hacia atr_s. Vea la Fig. 3-5. IADVERTENCIA! Antes de operar el tractor, asegurese de que el asiento est_ enganchado...
- Page 119 Controles y Caracter sticas Monitor indicador de sistemas M6dulo del interruptor de encendido Perilla de potencia de arranque (PTO) Control del (enganche de cuchilla) regulador Pedal de Control del freno obturador Palanca de freno Palanca de control de mano de crucero Palanca de elevaci6n de la Palanca de ajuste...
- Page 120 Palancade control dei M6dulo dei interruptor d eencendido R_pido==_ regulador La palanca de control del regulador est_ ubicada del lado izquierdo panel de instrumentos del tractor. Esta palanca controla la velocidad del motor. Cuando se Io coloca en una posici6n determinada, el regulador mantiene...
- Page 121 Servicio de este manual o haga que el sistema de carga LCD (pantalla de cristalliquid0) sea verificado por su distribuidor Cub Cadet. Cuando la llave de encendido serota fuera de la posici6n...
- Page 122 Palancade freno de rnano Palancade control de crucero La palanca de freno de mano, ubicada en el centro del tablero La palanca de control de crucero est_ ubicada en el centro del control del tractor, debajo del volante, se utiliza para enganchar tablero de instrumentos del tractor.
- Page 123 P6ngase en cebador. contacto con su distribuidor Cub Cadet. NOTA: NO deje el control del cebador activado mientras opera el El sistema de bloqueo de seguridad...
- Page 124 Conducci6ndei tractor Modode precaud6nen marcha atr s La posici6n MODe DE PRECAUCION EN MARCHA ATRAS del m6dulo del interrupter de Ilave permite operar el tractor en marcha atr_s desarrollar excesiva velocidad y detenerse con las cuchillas (toma de fuerza - PTO) enganchadas. IADVERTENCIA! Evite arrancar subitamente, repente.
- Page 125 Activaci6n dei control de crucero Operaci6n en pendientes Consulte la secci6n INDICADOR DE PENDIENTE en la p_igina 7 para determinar en qu6 pendientes puede operar el tractor de control de crucero mientras se desplaza en marcha atr_is. ADVERTENCIA! Nunca enganche la palanca manera segura.
- Page 126 Los tractores de la serie 1000 de Cub Cadet vienen equipados con un kit para abono que incluye cuchillas especiales, incorporadas otros accesorios (disponibles pot separado).
- Page 127 Cambie el filtro de aceite segOn las instrucciones ser llevadas a cabo por un distribuidor de Cub Cadet. Manual Propietario Kohler. Cambi0 de aceite del motor Vuelva a llenar el motor con aceite nuevo. Consulte Manual del Propietario...
- Page 128 Permanezca en la posici6n del operador con la plataforma Lirnpieza del tractor de corte enganchada durante dos minutos como minimo, Si se derrama combustible o aceite sobre la m_iquina, debe permitiendo que el lado inferior de la plataforma de corte se lave a rondo.
- Page 129 Puntosde pivote y varillaje Ajustes Lubrique todos los puntos de pivote del sistema de impulsi6n, el freno de mano y el varillaje de elevacidn al menos una vez por de encendido y coloque el freno de mano antes de temporada con aceite ligero.
- Page 130 Consulte Detr_is del eje, mida la distancia horizontal desde el interior con su distribuidor Cub Cadet para realizar un ajuste correcto de la Ilanta izquierda hasta el interior de la Ilanta derecha. freno. Anote la distancia.
- Page 131 Calendado de mantenimiento Antesde Cada Cada Cada Cada Antesde cadauso 10horas 25 horas 50 horas lOOhoras almacenar Umpie el cap6/Iosrespiraderos Inspecdone el nivelde aceitedel motor Controleelnitro de airepara vet si haypiezas .f" sucias, s ueltasoda_adas Limpiey vuelva a lubricarel depuradorde espumadelfiltro de aire Reemplace el elemento delfiltro de aire Cambieel aceitedel motor y reemplace elfiltro...
- Page 132 Registro de mantenimiento Lleve un registro del mantenimiento realizado a su tractor. fabricaci6n Medidorhorario Mantenimiento Realizadopot AJUSTES SECCION MANTENIMIENTO...
- Page 133 Servkio Deslice suavemente la plataforma de corte hacia la parte Extracci6nde ia plataforma de torte delantera del tractor y con cuidado guie los ganchos de la Para extraer la plataforma de corte, proceda de la siguiente plataforma para extraerlos de la varilla estabilizadora de la manera: plataforma.
- Page 134 Para afilar las cuchillas de corte de forma adecuada, Cuchillasde torte extraiga cantidades iguales de metal de ambos extremos IADVERTENCIA! Apague el motor y extraiga de las cuchillas a Io largo de los bordes cortantes, de forma Ilave de contacto antes de retirar las cuchillas de paralela al borde de caida, a un _ngulo de 25 °...
- Page 135 Solicite a su distribuidor Cub Cadet que realice el reemplazo de la PRECAUCION: Cuando cargue la bateria de su tractor, utilice correa de transmisi6n.
- Page 136 IVota:Si hay demasiada tensi6n sobre la correa y esto (arnbiode ia correade ia plataforrna impide la extracci6n de la misma f_icilmente del embrague IADVERTENCIA! Apague el motor y extraiga la de la potencia de arranque el_ctrica, sujete con cuidado Ilave de contacto antes de retirar las cuchillas de polea Ioca y girela hacia el lado izquierdo del tractor para aflojar la tensi6n...
- Page 137 Figura 7-7 SECCION 7 -- SERVlCiO...
- Page 138 Soluci6nde Problemas Problema Causa Soluci6n El motor funciona de 1. La unidad est_ fundonando con el CEBADOR Presione el control del cebador. manera err_tica activado. 2. Los cables de la bujia est_n flojos. Conecte y ajuste los cables de la bujJa. 3.
- Page 139 Piezas de reemplazo Componente N_mero de pieza y Descripci6n 759-3336 Bujia (Champion RC12YC) KH-20-883-02-$1 Depurador y elemento de filtro de aire Kohler KH-52-050-02-S Filtro de aceite Kohler KH-25-050-22-$1 Filtro de combustible Kohler 754-04153 Correa de transmisi6n (plataforma de corte) 942-04125 Cuchilla de plataforma (exterior) 942-04124...
- Page 140 Componente N_mero de pieza y Descripci6n 734-04155 Rueda de plataforma (delantera) 734-0973 Rueda de plataforma (trasera) 925-1707D Bateria 951-3.124B Tap6n del dep6sito de combustible Control/cable del cebador 746-04121 746-1087 Control/Cable del regulador 725-2054A Llave de encendido 931-1.032B Conjunto de canal de descarga Llame pot tel_fono al (800) 965-4CUB para solicitar piezas de reemplazo...
- Page 141 Aditamentos y Accesorios Los siguientes aditamentos y accesorios son compatibles con la unidad Cub Cadet LT1045. Consulte con su distribuidor Cub Cadet o con el representante al cual le ha comprado el tractor para obtener m_s informaci6n con respecto a precios y disponibilidad.
- Page 142 Notas...
- Page 143 DECLARAClON DE GARANTJA DE CONTROL DE EMISIONES DE CALIFORNIA DERECHOS Y OBLIGACIONES DE SU GARANTJA El Departamento de los Recursosde Aire de Californiay MTDConsumerGroupInc,se complacenen explicarla garantiadel sistemade controlde emisionespot evaporaci6nde su cortadorade cesped 2007.En California,lasnuevas maquinaspara cortarcespedse debendiseSar,construiry equiparde modo de cumplir con las rigurosasnormascontrala poluci6ndel estado.MTDConsumerGroupInc debe garantizarel sistemade control de emisionespor evaporaci6n(EECS) de su cortadorade cespedpot el periodode tiempo in@ado m_s abajo, siemprey cuandono exista uso incorrecto,negligenciao mantenimientoinadecuadode dicha m_quina.
- Page 144 Cub Cadet. El recurso exclusive es reparar o reemplazar el producto seg_n Io anteriormente Bastidory eje frontal- Cub Cadet garantiza el bastidor, y eje de pivote de hierro fundido frontal contra defectos en los materiales y mane de obra establecido.