JVC KW-AVX720 Instructions Manual
Dvd receiver with monitor
Hide thumbs
Also See for KW-AVX720:
- Instructions manual (187 pages) ,
- Installation & connection manual (6 pages) ,
- Specifications (2 pages)
Table of Contents
Advertisement
Having TROUBLE with operation?
Please reset your unit
Refer to page of How to reset your unit
Haben Sie PROBLEME mit dem Betrieb?
Bitte setzen Sie Ihr Gerät zurück
Siehe Seite Zurücksetzen des Geräts
Vous avez des PROBLÈMES de fonctionnement?
Réinitialisez votre appareil
Référez-vous à la page intitulée Comment réinitialiser votre appareil
Hebt u PROBLEMEN met de bediening?
Stel het apparaat terug
Zie de pagina met de paragraaf Het apparaat terugstellen
Dear Customer,
This apparatus is in conformance with the valid European
directives and standards regarding electromagnetic
compatibility and electrical safety.
European representative of Victor Company of Japan, Limited
is:
JVC Technical Services Europe GmbH
Postfach 10 05 04
61145 Friedberg
Germany
Sehr geehrter Kunde, sehr geehrte Kundin,
dieses Gerät stimmt mit den gültigen europäischen Richtlinien
und Normen bezüglich elektromagnetischer Verträglichkeit
und elektrischer Sicherheit überein.
Die europäische Vertretung für die Victor Company of Japan,
Limited ist:
JVC Technical Services Europe GmbH
Postfach 10 05 04
61145 Friedberg
Deutschland
EN, GE, FR, NL
© 2009 Victor Company of Japan, Limited
Cher(e) client(e),
Cet appareil est conforme aux directives et normes
européennes en vigueur concernant la compatibilité
électromagnétique et à la sécurité électrique.
Représentant européen de la société Victor Company of Japan,
Limited :
JVC Technical Services Europe GmbH
Postfach 10 05 04
61145 Friedberg
Allemagne
Geachte klant,
Dit apparaat voldoet aan de geldende Europese normen en
richtlijnen inzake elektromagnetische compatibiliteit en
elektrische veiligheid.
De Europese vertegenwoordiger van Victor Company of Japan,
Limited is:
JVC Technical Services Europe GmbH
Postfach 10 05 04
61145 Friedberg
Duitsland
0209DTSMDTJEIN
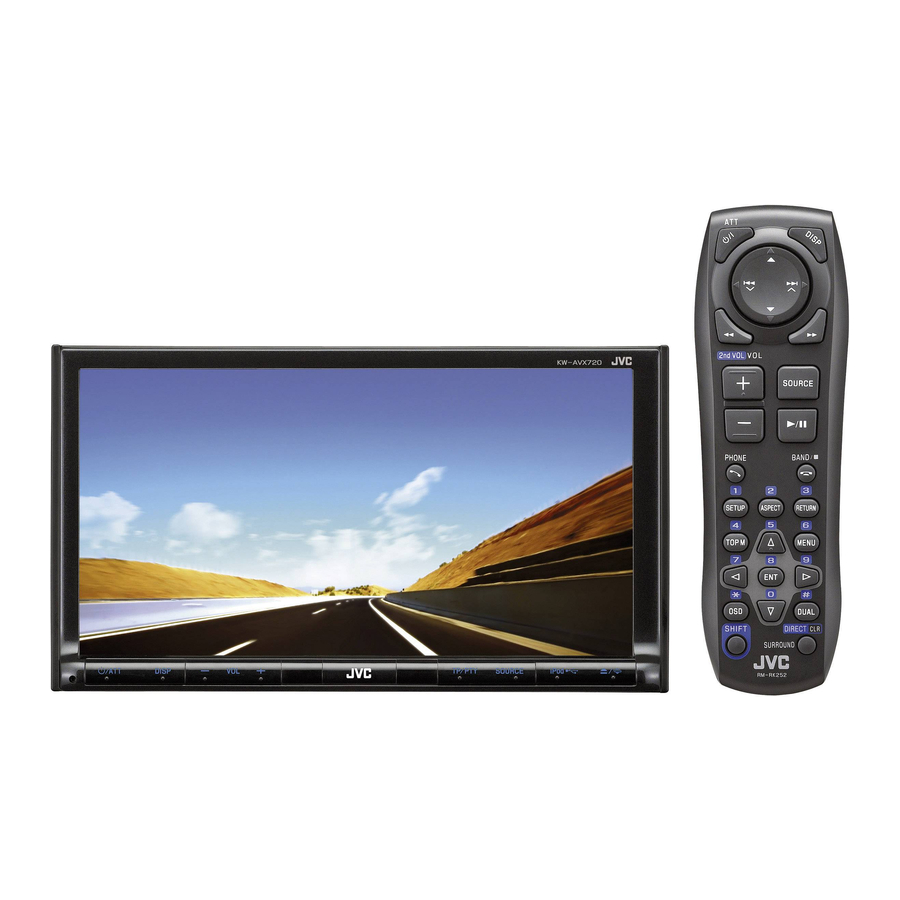
DVD RECEIVER WITH MONITOR
DVD-RECEIVER MIT MONITOR
RÉCEPTEUR DVD ET MONITEUR
DVD-RECEIVER MET MONITOR
KW-AVX720
For canceling the display demonstration, see page 12.
Zum Abbrechen der Displaydemonstration siehe Seite 12.
Pour annuler la démonstration des affichages, référez-vous à la page 12.
Zie bladzijde 12 voor het annuleren van de displaydemonstratie.
For installation and connections, refer to the separate manual.
Für den Einbau und die Anschlüsse siehe das eigenständige Handbuch.
Pour l'installation et les raccordements, se référer au manuel séparé.
Bijzonderheden over de installatie en aansluiting van het apparaat vindt u in de desbetreffende handleiding.
INSTRUCTIONS
BEDIENUNGSANLEITUNG
MANUEL D'INSTRUCTIONS
GEBRUIKSAANWIJZING
GET0603-001A
[E]
Advertisement
Table of Contents

Related Manuals for JVC KW-AVX720


Summary of Contents for JVC KW-AVX720
- Page 1 électromagnétique et à la sécurité électrique. European representative of Victor Company of Japan, Limited Représentant européen de la société Victor Company of Japan, Limited : JVC Technical Services Europe GmbH JVC Technical Services Europe GmbH Postfach 10 05 04 Postfach 10 05 04...
- Page 2 Thank you for purchasing a JVC product. Please read all instructions carefully before operation, to ensure your complete understanding and to obtain the best possible performance from the unit. IMPORTANT FOR LASER PRODUCTS 1. CLASS 1 LASER PRODUCT 2. CAUTION: Do not open the top cover. There are no user serviceable parts inside the unit; leave all servicing to qualified service personnel.
-
Page 3: How To Read This Manual
Cautions on the monitor: How to reset your unit • The monitor built in this unit has been produced with high precision, but it may have some ineffective dots. This is inevitable and is not malfunction. • Do not expose the monitor to direct sunlight. •... -
Page 4: Playable Disc Type
Playable disc type Disc type Recording format, file type, etc Playable DVD-Video (Region Code: 2) * • DTS sound cannot be reproduced. DVD-Audio/DVD-ROM DVD Recordable/Rewritable DVD-Video (DVD-R/-RW * , +R/+RW * DVD-VR • DVD Video: UDF bridge DivX/MPEG1/MPEG2 • DVD-VR •... -
Page 5: Table Of Contents
CONTENTS How to read this manual ........................How to reset your unit ........................How to forcibly eject a disc ......................... Playable disc type ..........................INTRODUCTIONS Basic operations ..........................• Using the monitor panel/touch panel ......................• Using the remote controller (RM-RK252) ....................Preparation ............................ -
Page 6: Basic Operations
Basic operations Using the monitor panel/touch panel USB cable from the rear of the unit, ( Display <AV Menu> screen, ( Display the <Source Menu> screen, ( Display/exit the Short Cut icons, ( SOURCE 0:02:26 Folder Name FLAT File Name Track Title Artist Name 3:00... - Page 7 • Selects “USB/ iPod” as the source. You can also adjust the • Switches the setting between “HEAD MODE” and volume by moving your “iPod MODE” (Hold) finger on the touch panel • Displays <Open/Tilt> screen. * as illustrated. [Open] : Opens the monitor panel. [Eject] : Ejects the disc.
- Page 8 <Source Menu> screen You can also select the source using the touch panel. SOURCE Source Menu TUNER 87. 5 MHz Bayern Radio FLAT Pop Music 3:00 BAND Current source Exit Short Cut icons You can easily access some frequently used functions by using the Short Cut icons. Available icons vary among the sources.
-
Page 9: Using The Remote Controller (Rm-Rk252)
Using the remote controller (RM-RK252) Installing the batteries R03/LR03/AAA Insert the batteries into the remote controller by matching the polarity (+ and –) correctly. Caution: • Danger of explosion if battery is incorrectly replaced. Replace only with the same or equivalent type. •... - Page 10 • DISC/USB: VOL (volume) + / – buttons – DVD-Video: Selects the title. • Adjusts the volume level. – DVD-VR: Selects the program/Playlist. • Bluetooth PHONE: – USB/other discs (except VCD/CD): Selects the – Adjusts the volume of the incoming calls. folders if included.
- Page 11 SOURCE button DIRECT button • Selects the source. • DISC/USB: Enters direct search mode for chapter/title/program/playlist/folder/track (play) / (pause) button when pressed with SHIFT button ( 36). • DISC/USB/ iPod : Starts playback/pauses. • Bluetooth PHONE: Answers incoming calls. CLR (clear) button •...
-
Page 12: Preparation
Preparation Canceling the display demonstration and setting the clock Turn on the power. Set the clock. Setup Demonstration Bright Wall Paper Blue Color Ÿ Scroll Once Auto Display <AV Menu> screen. Dimmer Auto Dimmer Time Set Back BAND Setup Time Set Display <Setup>... -
Page 13: Av Menu
AV Menu operations You can use the <AV Menu> for most of the Press the desired icon/item to perform operations and settings. The available menu items the desired operations/settings. shown on the touch panel, depends on the selected source. Moves to the preceding Indicates the next hierarchy menu page level/setting item exists... - Page 14 Initial: Underlined Menu item Selectable setting/item ♦ Demonstration : Cancels. ♦ : Activates the demonstration on the screen. To stop it temporarily, touch the screen. ( Wall Paper You can select the background picture of the screen. ♦ Bright, Future, Horizon, Plain Color You can select the color of the background picture.
- Page 15 Menu item Selectable setting/item Aspect * You can change the aspect ratio of the picture. Aspect ratio of the incoming signal 16:9 Regular: For 4:3 original pictures Full: For 16:9 original pictures Panorama: For viewing 4:3 pictures naturally on the wide screen Auto: •...
- Page 16 Menu item Selectable setting/item Menu Language * Select the menu language; Initial English ( Audio Language * Select the audio language; Initial English ( Subtitle * Select the subtitle language or erase the subtitle <Off>.; Initial English ( Monitor Type * Select the monitor type to watch a wide screen picture on the external monitor.
- Page 17 Menu item Selectable setting/item D. (Digital) Audio Select the signal format emitted through the DIGITAL OUT (optical) terminal. Output * ♦ : Select this when connecting an amplifier or a decoder incompatible with Dolby Digital or MPEG Audio, or when connecting to a recording device.
- Page 18 Menu item Selectable setting/item TA Volume When you activate TA Standby Reception ( 6), the unit will temporarily switch to Traffic Announcement (TA) if available, from any source other than AM. You can preset the TA volume level. • The volume changes to the preset TA volume level if the current volume level is lower than the preset level.
- Page 19 Menu item Selectable setting/item External Input * For connecting an external component to the CD changer jack on the rear. ♦ Changer/iPod * : CD changer, ( 43), iPod, ( 46). ♦ External : Any other than the above, ( 48).
- Page 20 Selects a preset sound mode suitable to the music Adjust the settings, then store. genre. ♦ Equalizer Flat (Initial), Hard Rock, R&B, Pop, Jazz, Dance, Country, Reggae, Classic, User1, User2, User3 Display <AV Menu> screen. BAND Back Edit Display <Equalizer> screen. Make adjustments by moving each bar directly.
- Page 21 Initial: Underlined Menu item Selectable setting/item Fader/Balance Fader : Adjust the front and rear speaker output balance. • When using a two-speaker system, set the fader level to “0.” ♦ F6 to R6; Initial 0 Balance : Adjust the left and right speaker output balance. ♦...
- Page 22 Initial: Underlined Selectable items when the source is: • TUNER : Mono, SSM, PTy Standby, PTy Code • : D. (Dynamic) Range Control, Announce Standby, Announce Code, PTy Standby, PTy Code • DISC, USB, CD-CH, iPod : Repeat, Random • iPod * : Repeat, Random, Audiobooks •...
- Page 23 Menu item Selectable setting/item D. (Dynamic) Some DAB services provide Dynamic Range Control (DRC) signals together with their regular Range Control programme signals. DRC will reinforce the low level sounds to improve your listening when the surrounding sounds are noisy. •...
- Page 24 Menu item Selectable setting/item Random * Available items depend on the loaded disc type and playback file. Source DISC CD-CH iPod iPod Disc/file type Random Folder Disc/USB (All) Song Album ♦ Folder : Randomly plays all tracks of the current folder, then tracks of the next folders. ♦...
- Page 25 Source Operation/setting TUNER/DAB • Storing a preset station/service manually Press [BAND], then [ ] to tune in to the station you want to preset. Select <List> from the <AV Menu>. Press and hold a preset number. List Ex.: Storing FM station in to preset number 4 Back Back...
- Page 26 Source Operation/setting Bluetooth PHONE Selecting a preset phone number on the list to make a call List Phone Number Back Back CD-CH Selecting a disc on the list If an MP3 disc is selected, Folder/ Disc List Track List appear. Select a track to Disc 01 Disc 04 start playback.
- Page 27 Select “Bluetooth PHONE” or “Bluetooth AUDIO” as the source for operations. • Firstly, use <Open> or <Search> to register and establish the connection with a device. Menu item Selectable setting/item Dial Menu * Select the method to make a call. ♦...
- Page 28 Menu item Selectable setting/item Open Preparation: • Operate the Bluetooth device to turn on its Bluetooth function. ∞ • Make sure “NEW DEVICE” is selected. If not, press [ ] or [ ] to select it. Press <Open> on the <Bluetooth> menu. Enter a PIN (Personal Identification Number) * •...
- Page 29 Menu item Selectable setting/item Special Device Only for “NEW DEVICE.” Select a device you want to connect from the list of Bluetooth devices which require some special procedure to establish the Bluetooth connection. Then, use <Open> or <Search> to connect. •...
-
Page 30: Listening To The Radio
Listening to the radio Preset number SOURCE TUNER 87. 5 MHz Band PS (station name) for Bayern Radio Sound mode FLAT FM Radio Data System. * Pop Music Tuner/Standby Reception indicator 3:00 PTY code for FM Radio BAND Data System •... - Page 31 Storing your favorite programme types The following features are available only for FM You can store your favorite PTY codes into the PTY Radio Data System stations. Preset List. Ex.: Storing <Drama> into <Preset 1> Searching for FM Radio Data System programme—PTY Search You can search for your favorite programmes being broadcast by selecting the PTY code of your favorite...
-
Page 32: Disc Operations
Disc operations The disc type is automatically detected, then playback starts (for some discs, the top menu of the disc appears). If a disc does not have any disc menu, all tracks on it will be played repeatedly until you change the source or eject the disc. - Page 33 Changing the display information Each time you press the button, the display changes to show the different information. ( Ex.: While playing a DVD Video SOURCE FLAT CHAP. RPT 3:00 Audio format—Dolby Digital, MP3, WMA, WAV Disc/track information Disc type—DVD, DVD-VR, VCD, CD •...
-
Page 34: Operation Buttons On The Screen
Operation buttons on the screen You can display the following operation buttons while watching the playback pictures on the screen. • If no operation is done after awhile, the operation buttons disappear (except when a disc menu is displayed). [SOURCE] Displays <Source Menu>... -
Page 35: Operations Using The Remote Controller (Rm-Rk252)
Operations using the remote controller (RM-RK252) Button Stop play Stop play Start play/Pause (if pressed during play) • DivX/MPEG: Start play/Pause (if pressed during play) • JPEG: • Start play (Slide show: Each file is shown for a few seconds.) •... - Page 36 Button Stop play Stop play Stop play Start play/Pause (if pressed Start play/Pause (if pressed Start play/Pause (if pressed during play) during play) during play) Reverse/forward track search * Reverse/forward track search * Reverse/forward track search * • Forward slow motion * during pause.
- Page 37 Using the list screens... (DVD-VR) Operations using the Display the Original Program screen. on-screen bar (DVD/DVD-VR/DivX/MPEG/JPEG/VCD) These operations are possible on the monitor using the Display the Playlist screen. remote controller. Show the on-screen bar ( 38). Select an item you want to start play. (twice) Select an item.
- Page 38 On-screen bar Ex.: DVD-Video Information Operation Disc type Elapsed playing time of the current • DVD-Video: Audio signal format type and chapter/track * channel Remaining time of the current • VCD: PBC chapter/track * Playback mode * Playback status DVD-Video: T.
-
Page 39: Usb Operations
USB operations You can connect a USB mass storage class device such as a USB memory, Digital Audio Player, portable HDD, etc. to the unit. • You can also connect the iPod to the USB terminal of the unit. For details of the operations, 45 –... -
Page 40: Using The Bluetooth® Devices
• To register a device using <Open> or <Search>, • To connect a special device, • To connect/disconnect/delete a device, Changing the display information Bluetooth Information: If you wish to receive more information about Bluetooth, visit the following JVC web site: <http://www.jvc.co.jp/english/car/> (English website only). -
Page 41: Using The Bluetooth Cellular Phone
Using the Bluetooth cellular phone Status of the device Connected device name [5 / ∞]: Selects the • Signal strength/Battery remainder (only when • When a cellular phone with audio function is the information comes from the device). other registered device. registered/connected, appears. - Page 42 When an SMS comes in... Presetting the phone If the cellular phone is compatible with SMS (Short numbers Message Service), you can read the messages on the You can preset up to 6 phone numbers. screen. • You cannot edit or send a message through the unit. Select the phone number you want to preset from <Phonebook>, <Redial>, When <Message Info>...
-
Page 43: Using The Bluetooth Audio Player
If playback does not start automatically, operate the Bluetooth audio player to start playback. Listening to the CD changer It is recommended to use a JVC MP3-compatible CD changer with your unit. • You can play only CDs (CD-DA) and MP3 discs. -
Page 44: Listening To The Dab Tuner
Listening to the DAB tuner Preset number SOURCE DAB1 1475.216MHz LN Band Service Label Sound mode FLAT If no signal is received, DAB indicators */ “No DAB Signal” appears. Standby Reception indicator 3:00 BAND Press [SOURCE], then press [DAB]. Ÿ Press [BAND]. -
Page 45: Listening To The Ipod/Iphone
Listening to the iPod/iPhone You can connect the iPod/iPhone using the following cable or adapter: Cable/adapter To operate Listen to the USB 2.0 cable (accessory of the iPod/iPhone) to the See “When connected with the USB music USB cable from the rear of the unit. cable”... -
Page 46: When Connected With The Interface Adapter
Press [SOURCE], then press [iPod ]. The following operations/settings are only Playback starts automatically. available in “HEAD MODE.” • To display the <iPod Artwork>, • When you connect the iPod to the USB • To select track/video from <Search Mode>, terminal, “... -
Page 47: Using Other External Components
Selecting a track from the main Press [ ] to confirm the selection. menu Repeat steps 2 and 3 to select a track. • When a track is selected finally, playback starts. Press [SEARCH] to enter the main menu. • To return to the previous menu, press [SEARCH]. “SEARCH”... -
Page 48: Ext-Input
Navigation screen You can also connect a Navigation System to the VIDEO IN jack so that you can watch the navigation screen. Preparation: Make sure <Navigation> is selected for <AV Input>. ( To view the navigation screen Press DISP on the monitor panel repeatedly. ( •... -
Page 49: References
Maintenance Caution on cleaning the unit To keep discs clean Do not use any solvent (for example, thinner, benzine, A dirty disc may not play correctly. etc.), detergent, or insecticide. This may damage the If a disc does become dirty, wipe it with monitor or the unit. -
Page 50: More About This Unit
More about this unit General • When Alternative Frequency Reception is activated (with AF selected), Network-Tracking Reception is Turning on the power also activated automatically. On the other hand, • By pressing SOURCE on the monitor panel, you Network-Tracking Reception cannot be deactivated can also turn on the power. -
Page 51: File Playback
* <.mod> is an extension code used for the MPEG2 files – MP3 files encoded with MP3i and MP3 PRO format. recorded by JVC Everio camcorders. The MPEG2 files – MP3 files encoded with Layer 1/2. with the <.mod> extension code cannot be played –... -
Page 52: External Monitor
Disc/file information shown on the • DivX/MPEG1/MPEG2/JPEG/MP3/WMA/WAV external monitor The following screens appear only on the external monitor. • CD TIME 00:14 T. RPT Track : 6 / 14 Cloudy Fair Hail Indian summer Rain Track Information Shower Album Snow Four seasons Thunder Artist... - Page 53 USB operations Bluetooth operations • If “No USB Device“ appears after removing a device, General reattach a device or select another playback source. • While driving, do not perform complicated operation • When the USB device has no playable files, or has not such as dialing the numbers, using phone book, etc.
- Page 54 When operating an iPod, some operations may not – iPod with video (5th Generation) * be performed correctly or as intended. In this case, – iPod classic * visit the following JVC web site: – iPod nano * <http://www.jvc.co.jp/english/car/> (English – iPod nano (2nd Generation) * website only) –...
-
Page 55: Menu Settings
Menu settings • If you change the <Amplifier Gain> setting from <High> to <Low> while the volume level is set higher than “30,” the unit automatically changes the volume level to “VOL 30.” • After you change any of <Menu Language/Audio Language/Subtitle> settings, turn off then on the power, and re-insert the disc (or insert another disc) so that your setting takes effect. -
Page 56: Display Information
Display information • Available display information varies among the playback sources. Each time you press DISP, the display changes to show the various information. Ex.: When the playback source is a DVD video disc SOURCE SOURCE FLAT FLAT CHAP. RPT 3:00 3:00 Playback picture screen... - Page 57 Albanian Xhosa Estonian Javanese Nauru Serbian Yoruba Basque Georgian Nepali Siswati Zulu JVC bears no responsibility for any loss of data in an iPod/iPhone and/or USB mass storage class device while using this unit. Continued on the next page REFERENCES...
- Page 58 • The Bluetooth word mark and logos are owned by the Bluetooth SIG, Inc. and any use of such marks by Victor Company of Japan, Limited (JVC) is under license. Other trademarks and trade names are those of their respective owners.
-
Page 59: Troubleshooting
Troubleshooting What appears to be trouble is not always serious. Check the following points before calling a service center. • For operations with the external components, refer also to the instructions supplied for the adapters used with the connections (as well as the instructions supplied with the external components). •... - Page 60 Symptom Remedy/Cause • Disc can be neither recognized nor Eject the disc forcibly. ( played back. • Disc cannot be ejected. Unlock the disc. ( • Recordable/Rewritable discs cannot • Insert a finalized disc. be played back. • Finalize the discs with the component which you used for •...
- Page 61 Symptom Remedy/Cause • Noise is generated. The track played back is not a playable file format. Skip to another file. • Tracks cannot play back as you Playback order may differ from the one played back using other have intended them to play. players.
- Page 62 Symptom Remedy/Cause • “No Disc” appears on the screen. Insert a disc into the magazine. • “No Magazine” appears on the screen. Insert the magazine. • “Cannot play this disc Check the disc” appears Current disc does not include playable files. Replace on the screen.
-
Page 63: Specifications
Specifications Maximum Power Output: Front/Rear: 50 W per channel Continuous Power Output Front/Rear: 20 W per channel into 4 Ω, 40 Hz to (RMS): 20 000 Hz at no more than 1.0% total harmonic distortion Load Impedance: 4 Ω (4 Ω to 8 Ω allowance) Equalizer Control Range: Frequencies: 60 Hz, 150 Hz, 400 Hz, 1 kHz, 2.5 kHz,... - Page 64 Signal Detection System: Non-contact optical pickup (semiconductor laser) Frequency Response: DVD, fs=48 kHz/96 kHz: 16 Hz to 22 000 Hz VCD/CD: 16 Hz to 20 000 Hz Dynamic Range: 96 dB Signal-to-Noise Ratio: 98 dB Wow and Flutter: Less than measurable limit USB Standards: USB 2.0 Full Speed Data Transfer Rate...
-
Page 65: Operation Index
Operation index General Reset ..............3, 6 Attach/detach ...........39 Volume ..........6, 7, 10, 21 Start/pause playback ......11, 39 AV Menu ............6, 13 Repeat/random play .......23, 24 Source ..........6, 8, 11, 34 Short Cut ...........6, 8, 34 Bluetooth RM-RK252 ........9 – 11, 35 – 38 Connect/disconnect/delete ..28, 29, 40 Clock .............12, 15 Make a call ..........27, 41...