Advertisement
Quick Links
Operator's
Manual
CRAFTSMAN _
g
2.0 HP Motor
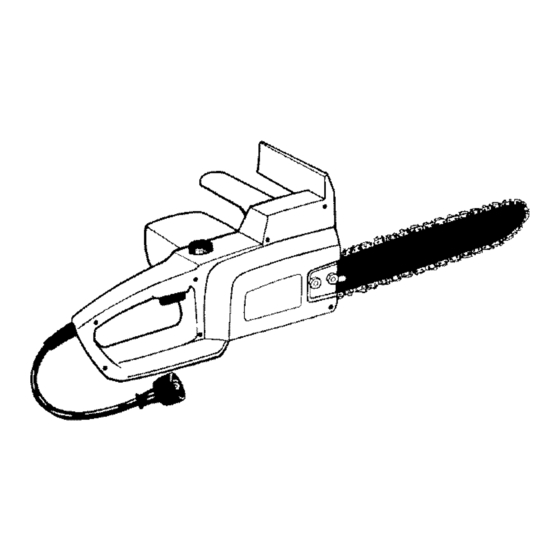
ELECTRIC
CHAIN SAW
Model No.
358.341000
- 14 in. Bar
®
WARNING:
Read and follow all Safety
Rules and Operating
Instructions
before first use of this product.
For answers
to your questions
about this product:
Call 7 am-7
pm, Mon-Sat;
Sun, 10 am-7
pm
1-800-235-5878
a
a
0
g
Sears, Roebuck
and Co., Hoffman
Estates,
IL 60179 USA
530084337
09/12/97
Advertisement

Related Manuals for Craftsman 358.341000


Summary of Contents for Craftsman 358.341000
- Page 1 Operator's Manual 2.0 HP Motor CRAFTSMAN _ ELECTRIC CHAIN SAW Model No. 358.341000 - 14 in. Bar ® WARNING: Read and follow all Safety Rules and Operating Instructions before first use of this product. For answers to your questions about this product: Call 7 am-7 pm, Mon-Sat;...
- Page 2 ON CRAFTSMAN ELECTRIC CHAIN SAW. If this Craftsman Electric Chain Saw faiIs to perform properly due to a defect in material or workmanship within (1) year from the date of pur- chase, Sears wilt repair or replace it, free of charge.
- Page 3 • Keep oil cap and fasteners securely retreat path, K eep w ork a rea clean. tightened. Cluttered areas i nvite i njuries. • Use only Craftsman accessories OPERATE YOUR SAFELY replacement parts as recommended.
- Page 4 ELECTRICAL SAFETY • To avoid t he possibility ofelectric • Use avoltage supply asshown o n shock, avoid b ody c ontact with any unit. grounded conductor, such asmetal • Avoid d angerous environments. Don't fences orpipes. use appliances indamp o rwet l oca- •...
- Page 5 the saw chain i nthe cut.The Com- Avoid Pinch-Kickback: puted K ickback Angle ( CKA) listed o n • Be extremely aware of situations your s aw and listed i nthe following obstructions that can cause material CKA Tabie r epresents the angle o fkick- to pinch the top of or otherwise stop...
- Page 6 • Handguard: designed toreduce the and joints of people prone to circulation chance ofyour l eft h and c ontacting disorders or abnormal swelling. the chain i fyour h and s lips o ff t he Prolonged use in cold weather has front handlebar.
- Page 7 KNOW YOUR SAW READ THIS OPERATOR'S MANUAL AND SAFETY RULES BEFORE OPERAT- ING YOUR CHAIN SAW. Compare the illustrations with your unit to familiarize yoursetf with the tocation of the various controls and adjustments. Save this manual for future reference, Oiler Actuator/ Chain Adjustment Screw Bar Oil Cap...
- Page 8 Craftsman chain know the direction of tree fall, nor cut at saw bar o il. I fCraftsman bar o il i snot...
- Page 9 FELLING LARGE TREES cutting before the felling back cut is _6inches indiameter orlarger) complete and use wedges of wood, enotch m ethod isused tofeIt t arge plastic or aluminum to open the cut and trees. Anotch i scutonthe side ofthe drop the tree along the desired line of tree inthe desired direction offailAfter fail.
- Page 10 • Cut s hattered wood v ery carefully; your saw when it is pinched or hung in sharp p ieces ofwood c ould b eflung a Iog. toward operator. Use a wedge to remove pinched saw • Use asawhorse tocutsmall logs. Never allow another person tohold the tog while c utting and never hold the tog with your l eg orfoot.
- Page 11 • Watch fortogs w ith acompression • Frequently clear branches out of the side. See illustration above forcutting way to avoid tripping over them. togs w ith acompression side. LIMBING Using a log for support 2r<dCut Remove Smatl Limbs With One Cut t Cut Limbing is removing the branches from 1stCut...
- Page 12 NOTE: It is recommended that the saw be turned upside down for chain tensioning. 2 Use Craftsman chain saw bar oil • Unplug unit from the power source. • Loosen bar nuts untit they are only CHECK DAMAGED finger tight.
- Page 13 Check the condition of the guide bar Adjusting Screw each time the chain is sharpened. worn guide bar wiit damage the chain and make cutting difficult. To maintain guide bar: • Disconnect the chain saw from the power source. See instructions under "Chain Replacement".
- Page 14 • Turn t he unit u pside down o naflat • Hold the guide bar against the saw surface. Straighten out c hain, then frame and instatt the bar clamp plate. tay itonafiatsurface, Be sure adjusting pin is in the adjust- ing pin hole in the bar;...
- Page 15 EXTERNAL SURFACES Prepare your u nit f orstorage atthe end ofthe season orifitwill n ot b eused f or Ifyour chain s aw istobestored fora 30days o rmore. period of time, dean it thoroughly WARNING: before storage. Store in a clean dry area. •...
- Page 16 Front Handle Left Side Saw Chain Manual Oiler Control Switch Lockout Rear Handle Guide Bar Switch Trk Power Cord Right Side Guide Bar No_e Guide Bar Mounting Sprocket Spocket Guide Bar Tip Guide - An attachment that may be provided on the end of the guide bar to prevent the chain at the end of the guide bar from contacting the wood.
- Page 17 Kickback, Pinch - The rapid pushback of the saw which can occur when the wood closes in and pinches the moving saw chain in the cut along the top of the guide bar. Kickback, Rotational - The rapid upward and backward motion of the saw which can occur when the moving saw chain near the upper portion of the tip of the guide bar contacts...