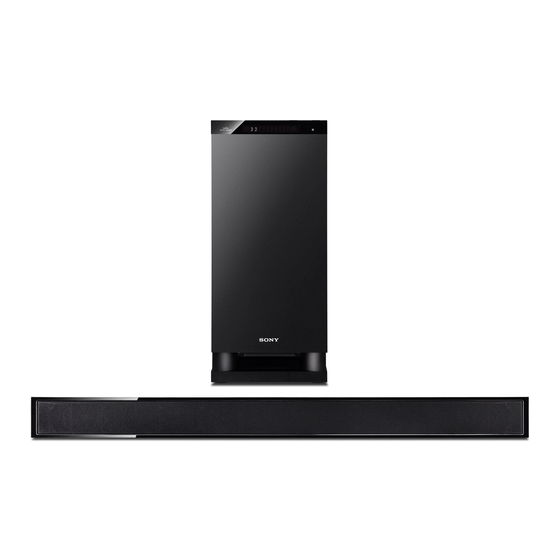
Sony HT-CT150 Operating Instructions Manual
Hide thumbs
Also See for HT-CT150:
- Operating instructions manual (124 pages) ,
- Service manual (4 pages) ,
- Specifications (2 pages)
Table of Contents
Advertisement
Available languages
Available languages
Quick Links
Advertisement
Table of Contents

Related Manuals for Sony HT-CT150


Summary of Contents for Sony HT-CT150
- Page 1 SON_ 4-174-097-43(1 ) Home Theatre System Operating Instructions_ Manual de instrucciones_ HT-CT150 [_ DOLO¥ OOOLOO,_,,, o,o1_o,, ..H_:3_| DIGITAL s-_oRce S-iTiEis-rer ×.v.Colour MED,A POfiT _ROnT SURROUND Digital Amp|ifier ©2010 Sony Corporation...
- Page 2 The unit is not disconnected from the AC power source On safety (mains) as long as it is connected to the wall outlet, • Shoukt any solid object or liquid fall into the system, even if the unit itself has been turned off. unplug the system and have it checked by qualified...
- Page 3 If you have any question or problem concerning your system, please consult your nearest Sony dealer. Copyrights This system incorporates Dolby ': Digital and Pro Logic Surround and the DTS ':* Digital Snrround System.
-
Page 4: Table Of Contents
... 22 (HDMI SIGNAL PASS THRU) Setting the Audio Return Channel function to off ..........Advanced Settings Controlling connected Sony components with the remote ........ Changing the input button assignments the remote ........Settings and adjustments using the amplifier menu ......... - Page 5 -,,1 • Remote commander (RM- • Subwoofer (SA-WCTI50) • Speaker cord ¢D AAU072) =_oo • Digital optical cord 12)1" a TV _crlD (2.5 m) (1) • Speaker (SS-CTI50) • R6 (size batteries • Operating Instructions Inserting batteries into remote Insert two R6 (size AA) batteries (supplied) by matching the (_ and (_ ends on the batteries to the...
-
Page 6: Connecting The Speaker
Connecting the speaker cord to the speaker connectors of the speaker cord are color-coded depending on the type of speaker. Connect connectors of the speaker cord to match the color of the speaker jacks. Rear of the speaker Green Red_[_ White O Speaker cord (supplied) - Page 7 Install the speaker on a vertical and flat reint_rced area of the wall. • Be sure to subcontract the installation to Sony dealers or licensed contractors and pay special attention to safety during the installation.
- Page 8 The connectors of the speaker cord are color-coded depending on the type of speaker. Connect the connectors of the speaker cord to match the color of the SPEAKERS jacks. Rear of the subwoofer ..I QQ© CEntER ssarl@// Green __ White Speaker O Speaker cord (supplied)
-
Page 9: Bravia" Sync Features
Connect the TV and/or player, etc.. with HDM[ jacks to the system using an HDM[ cable. By connecting Sony "BRAVIA" Sync-compatible components using HDMI cables and by setting the Control for HDMI limction via the TV for each connected component, operation can be simplified. - Page 10 • Sony recommends that you use an HDMI-authorized cable or Sony HDMI cable. • Check the setup of the connected component if an image is poor or the sound does not come out of a...
-
Page 11: System
£3 When connecting components that do not h ave HDM[ jacks, such as a"PlayStation 2."aDVD player. asatellite tuner, oracable television tuner, etc.. set " CTRL HDMI" to"OFF" inthe AMP menu ofthe system (page 20). Other audio components, etc. DVD player, etc. _=====._..,J___ Digital Audio OUT Digital coaxial cord... - Page 12 Be%re connecting the AC power cord (mains lead) of the system to a wall outlet (mains), connect all the other components and TV to the system. • Alter connecting the AC power cord (mains lead), wait about 20 seconds bet_re turning on the power by pressing •...
- Page 13 "10 For more information, see the pages indicated in parentheses. I3" Subwoofer Top view VOLUME- I/(_ (on/standby) INPUT SELECTOR VOLUME + Press to select the input source to play back. Front panel display Every time you press the button, the input source changes cyclically as follows: TV --* BD --* DVD --* SAT/CATV --* VIDEO...
- Page 14 Front panel display (subwoofer) POWER/ACTIVE STANDBY indicator NIGHT (page 31) Lights up in NIGHT MODE. Lights as follows: SLEEP (page 32) Green: The system is turned on. Amber: Only HDMI parts of the system Flashes when the sleep timer is active. are on (The Control for HDMI HDMI (page 9) function is working).
- Page 15 SLEEP Remote control Press to turn off at a preset time when you want to tall asleep listening to music. You This section describes subwoofer and speaker can preset the time in 10-minute increments. button operation. See page 24 for details on the "u NIGHT MODE button operation...
-
Page 16: (System Audio Control)
Turn on the TV and choose a program. Refer to the operating instructions of your TV for details. Turn thesystem Press TV on the remote. Adjust the volume by pressing TVl/(5 THEATER .INPUT /_/_ i/(b MASTER VOL +/-. Input • The sound may be output from the TV's speaker. In buttons .... - Page 17 Press the input buttons to display the input source in the front panel display. • When you connect the video output jack of the DIGITAL MEDIA PORT adapter to the video input Input source Playable component jack of the TV, set "CTRL HDMI" to "OFF"...
- Page 18 2CH STEREO P.AUDIO the center speaker produces no sound. STANDARD If you press the THEATER button on a Sony TV remote when "CTRL HDMI" is set to "ON," the sound field changes to "MOVIE" (some Sony TVs excluded).
-
Page 19: Connected Components
"BRAVIA" Sync via an HDMI components. cable (not supplied), operation is simplified When you connect a Sony TV with the Control below: for HDMI timction, the Control for HDM[ • One-Touch Play (page 20) limction for the system and the connected... -
Page 20: To Off
Display the list of the HDMI components on the TV menu, and set • If the Control tUr HDMI fimction tUr the connected the Control for HDMI function to on for component cannot be set simultaneously by setting the connected components. "CONTROL FOR HDMI"... - Page 21 I _' t :ll'T1 • Even if the system is turned off (active standby • When the TV is turned on bet_re this system is turned mode), the HDM] signal will be sent from the on, the TV sound will not be output for a moment. connected component to the TV via the HDMI...
- Page 22 • Depending on the status, the connected components may not be mined oft'. For details, refer to the operating instructions of the connected components. (System Power Off) When you turn the TV offby using the power (HDMI SIGNAL PASS THRU) button on the TV's remote, the system and the connected components turn off automatically.
-
Page 23: With The Remote
Press '1"/4,repeatedly until "ARC" Press ,I,/4, to select the setting. • AUTO: When the TV is turned on while appears, then press (_ or ->. Press '1"/4,to select "OFF". the system is in standby mode. the system outputs HDM[ signals •... - Page 24 Common operations on the equipment. In that case. select them using Remote Button Function the remote control supplied with the equipment. TV I/_) Turns on or off tile Sony AV I/_) TV or audio/video (on/standby) components that the ..remote is assigned operate.
- Page 25 For TV, press and hold [] low-light settings, when TV (yellow), and press the number buttons to select you connect a Sony TV channels. that is compatible with the THEATER button For other components, fimctiou. Also, audio is press and hold []...
- Page 26 To control the DVD player/Blu-ray Remote Button Function Disc player D_ (playback)/|| Play mode buttons. (pause, press again to Remote Button Function resulne normal ANGLE Switches to other viewing playback)Ira (stop) angles when multi-angles are recorded on a DVD _, "1",4,, ÷, @ Moves the highlight (cursor) and selects the...
- Page 27 Press and hold the input button whose Remote Button Function assignment you want to change, and RETURN Returns to the previous then press and hold AV I/(_ at the same screen of any displayed time. menu. Example: While holding down DVD. press <-, "1 _ , ',1,,->, @ Selects a menu item and and hold AV Ii(_).
- Page 28 Blu-ray Disc player or Blu-ray Disc recorder. b)The initial setting of the DVD button. Sony DVD recorders are operated with a DVDI or DVD3 setting. For details, refer to the operating instructions supplied with the DVD recorders.
- Page 29 -SET-- -CTRL HDMI _ HDMI L -VOL MAX, 49, 48, Using the AMP menu LIMIT ..2, 1, MIN You can set the following items with AMP - PASS _ AUTO MENU on the remote. THRU' The default settings are underlined. ARC _'_' -- AMP MENU -LEVEL--...
- Page 30 Adjusting the bass and treble • These settings are retained even if you disconnect the level (BASS, TREBLE) AC power cord (mains lead). You can adjust the bass and treble level easily. The following pages show details for each Select "TONE"...
- Page 31 Enjoying multiplex broadcast Setting the sound from the sound (DUAL MONO) satellite tuner (INPUT MODE) Even if you connect the satellite tuner to the can enjoy multiplex broadcast sound when HDMI SAT/CATV input jack of the system. the system receives an AC-3 multiplex broadcast...
- Page 32 Changing the display setting Auto Standby function (AUTO (DISPLAY) STBY) You can change the display behavior of the flont You can reduce power consumption. The system panel display. enters standby mode automatically when you do not operate the system for about 30 minutes and Select "SYSTEM"...
- Page 33 Should any component. problem persist, consult your nearest Sony dealer. The surround effect cannot be obtained. • Depending on the digital signal, the POWER...
-
Page 34: The Remote
No sound or only a very low-level sound of the When the system is in standby mode, there is connected component is heard from the no image or sound on the TV. system. • "CTRL HDMI" is set to "OFF." •... - Page 35 If the HDMI) cause of the problem cannot be found even Dolby Digital Plus alter checking the above item. consult your Dolby True HD -',1 nearest Sony dealer. DTS-HD If the system still does * Linear PCM accepts sampling frequencies...
- Page 36 BD, DVD, SAT/CATV; Video inputs/outputs (3D) Design and specifications are subject to change without notice. 1280 x 720p@59.94/60 Frame packing 1920 x 1080i @ 59.94/60 Hz Frame packing 1920 x 1080i @ 59.94/60 Hz Side-by-Side (Hall') 1920 x 108% @59.94/60 Hz Side-by-Side (Hall') 1280 x 720p@50...
- Page 37 A/V SYNC NIGHT MODE AMP menu 10, 23 AUDIO DRC 30 PROTECTOR AUTO STBY Remote BASS before use 5 "BRAVIA" Sync 19 operating 15, 24 CNT LEVEL Sleep timer Connecting Sound field 18 Blu-ray Disc player SW LEVEL cable television tuner 9, l 1 DIGITAL...
- Page 38 La unidad no estarfi desconectada de la fuente de Seguridad alimentacidn de ca mientras estd conectada a la toma de • En caso de que caiga algfin objeto sdlido o lfquido pared, aunque se haya apagado la pmpia unidad. dentro del sistema, descondctelo y solicite al personal especializado...
- Page 39 (x.v.Color)" son marcas comerciales de Sony disolventes, como alcohol o bencina. Corporation. Si desea realizar alguna pregunta o solucionar alg6n problema relacionado con el sistema, pdngase contacto con el distribuidor Sony mils cercano. 3 ES...
- Page 40 1! _!= 1! _!= 1! _!= 1! _!= 1! _!= 1! _!= 1! _!= 1! _!= 1! _!= ii_iiii Precauciones ..........Ajustes avanzados Procedimientos iniciales Cdmo controlar los componentes de Sony con el mando a distancia ....Desembalaje ..........Cdmo cambiar las asignaciones de los Cdmo colocar el sistema ......
- Page 41 "o ¢D • Mando a distancia • Altavoz potenciador de graves • Cable de altavoz (l) (RM-AAU072) (1) (SA-WCT150) 5" =_oo ¢D • Cable digital 6ptico para televisor (2,5 m) (1) • Altavoz (SS-CT150) • Pilas R6 (tamafio AA) (2) •...
- Page 42 i!ii.. _m_.._D| _ai[.[__i.B!i_.j.._j!ii ii!i_i_, i_ii ¸ il,iiiiii iiii_iii _iiii i,i,,iiii_; ii_f,iiiii !iiii i_,i_:i_:i_,ii_:iii_i!! i,iii/Jii ll_ii'iii iii!ii _iiiiii i!i/_i iii!i _ii_i iii :_:_ii_i_i!_ii.!i_!.!!!!!!!!!!!!!!!!!!!!!!!!!!!!!!!!!!!!!!!!!!!!!!!!!!!!!!!!!!!!!!!!!!!!!!!!!!!!!__iii_ _ii ! I i _i iJ ii i _!_!_!_!_!_!_!_!_!_!_!_!_!_!_!_!_!_!_!_!_!_!_!_!_!_!_!_!_!_!_!_!_!_!_!_! C_mo conectar el cable de altavoz al altavoz Los conectores del cable de altavoz estdn codificados con colores de acuerdo con el tipo de altavoz.
- Page 43 Sony. Preste especial atencidn 5" la seguridad durante la instalacidn. • Sony no se rcsponsabiliza por accidentes o dafios ocasionados por una instalacidn incorrecta, resistencia ¢D insuficiente de la pared, instalacidn incorrecta...
- Page 44 Los conectores del cable de altavoz estdn codificados con colores de acuerdo con el tipo de altavoz. Conecte los conectores del cable de altavoz de modo que coincidan con el color de las tomas SPEAKERS. Parte posterior del altavozpotenciador de graves ..
- Page 45 HDMI a travds de un cable ¢D HDMI. Si conecta los componentes compatibles con Sony "BRAVIA" Sync con los cables HDMI, la opemci6n se puede simplificar al establecer la funci6n Control pot HDMI en el televisor...
- Page 46 Colour o 3D no se visualizanln correctamente. • Sony recomienda llt utilizaci6n de un cable HDMI autorizado o un cable HDMI Sony. • Si llt imagen es deficiente o si el sonido no se emite desde un componente conectado it travds del cable...
- Page 47 Si desea conectar componentes que no tienen tomas HDMI, como "PlayStation 2", un reproductor DVD, un sintonizador satelital, un sintonizador de televisi6n pot cable, etc., establezca "CTRL HDMI" en "OFF" en el menfi AMP del sistema (pfigina 21 ). Otros componentes de audio, etc.
- Page 48 i!ii__m__DNi ii!iiiiiiiiiiii i_ii ¸il,iiiii{ iiiiiiii iiiii i'i,,iliiii!i ii:i :ii!ili iiiiiii},/ii ii i i!!i_ i{i!!i _iiiii!!,iiii Uni!:ii' :i _I iii;!il i{ i i% i, !,!,!i iii |i_id_iii_i,,.,_mBiii iii/J ii} tiiiiiiiii :ii' iiiiiii!! ii i _iHii!iiii i!i iiJ i iiii_iii iiiii!iii i!i/l{iii_ i[[_ ii_i'ii'ii¸ii_ iiiiii!iiili!iii/iil...
- Page 49 "O Para obtener mils informaci6n, consulte las pfiginas indicadas entre pardntesis. Altavoz potenciador de graves €- I/(_ (encendido/en espera) VOLUME- INPUT SELECTOR VOLUME+ Visor del panel frontal Presione este bot6n para seleccionar fuente de entmda pare reproducir. Cada vez que presiona el bot6n, la fuente de entmda cambia clclicamente de la siguiente manem: TV -_ BD -_ DVD -_...
- Page 50 Visor del panel frontal (altavoz potenciador de graves) Indicador POWER/ACTIVE STANDBY NIGHT (pagina 33) Se enciende en NIGHT MODE. Se enciende de la siguiente manera: Verde: el sistema est_i encendido. SLEEP (pagina 34) Ambar: s61o los componentes HDMI del Parpadea cuando el temporizador sistema est_in encendidos apagado...
- Page 51 Botones de entrada Mando a distancia Presione uno de los botones para seleccionar el componente que desea Esta secci6n describe el funcionamiento utilizar. bot6n del altavoz y el altavoz potenciador SLEEP groves. Consulte Digina 26 pare obtener detalles sobre el funcionamiento de los componentes Presione para apagar a unit hora conectados.
- Page 52 Si esta utilizando "BRAVIA" Sync (Control de audio sistema) No es necesario realizar los pasos 2 y 3 flue se mencionan anterionnente. Cuando se enciende el televisor, tambi6n se enciende el sistema y la fuente de entrada cambia autom_iticamente. Tv/O Tambidn puede ajustar el volumen del sistema THEATER *INPUT A_/O_ -- i/(b...
- Page 53 Presione los botones de entrada para visualizar la fuente de entrada en el visor del panel frontal. Fuente de Componente que se puede entrada reproducir Televisor, etc. concctado a la toma de TV TVI/d) THEATER.INPUT A_/_b If/_ c:::_ r-7 O> ,,,,,,,,,,,,,,,, i/d>...
- Page 54 • Cuando conecte la toma de salida de vide() del adaptador DIGITAL MEDIA PORT a la toma de entrada de vide() del televisor, establezca "CTRL HDMI" en "OFF" en el menfi AMP del sistema (p@ina 21). Las imfigenes de un componente conectado al adaptador DIGITAL...
- Page 55 STANDARD • Si presiona el botdn THEATER en el mando a distancia de un televisor Sony cuando "CTRL HDMI" estfi establecido en "ON", el campo acdstico cambia a "MOVIE" (no se incluyen algunos televisores Sony).
- Page 56 Control por HDMI pare los componentes conectados. compatibles con "BRAVIA" Sync a travds de un cable HDMI (no suministrado), Cuando conecta un televisor Sony con la funci6n funcionamiento se simplifica de la siguiente Control por HDMI, la funci6n Control por...
- Page 57 Observe la lista de los componentes Si agrega o vuelve a conectar HDMI en el menu del televisor y active componente la funcibn Control por HDMI para los Realice los pasos de "C6mo prepararse para componentes conectados. "BRAVIA" Sync" (pfigina 20) y "Si el mensaje La funci6n Control por HDMI para el "COMPLETE"...
- Page 58 Presione AMP MENU. Se desactiwml el menfi AMP. THEATER.NPUT AV/_ _J,_.. -- v(b • 1 [:B [SB •4 C521 • 7 (Reproduccion mediante • CLEAa ,0/10 ._Nr_ pulsacion) E] E3 E] popup/ NIGHI MOD_ SLEP TOPM_NU MENU Reproduce un componente conectado.
- Page 59 Presione t"/4, varias veces hasta que aparezca "SET HDMI" y, a continuacibn, presione (_ o ->. AV I/(_ • 1 °3 Presione t"/4, varias veces hasta que E21 [SB aparezca "VOL LIMIT" y, a • 4 continuacibn, presione @ o ->. Presione t"/,I, para seleccionar el limite •...
- Page 60 configuraci6n ahorra energia en el modo en espera comparada con la configumci6n "ON". • ON: cuando el sistema est5 en el modo en espem, el sistema (HDMI SIGNAL PASS THRU) continuamente emite sefiales HDMI desde la toma de salida Cuando utiliza "BRAVIA" Sync, puede disfiutar HDMI del sistema.
- Page 61 Presione ¢./4, para seleccionar "OFF". • ON: se actiwt la funci6n ARC. • OFF: se desactiwt la funci6n ARC. Presione AMP MENU. Se desactiwu'_ el menfi AMP. |_'[wgl • Cuando la funcidn "CTRL HDMI" est_i eslablecida "OFF", la funcidn ARC y su conl'iguracidn no estfin disponibles.
- Page 62 Bot6n del mando a Funcidn distancia ....TV lid) Enciende y apaga el AV I/_ Sony o los televisor (encendido/cn componentes de audio/ espera) vfdeo clue debe controlar .... mando a distancia. Presione TV I/@/AV...
- Page 63 Para los derails luces bajas, cuando COlilponentes, lilantenga conecta un televisor Sony presionado el bot6n que es compatible con la SHIFT y presione l'uncidn del bot6n botones numdricos para THEATER. Ademfis, el...
- Page 64 Bot6n del mando a Funci6n Botbn del mando a Funcion distancia distancia MENU/HOME Muestra el menfi. (reproducir)/ Botones del modo de n (pausar, volver a reproduccidn. ._._l/l_l_ Cuando se presiona presionar y reanudar durante la reproduccidn, la reproduccidn permite avanzar normal)/m (detener) retroceder...
- Page 65 Botbn del mando a Funcion Boton del mando a Funcion distancia distancia SUBTITLE Selecciona el idioma de los RETURN Vuelve a la pantalla subt(tulos cuando anterior de cualquier mentl graban subtftulos que se haya mostrado. multilingiies en un <-, I", ,_, +, @ Selecciona un clemento BD-ROM/DVD...
- Page 66 Blu-ray Disc. cambiar y presione AV I/_ al mismo b)Configuracidn inicial del botdn DVD. Las grabadoras tiempo. de DVD Sony funcionan con una configuracidn Ejemplo: mientras mantiene presionado DVD1 o DVD3. Para conocer mils detalles, consulte el Manual de instrucciones...
- Page 67 -SET-- -CTRL HDMI ]_OFF HDMI* -VOL MAX, 49, 48, LIMIT"" ... 2, 1, MIN C6mo utilizar el mend AMP - PASS _ AUTO THRU" L ON Puede establecer los siguientes elementos AMP MENU en el mando a distancia. ARC'" ]_OFF La configumci6n predetenninada es la que se...
- Page 68 • STD: reproduce llt pistil de sonido con el tipo de rango din_mico disefiado • Estos ajustes se manlienen aun si desconecta el cable por el ingeniero de grabaci6n. de alimentacidn de ca. • MAX: comprime el rango dinmnico por completo.
- Page 69 C6mo escuchar el sonido C6mo ajustar el sonido desde el sintonizador satelital emisi6n multiplex (DUAL MONO) (INPUT MODE) Aun cuando conecta el sintonizador satelital a la Podr_i escuchar el sonido de emisi6n multiplex cuando el sistema reciba o reproduzca una serial toma de entrada HDMI SAT/CATV del sistema, de emisi6n multiplex...
- Page 70 [L'I'W_ C6mo cambiar el ajuste • Esta funcidn estfi disponible solamente para este visualizaci6n (DISPLAY) sistellna, no para el televisor conectado otros componentes. Puede cambiar la visualizaci6n del visor del panel frontal. Funci6n Modo en espera Seleccione "SYSTEM" en el ment3 AMP autom_tico (AUTO STBY)
- Page 71 Si el • AI conectar el Blu-my Disc, reproductor problema persiste, comunlquese con el DVD, etc., a las tomas de entmda digital del distribuidor Sony re;is cercano. sistema, compmebe la configumci6n ENCENDIDO audio (configumcidn para salida de audio) del componente conectado.
- Page 72 • Verifique si HDMI IN y HDMI OUT est_n El sonido est_i demorado con respecto a la conectados al revds. imagen del televisor. • Establezca "A/V SYNC" en "OFF" si "A/V • Compruebe que los cables estdn totahnente SYNC" est;i establecido en "ON".
- Page 73 DE SALIDA (nominal) problema despuds de verificar el elemento Frontal L/Frontal 60 W + 60 W (a 4 ohmios, anterior, consulte al distribuidor Sony re;is 1 kHz, 1% THD) cercano. POTENCIA DE SALIDA (refcrencia) Frontal L/Frontal R/Centro: Si el sistema...
- Page 74 Secci6n HDMI Altavoz potenciador de graves (SA-WCT150) Conector Conector HDMU M Entradas/salidas de vfdeo BD, DVD, SAT/CATV; Sistema lie altavoz Alta'_,oz poteneiador 640 x 480p@60 graves, reflcjo de bajos 720 x 480p@59.94/60 Unidad de altavoz 130 mm tip() cdnico 1280 x 720p@59.94160 hnpedancia nominal 4 ohmios...
- Page 75 A/V SYNC Mando a distancia antes de usar 5 10, 24 AUDIO funcionamiento 15, 26 AUTO STBY Men6 AMP 31 Muting BASS NIGHT MODE "BRAVIA" Sync 20 PROTECTOR Cable digital 6ptico Campo acfistico CNT LEVEL Conexidn SW LEVEL Adaptador DIGITAL MEDIA PORT PlayStation...
- Page 76 "417409743"(1) Sony Corporation Printed in Malaysia http://www.sony.net/...