Canon POWERSHOT A60 User Manual
Hide thumbs
Also See for POWERSHOT A60:
- User manual (231 pages) ,
- Software starter manual (138 pages) ,
- Parts catalog (19 pages)
Table of Contents
Advertisement
Quick Links
ALAYSIA
tb
€
r-
o
m
3
_D
c
(O
G_
Q.
Call@H
_DI-Eog_
I Jllfllll+l
llllllll
"_o w_rSh ot A 70
_ower_hot
A _0
DIGITAL
CAMERA
Camera
User Guide
DIG_C
• Please start by reading the Precautions
on page 7 of this
manual.
• Please refer to the Software
Starter Guide for information
on
installing the software and downloading
images+
• Please also read the printer user guide included with your
Canon printer
ExifPdnt
DPOF
DIRECT
PRINT
BUBBLE JET
DIRECT
Advertisement
Table of Contents

Related Manuals for Canon POWERSHOT A60


Summary of Contents for Canon POWERSHOT A60
- Page 1 7 of this PRINT manual. • Please refer to the Software Starter Guide for information installing the software and downloading images+ • Please also read the printer user guide included with your BUBBLE JET Canon printer ALAYSIA DIRECT...
- Page 2 Flowchart and Reference Guides...
- Page 3 Trademark Acknowledgements • Canon and PowerShot and Bubble Jet are trademarks of Canon, Inc. • CompactFlash is a trademark of SanDisk Corporation. • iBook and iMac are trademarks of Apple Computer, inc. • Macintosh, PowerBook, Power Macintosh and QuickTime are trademarks of Apple Computer, Inc, registered in the United States and other countries.
- Page 4 Icons under title bars show the operations mode. As in the example below, the mode dial should be set to _, P, Tv, Av, M, _'I1,_, _, _, or I_. TV AV M _31_ qL_ r-_ i : This mark denotes issues that may affect the camera's operation.
- Page 5 A quick introduction intended for new users who want to shoot first and learn more later.Tells you how to get the camera running and how to begin shooting and playing back images. Introducesyou to all of the cameracomponents, a nd explainshow to load batteriesand usethe shutterbutton, amongother basicfunctions.
- Page 6 ii!:_: Functions andoperations tables. These pages a re shaded o ntheright e dges t omake them easy tofind. Installing theBatteries ............Installing aCF Card ............Setting the Date/Time ............Setting the Language ............Turning the Power On ............Switching between Shooting and Replaying ......
- Page 7 _,J Night Scene Mode ............Fast Shutter ..............9IF Slow Shutter ..............Stitch Assist Mode ............Movie Mode ..............Macro Mode ..............Self-Timer ............... Digital Zoom ................Continuous Shooting ............Program AE .............."Iv Setting the Shutter Speed ..........Av Setting the Aperture ............
- Page 8 Protecting Images ............Erasing Images Individually ..........Erasing AllImages ............Formatting aCF Card ............Connecting the Camera toa Printer ........Printing ................ Setting the Print Settings (Direct Print Function) ....Print Settings (DPOF Print Settings) ........Printing with DPOF P rint Settings ........Selecting Images for T ransferring ........
- Page 9 Replacing the Date Battery ..........Using the Optional Battery Kits ........... Using the Optional Lenses and Lens Adapter ....197 Camera Care and Maintenance .......... Troubleshooting ..............
- Page 10 Warning Against Copyright Infringement Please note that Canon digital cameras are intended for personal use and must be used in a manner that respects international and domestic copyright laws and regulations.
- Page 11 • Before using the camera, please ensure that you have read and understood the safety precautions described below. Always ensure that the camera is operated correctly. • The safety precautions noted on the following pages are intended to instruct you in the safe and correct operation of the camera and its accessories to prevent injuries or damage to yourself, other persons and equipment.
- Page 12 There is a risk of high-voltage electrical shock. Please take the first opportunity to consult your camera distributor or a Canon Customer Support Help Desk. • Stop operating the equipment immediately...
- Page 13 Continued use of the equipment may result in fire or electrical shock. Please consult your camera distributor or the closest Canon Customer Support Help Desk. • Do not use substances containing alcohol, benzene,...
- Page 14 Use only recommended batteries and accessories. • If using AA-size NiMH batteries, use only Canon AA-size NiMH batteries and charger recommended for use with these batteries. Use of another charger may cause batteries...
- Page 15 • Disconnect the battery charger or the compact power adapter from both the camera and power outlet after recharging and when the camera is not in use to avoid fires and other hazards. • The camera terminal of the battery charger cord and the compact power cord is designed for exclusive use with your camera.
- Page 16 • Do not operate the flash with dirt, dust or other items stuck to its lens. The resulting heat build-up could damage the flash. • If your camera is used for prolonged periods, the camera body may become warm. Please take care when operating the camera for an extended period as your hands may experience a burning sensation.
- Page 17 Avoid Strong Magnetic Fields Never place the camera in close proximity to electric motors or other equipment generating strong electromagnetic fields. Exposure to strong magnetic fields may cause malfunctions corrupt image data. Avoid Condensation Related Problems Moving the equipment rapidly between hot and cold temperatures may cause condensation (water droplets) to form...
- Page 18 Install the batteries (p. 20). Slide the battery cover lock, then open the cover and insert the batteries. • For important information about batteries, see Proper Battery Handling (p. 21). (p. 24). Install the OF card Open the CF card slot cover and insert a CF card.
- Page 19 Turn the mode dial to (p. 60). Focus (p. 40). Aim the camera at the subject, and lightly press and hold the shutter button halfway down. The camera beeps twice when the focus is set. Shoot (p. 40). Press the shutter button all the way.
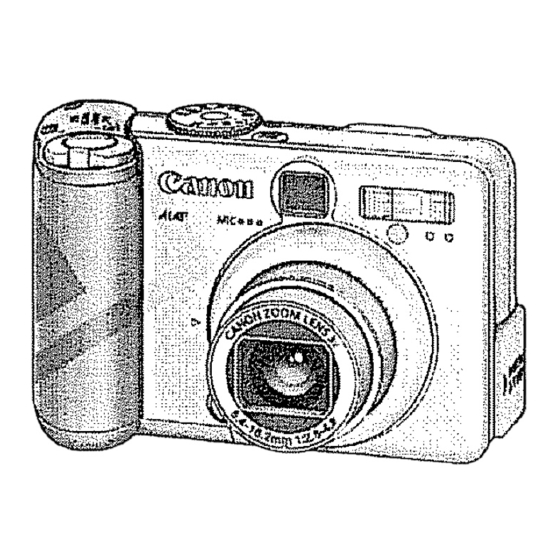
- Page 20 Zoom Lever (p. 42, 85, 118, 119) Shutter Button (p. 40) Shooting Mode Dial (p. 19) ON/OFF button (p. 30) Optical Viewfinder Window (p. 38) Speaker AF-assist Beam (p. 41) Red-Eye Reduction Lamp (p. 68) Self-Timer Lamp (p. 88) Flash (p. 67) minal Cover Ring Re ease Lens...
- Page 21 CF Card Slot Cover (p. 24) LCD Monitor .3 (p. 33) Strap Mount Viewfinder (p. 38) Attaching the wrist strap .1 Battery Cover (p. 20) Battery Cover Lock (p. 20) ]'ripod Socket .1 Be careful not to wave the camera about or catch it on other items when dangling it from the wrist strap, *2 To connect...
- Page 22 ..... Mode Switch (p. 32) II ,_- _(F,.sh),Up i __ Bu,on(p.,3,67) _'d_"o_ II I RightBu.on(_.,3) SET_ENUDISP, FUNC. _\ I_H'_'T_ I (Macr°)' MF' °°wn Butt°n6t) Left Button (p. 43) FUNC. (Single image erase) Button (p. 43, 132) DISP, Button (p. 33) MENU Button (p.
- Page 23 Use the shooting mode dial to select a Shooting mode. Auto Image • _ : Auto (p. 60) The camera automatically selects settings. • Image Zone The camera automatically selects settings according to the image composition type. _1'II : Portrait (p. 70) : Landscape (p.
- Page 24 repar,ng The camera uses four AA-size alkaline batteries supplied with the camera.You may use optional nickel metal hydride (NiMH) batteries. Be sure that the camera power is off. Slide the battery cover lock in the direction of the arrow, and push the battery cover slightly forward.
- Page 25 Battery and Charger Kit and AA-size rechargeable NiMH batteries, see the System Map (separate from this guide). • Use AA-size alkaline or Canon AA-size NiMH batteries only. For information on handling the AA-size rechargeable NiMH batteries, see Using the Optional Battery Kits (p. 193).
- Page 26 • Be careful to load the batteries with their positive (+) and negative (-) ends in the right direction. • Never mix batteries of different types or from different manufacturers. All four batteries should be identical. • Before inserting the batteries, wipe the battery terminals well with a dry cloth.
- Page 27 The positive electrode (plus terminal) is flat. The negative terminal is correctly formed (protruding from the metal base), but the seal does not extend up over the edge of the metal base. The LCD monitor displays an icon or message to let you know when batteries...
- Page 28 Be sure that the camera is turned off. Slide the CF card slot cover in the direction of the arrow, and open it. Insert the CF card with the label facing out and the arrow pointing • Insert the CF card all the way into the slot, so that the CF card eject button pops all the way out.
- Page 29 Close the CF card slot cover securely. • When the indicator on the left side of the viewfinder blinks green, the camera is writing, reading, erasing or transmitting an image to or from the card. Do net perform the following, for image data may be lost or corrupted: - Do net shake the camera.
- Page 30 The Set Date/Time menu will appear when the camera is first turned on or the date battery has run down. Replace the date battery, then reset the date and time starting from step 5 below. Press the ON/OFF button to turn on the camera (p.
- Page 31 4" Press the up or down button to select [] (Date/Time), and then press the button. Set the date and time. • Use the up or down button to change the value of the highlighted field. • Press the left or right button to highlight another field. •...
- Page 32 Use this feature to select the language for the LCD monitor display. Press the ON/OFF button to turn on the camera (p. 30). MENU Press the button. The [ [] (Rec.)] or [ [] (Replay)] Menu will display. [ [] (Rec.)] menu shown Select the [ m (Set up)] menu using the left...
- Page 33 Select [] (Languages) using the up or down button and press the button. Select a language using the up, down, left or right button. Press the button. [3.. After adjusting the settings, press the MENU button. In replay mode, you can change the language by holding the SET button while you press the MENU button.
- Page 34 ions Press the ON/OFF button until the green indicator begins blinking. Shooting Mode Current shooting settings will appear in the LCD monitor for about 6 seconds. °,,_°°° ; h °°_°",;_t °°_;h °°°°,,;..outurn e ensw retract after approximately 1 minute. Replaying mode The LCD monitor displays an image.
- Page 35 • You will hear a start-up sound and see the start-up image when the power comes on. (To change the start- up sound and image, see below and pages 52 and 181 .) • The start-up image does not appear when the LCD monitor is off or the A/V0UT terminal is connected to a Turning on the camera without the start-up sound and...
- Page 36 You can quickly switch between Shooting mode and Replaying mode. This is convenient when you wish to shoot again after checking or deleting an image immedi- ately after it is shot. Shooting Mode Replaying Mode The lens does not retract right away when the camera switches to Replaying mode.
- Page 37 The LCD monitor can be used to compose images while shooting, adjust settings menus and replay images. The image in the LCD monitor may darken when the monitor is used under sunlight or other strong lighting. This is net a defect. Shooting Mode Pressing...
- Page 38 Set the flash to on or affix the camera to a tripod when the upper indicator blinks orange and the camera shake warning icon ( _ ) appears in the LCD monitor after the metering preparations are complete. Replaying Mode •...
- Page 39 Shooting Mode p. 19 -2 ... +2 Exposure Compensation p. 101 White Balance p. 103 Drive Mode p. 83/87 r_a _a ISO Speed p. 110 Photo Effects p. 108 E_3 Eq E.q Light Metering Mode p. 99 Compression p. 64 (PowerShot A70) LMI M2S_ Resolution...
- Page 40 Replaying Mode simple display mode,the followinginformationappears. Image Number and Total (Display Image/Total) Date / Time Compression p. 64 (PowerShot A70) L M1 M2 S Resolution (Still images) p. 64 (PowerShot A60) r.h3 Sound memo (wave file) p. 128 Movie p. 122 Protection Status p.
- Page 41 B li9 B I_ _10 Shooting Mode p. 19 t_[]r180 -2 ... _+0... +2 Exposure Compensation p. 101 White Balance p. 103 Photo Effects p. 108 ISO Speed p. 110 Flash p. 67 Macro Mode p. 81 Manual Focus p. 115 E._3 E 3 E.7 Light Metering Mode...
- Page 42 Setting the LCD monitor to Off (p. 33) and using the optical viewfinder can help conserve power while shoot- ing. Align the square brackets (autofocus metering field) inside the viewfinder on the primary subject to compose the image. Viewfinder _ __F_i _ Shows the center of the image...
- Page 43 About the Autofocus Function This camera employs AiAF (artificial intelligence autofecus) technology which uses a broad metering field to calculate the focal distance with high precision. It delivers a crisp focus even when the photographic subject is slightly off-center. Image Seen in Viewfinder vs.
- Page 44 The shutter button features a two-stage action. Pressing Halfway Pressing halfway automatically sets the exposure, focus and white balance. The indicators light or blink as follows. Upper Indicator • Green: Metering complete (two beeps sound) • Orange: Flash will fire •...
- Page 45 • Ifthe orange oryellow i ndicator blinks while y ou press halfway, you can still p ress fully totake the shot. • Images are first s aved into the camera's internal memory before being r ecorded onto the CF card, allowing the next images tobetaken i mmediately long assufficient space isavailable inthe internal...
- Page 46 The zoom can be adjusted to any setting in the 35 to 105 mm range in 35 mm film equivalent terms. : Press the zoom lever left to zoom out for a wide-angle shot. L-_ : Press the zoom lever right to zoom in for a telephoto shot.
- Page 47 Menus are used to adjust shooting, replaying, date / time and electronic sound settings. Menus can be displayed by either pressing the FUNC. button or the MENU button. Watch the LCD monitor while performing the following procedures. Press the F!.JNC. button. •...
- Page 48 Select setting contents using the left or right button. Some menu items can only be selected after pressing the SET button and displaying the next menu. Press the SET button again to confirm the setting. Press the FUNC. button. • The menu closes. •...
- Page 49 • The menu switches as fellows: [ [] (Rec.)] or [ [] (Replay)] _ [ [] (Set up)] _ [ (My Camera)] • Pressing the zoom lever also switches between the menu tabs. _,_ Select a menu item using the up or down button.
- Page 50 Shooting Mode FUNC. Menu Shooting Mode Rec. Menu* Selectable items vary according to each mode. Replaying Mode Replay Menu*...
- Page 51 SetupMenu* MyCamera Menu* * Use the zoom lever to switch between menus anytime.
- Page 52 !MenuSetting_andDefau!t!Settings This chart shows the options for each menu and the default settings. FUNC. button Menu Item Reference Available Settings Page -2 to +2 Exposure Compensation Flash Output Low / Medium / Strong* White Balance Drive Mode 83, 87 O* l Dd_Ml l o._l _3 AUTO / 50* / 100 / 200 / 400 ISO Speed...
- Page 53 MENU button Reference Menu Item Available Settings Page On*/Off AiAF On*/Off Red-eye Rec. On*/Off Menu AF-assist Beam On / Off* (Red) DigitalZoom Off / 2* to 10 sec. Review Protect Turns image protection on and off Rotate Rotates the image in the display Sound Memo Adds sound memos to images Replay []...
- Page 54 Reference Menu Item Available Settings Page On* / Off Beep On* / Off AutoPowerDc_n Sets the date and time Date/Time Format Formats the CF card Shutter Volume Off/1 /2"/3/4/5 Off/1 /2"/3/4/5 Playback Vol. Off/1 /2"/3/4/5 Start-up Vol. Setup [] Off/1 /2"/3/4/5 Operation Vol.
- Page 55 • Some menu items are not available in certain Shooting modes (p. 224). • You can apply a desired image and sound to [_ and [_ in the My Camera menu. For details, see Registering My Camera Settings (p. 55) or the Software Starter Guide.
- Page 56 My Camera allows you to customize the start-up image and start-up, shutter, operation and self-timer sounds. Each menu item has three choices. e.g. Start-up image As default settings, My Camera setting [ [_ ] has a science fiction theme and My Camera setting [ [_ ] has an animal theme.
- Page 57 Select the [ _ (My Camera)] menu using the left or right button. Select a menu item using the up or down button. Select setting content using the left or right button. [3.. MENU Press the button. • Pressing the MENU button closes the menu and makes the settings take effect.
- Page 58 • If select [Theme] in Step 4, can select a consistent theme for each of the My Camera settings. • If [] (Beep) in the [ [] (Set up)] menu is set to [On], the beep sounds even if each sound item such as [Start-up Sound], [Operation Sound], [Selftimer Sound] and...
- Page 59 Images recorded onto the CF card and newly recorded sounds can be added as My Camera settings to the [ [_ ] and [ [_ ] menu items.You can also use the supplied software to upload your computer's images and sounds to the camera.
- Page 60 Select the [ _ (My Camera)] menu using the right button. Select the menu item you wish to register using the up or down button. Select l_ or l_] using the right or left button. appears. DISP. Press the button. An image appears.
- Page 61 [Start-up Image] _ Step 8a, 9a [Start-up Sound], [Shutter Sound], [Selftimer Sound] _ Step 8b, 9b Select the image you wish to register using the left or right button. Press the SET button. Select 1_7 (Record) using the left or right button and press the button.
- Page 62 Select I_ (Register) using the left or right button. Select [OK] using the left or right button and press the button. • Sounds recorded with the movie (p. 79) and sound memo (p. 128) functions cannot be added as My Camera settings.
- Page 63 • Start-up Sound, Operation Sound, Selftimer Sound Shutter Sound • Recording format WAVE (monaural) • Quantization 8 bit • Sampling frequency 11.025 kHz and 8.000 kHz • Recording time 11.025 kHz 8.000 kHz Start-up Sound 1.0 sec. or less 1.3 sec. or less Operation Sound 0.3 sec.
- Page 64 rags See Functions Available in Each Shooting Mode (p. 228) at the end of this manual to find out which settings can be changed in which Shooting modes. In this mode, all you have to do is press the shutter button and let the camera do everything else.
- Page 65 Press the shutter button halfway (p. 40). • Two beeps will sound when the camera has finished metering, and the indicator will light green or orange. If the LCD monitor is on, the AF frame will appear green. • The yellow indicator will blink and the beep will sound one time if the subject is difficult to focus on.
- Page 66 [q_i_ P Tv Av M flail_ I_ _,IIF I::_ l After a photo is taken, the image displays on the LCD monitor for two seconds (To change, see Changing the Image Display Duration (p. 63)). There are two ways to display the image for longer.
- Page 67 The length of time images are displayed after a photo been taken can be changed from 2 seconds to 10 seconds or turned off. In the [ [] (Rec.)] menu, select [] (Review). See Selecting Menus and Settings (p. 43) Select a Review setting and press the MENU button.
- Page 68 I_PTv Av M tl_ll_ _i _" E:_I ',_, 1 You can change the resolution and compression (exclud- ing movies) settings to suit the purpose of the image you are about to shoot. Resolution Purpose P0werShotA70PowerSh0tA6O High (2048x1538 pi×ele) . Print A 4size *_210x 297mm 2048x1536 1600x1200 (8.3x 11.7in.)or larger p rints...
- Page 69 • Movies can be shot with the following resolution. Resolution PowerShot A70 PowerShot Ae0 640 x 480 pixels 320 x 240 pixels 320 x 240 pixels 160x120pixels 160x120pixels Turn the shooting mode dial to the desired Shooting mode. Press the FUNC. button. _,_ Select t L* (2048 x 1536 or 1600 x 1200) using the up or down button, PowerShot A70...
- Page 70 Select the compression you wish to set using the left or right button. You can shoot the image right after selecting settings by pressing the shutter button. This screen will appear again, once the image is shot. Press the FUNC. button. Shoot the image.
- Page 71 [i_E_ P Tv Av M _,'11 _ , _j _, lIE" I::::_1 i Use the flash according to the guidelines below. The flash fires automatically Red-eye reduction, required by the lighting level, and Auto the red-eye reduction lamp fires each time the main flash fires. The flash fires automatically Auto required by the lighting level.
- Page 72 When the red-eye reduction function is off Shoot the image. • The flash will fire if the indicator beside the viewfinder lights orange when the shutter button is pressed halfway. (Does not fire in (_) .) • Shooting procedures are the same as for the _ mode (p.
- Page 73 When shooting with a high ISO sensitivity and using the flash, there is more of a chance of overexposure closer you are to the subject. • Some settings are not available with certain Shooting modes. Please refer to Functions Available in Each Shooting Mode (p.
- Page 74 Use this mode when you want the subject to appear sharp and the background to blur. Turn the shooting mode dial to tt'll. Shooting procedures are the same as for the _ Mode (p. 60). • For functions available in this mode, see page 224. •...
- Page 75 Use this mode to shoot expansive landscape scenes. Turn the shooting mode dial to _,. Shooting procedures are the same as for the _I_ Mode (p. 6O). _]° _°f°°,i°" °i_,°i°thi "°d°° "p°0 ..• or unc onsava a e n e, see a e224.
- Page 76 Use this mode to capture human subjects against the backdrop of an evening sky or night scene. The people are illuminated with light from the flash while the backdrop is captured at a slow shutter speed so that both appear correctly exposed.
- Page 77 Use this mode to shoot fast moving objects. J_ Turn the shooting mode dial to _&,. Shooting procedures are the same as for the _ mode (p.6O). page • For functions available in this mode, see 224. • Noise in the recorded image may increase if you shoot dark subjects.
- Page 78 Use this mode to shoot moving objects to make them appear blurred such as river rapids. Turn the shooting mode dial to a$'. Shooting procedures are the same as for the _ mode (p.60). Always use a tr_ cd to prevent camera shake in this mode.
- Page 79 Use this mode when taking shots that you want to combine into a panorama. To create the panorama itself, you must stitch the images together at your computer..... u e°t ..To create the panorama at your computer, PhotoStitch software that came with your camera. The PhotoStitch program detects the overlapping portions of adjoining images and merges them.
- Page 80 • Compose each frame so that it overlaps 30 to 50 % of the adjoining image. Try to keep the vertical misalign- ment to within 10 % of the image height. • Do not include moving items in the overlap. •...
- Page 81 Selectthe shooting sequenceusing the left or right button andpress the button. You can also press the shutter button directly to shoot without pressing SET. ° Shoot the first image. The exposure and white balance settings are set and o .c locked with the first image, Compose and shoot the second...
- Page 82 Press the button after the last shot. • A custom white balance setting (p. 103) cannot be set in mode. To use a custom white balance setting, first set it in another Shooting mode. • The settings in place for the first image are locked in and cannot be changed for subsequent shots.
- Page 83 (PowerShot A70 only), 3 minutes at the setting and about 3 minutes* at the [] setting. * Using and optional Canon FC-256MH CF Card (not sold in some regions) When using the CF card supplied with the camera, the...
- Page 84 These times may vary with the subject and shooting conditions. Recording will automatically stop when the maximum is reached or when the CF cards runs out of free capacity. Filming may stop unexpectedly with certain types of CF card (if it is a slow-recording card, if it has been formatted on a different camera or a computer, or if images have...
- Page 85 [q_i_ P Tv Av M t_ ll_i _,,IE" FQ ',m,] Use the macro mode to shoot close-ups of subjects in the range of 5 to 46 cm (2.0 in. to 1.5 ft.) at wide angle end and 26 to 46 cm (10 in. to 1.5 ft.) at telephoto end. DISR Press the button to turn the LCD...
- Page 86 • Some settings are not available with certain Shooting modes. Please refer to Functions Available in Each Shooting Mode (p. 224). • Always use the LCD monitor to compose images in macro mode. Shooting with the viewfinder is possible, though, the parallax phenomenon may cause images composed with the optical viewfinder to be off-center 33).
- Page 87 i_PTv Av M tl_lt , _ _i _,,@L="r-Q ',m,i You can take pictures with the self-timer in any Shooting mode. FUNC. Press the button. Select El* (Drive Mode) using the up or down button. * The current setting is displayed. _,_ Select £_ or _3 using the left or right button and press the FUNC.
- Page 88 You can change the self-timer sound by changing the setting in [Selftimer Sound] in the [ _ (My Camera)] menu (p. 181).
- Page 89 [!_]_P Tv Av M tl'll_ _ _,,G_" ] When the LCD monitor is on, images can be zoomed with the combined optical and digital zoom functions as follows (figures are approximate.) PowerShot A70:3.8 times, 4.8 times, 6.0 times, 7.4 times, and 9.6 times PowerShot A60:3.8 times, 4.7 times, 6.0 times, and 7.5 times DISE...
- Page 90 Press the zoom lever toward L-$3 and hold it. • The lens will zoom to the maximum optical telephoto setting and stop. Release the lever and press it toward E_ again to further zoom the image digitally. • Press the lever toward [] to zoom back out.
- Page 91 2.2 images per second* (PowerShot A70) or approx. 2.6 images per second* (PowerShot A60) (When the LCD monitor is OFF in Large/Fine mode). * These figures reflect Canon's testing standard, the actual figures will vary according to the subject and shooting conditions.
- Page 92 • The interval between frames lengthen somewhat when the internal memory becomes full. • The flash can be used, but the interval between images will lengthen to accommodate the flash recharge time.
- Page 93 Camera settings such as shutter speed and aperture can be freely changed for shooting. 224) at the end of this manual to find out which See Functions Available in Each Shooting Mode (p. settings can be changed in which Shooting modes. Please see _ Mode (p.
- Page 94 Shoot the image. • The shutter speed and aperture value will automatically appear on the LCD monitor if it is on. • The correct exposure has been set if the shutter speed and aperture value show in white. • For functions available in this mode, see page 224. •...
- Page 95 When you set the shutter speed in the shutter speed- priority AE mode, the camera automatically selects an aperture value to match the brightness. Faster shutter speeds allow you to catch an instantaneous image of a moving subject while slower speeds create a flowing effect and allow you to shoot without a flash in dark areas.
- Page 96 Shoot the image. The correct exposure has been set if the shutter speed and aperture value show in white. If the aperture value shows in red, the image is under exposed (insufficient light) or overexposed (too much light). Adjust the shutter speed using the left and right buttons until the aperture value display turns to white.
- Page 97 • For functions available in this mode, see page 224. • Please note that camera shake becomes a factor at low shutter speeds. If the camera shake warning [] appears in the center of the LCD monitor, secure the camera to a tripod before shooting.
- Page 98 The aperture adjusts the amount of light that passes through the lens. Selecting a lower aperture value (opening the aperture) allows you to fade the background. A higher aperture value (closing it) brings the entire range from foreground to background into focus. Turn the shooting mode dial to Av.
- Page 99 Shootthe image. The correct exposure has been set if the shutter speed and aperture value show in white. • If the shutter speed shows in red on the LCD monitor, the image is under exposed (insufficient light) or overexposed (too much light). Adjust the aperture value using the left and right buttons until the shutter speed display turns white.
- Page 100 You can manually set the shutter speed and aperture to achieve a particular effect. This is convenient for shooting fireworks and other images where it is difficult to set the correct exposure automatically. Turn the shooting mode dial to M. The shutter speed and aperture value appears on the LCD monitor if it is on.
- Page 101 Shoot the image. When you press the shutter button halfway, a number indicating the difference between the standard exposure* and the selected exposure appears on the LCD monitor. If the difference is more than _+2steps, "-2" or "+2" appears in red.
- Page 102 [ P TvAvM_Tt '_ p_ _€',_" You can change the auto focus frame (AF frame) selection method. The AF frame will appear when the LCD monitor is turned on (p. 40). The camera automatically selects between 5 AF frames to focus according to the shooting conditions.
- Page 103 iPTv You can switch between metering modes to shoot. Appropriate for standard shooting conditions, including backlight scenes. The camera divides images into several zones E_-] Evaluative for light metering. The camera evaluates Light Metering the complex lighting conditions, such as the position of the subject, the brightness, the background, the direct light, and the backlighting, and adjusts the settings to...
- Page 104 Select i-B-I* ( Evaluative) using the up or down button. * The current setting is displayed. Select a light metering mode using the left or right button. _,_ Press the FUNC. button. Shoot the image. Some settings are not available with certain Shooting modes.
- Page 105 I P Tv Av _,3t , _ [] _,,L =" _ ,,HI Adjust the exposure compensation setting to avoid making the subject too dark when it is backlit or shot against a bright background. Press the DISP. button to turn on the LCD monitor.
- Page 106 Select a setting using the left or right button. • The settings can be adjusted in 1/3 steps in the range of - 2EV to +2EV. • You can shoot the image right after selecting settings by pressing the shutter button. This screen will appear again, once the image is shot.
- Page 107 IPTv Av M tl'l) ,_ _j _,,IE" r-Q ',n, ] When the white balance mode is set to match the light source, the camera can reproduce colors more accurately. Set the white balance mode to a natural or artificial light setting according to the circumstances.
- Page 108 Select m* (Auto) using the up or down button. * The current setting is displayed. Select the desired setting using the left or right button. • Please see the next page regarding the _m_ custom setting. • You can shoot the image right after selecting settings by pressing the shutter button.
- Page 109 You can set a custom white balance to obtain the optimal setting for the shooting conditions by having the camera evaluate a subject such as a white piece of paper or cloth, or a photo-quality gray card. FUNC. Press button. Select []* (Auto) using the up or down button.
- Page 110 Aim the camera at the white paper or cloth, or gray card and press the button. • Aim the camera so that the white paper or cloth, or gray card, completely fills the frame on the LCD monitor screen or the entire viewfinder before pressing the SET button.
- Page 111 • Some settings are not available with certain Shooting modes. Please refer to Functions Available in Each Shooting Mode (p. 224) • To set and use a custom white balance setting, it is advisable to select the P Shooting mode and set the exposure compensation and flash exposure compensa- tion to zero (_+0).The correct white balance may not be...
- Page 112 [PTv Av M t)l _ i_ _" r<_',m, i can shoot with differentphotoeffects. Photo Effect Off Records with no effect. Vivid Emphasizes the contrast and color saturation to record in bold color. Tones down the contrast and color Neutral saturation to record neutral hues. Low Sharpening Records subjects with softened outlines.
- Page 113 _,_ Select the desired setting using the left or right button. • If the LCD monitor is on, you can check the results by viewing the image on the LCD monitor. • A shot can be taken immediately after by pressing the shutter button.
- Page 114 [PTv Change the ISO speed when shooting in dark places or when you want to shoot with a faster shutter speed.You can choose from the following speeds: Auto, 50, 100,200 and 400. Press the FUNC. button. Select []* (ISO Speed) using the up or down button.
- Page 115 Press the FUNCo button. Shoot the image. • Higher ISO speeds increase the image noise. To take clean images, use as low an ISO speed as possible. • Although the AUTO setting selects the optimal speed, it will automatically raise the speed when the shooting condition limits are reached.
- Page 116 In M mode, the flash output can be controlled in three steps, starting from FULL, when shooting. Press the FUNC. button. Select [] (Flash Output) using the up or down button. Adjust the flash output using the left or right button. You can shoot the image right after selecting settings by pressing the shutter button.
- Page 117 IPTv Av M tl_lt_, II_i _,,IL_" FQ ',m,] The autofocus may not work well on the following types of subjects. • Subjects with extremely low contrast to the surround- ings • Subjects mixing close and far objects • Subjects with extremely bright objects at the center of the composition •...
- Page 118 Keep it pressed while you recompose image and press the shutter button all the way to shoot the image. Focus Lock Method 2 Press the DISP. button to turn on the LCD monitor. Press the shutter button halfway to lock the focus.
- Page 119 The focus can be manually set. Press the DISE button to turn on the LCD monitor. Press the MF button until MF appears. • The MF indicator appears. • The MF indicator shows approximate figures. Use them as a shooting guideline only.
- Page 120 You can select the way file numbers are assigned. The file numbers are reset to the start (100-0001) each time a new CF card is inserted. New images recorded on CF cards with existing files are assigned the next available number. The file number of the last image to be shot is memorized so that images recorded to a new CF card...
- Page 121 Setting the [File No. Reset] to [Off] is useful for avoiding file name duplication when images are downloaded to a computer. About File and Folder Numbers Images are assigned file numbers from 0001 to 9900, and folders are assigned folder numbers from 100 to 998 (Folder numbers cannot contain 99 in the last two digits).
- Page 122 ay,ng You can view the recorded images on the LCD monitor. Set the mode switch to r_. The last recorded image appears (single image replay). Move between images using the left or right button. Use the left button to move to the previous image and the right button to move to the next.
- Page 123 Images can be magnified up to approximately 10 times. Set the mode switch to [-_q. Press the zoom lever toward 0_. • You can move around the magnified image using the left, right, up or down button. • Hold the SET button down and press the zoom lever toward O_ to cycle through each setting, approximately 2.5 times, to approximately 5 times and 10 times.
- Page 124 Up to nine images can be viewed at once in index replay. Set the mode switch to r-_l. Press the zoom lever toward _"_. SelectedImage MovieFrame Nine images appear at once (index replay). Change the image selection using the left, right, up or down button.
- Page 125 The display can be advanced or set back 9 images in either single image replay or index replay. Display the JUMP bar. • Press the zoom lever twice toward _ while in single replay (p. 118). • Press the zoom lever once toward _ while in index replay (p.
- Page 126 You can replay the images shot in _m mode. Set the mode switch to r-_l. Movies cannot be viewed in index replay. Select a movie using the left or right button and press the SET button. • A movie displays with the _'_ icon on it.
- Page 127 Pausing and Resuming Play • Press the SET button to pause the movie. Press it again to resume. Fast Forwarding / Rewinding • Select one of the following operations using the left or right button and press the SET button. Return to Single Image View First Frame Previous Frame (Rewinds if the SET button is held...
- Page 128 You can delete unwanted portions from the first or second half of a movie clip. Select the movie you wish to edit and press button. See Viewing Movies (p. 122). Select (Edit) usingthe left or right button and press button. The movie editing panel and the movie editing bar appear.
- Page 129 4" Select the range you wish to edit using the left or right button. Select I1 (play) usingthe up or down button and press the button. • The temporarily edited movie will start playing. • The movie will stop if you press the SET button while it is playing.
- Page 130 Select [Overwrite] or [New File] using the left or right button. • [Overwrite] : Saves the edited movie under the same file name as the original movie. The original data is deleted. • [New File] : Saves the edited movie under a new file name.
- Page 131 Images can be rotated 90 -0and 270-0clockwise on the LCD monitor. 0 ° (Original) 90 ° 270 ° Select [] (Rotate) from the [ [] (Replay)] menu. See Selecting Menus and Settings (p. 43). Select an image you want to rotate using the left or right button and press the SET button.
- Page 132 In replay mode (including single replay, index replay and magnifying replay) you can attach sound memos (up to 60 seconds) to an image. The sound data is saved in WAVE format. Select [] (Sound Memo) in the [ [] (Replay)] menu.
- Page 133 • The recording starts and the elapsed time is displayed. Speak towards the microphone of the camera. • To stop recording, press the SET button. To restart recording press the SET button again. • You can add as many sound memos as you like until their total time reaches 60 seconds.
- Page 134 Use this feature to automatically replay all of the images in the CF card (Auto Play). The LCD monitor displays each image for approximately 3 seconds. In the [ [] (Replay)] menu, select (Auto Play). • See Selecting Menus and Settings (p. 43). •...
- Page 135 You can protect important images from accidental erasure. In the [ [] (Replay)] menu, select (Protect). See Selecting Menus and Settings (p. 43). Select an image you want to protect using the left or right button and press the button. Protected Icon •...
- Page 136 Please note that erased images cannot be recovered. Exercise caution before erasing a file. Select the image you wish to erase using the left or right button and press the/_ button. A confirmation screen appears. Select [Erase] using the left or right button and press the button.
- Page 137 In the [ [] (Replay)] menu, select [] (Erase all) and press the button. A confirmation screen appears. Select [OK] using the left or right button and press the SET button. To cancel instead of erasing, select [Cancel] and press the SET button.
- Page 138 You should format a new CF card or one from which you wish to erase all images and other data. Please note that formatting (initializing) a CF card erases all data, including protected images and other file types. Please check the contents of the CF card before formatting In the [ I_l (Set up)] menu, select [] (Format)
- Page 139 • If the camera does not work properly, the inserted CF card may be malfunctioning. Reformatting the CF card may solve the problem. • When a non-Canon brand CF card is malfunctioning, reformatting it may solve the problem. • CF cards formatted...
- Page 140 *_ The direct print [] icon appears on direct print compatible CP Series printers. *2 Digital Print Order Format BJ Printer with the direct print function Canon printer with the direct print function Printed images CF Card Photo lab...
- Page 141 Please refer to the System Map supplied with your _ camera for direct print function compatible printer (CP ;! Ser!es! !n!°_rn at!°n _ Print Settings for Direct Print Function • Select how many copies you want (p.146) • Select the print style (p.146) •...
- Page 142 Use the Print Order Menu as shown below to select all print settings. Direct Print Function Mode switch PowerShot DPOF Settings Mode switch [_...
- Page 143 MENU :Turns the menu on/off : Selects items and settings : Sets items and settings Paper (p. 146) Style Borders (p. 146) Image (p. 146) Date (p. 146) _Number of copies (p. 146) Trimming or printing area (p. 149) (p. 152) -Order _ Number of copies (p.
- Page 144 You can make clear prints swiftly and easily when connect the camera to an optional direct print function compatible printer (CP Series) or a direct print function compatible Bubble Jet printer (sold separately). It can also be used with DPOF print settings.
- Page 145 _,_ Connect the camera and printer using the direct interface cable. When you insert the cable, make sure the "Canon" mark of the cable faces up. to Printer Direct Interface Cable DIF-100 Press the printer's ON/OFF button to turn on the power.
- Page 146 BJ printer and inserted the other end in a power outlet. Connect the camera and printer using the cable. When you insert the cable, make sure the "Canon" logo on the cable faces up. to BJ Printer Connection Cable...
-
Page 147: Setting The Language
4" Set the mode switch to I-_ and turn the camera on. [] appears on the camera LCD monitor when the BJ printer is properly connected to the camera. • On Bubble Jet printers with operation panels, images cannot be printed through the operation panel while the camera is connected. - Page 148 * The following illustrations show examples from a direct print function compatible printer (CP Series). Options for the Style category will differ slightly for BJ printers. An image can be printed when displayed in single replay or selected in index replay. Choose an image using the left or right button and press the button.
- Page 149 You cannot print movies. Cancel Printing • To cancel printing between images printed, press the SET button. A confirmation dialog appears. Select [OK] using the left and right buttons and press the SET button. - Direct Print Function Compatible Printers (CP Series) A print in progress cannot be stopped.
- Page 150 In Replaying mode, press the button and select the [Copies] option using the up or down button. Specify the desired number of copies using the left or right button. You can specify from 1 to 99 prints. You can select from among the following print styles. Direct Print Function Compatible Printer...
- Page 151 Direct Print Function Compatible BJ Printer Select the paper size from the following. [Card #1], [Card #2], [Card #3], [LTR] er [] Paper [A4] For the usable paper type, please refer to the Bubble Jet Printer User Guide. [] Berderless Prints right to the edges of the page.
- Page 152 Select settings using the left or right button. Image Settings Paper (Direct print compatible (Direct print compatible CP series printer) BJ printer) Select [Standard] Select [Card #1], [Card #2], [Multiple]. [Card #3], [LTR] or [A4]. Borders Date Choose [Borderless] Choose [On] or [Off].
- Page 153 MENU 4" Press the button. If [Bordedess] or [Multiple] is selected as the print style, the center portion of the recorded image (the image displayed on the LCD monitor) is printed at an enlarged size. As a result, the image's top, bottom and sides may be cropped slightly.
- Page 154 In Replaying mode, press the button, choose [Trimming] using the up or down button and press the button again. The trimming frame will appear at the center of the image. If a trimming setting has already been selected for the image, the frame will appear around the previously selected portion.
- Page 155 Press the button to close the setting menu. Trimming Frame • The trimming setting on es to one image. • The trimming setting is cancelled with the following operations. - When you set the trimming settings for another image. - When you close the Print mode (when you turn the camera power off, change the camera mode, or detach "E the direct interface cable).
- Page 156 Choose from three printing area options. Prints the top area of an image. Middle Prints the middle area of an image. Bottom Prints the bottom area of an image....Prior to Setting the Printing Ar_a ... • Please set the Print Style (Image Settings, Paper, Borders and Date) first before setting the printing area (p.
- Page 157 • The printing area setting only applies to one image. • The printing area setting is cancelled with the following operations. - Printing - When you set the printing area setting for another image. - When you close the Print mode, i.e. •...
- Page 158 You can select images on a CF card for printing specify the number of print copies in advance using the camera. This is extremely convenient for sending images to a photo developing service or for printing on a direct print function compatible printer (CP Series)
- Page 159 Select images for printing. of Copies Single Images • When the print type (p. 156) is set to [Standard] or [Both], select an image using the left or right button. You can set the number of copies (up to 99) to be printed using the up or down button.
- Page 160 MENU Press the button......• Images are printed in order from oldest to newest by shooting date. • A maximum of 998 images can be marked per CF card. • Press the zoom lever in step 3 to switch between single and 3-image index replay for selecting an image.
- Page 161 Select [Set up] using the left or right button and press the button. _,_ Select [] (PrintType), [] (Date) or [] (File No.) using the up or down button. Select a setting using the left or right button. [](PrintType) [_J(Date) Select [Standard], [Index], Select...
- Page 162 MENU _,_ Press the button. The set up menu will close and the Print Order menu will reappear. • When [Print Type] is set to [Index], the [Date] and [File No.] cannot be set to [On]. • If [Print Type] is set to [Both], both [Date] and [File No.] can be set to [On], however, only the file number is printed for the index print.
- Page 163 Select[OK] using the left or right button and press the button. If you decide you don't want to reset the settings, select [Cancel] and press the SET button.
- Page 164 You can use the DPOF print settings to print with an optional direct print function compatible printer Series) or with a direct print function compatible printer. In the [ [] (Replay)] menu, select [] (Print Order) and press the button. See Selecting Menus and Settings (p.
- Page 165 Select [OK] using the up, down, left or right button and press the button. The image will start to print and, when it is completely finished, the display will revert to the standard replay mode. • To print the date, set the [Date] setting in the print order menu in Step 2 on the previous page to [On].You cannot "E...
- Page 166 • The maximum number of images printed on one page in the Index print type depends upon the selected paper size. - Card Size: 20 images - L Size: 42 images - Postcard Size: 63 images (Please refer to your Bubble Jet's user guide for an expla- nation of the number of images printed with a Bubble Jet printer.) Cancel Printing...
- Page 167 Using the camera, you can make marks on images you wish to transfer and attach to e-mails. (Please use the supplied software for actually transferring images. ) These settings are compatible with the Digital Print Order Format (DPOF) standards. The _, mark will display on images that have had transfer marks set by another DPOF-compliant camera.
- Page 168 Select images for transferring. Single Images • Select an image using the left or right button and mark or remove marks from images using the up or down button. • You can use the same procedures to select images in index replay (3 images).
- Page 169 ,ew,ng mages on a A video-compatible television connected via the supplied AV cable AVC-DCIO0 can be used to view images as you shoot or replay them. Turn off the camera (p. 30). Attach the AV Cable to the terminal on the camera.
- Page 170 appear • No image will on the LCD monitor when the camera is connected to a TV monitor. • The video output signal can be switched (NTSC or PAL) to accommodate different regional standards (p. 181 ). The default setting will vary between regions. NTSC: Japan, U.S.A., Canada, Taiwan, etc.
- Page 171 mages Download images taken with the camera to a computer in one of the following ways: • Connect the camera to a computer with the USB cable You can then download images directly from the camera to a computer. • Directly from the OF card Using a laptop computer or a card reader, you can download images directly from the CF card.
- Page 172 Install the driver and the software applications bundled on the Canon Digital Camera Solution Disk. Please see the Software Starter Guide for information system requirements and installation instructions. Connect the supplied USB interface cable to the computer's USB port and the camera's DiGiTAL terminal.
- Page 173 _,_ Set the camera's mode switch to _ press the ON/OFF button until the indicator next to the viewfinder starts blinking green. The LCD monitor displays in replay mode. When the connection to the computer is complete, the LCD monitor turns off and the green indicator lights steady.
- Page 174 10.2), you can use the software distributed with these operating systems to download images (JPEG format only) without installing the software bundled on the Canon Digital Camera Solution Disk. This is useful for downloading images to a computer in which the software is not installed.
- Page 175 Eject the CF card from the camera, and insert it into a CF card reader connected to the computer. • If you are using a PC card reader, first insert the CF card into a PC card adapter (optional), and then insert the PC card adapter into the computer's PC card reader.
- Page 176 :ions * Default setting Item/ Reference Setting Content Menu Screen Page ExposureCompensation Sets the exposure compensation. -2 ... 0 ... +2 Flash Output Adjusts the flash output in i mode. White Balance Sets the white balance. • AWB(Auto)* • _:- (Day Light) •...
- Page 177 Item/ _eference Setting Content Menu Screen Page ISO Speed Sets the sensitivity at which images are recorded. • 50* • 100 • 200 • 400 • AUTO Photo Effect Switches between photo effects. • [] (Effect Off)* • [] (Vivid) •...
- Page 178 Item/ Reference Menu Screen Setting Content Page Resolution(Movies) Sets the number of pixels used for images. • [] (640 x 480 pixels) (PowerShot A70 only) • [] (320 x 240 pixels)* • [] (160 x 120 pixels) Compression Sets the relative compression ratio used for images.
- Page 179 * Default setting Item/ _eference Menu Screen Setting Content Page m Red-eye Sets whether or not the red-eye reduction lamp fires. • On* • Off m AF-assi_ Beam Sets the output of the AF-assist beam according to shooting conditions when using the auto focus.
- Page 180 Item/ Reference Setting Content Menu Screen Page [] Protect Protects images from accidental erasure. [] Rotate Rotates images 90 or 270 degrees clockwise in the display. []Sound Memo Adds sound memos to images. [] Erase all Erases all images from a CF card (excluding protected images).
- Page 181 * Default setting Item/ _eference Menu Screen Setting Content Page [] Auto Play Plays images automatically one after the other. [] Print Order Sets which images and how many copies will be printed on a printer with the direct print function or at a photo lab service.
- Page 182 Item/ Reference Menu Screen Setting Content Page [] Beep Sets whether or not the beep sounds when the shutter button is pressed or when a menu operation is performed. See also "How the [Beep] setting in the [W (Set up)] menu and each sound setting in the [[_(My Camera)] menu are related"...
- Page 183 * Default setting Item/ _eference Menu Screen Setting Content Page [] Shutter Volume Adjusts the sound volume when the shutter button is pressed all the way. There is no shutter sound in Movie mode. • =_Dd_ (Off) • .DDDE_ ( 1) •...
- Page 184 Item/ Reference Menu Screen Setting Content Page [] SelffimerVol. Adjusts the sound volume of the Selftimer Sound. • DDDD[3(Off) • =_d_[_(1) • =.Dd3 (2)* • ==mD[_(3) • =.dD • ==din (5) File No, Reset Sets how file numbers are assigned to images when new CF cards are inserted.
- Page 185 *Default setting Item/ _eference Menu Screen Setting Content Page Video System Sets the video output signal standard. • NTSC* • PAL You can select the theme, start-up image and sound, shutter sound, operation sound and selftimer sound used on this camera. These are called My Camera settings. You can also customize the [ [] ] and [ [] ] options for each...
- Page 186 Item/ Reference Setting Content Menu Screen Page [] Start-up Image Sets the start-up image when you turn on the camera. (Off) • _ *Ell* Start-up Sound Sets the start-up sound when you turn on the camera. *_ (Off) • _ Sets the sound when the multicontroller Operation Sound or any button other than the shutter...
- Page 187 * Default setting Item/ _eference Menu Screen Setting Content Page [] Shutter Sound Sets the shutter sound when you depress the shutter button.There is no shutter sound while a movie is being shot.*_ • [_ (Off) •El* "1 How the [Beep] setting in the [ f1_ (Set up)] menu and each...
- Page 188 You can reset all of the menu and button operation settings to default except for [Date/Time], [Language], [Video System]. Turn on the camera. The mode dial can be turned to any setting. MENU Press the button for longer than 5 seconds.
- Page 189 • The custom white balance is not cancelled even if settings are reset to default settings. (p. 105) • Settings cannot be reset when the camera is connected to a computer, to an optional direct print function compatible printer (CP series) or to a direct print function compatible BJ printer (optional).
- Page 190 The following messages may appear on the LCD monitor. Busy...: Image is being recorded to, or read from, CF card. Resetting settings to default. No Memory card: You attempted to shoot or replay images without a CF card installed. Cannot record!:Yeu attempted to shoot an image without a CF card installed.
- Page 191 A problem exists if the error code reappears. Note the number and contact our Canon Customer Support Help Desk. If an error code displays directly after taking a picture, the shot may not have been recorded.
- Page 192 The following messages may appear on the camera's LCD monitor when a direct print compatible printer is printing. Depending on the printer model, some messages may not display. No Paper: Paper cassette is incorrectly inserted or out of paper. Or the paper feed isn't operating correctly.
- Page 193 Could not print You attempted to use the DPOF print xx images: settings to print xx images that are from another camera, that have been recorded in a different format, or that have been edited on a computer. The following messages may appear when the camera is connected to the direct print compatible...
- Page 194 RESUME/CANCEL button on Bubble Jet Printer. Please request replacement of the waste tank at your nearest Canon customer support center listed in the Bubble Jet Quick Start Guide. Printer error: Turn off the printer, then turn it on again. If...
- Page 195 ices The camera uses a special Date battery to power its internal clock. If the LCD monitor displays the Set Date/ Time menu when you turn on the camera, this means that the Date battery has run down and the clock has stopped running.
- Page 196 Pull the battery out of the holder, as shown. Positive terminal Insert the new date battery into the holder, with the positive terminal (+) facing up. Replace the date battery holder back into its original position, and close the DiGiTAL terminal cover.
- Page 197 • The indicator blinks while charging, then comes on solid when charging is finished. • This charger can be used only to charge Canon AA-size NiMH batteries. Please do not attempt to charge any other type of batteries with this charger.
- Page 198 Switch to different, unused batteries. If you are purchasing batteries, look for Canon's AA-size NiMH batteries (four- piece set). • Leaving batteries in the camera or charger may damage it causing battery leakage.
- Page 199 • Ittakes a pproximately 220 minutes forthe charger to fully recharge the batteries (as determined bytesting at Canon facilities). Please denot c harge batteries in areas w here the temperature isoutside the range o f0to 35°C (32 to95°F). •Charging time varies a ccording...
- Page 200 Open the DiGiTAL terminal cover, and connect the adapter's DC plug into the camera's DC IN terminal. Please unplug the adapter from the power outlet when you have finished using the camera. Please do not attempt to use any AC adapter other than AC Adapter Kit ACK600 with your camera.
- Page 201 The camera supports use of the optional Wide Converter WC-DC52, Tele-converter TC-DC52 and Close-up Lens 250D (52 ram). In order to attach any of these lenses, you also need to use the optional Conversion Lens Adapter LA-DC52C. Use this converter for taking wide-angle shots. The wide converter changes the focal length of the camera body's lens by a factor of 0.7 (The thread diameter is 52 ram.).
- Page 202 This 52 mm-threaded diameter magnifying conversion lens is for taking telephoto shots. The lens changes the focal length of the camera body's lens by a factor of 2.4x. This lens makes it easy to take macro shots. With the camera set to Macro mode, you can use this option to shoot subjects that are 4 to 25 cm (1.6 to 9.8 in.) at wide angle end and 13 to 25 cm (5.1 to 9.8 in.) at telephoto end from the lens tip.
- Page 203 • It is not possible to attach a lens hood or filter to the wide converter or tele-oonverter. • If you use the flash when shooting with the wide converter, the outer area of the recorded image (and especially the lower right corner) will come out relatively dark.
- Page 204 This optional adapter is required for attaching the wide converter, tele-converter and close-up lens (all optional). Be sure that the camera is turned off. Press the ring release button and hold it down, and turn the ring in the direction of the arrow.
- Page 205 Align the • marks on the Conversion Lens Adapter and the camera, and turn the adapter in the direction of the arrows as far as the • mark on the camera. Set the lens on the adapter, and attach it securely by turning it in the indicated direction.
- Page 206 Completely remove all dust and dirt from conversion lenses with a lens blower brush before use. The camera may focus on any dirt that remains. Exercise due caution when handling the lenses since it is easy to dirty them with finger prints. Be careful net to drop the camera or adapter when removing the ring.
- Page 207 • Never use synthetic cleansers on the camera body or lens. If dirt remains, contact the closest Canon Customer Support Help Desk as listed on the separate Canon Customer Support leaflet. Viewfinder, Use a lens blower brush to remove dust and dirt.
- Page 208 (four AA-size batteries.) • Use an AC adapter. Batteries are not the Use only unused AA- size alkaline batteries right type. or Canon AA-size NiMH batteries. (For information about alkaline batteries, see Proper Battery Handling (p. 21 )) Poor contact between...
- Page 209 OF card (p. 134). If reformatting doesn't work, the OF card logic circuits may be damaged. Contact the nearest Canon Customer Support Help Desk. CF card slot cover or Close the OF card slot Lens will not battery cover opened...
- Page 210 Problem Cause Solution Batteries are not the Battery pack Use only unused AA- consumed size alkaline batteries right type. or Canon AA-size quickly NiMH batteries. (For information about alkaline batteries, see Proper Battery Handling (p. 21 )) The batteries are cold.
- Page 211 Cause Problem Solution Poor electrical contact. • Be sure to set If using rechargeable batteries firmly into batteries: the charger. Batteries • Be sure that the net charge. power cord is firmly connected to the charger, and is firmly plugged in to the power outlet.
- Page 212 Problem Cause Solution Shots are • Ensure that there is The subject was blurry or outside the range over at least 46 cm (1.5 ft.) unfocused. which the camera can between the camera focus. lens and subject. • Use the macro mode to shoot close-ups between 5 to 46 cm (2.0 in.
- Page 213 Problem Cause Solution The subject The subject is too When flash is used, the comes out close to the flash. distance between lens overexposed and subject should be (too bright). no less than 26 cm (10 in.). The subject is Set exposure brighter than the compensation...
- Page 214 Problem Cause Solution White dots or Light from the flash has This is a phenomenon white reflected off dust that occurs with digital asterisks )articles or insects in cameras and does not the air. This occurs constitute a appear on th_ malfunction.
- Page 215 :ions All data is based on Canon's standard testing methods. Subject to change without notice. Camera Approx. 3.2 million effective pixels Approx. 2 million 1/2.7 in. CCD (Total number of pixels: approx. 3.3 Image million) Sensor 1/2.7 in. CCD (Total number of pixels: approx. 2.1...
- Page 216 Sensitivity : AUTO/ISO 50/100/200/400 equivalent White Balance : TTL auto/preset (daylight, cloudy, tungsten, fluorescent, fluorescent H) or Custom white balance Flash : Auto, On, Off Red-eye reduction On: Red-eye reduction auto/Red- eye reduction On/Flash Red-eye reduction Off: On/Off Flash Range : Normal Mode: 46 cm - 4.2 m (1.5 - 14 ft.) (W), 46 cm - 2.5 m (1.5 - 8.2 ft.) (T) Macro Mode:...
- Page 217 *2This is the maximum recording time per movie clip for the optional Canon FC-256MH CF card (not sold in some regions).
- Page 218 Approx. Approx. Approx. Battery NB-1AH 350 shots 1000 shots 280 min. * The data above reflects standard Canon testing conditions. The actual figures will vary according to the shooting conditions settings. <Test Conditions> Shooting: Normal temperature (23 ° C, 73 ° F), alternating wide...
- Page 219 PowerShot A 70 FC-16M FC-32M FC-64M FC-128M FC-256MH 1390 1563 1355 2720 Movie (in seconds} [] 1954 PowerShot FC-16M FC-32M FC-64M FC-128M FC-256MH 1390 < 1563 1355 2720 Movie (insec0nds) [] 1954...
- Page 220 • The following are the approximate maximum recording times for movie clips: []: approx. 30 seconds* (PewerShot A70 only), [], approx. 3 minutes. Shown are the maximum continuous recording times. * When used with the FC-256MH CF card (sold separately) •...
- Page 221 NiMH Battery NB-1AH Supplied with the optional NiMH Battery NB4-100 set and the Battery/ Charger Kit CBK100. Type Rechargeable nickel metal hydride battery Nominal Voltage 1.2 V DC Typical Capacity 1600 mAh (Lowest : 1550mAh) Cycle Life Approx. 300 times Operating 0 - 35 °C (32 - 95 °F) Temperature...
- Page 222 CompactFlash Card Card Slot Type Type I Dimensions 36.4 x 42.8 x 3.3 mm (1.4 x 1.7 x 0.1 in.) Weight Approx. 10 g (0.4 oz.) Wide Converter WC-DC52 (optional) Magnification Approx. 0.7x (35 mm film equivalent at wide angle end: approx. 24.5 mm) Focusing Range Approx.
- Page 223 Close-Up Lens250D 52mm(optional) Focal Length 250 mm Focusing Range 40 - 250 mm (1.6 - 9.8 in.) (W)/130 - 250 (from tip of lens) mm (5.1 - 9.8 in.) (T) (when mounted on PowerShot A70 or A60) Thread Diameter 52 mm standard filter thread (Conversion Lens Adapter LA-DC52C required for mounting to PowerShot A70 or...
-
Page 224: Auto Mode
Continuous Shooting (l_) Creative Zone AC Adapter Kit AF Frame Auto Selection Date/Time 26, 178 Manual Selection Default Settings 48 - 50 Aperture-Priority AE (Av) Digital Terminal 16, 141,165 Aperture Value 89, 91, 94, 96 DigitaIZoom 42, 85, 175 Auto Mode (_) Display Modes 33- 37 Auto Play... -
Page 225: Landscape Mode
Messages Image Zone19 Microphone Index Replay 1 20 Movie (_lm) Indicators 18 Shooting 79 Information View33- 3 7 Replaying Interface Editing 1 24 Cables 1 7, 141,165 My C amera ISO Speed 110 Menu 181 Settings 52 Registering Jump121 Night Scene Mode (Jq)72 Landscape Mode (2) 71 Language 28, 180... -
Page 226: Stitch Assist Mode
Index Replay Framing Subjects Jumping Shooting LCD Monitor Strap Magnifying Images Movies Telephoto Rotating Transfer Order Single Image Replay Reset Resolution Selecting Images Resetting the settings to default Troubleshooting 204 - 210 Ring Release Button 16, 200 Rotate Video System 165, 181 Viewfinder Self-Timer... - Page 227 If such changes or modifications should be made, you could be required to stop operation of the equipment. Canon U.S.A. Inc. One Canon Plaza, Lake Success, NY 11042, U.S.A. Tel No. (516) 328-5600 Canadian Radio Interference Regulations THIS CLASS B DIGITALAPPARATUS MEETS ALL REQUIREMENTS OF THE CANADIAN INTERFERENCE CAUSING EQUIPMENT REGULATIONS.
-
Page 228: Macro Mode
This chart shows the functions available in each shooting mode Large Medium 1 (_) Resolution Medium 2 (_) Medium (2) Small Movie (1> Resolution Movie Movie Superfine 3ompression NormalFine Auto Flash • • • ® Red-Eye Reduction Flash Output .._,F-assist Beam Single Shot •... - Page 229 Reference Page _.._ • ..• • • • 0" ..0" 0" 0" 0" 0" 0" 0" • • • • • • • • • • • • • • • • • • • • •...
-
Page 230: Digital Zoom
Digital Zoom Exposure Compensation • • • Evaluative Metering • • • • Light Metering Center-Weighted A veraging [] ..System Spot Metering ..White Balance _(4) • • • Photo Effect • • • ISO Speed _(s) _(s> _(s) _(s) * : Default, •... - Page 231 _eference Page • • ..:'"'0 :' _(s) @is) •...
- Page 232 CallOll CDI-E093-010 XXXXXXXXX © 2003 CANON INC. PRINTED IN MALAYSIA XXXXXXX...