GE GFWH2400 Owner's Manual & Installation Instructions
Hide thumbs
Also See for GFWH2400:
- Owner's manual & installation instructions (52 pages) ,
- User manual (52 pages) ,
- Owner's manual & installation instructions (52 pages)
Table of Contents
Advertisement
GEAppliances.com
............................. 2, 3
Operating Instructions
Control Panels ..................................................... 4
Control Settings ..............................................5 , 6
Features .............................................................6-9
Loading and Using the Washer ........... 9, 10
Cleaning the Washer ............................. 11-13
Preparing to Install Your Washer ............. 14
Location of Your Washer ............................. 15
Rough-In Dimensions .................................... 15
Unpacking Your Washer .............................. 16
Electrical Requirements................................ 16
Grounding Requirements ............................ 16
Water Supply Requirements ...................... 17
Drain Requirements ....................................... 17
Installing the Washer ............................. 17-18
Replacement Parts ......................................... 18
Adaptive Vibration Control .......................... 19
Warranty .................................................... 24, 25
Service Telephone Numbers ..................... 26
As an E
S
partner,
®
NERGY
TAR
GE has determined that this
product meets the E
S
NERGY
guidelines for energy efficiency.
Write the model and serial
numbers here:
Model # _________________
Serial # __________________
You can find them on a label on the
side of the washer.
........... 14-19
................... 20-23
®
TAR
Owner's Manual &
Installation Instructions
GFWH2400
GFWH2405
GFWS3500
GFWS3505
GFWS3600
GFWS3605
49-90390 GE 05/13/10
Advertisement
Table of Contents

Related Manuals for GE GFWH2400


Summary of Contents for GE GFWH2400
-
Page 1: Table Of Contents
Consumer Support Warranty ............ 24, 25 Service Telephone Numbers ..... 26 As an E partner, ® NERGY GE has determined that this product meets the E ® NERGY guidelines for energy efficiency. Write the model and serial numbers here: Model # _________________... -
Page 2: Safety Instructions
IMPORTANT SAFETY INFORMATION. READ ALL INSTRUCTIONS BEFORE USING. WARNING! For your safety, the information in this manual must be followed to minimize the risk of fire or explosion, electric shock, or to prevent property damage, personal injury or loss of life. The instructions in this manual and all other literature included with this washer are not meant to cover every possible condition and situation that may occur. -
Page 3: When Using The Washer
Check the in this Owner’s Manual, or in published user-repair condition of the fill hoses; GE recommends instructions that you understand and have the changing the hoses every 5 years. -
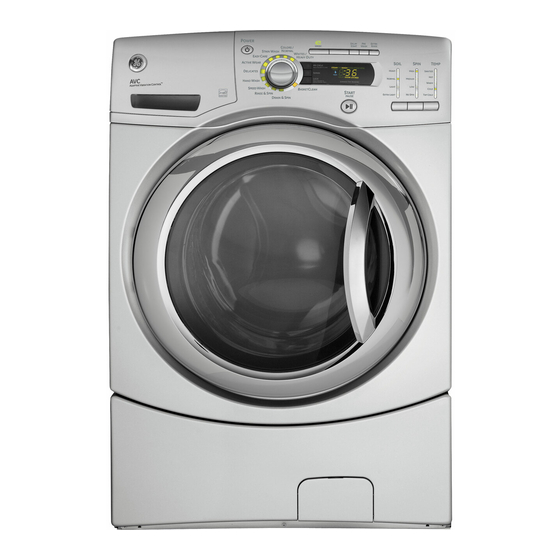
Page 4: Control Panels
About the washer control panel. Find the illustration that closely matches your model and see the cycle descriptions starting on page 6 for details. -
Page 5: Control Settings
About the washer control settings. GEAppliances.com Power Press to “wake up” the display. If the display is active, press to put the washer into standby mode. NOTE: Pressing POWER does not disconnect the appliance from the power supply. Wash Cycles The wash cycles are optimized for specific types of wash loads. -
Page 6: Features
About the washer control panel. Soil Level Changing the SOIL LEVEL increases or decreases the wash time to remove different amounts of soil. To change the SOIL LEVEL, press the SOIL LEVEL button until you have reached the desired setting. You can choose between Extra Light, Light, Normal or Heavy soil. -
Page 7: Delay Start
About the washer features. NOTE: Features may not be available on all washer models. GEAppliances.com Extra Rinse Use an extra rinse when additional rinsing is desired to remove excess dirt and detergent from soiled loads. Delay Start You can delay the start of a wash cycle NOTE: If you forget to fully close the door, for 10–18 hours, depending on the model. -
Page 8: About The Washer Features
About the washer features. The Dispenser Drawer Slowly open the dispenser drawer by pulling You may see water in the bleach and fabric it out until it stops. softener compartments at the end of the cycle. This is a result of the flushing/siphoning action and is part of the normal operation of the After adding laundry products, slowly close washer. -
Page 9: Loading And Using The Washer
GEAppliances.com The Fabric Softener Compartment Dilute with water to the maximum fill line. If desired, pour the recommended amount Do not exceed the maximum fill line. of liquid fabric softener into the compartment Overfilling can cause early dispensing of the labeled “FABRIC SOFTENER.”... - Page 10 Loading and using the washer. Loading the Washer Wash drum may be fully loaded with loosely added To add items after washer has started, press items. Do not wash fabrics containing fl ammable START/PAUSE and wait until the door is unlatched. materials (waxes, cleaning fl...
-
Page 11: Cleaning The Washer
See Installation Instructions in this book. If these parts are not available, they can be ordered by visiting our Website at GEAppliances.com or by calling 800.GE.CARES. In Canada, visit wwwgeappliances.ca or call 1.800.561.3344. -
Page 12: Cleaning The Washer
Cleaning the washer. Cleaning the Pump Filter Due to the nature of the front-load washer, it is sometimes possible for small articles to pass to the pump. The washer has a filter to capture lost items so they are not dumped to the drain. - Page 13 GEAppliances.com Dispenser Drawer Area: Detergent and fabric softener may build up in the dispenser drawer. Residue should be removed once or twice a month. Remove the drawer by first pulling it out until it stops. Then reach back into the left rear corner of the drawer cavity and press down firmly on the lock tab, pulling out the drawer.
-
Page 14: Installation Instructions
Installation Washer Instructions If you have any questions, call 800.GE.CARES (800.432.2737) GEAppliances.com. or visit our Website at: In Canada, www.geappliances or call 1.800.561.3344. visit TOOLS REQUIRED FOR BEFORE YOU BEGIN WASHER INSTALLATION Read these instructions completely and carefully. 1/4 nut driver IMPORTANT –... -
Page 15: Location Of Your Washer
Installation Instructions LOCATION OF YOUR WASHER ROUGH-IN DIMENSIONS Do Not Install the Washer: 1. In an area exposed to dripping water or outside FRONT weather conditions. The ambient temperature should 27” (68.58 cm) never be below 60°F (15.6°C) for proper washer operation. -
Page 16: Unpacking Your Washer
United States by visiting our website at GEAppliances.com electrician replace it with a properly grounded or calling 800.GE.CARES. Order kit #WH49X10039. three-prong grounding-type receptacle. In Canada, please contact your nearest parts retailer. -
Page 17: Water Supply Requirements
Installation Instructions INSTALLING THE WASHER WATER SUPPLY REQUIREMENTS 1. Run some water from the hot and cold faucets to flush Hot and cold water faucets MUST be installed within the water lines and remove particles that might clog up 42 inches (107 cm) of your washer’s water inlet. The faucets the water valve screens. -
Page 18: Replacement Parts
REPLACEMENT PARTS If replacement parts are needed for your washer, they can be ordered in the United States by visiting our Website at GEAppliances.com or by calling 800.GE.CARES. In Canada, please contact your nearest parts retailer. Cable Tie Cable Tie... -
Page 19: Adaptive Vibration Control
Installation Instructions ADAPTIVE VIBRATION CONTROL 3. Rotate the cycle knob and select PE1 or PE2 for Your GE washer is equipped with Adaptiive Vibration Control pedestal. Press the START button to make the Technology. Using information about the floor, this system selection PE1 is YES and PE2 is NO. -
Page 20: Troubleshooting Tips
Before you call for service… Troubleshooting Tips Save time and money! Review the charts on the following pages first and you may not need to call for service. Problem Possible Cause What To Do Not draining Load is out of balance •... -
Page 21: Before You Call For Service
Before you call for service… GEAppliances.com Problem Possible Cause What To Do Incomplete cycle Automatic load redistribution • Timer adds 3 minutes to cycle for each rebalance. 11 or 15 or timer not rebalances may be done. This is normal operation. advancing Do nothing;... - Page 22 Before you call for service… Problem Possible Cause What To Do Water does not Automatic self system checks • After START is pressed, the washer does several system enter washer or checks. Water will flow 60 seconds after START is pressed. enters slowly Water supply is turned off •...
- Page 23 GEAppliances.com Problem Possible Cause What To Do Detergent leak Incorrect placement of • Make sure detergent insert is properly located and fully seated. detergent insert Never put detergent above max line. This is normal • It is normal operation to see detergent leak on door gasket about 20 seconds after filling the dispenser.
-
Page 24: Warranty
This warranty is extended to the original purchaser and any succeeding owner for products purchased for home use within the USA. If the product is located in an area where service by a GE Authorized Servicer is not available, you may be responsible for a trip charge or you may be required to bring the product to an Authorized GE Service location for service. -
Page 25: Warranty
GE Washer Warranty. (For customers in Canada) All warranty service provided by our Factory Service Centres Staple your receipt here. or an authorized technician. For service, call 1.800.561.3344. Proof of the original purchase Please have serial number and model number available when date is needed to obtain service calling for service. -
Page 26: Consumer Support
Contact Us GEAppliances.com In the U.S.: If you are not satisfied with the service you receive from GE, contact us on our Website with all the details including your phone number, or write to: General Manager, Customer Relations GE Appliances, Appliance Park Louisville, KY 40225 In Canada: www.GEAppliances.ca, or write to:...