Table of Contents
Advertisement
Available languages
Available languages
Operator's
Manual
CRRFr MRN
21" SNOW THROWER
Model No. 247.88780
CAUTION:
Before
using
this product,
read this
manual
and follow
all
safety
rules
and operating
instructions.
o SAFETY
ASSEMBLY
OPERATION
MAINTENANCE
PARTS LIST
o ESPANOL
Sears Brands
Management
Corporation,
Hoffman
Estates,
IL 60179, U.S.A.
Visit our website:
www.craftsman.com
FORM1/O.769-06194B
4/29/2011
Advertisement
Table of Contents

Related Manuals for Craftsman 247.88780


Summary of Contents for Craftsman 247.88780
- Page 1 Model No. 247.88780 o SAFETY ASSEMBLY OPERATION MAINTENANCE PARTS LIST CAUTION: Before using o ESPANOL this product, read this manual and follow safety rules and operating instructions. Sears Brands Management Corporation, Hoffman Estates, IL 60179, U.S.A. Visit our website: www.craftsman.com FORM1/O.769-06194B 4/29/2011...
- Page 2 This warrantyis void if this productis everusedwhile providingcommercialservicesor if rentedto anotherperson. For warranty coverage details to obtain repairor replacement, v isit the web site: www.craftsman.com This warranty covers ONLYdefects in material and workmanship. Warranty coverage does NOT include: •...
- Page 3 This machinewas builtto be operatedaccordingto the safeopera- This symbolpointsout importantsafetyinstructionswhich,if not tion practicesin this manual.As with anytype of powerequipment, followed,couldendangerthepersonalsafetyand/orpropertyof carelessnessor error on the partof the operatorcan resultin serious yourselfand others. Readand followall instructionsin this manual injury.This machineis capableof amputatingfingers,hands,toes beforeattemptingto operatethis machine.Failureto complywith and feet and throwingdebris.Failureto observethe followingsafety these instructionsmay resultin personalinjury.Whenyou seethis...
- Page 4 Safe Handling of Gasoline • Exerciseextremecautionwhenoperatingon or crossinggravel surfaces.Stay alertfor hidden hazardsor traffic. Toavoidpersonalinjuryor propertydamageuseextremecare in handlinggasoline.Gasolineis extremelyflammableand the vaporsare Exercisecautionwhenchangingdirectionand whileoperatingon explosive.Seriouspersonalinjurycan occurwhengasolineis spilled slopes. on yourselfor yourclotheswhichcan ignite. Washyour skin and Planyoursnow-throwing patternto avoiddischargetowards changeclothesimmediately. windows,walls,cars etc. Thus,avoidingpossibleproperty •...
- Page 5 MAINTENANCE & STORAGE DO NOT MODIFY ENGINE • Nevertamperwith safetydevices.Checktheirproperoperation Toavoidseriousinjuryor death,do not modifyengine in any way. regularly.Referto the maintenance and adjustmentsectionsof Tampering with the governorsettingcanlead to a runawayengineand this manual. cause it to operateat unsafespeeds.Nevertamperwithfactory setting of engine governor. •...
- Page 6 SAFETY SYMBOLS This pagedepictsand describessafetysymbolsthat mayappear on this product. Read,understand,and followall instructionson the machine beforeattemptingto assembleand operate. READ THE OPERATOR'S MANUAL(S) Read, understand, and follow all instructions in the manual(s) before attempting to assemble operate WARNING-- ROTATING BLADES Keep hands out of inlet and discharge openings while machine is running.
- Page 7 NOTE:All referencesto the left or rightside of the snowthrowerare Tightenthe previouslyremovedhardwareto securethe handlein fromthe operator'sposition.Anyexceptionswill be noted. place. See Figure2. UNPACKING THE SNOW THROWER installing the Chute Placethe chutehandle on the lowerchuteas shownin Figure3. Openthe top of the carton. Be certainthat the handleis alignedin the channelon the chute Cut downthe cornerson the front of thecarton and folddown the and the tabs snap intoplace.
- Page 8 SET-UP Align theholes in the chutebasewith the holesin the lowerchute and securewith the previouslyremovedscrews.See Figure5. Fuel Recommendations Useautomotivegasoline(unleadedor lowleadedto minimizecombus- tion chamberdeposits)with a minimumof 87 octane.Gasolinewith up to 10%ethanolor 15%MTBE(MethylTertiaryButyl Ether)can be used.Neverusean oil/gasolinemixtureor dirty gasoline.Avoidgetting dirt, dust,or water inthe fuel tank.DO NOTuse E85 gasoline. •...
- Page 9 Slowlyadd oil untilthe oil levelregistersbetweenhigh (H) and low Checking and Adding (L) on the dipstick,Figure8. Referto the Serviceand Mainte- nancesectionforthe correctoil viscosityand engine oil capacity. Theengine is shippedwithoutoil in theengine.Youmustfill the enginewith oil beforeoperating.Runningthe enginewith insufficient _o can causeserous eng ne damageand vo d the productwarranty. Placethe snowthroweron a flat,level surface.
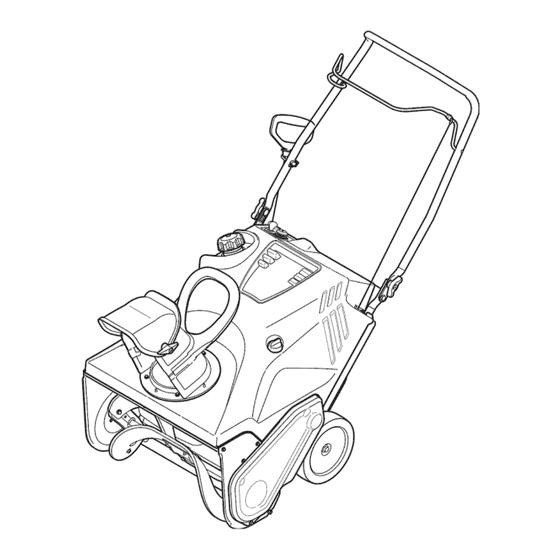
- Page 10 AugerControl Recoil Gas Ca Control ChuteAssembl' ShavePlate Aug{ Handle Figure9 Nowthat youhaveset up yoursnowthrower,it's importantto become Removethe gascap to add fuel. acquainted with its controlsand features.Referto Figure9. CHOKE CONTROL The key is a safetydevice.It mustbe fully insertedin order for theengine to start. Removethe key whenthe snow throweris not in use.
- Page 11 CHUTE ASSEMBLY BEFORE STARTING THE ENGINE Rotatethe dischargechute to the left or rightusingthe controlhandle. Thepitch of the dischargechute controlsthe angleat which the snow is thrown.Loosenthewing knobon the side of the dischargechute machineand in this manualbefore beforepivotingthe dischargechute upwardor downward.Retighten the knoboncethe desiredpositionhasbeen achieved. STARTING THE ENGINE SHAVE PLATE...
- Page 12 Electric Starter Recoil Starter Determinethat yourhome'swiringis a three-wiregroundedsystem. Pushthe chokeleverto the CHOKEIll position. Ask a licensedelectricianif youare not certain. If the engineis warm,placethe chokein the RUN_ I position If you havea groundedthree-prongreceptacle, p roceedas follows: instead ofCHOKE I"rl. Plugtheextension cordintotheoutletlocated on theengine's surface.
- Page 13 MAINTENANCE SCHEDULE Beforeperforminganytype of maintenance/service, disengageall Followthe maintenance schedulegiven below.This chart describes controlsand stopthe engine.Wait untilall movingparts havecome serviceguidelinesonly. Usethe ServiceLog columnto keeptrackof to a completestop.Disconnectsparkplug wireand groundit against completedmaintenance tasks.To locate the nearest Sears Service the engineto preventunintendedstarting.Alwayswearsafetyglasses Centeror to scheduleservice,simplycontactSearsat 1-800-4-MY-HOME®.
- Page 14 Drainfuelfrom the tank by runningtheengine untilthe fueltank is 7. Refillwith the recommended oil and checktheoil level; referto empty.Be surethe fuel fill capis secure. Checkingand AddingOil in the AssemblySection. Removethethreescrewsthat securethelowerpanel.Remove the Reinstall t he oil fillercap/dipsticksecurely. lowerpanelby liftingup on the panelto freethetabs atthe bottom Re-install t he lowerpanel byplacingthetabs in the tab slots, of thepanelfromthetab slotsandthenpull back.See Figure13.
- Page 15 Measurethe plug gap with a feelergauge.Correctas necessary Removingdebriswillinsureadequatecooling,correctengine speed and reducethe risk of fire. by bendingthe side electrode,Figure16.The gap shouldbe set to .02-.03inches (0.60-0.80turn). Accumulation of debrisaroundthe mufflercouldcausea fire. Inspect and clean beforeeveryuse. LUBRICATION Electrode Lubricate the pivotpointson thecontrol handleand the extension springat the end of the controlcablewith a light oil onceevery season and beforethe snowthroweris put intostorageat the end of the season.
- Page 16 AUGER DRIVE BELT REPLACEMENT If the starteris difficult to pull, removethe sparkplug and pull the handleseveraltimesto ensurethat any oil trappedin the engine Runthe snowthroweruntilthe fueltank isempty. head is removed, Pullthe recoilstarterhandleuntil resistanceisfelt.Thentip the snowthrowerbackuntil itrestson thehandles. Slidea boardup throughthe augerand throughthe chute to Oil may comeout of the spark plug holewhen it is removed and the securethe auger inplace.
- Page 17 To replacethe belt followthese instructionsand referto Figure21: Tochangethe rubberpaddles,proceedasfollows: Drive HexWasherScrew Paddl_ HexWasherScrew Figure21 Figure22 Routethe beltaroundthe drivepulleyand underthe idler pulley. Runthe snowthroweruntilthe fueltank is empty. Routethe end of the beltaroundthe auger pulleyand slidethe Pullthe recoilstarterhandleuntil resistanceis felt.Then tip the snow throwerbackuntil it restson the handles.
- Page 18 If the snowthrowerwillnot be usedfor30 daysor longer,or if it is the end of the snowseasonwhenthe last possibilityof snowis gone,the equipmentneedsto be storedproperly.Followstorageinstructionsbelowto ensuretop performance from the snowthrowerfor manymoreyears. PREPARING THE ENGINE PREPARING SNOW THROWER Enginesstoredover30 days need to be drainedof fuel to prevent If the snowthrowerwill not be usedfor 30 days or longer,followthe instructionsbelow.
- Page 19 Beforeperforming anytypeof maintenance/service, disengage all controlsandstopthe engine.Waituntilall moving partshavecometo a complete stop.Disconnect sparkplugwireandgrounditagainst t he engine to Iprevent u nintended starting. A lways wearsafetyglassesduringoperation orwhileperforming anyadjustments o r [repairs. Thissectionaddresses minor service issues.To locate the nearest Sears Service Center or to scheduleservice,simplycontact Sears at 1-800-4-MY-HOME®.
- Page 20 Craftsman Snow Thrower IViodel 247.88780...
- Page 21 Craftsman Snow Thrower IViodel 247.88780 684-04168 Idler PulleyAssembly 741-04517 Ball Bearing 684-04398 Frame 946-04701 ClutchCable 684-04394 AugerAxleAssembly 747-05360 DriveCableWire Support 684-04393 AugerPaddle 748-0234 ShoulderSpacer 929-0071A 749-04810 LowerHandle 3-ProngExtensionCord 753-06469 AugerReplacement K it (Inc.2 Paddles 750-04571 ShoulderSpacer,.260x .785x .538 and 12 Hex WasherScrews)
- Page 22 Craftsman Snow Thrower Model 247.88780...
- Page 23 Craftsman Snow Thrower IViodel 247.88780 710-0895 Screw,1/4-15x 0.75 710-0451 CarriageBolt,5/16-18x .750 747-05327B-0637 Auger Bail 749-04703B-0637 UpperHandle 712-04063 FlangeLock Nut,5/16-18 712-04064 FlangeLock Nut, 1/4-20 738-04419A ShoulderScrew,1/4-20x .375x .148 720-04122 Wing Knob,5/16-18 731-04426A UpperChute 731-07644 ChuteHandle 931-07753A LowerChute 932-04111 ChuteAdjustmentSpring 736-04576 FiatWasher,.28x 1.51x .066...
- Page 24 Craftsman Engine Model 265-JU For Snow Thrower Model 247.88780 6125 126 125 ........61\_\62 ,© g7 84 _82 Io9_o' _ 124"#" 3_7 3 7 /_35 25/_ 36/_..118 38 _ L._J_;I..39 132/® _\131...
- Page 25 Craftsman Engine IViodel 265-JU For Snow Thrower IViodel 247.88780 710-04968 Bolt 951-10805 Flywheel 951-11054 ValveCover 951-10909 CoolingFan 731-07059 BreatherHose 951-10911 StarterCup 726-04101 712-04209 HoseClamp 751-11124 951-10647 ValveKit (incl. intakeand exhaustvalve) PivotLockingNut 751-11123 ValveAdjustingNut 751-12014 BlowerHousing 736-04455 Washer 710-04902 PivotBolt 710-04974...
- Page 26 Craftsman Engine Model 265-JU For Snow Thrower Model 247.88780 " o® 751-12011 Carburetor Assembly 951-10722A CylinderHeadAssembly (Not Shown) -- MainJet 951-11565 HeadCoverGasket NeedleValveSpring 751-12000 IntakeValveSpringSeat Float 751-11124 PivotLockingNut 951-11589 FuelBowlGasket 751-11123 ValveAdjustingNut 951-11349 FuelDrain PlugGasket 751-11893 RockerArm FuelBowlGasket 710-04902 PivotBolt...
- Page 27 Craftsman Engine IViodel 265-JU For Snow Thrower IViodel 247.88780 _" 751-12029 Short BlockAssembly(Not Shown) 751-12026 GasketKit, External(Not Shown) 951-11565 HeadCoverGasket 951-11565 HeadCoverGasket 951-11285 MufflerGasket 951-11285 MufflerGasket 951-11567 CarburetorInsulatorGasket 951-11567 CarburetorInsulatorGasket 951-11568 CarburetorInsulatorPlate 951-11568 CarburetorInsulatorPlate 751-11898 751-11569A Carburetor Gasket CylinderHeadGasket 751-11899...
- Page 28 Craftsman Snow Thrower IViodel 247.88780 777834027 CHOKE BELOW 777D16345 777832236 777S33118 777122139 777S33731 777123463 DOHot USEE85 OR FUEL COHTAIHING MORE THAN10% ETHANOL 777X43688 777D16367...
- Page 29 MTD CONSUMER GROUP INC (MTD), the California Air Resources Board (CARB) and the United States Environment Protection Agency (U. S. EPA) Emission Control System Warranty Statement (Owner's Defect Warranty Rights and Obligations) EMISSION CONTROLSYSTEM COVERAGE IS APPLICABLE TOCERTIFIEDENGINESPURCHASED IN CALIFORNIA IN 2005 ANDTHERE- AFTER,WHICHARE USEDIN CALIFORNIA, A NDTO CERTIFIED MODELYEAR2005 AND LATERENGINESWHICHARE PURCHASED AND USEDELSEWHERE IN THE UNITEDSTATES.
- Page 30 (4)Repair orreplacement ofany warranted part under the warranty provisions ofthis article m ust beperformed atnocharge tothe owner ata warranty station. (5)Notwithstanding the provisions ofSubsection (4) above, warranty services orrepairs must beprovided atallMTD distribution centers that are franchised toservice the subject engines. (6)The owner must not b echarged fordiagnostic labor that l eads tothe determination that a warranted...
- Page 31 Look For Relevant Emissions Durability Period and Air index information On Your Engine Emissions Label Engines that are certified to meet the California Air Resources Board (CARB) Tier 2 Emission Standards must display information regarding the Emissions Durability Period and the Air Index. Sears Brands Management Corporation makes this information available to the consumer on our emission...
- Page 32 Congratulations on makinga smartpurchase.YournewCraftsman@ Onceyou purchasethe Agreement,a simplephonecall is all that it productis designedand manufactured for yearsof dependableopera- takesfor youto scheduleservice.Youcan call anytimedayor night,or tion. But likeall products,it may requirerepairfrom time to time.That's schedulea serviceappointmentonline. whenhavinga RepairProtectionAgreementcansave youmoneyand The RepairProtectionAgreementis a risk-freepurchase.If youcancel aggravation.
- Page 33 LISTADO DE PIEZAS PRECAUCION: Antes de o ESPArqOL usar este producto, lea este manual y siga todas las reglas de seguridad e instrucciones de funcionamiento. Sears Brands Management Corporation, Hoffman Estates, IL 60179 EE.UU. Visite nuestro sitio web: www.craftsman.com FORMULARIO I/.0769-06194B 4/29/2011...
- Page 34 La presentegarantiase anula si se utilizaeste productoalguna vezpara prestarservicioscornerciales o si se Ioalquilaa otra persona. Paraobtener informaci6n sobre el alcance de la garantiay solieitar la reparaci6no el reemplazo, v isite el sitio Web: www.craftsman.com Esta garanfia eubre0NiCAMENTElos defectos en los rnateriales y en la mano de obra. Esta garanfia NOcubre: •...
- Page 35 Estam_quinaest_ dise_adapara set utilizadarespetandolasnormas La presenciade este sfmboloindica que setrata de instruccionesde de seguridadcontenidasen este manual.AI igual quecon cualquiertipo seguridad importantesquedebe respetarpara evitarponeren riesgosu de equipomotorizado,un descuidoo error por partedel operadorpuede seguridad personaly/o materialy la de losdemos.Leay cumplatodas las producir lesionesgraves.Esta m_quinaes capaz de amputardedos, instruccionesde este manualantesde intentaroperar esta m_quina.Si no manos y piesy de arrojar residuos.Deno respetarlas instruccionesde respetaestas instruccionespuedeprovocarlesionespersonales.Cuando...
- Page 36 • Planifiqueel patr6nen elque va air arrojandonieve para evitarque Manejo seguro de la gasolina la descargade materialse produzcahacia lasventanas,las paredes, Para evitarlesionespersonaleso da_os materialessea sumamentecuida- los autom6viles,etc. y evitarasi posiblesdaSosmaterialeso lesiones dosoal manipularla gasolina.La gasolina essumamenteinflamabley sus producidas porlos rebotes. vaporespuedencausar explosiones.Si se derramagasolinaencima o sobre la ropa se puedelesionargravementeya quese puedeencender.
- Page 37 NO MODIFIQLIE EL MOTOR • Controlefrecuentementeque todoslos pernosy tornillosesten bien ajustadospara comprobarque lam&quinase encuentraen condiciones Paraevitarlesionesgraveso la muerte, no modifiqueel motorde ninguna segurasde funcionamiento. A dem_s,hagauna inspecci6nvisual de la manera.Si altera laconfiguraci6ndel regulador,el motorse puededesbocar m_quinaparaverificar si est_ daSada. y funcionara velocidadesque no son seguras.Nunca cambiela configuraci6n •...
- Page 38 S{IVlBOLOS DE SEGURIDAD En esta p_gina se presentan y describen los simbolos de seguridad que pueden aparecer en este producto. Lea, entienda y cumpla todas las instrucciones incluidas en la m_quina antes de intentar realizar el montaje de la unidad y utilizarla. o_--_ _--_- LEA LOS MANUALES DEL OPERADOR...
- Page 39 NOTA:Todaslas referenciasa loslados derechoo izquierdode lam_quina Ajustelos elementosde ferreteriaqueextrajo previamentepara sujetar quitanievese hacenobservandola mismadesdela posici6ndel operador.En la manijaen su hgar. Veala Figura2. caso de que hubieseunaexcepci6n,se especificar&claramente. Instalaci6n del canal COMO DESEMBALAR LA MAQUINA Coloqueel conductode lamanijaen la rampainferiorcomose muestra QUITANIEVE en la Figura3.
- Page 40 CONFIGURACION Alineelosorificios de la basedel canal con losorificios del canal inferior y sujetelocon lostornillosque extrajoanteriormente.Veala Figura5. Recomendaciones sobre el combustible Utilicegasolinapara autom6viles(sin plomo o bajo contenidode plomo para minimizarlosdep6sitosen lac_marade combusti6n)con un m[nimode 87 octanos.Se puedeusargasolinacon hastaun 10%de etanolo un 15%de MTBE(eter mefilicoterciario-but[lico).Nunca use una mezclade aceitey gasolina nigasolinasucia.
- Page 41 Agregueaceite lentamentehastaque el nivelde aceite registreentre alto (H) y bajo (L), Figura8. Consultela secci6nServicio y Manten- Procedimiento para controlar y agregar aceite imiento paraver la correctaviscosidady capacidadde aceitedel motor. El motorse envia sin aceiteen el motor.Antesde ponerel motoren marcha debe Ilenarlode aceite.Si se hacefuncionarel motorsin suficienteaceite puedecausardaSosgravesal motory anularlagarantia del producto.
- Page 42 Controlde la barrena Llave Br'Bo Cebador t6n delarrancador Manijadel electrico retroceso Salidadel arrancador el_ctrico i "!!!! iiiiii!!!!!!!! " Palanca _ /"/ estrangulador Tapade combustible Manijade control Montajedel canal de aceite Placade raspado Barrena Figura9 TAPA DE COMBUSTIBLE Ahoraqueya ha ajustadosu m_quinaquitanieveparael funcionamiento, e s importantefamiliarizarsecon sus controlesy caracterfsticas.Consulte Saque eltap6n del combustiblepara agregarcombustible.
- Page 43 MONTAJE DEL CANAL ANTES DE ARRANCAR EL MOTOR Haga rotarel canal de descarga hacia laizquierdao derechausandola manijade control.La inclinaci6ndel canal de descargacontrolael &ngulo con el quese arroja lanieve.Afloje la perillade aletasdel costado del canal Lea, comprenday siga todas lasinstruccionesy advertenciasqueaparecen de descargaantesde girar el canal de descargahacia arribao hacia abajo.
- Page 44 Determinesi el cableadode su hogares un sistemade tres cablesconectado Tire de la manijadel arrancadorcon un movimientofirmey r_pido. a tierra.Consultecon un electricistamatriculadosi no est_ seguro. No suelteLa manijanideje queretrocedaa su posici6noriginal. Mantengala manijadel arrancadorfirmementesujetay deje quela Si cuenta con un recept_culoparatres parasconectadoa tierra, realicelos cuerda retrocedalentamente.
- Page 45 PROGRAMA DE MANTENIMIENTO Antesde realizarcualquiertipo de mantenimiento o servicio,desenganche Siga elcronogramade mantenimientoquese presentaa continuaci6n.Esta todos loscontrolesy detengael motor.Esperea que sedetengancompleta- tabla s61odescribepautas de servicio.Utilice la columnaRegistrode Servicio mentetodas las piezas m6viles.Desconecteel cable de la bujia y p6ngalo para hacerel seguimientode lastareasde mantenimientocompletadas.Para haciendomasacontrael motorpara evitarque seenciendaaccidental- ubiear el Centrode Servicio Sears m_s cereanoo para programarun mente.Utilicesiempreanteojosde seguridadduranteel funcionamientoo...
- Page 46 Dreneel combustibledel tanque haciendofuncionarel motorhasta que Vuelvaa colocarel tap6n de vaciadoy aprietelofirmemente. eltanque de combustibleest_ vacio. AsegL]rese de que el tap6n de Rellenecon el aceiterecomendadoy compruebeel nivel de aceite,con- Ilenadode combustiblees seguro. suite Comprobaci6ny adici6nde aceiteen la Secci6nde la Asamblea. Retirelostres tornillosquesujetan el panelinferior.Quite el panelinfe- Vuelvaa colocar latapa de relleno / varilla indicadorade nivel.
- Page 47 Midala separaci6nde bujia con un calibrador.Realicelosajustes La extracci6nde losresiduosaseguraqueel enfriamientosea adecuado, necesariostorciendoel electrodo lateral,Figura 16.La separaci6ndebe la velocidaddel motorcorrectay el riesgo de incendiomenor. ajustarseen 0,02-0,03pulgadas(0,60-0,80mm). La acumulaci6nde residuosalrededordel silenciadorpodriaproducirun incendio.Inspecci6neloy limpieloantesde cada uso. LUBRICACION Electrodo Lubrique lospuntos de giro de la manijade control y del resortede extensi6n del extremodel cable de control con un aceiteliviano unavez portemporada y antesde almacenarla m_quinaquitanieveal final de latemporada.
- Page 48 REEMPLAZO DE LA CORREA Si esdificil jalar del arranque,extraigala buj[ay jale de la manijavarias vecespara estar segurode que se extraigacualquiercantidadde aceite TRANSMISION DE LA BARRENA atrapadaen la culatadel motor. Pongaen marcha lam_quinaquitanievehastaque eltanque de combustibleestevac[o. Jale de la manijadel arrancadorde retrocesohastasentir resistencia. Puedesalir aceitedel orificio de la buj[acuandolamismase extraey sejala Luegoincline la m_quinaquitanievehaciaarrashastaque quede de la manijade arranque.
- Page 49 Paravolvera colocar la correasiga estas instruccionesy consultela Paracambiarlas paletasde cauchoprocedade la Figura21: siguiente manera: Poleade transmisJOn / Polealoca Tornillopara arandela hexagonal _,,, Figura21 Figura22 Pasela correaalrededorde la poleade transmisi6ny pot debajode la Pongaen marchala m&quinaquitanievehastaque el tanquede combustibleeste vac[o. poleaIoca. Paseel extremode la correaalrededorde la poleade la barrenay Jale de la manijadel arrancadorde retrocesohastasentir resistencia.
- Page 50 Si no se vaa utilizar la m_quinaquitanievedurante30 dias o m_s,o si es elfinal de la temporadade nieve y ya no existeposibilidadde que nieve,es necesario almacenarel equipode maneraadecuada.Siga lasinstruccionesde almacenamientoquese indicana continuaci6nparagarantizarel rendimientom_ximode la m_quinaquitanievedurante muchosa_os m_s. PREPARACION DEL MOTOR PREPARACION DE LA MAQUINA QUITANIEVE Los motoresquese almacenandurantemAs de 30 dias debenset drenados...
- Page 51 Antesde realizar c ualquiertipo de mantenimiento o servicio,desenganche todosloscontrolesy detengael motor. E sperea quesedetengan completamente t odaslaspiezasm6viles.Desconecte elcablede labujiay p6ngalohaciendomasacontra l elmotorparaevitarqueseenciendaaccidentalmente. Utilicesiempreanteojos de seguridad duranteelfuncionamiento o mientras ajustao reparaesteequipo. En esta secci6n se analizan problemas menores de servicio. Para ubicar el Centro de Servicio Sears m_s eercano o para programarun servicio, simplemente eomuniquese con Sears al teJ_fono 1-800-4-MY-HOME ®.
- Page 52 MTD CONSUMER GROUP, iNC. (MTD), el Bordo de Recursos de Aire de California (CARB) y la Agencia de Protecci6n Medioambiental de Estados Unidos (U. S. EPA) Declaraci6n de Garantia del Sistema de Control de Emisiones (Derechos y obligaciones del propietario seg_n la garantia contra defectos) LA COBERTURADESISTEMADECONTROLDEEMISIONES APLICABLE A MOTORES CERTIFICADOS COMPRADOS ENCALIFORNIA EN2005 Y A PARTIRDE ENTONCES, QUESON USADOS EN CALIFORNIA, Y HASTA ANO2005 DE MODELOCERTIFICADO Y MOTORES POSTERIORES QUESON COMPRADOS Y USADOSENOTRAPARTEEN LOSESTADOS UNIDOS.
- Page 53 reernplazada segQn lagarantia segarantizar_, por e lresto d el p eriodo degarantia. (3) Cualquier pieza g arantizada que est_ prograrnada para reernplazo segQn elrnantenirniento requerido deconforrnidad con lasinstruc- clones escritas delaSubsecci6n (c)segarantiza por e lperiodo detiernpo anterior alaprirnera fecha d ereernplazo prograrnada para e sa pieza.
- Page 54 Busque el periodo de duraci6n de emisiones importantes yla informaci6n de clasificaci6n de aire en la etiqueta de emisiones de su motor Los motores cuyo cumpiimiento con los estAndares de emisi6n Tier 2 de la Comisi6n de Recursos Ambientales de California (CARB) est6 certificado deben exhibir la informaci6n relacionada con el periodo de duraci6n de ias emisiones y la clasificaci6n de aire.
- Page 55 Felicitaciones por haberrealizadouna adquisici6ninteligente.El Unavezadquiridoel Acuerdo,puedeprograrnar el serviciocon productoCraftsman@ que ha adquiridoest_ dise_adoy fabricado tan s61orealizaruna Ilarnadatelef6nica.PuedeIlarnaren cualquier para brindarrnuchosa_osde funcionarniento confiable.Perocorno mornento del dia o de la nocheo prograrnar un servicioen linea. todoslos productosa vecespuederequerirde reparaciones.Esen El Acuerdode Protecci6nde Reparaci6n es una cornprasin riesgo. esernornentocuandoel disponerde un Acuerdode protecci6npara Si ustedanula por alguna raz6nduranteel periodode garantiade reparaciones le puedeahorrardineroy problernas.
- Page 56 Your Home For troubleshooting, product manuals and expert advice: managernylife www.managemylife.com For repair - in your home - of all major brand appliances, lawn and garden equipment, or heating and cooling systems, no matter who made it, no matter who sold it! For the replacement parts, accessories owner's manuals that you need to do-it-yourself.