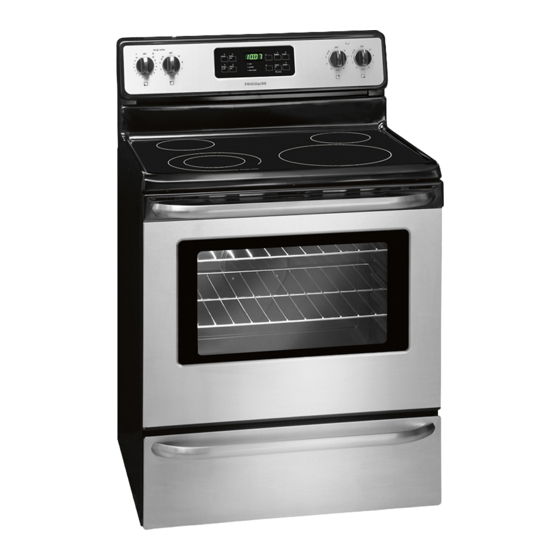
Frigidaire Electric Range Use & Care Manual
Electric range
Hide thumbs
Also See for Electric Range:
- User manual ,
- Use & care manual (64 pages) ,
- Important safety instructions manual (36 pages)
Table of Contents
Advertisement
Available languages
Available languages
All about the
Use
of your
Important Safety Instructions ......................... 3-5
Before Setting Oven Controls .......................... 6-8
Before Setting Surface Controls ..................... 9-10
Setting Surface Controls ............................. 11-14
Oven Control Functions (540 with probe) .......... 15
www.frigidaire.com USA 1-800-944-9044
&
Electric Range
T A B L E O F C O N T E N T S
www.frigidaire.ca Canada 1-800-265-8352
Care
Setting Oven Controls ................................. 16-31
Self-Cleaning ............................................. 32-34
Care & Cleaning ......................................... 35-38
Before You Call .......................................... 39-43
Major Appliance Warranty .................... back cover
Advertisement
Chapters
Table of Contents

Related Manuals for Frigidaire Electric Range


Summary of Contents for Frigidaire Electric Range
-
Page 1: Table Of Contents
All about the & Care Electric Range of your T A B L E O F C O N T E N T S Important Safety Instructions ......3-5 Setting Oven Controls ......... 16-31 Before Setting Oven Controls ......6-8 Self-Cleaning .......... -
Page 2: Product Registration
Setting Surface Controls ......... 11-14 Need help?? Single radiant elements ........... 11 Dual radiant element ..........12 Visit the Frigidaire web site at www.frigidaire.com Keep warm ............. 13 Before you call for service, there are a few things you can Home canning ............14 do to help us serve your better. -
Page 3: Important Safety Instructions
IMPORTANT SAFETY INSTRUCTIONS Read all instructions before using this appliance. Do not attempt to install or operate your appliance until Ask your dealer to recommend a qualified technician and you have read the safety precautions in this manual. an authorized repair service. Know how to disconnect Safety items throughout this manual are labeled with a the power to the range at the circuit breaker or fuse box WARNING or CAUTION statement based on the risk type. - Page 4 IMPORTANT SAFETY INSTRUCTIONS WARNING IMPORTANT • Storage in or on appliance — to avoid a fire Do not attempt to operate the range during a hazard, flammable materials should not be stored power failure. If the power fails, always turn off the in an oven, near surface units or in the storage range.
- Page 5 IMPORTANT SAFETY INSTRUCTIONS SELF-CLEANING OVENS IMPORTANT INSTRUCTIONS FOR USING YOUR COOKTOP WARNING • Know which knob controls each surface heating unit. Place a pan of food on the unit before turning it • Do not touch the oven during the self-clean cycle. on, and turn the unit off before removing the pan.
-
Page 6: Before Setting Oven Controls
BEFORE SETTING OVEN CONTROLS Oven vent location Oven rack stop The oven vent is located under the left side of the Most oven racks slide on rack guides provided along the control panel (See Fig. 1). When the oven is heating, oven cavity sides. -
Page 7: Air Circulation In The Oven
BEFORE SETTING OVEN CONTROLS Types of oven racks flat Your range may be equipped with one or more of the oven following oven rack types listed below: rack The flat oven rack (some models) may be used for most cooking needs and may be placed in most rack positions. The flat handle oven rack (some models) may be used for most cooking needs. -
Page 8: Before Setting Oven Controls
BEFORE SETTING OVEN CONTROLS Effortless™ Oven Rack system (some models) IMPORTANT Some models are equipped with a special oven rack system that automatically partially extends the oven rack • Only the Effortless™ Oven Rack system should from the interior oven glides to assist in easier access to be used in oven rack position 2. -
Page 9: Before Setting Surface Controls
BEFORE SETTING SURFACE CONTROLS About the ceramic glass cooktop Located under the surface of the glass ceramic cooktop element on are radiant surface elements. The design patterns on the hot surface indicator ceramic cooktop outlines the area and size of the surface indicator light light... - Page 10 BEFORE SETTING SURFACE CONTROLS Types of cooktop elements Using proper cookware Radiant surface elements are located just below the The size and type of cookware used will influence the surface of the glass cooktop. The patterns on the ceramic setting needed for best cooking results. Be sure to follow glass outlines the size and type of element available at the recommendations for using proper cookware as each position on the cooktop.
-
Page 11: Setting Surface Controls
SETTING SURFACE CONTROLS Suggested radiant surface element settings Single radiant surface elements (all models) The suggested surface element settings listed below are based when cooking with medium-weight aluminum pans with lids. Settings may vary when using other types of pans. Suggested settings for single and dual radiant elements table Settings... -
Page 12: Dual Radiant Element
SETTING SURFACE CONTROLS Dual radiant surface elements (some models) Symbols provided on the backguard graphics will indicate which coil of the dual radiant element will heat. The symbol indicates the inner coil only. The symbol indicates both inner and outer coils will heat. To operate a dual radiant element: 1. -
Page 13: Keep Warm
SETTING SURFACE CONTROLS Keep warm (some models) Temperature selection - Refer to the keep warm The purpose of the keep warm zone is to keep hot zone recommended food settings table (See Fig. 2). cooked foods at serving temperature. Use the keep warm If a particular food is not listed, start with the medium feature to keep cooked foods hot such as;... -
Page 14: Home Canning
SETTING SURFACE CONTROLS Home Canning Be sure to read and observe all the following points when CAUTION home canning using your appliance. • Radiant surface elements may appear to have cooled IMPORTANT after they have been turned off. The glass surface may still be hot and burns may occur if the glass NEVER place or straddle a cooking utensil over 2 surface is touched before it has cooled sufficiently. -
Page 15: Oven Control Functions (540 With Probe)
OVEN CONTROL FUNCTIONS READ THE INSTRUCTIONS CAREFULLY BEFORE USING THE OVEN. For satisfactory use of your oven, become familiar with the various keypad functions as described below. • bake —Use to broil — Use convect — Use convect convert — 0 thru 9 timer on set the bake... -
Page 16: Setting Oven Controls
SETTING OVEN CONTROLS Setting the clock When the appliance is powered up for the first time or when the electric supply to the appliance has been interrupted, the display will flash "12:00" (Fig. 1). Fig. 2 Fig. 3 NOTE Fig. 1 Changing between the 6-Hour Energy Saving or To set the clock for 1:30: continuous bake mode will not change how the cooktop... -
Page 17: Changing Oven Temperature Display Mode
SETTING OVEN CONTROLS Changing oven temperature display mode The oven control is preset to display the oven temperature with Fahrenheit values. The control may be changed to display either Fahrenheit or Celsius temperatures. To change the temperature display mode: Fig. 1 Fig. -
Page 18: Timer
SETTING OVEN CONTROLS Timer Quick preheat The timer helps keep track of cooking times without Use this feature to quickly preheat the oven. For best interferring with the cooking process. The timer may be results use when baking with a single rack only. A set for 1 minute up to 11 hours and 59 minutes. -
Page 19: Bake
SETTING OVEN CONTROLS Bake Bake time Use the bake feature to prepare most food items when A bake time setting may be added to most oven baking the recipe calls for normal baking. A reminder tone will features. Use the bake time setting to start the oven sound once the oven finishes preheating. -
Page 20: Delay Start
SETTING OVEN CONTROLS Delay start Use this keypad to add delay start time instructions for When the set bake time runs out: most timed cooking features or with the self-clean feature. 1. "End" will appear in the display window and the oven will shut-off automatically (See Fig. -
Page 21: Convect Bake
SETTING OVEN CONTROLS Convect Benefits of the convection features — Foods cook more evenly — Multiple rack baking — No special pans or bakeware needed The convect feature uses a fan to circulate the oven's heat uniformly around the oven. This improved heat distribution allows for fast, even cooking and browning results. -
Page 22: Convect Broil (Some Models)
SETTING OVEN CONTROLS Convect broil (some models) Convect convert Use the convect broil feature to cook thicker cuts of meats The convect convert feature allows you to convert any that require direct exposure to radiant heat and the baking recipe for the convect feature. The control uses the convect fan for optimum browing results. -
Page 23: Probe
SETTING OVEN CONTROLS Probe Be sure to use the probe feature for best results when IMPORTANT cooking foods such as roasts, hams or poultry. This feature also works well with other foods such as meat loaf • To avoid damaging the probe, do not use kitchen and casseroles. - Page 24 SETTING OVEN CONTROLS Probe (cont’d) Proper probe placement in food: Choosing a setting for how the oven will operate once the probe reaches the target temperature • Always insert the probe so that the probe tip rests inside at the center of the thickest part of meat or food Your oven is factory preset to automatically stop cooking (See Fig.
- Page 25 SETTING OVEN CONTROLS Probe (cont’d) USDA recommended minimum internal cooking probe temperatures: receptacle connector handle Food type Internal temp. Ground meat & meat mixtures Beef, Pork, Veal, Lamb 160°F (71°C) Turkey, Chicken 165°F (74°C) Fresh beef, veal, lamb Medium rare† 145°F (63°C) Medium 160°F (71°C)
-
Page 26: Probe
SETTING OVEN CONTROLS Probe (cont’d) NOTES • During the cooking process the internal food temperature will display by default. To review the Fig. 1 Probe error message: target temperature press the keypad once. If the error message "Prob ERR" displays (Fig. 1), check After 6 seconds the display will revert back to the to be sure that the probe connector is fully inserted into internal food temperature. -
Page 27: Broil
SETTING OVEN CONTROLS Broil Use the broil feature to cook meats that require direct exposure to radiant heat for optimum browning results. When broiling, always remember to arrange the oven racks while the oven is still cool. To set broil: Step Press 1. -
Page 28: Setting Pizza Feature
SETTING OVEN CONTROLS Setting pizza feature To set oven for keep warm: For your convenience the pizza feature provides 2 different settings. You may use the pizza feature whether Step Press starting with fresh or frozen pizza. 1. Press keep warm. To set the pizza feature: 2. -
Page 29: Adjusting The Oven Temperature
SETTING OVEN CONTROLS Adjusting the oven temperature Restoring to factory default settings When new, your appliance was set with a few Your appliance has been factory calibrated and tested to ensure an accurate baking temperature. For the first few predetermined oven control settings. Over time, the user may make changes to these default settings. -
Page 30: Set The Sabbath Feature
SETTING OVEN CONTROLS To Set the Sabbath Feature (for use on the Jewish Sabbath & Holidays) To program the oven for 350°F bake and activate For further assistance, guidelines for proper the Sabbath feature: usage and a complete list of models with the Step Press Sabbath feature, please vist the web at... -
Page 31: Setting Oven Controls
SETTING OVEN CONTROLS To Set the Sabbath Feature (cont’d) To turn off the oven but keep the Sabbath feature NOTES active: • If a delay start time longer than 12 hours (maximum Press cancel. of 24 hours) is desired, set the display mode for the 24 hour setting. -
Page 32: Self-Cleaning
SELF-CLEANING Preparing for self-clean Read before starting self-clean A self-cleaning oven cleans itself using high temperatures IMPORTANT that are well above normal cooking temperatures. The self-clean feature, if used properly, will eliminate soils • Remove all items from the oven and cooktop, from the oven completely or reduce them to a fine including food, cookware, utensils, plastic and powdered ash. - Page 33 SELF-CLEANING Read before starting self-clean (cont’d) IMPORTANT CAUTION To avoid possible burns use caution when opening the • It is normal for odors to occur during self-clean, oven door when the self-clean cycle is finished. The especially during the first self-clean cycle. It is oven may still be VERY HOT Stand to the side of recommend to ventilate the kitchen.
-
Page 34: Setting Delay Start Self-Clean Cycle
SELF-CLEANING Setting a delay start self-clean cycle If it becomes necessary to cancel self-clean: Example: To program a self-cleaning cycle with a 1. Press keypad. delay start time of 9:00 o’clock: 2. If the self-clean cycle has heated the oven to a high Step Press temperature, the "Hot"... -
Page 35: Care & Cleaning
CARE & CLEANING Cleaning recommendation table Surface type Recommendation For general cleaning, use hot, soapy water and a cloth. For more difficult • Control knobs (some models) soils and built-up grease, apply a liquid detergent directly onto the soil. • Painted body parts Leave on soil for 30-60 minutes. -
Page 36: Cooktop Maintenance
CARE & CLEANING Cooktop maintenance Cooktop cleaning IMPORTANT CAUTION Consistent and proper cleaning is essential to Before cleaning the cooktop, be sure the controls are maintaining your ceramic glass cooktop. turned to OFF and the cooktop is COOL. For light to moderate soil: Prior to using your cooktop for the first time, apply some of the glass-ceramic cooktop cleaner supplied with your new Apply a few drops of glass-ceramic cooktop cleaner... -
Page 37: Aluminum Foil And Oven Liners
CARE & CLEANING Cooktop cleaning (cont’d) Aluminum foil and oven liners (cont’d) Do not use oven bottom liners or use aluminum foil to WARNING cover the oven bottom or any oven racks. Using a liner in the DO NOT use a cooktop cleaner on a hot cooktop. oven restricts the heat The fumes can be hazardous to your health and and air flow needed to... -
Page 38: Removing And Replacing The Lift-Off Oven Door
CARE & CLEANING Removing and replacing the lift-off oven door CAUTION Oven door hinge • To avoid possible injury when removing or replacing the locations oven door, follow the instructions below carefully and with oven door always hold the oven door with both hands positioned fully open. - Page 39 BEFORE YOU CALL Solutions to common problems • Problem Possible Causes Solutions Display flashes time. Power interruption. Press cancel then set the correct time of day. Oven control The oven control has Press cancel to clear the display & stop beeping. Try bake or displays detected a fault or error broil feature again.
- Page 40 BEFORE YOU CALL • Solutions to common problems Problem Possible Causes Solutions Oven portion of Incorrect oven control Be sure the oven control was set correctly for the requested appliance does not setting. feature. See Setting Oven Controls section and review operate.
- Page 41 BEFORE YOU CALL Solutions to common problems • Problem Possible Causes Solutions bake or self-clean The time of day is incorrect. Set clock with correct time of day before adding a delay start did not start at the setting. See "Setting the clock" in Setting Oven Controls time expected.
- Page 42 BEFORE YOU CALL • Solutions to common problems Problem Possible Causes Solutions Oven smokes Oven door was closed. Be sure oven door is open when broiling. excessively when Meat too close to upper Reposition oven rack lower to provide proper clearance between broiling.
- Page 43 NOTES Problem Possible Causes Solutions Scratches or Coarse particles such as salt Be sure cooktop surface and bottom of cooking utensils are abrasions on or sand between cookware clean before usage. Small scratches do not affect cooking and cooktop surface. and cooktop surface.
- Page 44 MAJOR APPLIANCE WARRANTY Your appliance is covered by a one year limited warranty. For one year from your original date of This page is left blank intentionally purchase, Electrolux will pay all costs for repairing or replacing any parts of this appliance that prove to be defective in materials or workmanship when such appliance is installed, used and maintained in accordance with the provided instructions.
- Page 45 Avant de faire appel au service après-vente ..39-43 Commandes des éléments de surface ....11-14 Garantie sur les gros appareils Fonctions des commandes du four électroménagers ...... dernière de couverture (540 avec sonde) ........... 15 www.frigidaire.com États-Unis 1 800 944-9044 www.frigidaire.ca Canada 1 800 265-8352...
- Page 46 Réglage du verrouillage du four ........17 intervention s’avère nécessaire, il suffit d’un appel téléphonique Minuterie ................18 pour l’obtenir. Appelez le service à la clientèle Frigidaire au Ajouter une minute ............18 1 800 944-9044. Préchauffage rapide ............18 Cuisson au four ..............
- Page 47 MESURES DE SÉCURITÉ IMPORTANTES Lisez toutes les instructions avant d’utiliser cet appareil. Ne tentez pas d’installer ou d’utiliser votre appareil avant d’avoir lu Demandez à votre marchand de vous recommander un les mesures de sécurité présentées dans ce guide. Les mesures technicien qualifié...
- Page 48 MESURES DE SÉCURITÉ IMPORTANTES IMPORTANT AVERTISSEMENT • Rangement à l’intérieur de l’appareil ou sur l’appareil : pour N’essayez pas de faire fonctionner la cuisinière pendant éviter tout risque d’incendie, les articles inflammables ne une panne de courant. En cas de panne, éteignez toujours la doivent pas être rangés dans le four, près des éléments de cuisinière.
-
Page 49: Mesures De Sécurité Importantes
MESURES DE SÉCURITÉ IMPORTANTES FOURS AUTONETTOYANTS INSTRUCTIONS IMPORTANTES CONCERNANT L’UTILISATION DE LA TABLE DE CUISSON • Assurez-vous de connaître quel bouton correspond à AVERTISSEMENT chaque élément de surface. Placez un ustensile contenant des aliments sur l’élément avant de le mettre en marche et arrêtez •... -
Page 50: Avant L'utilisation Du Four
AVANT L’UTILISATION DU FOUR Emplacement de l’évent du four Position d’arrêt des grilles L’évent est situé sous le côté gauche du tableau de La plupart des grilles du four glissent sur les guides de grille commande (fig. 1). Lorsque le four fonctionne, l’air chaud situés le long des parois internes du four. - Page 51 AVANT L’UTILISATION DU FOUR Types de grilles de four Votre four peut être muni d’un ou de plusieurs des types de Grille de grilles de four décrits ci-dessous : four plate La grille de four plate (certains modèles) peut être placée dans la plupart des positions de grille et être utilisée pour la plupart de vos cuissons.
- Page 52 AVANT L’UTILISATION DU FOUR Système de grille de four Effortless IMPORTANT (certains modèles) Certains modèles sont munis d’un système de grille spécial qui • Seule la grille de four Effortless peut être utilisée prolonge partiellement et automatiquement la grille du four à dans la position de grille 2.
-
Page 53: Avant L'utilisation Des Commandes Des Éléments De Surface
AVANT L’UTILISATION DES COMMANDES DES ÉLÉMENTS DE SURFACE Table de cuisson en vitrocéramique Voyant Les éléments radiants de surface sont situés sous la surface de d’élément la table de cuisson en vitrocéramique. Les cercles incrustés Voyant de en marche dans la table de cuisson indiquent le contour des éléments de surface surface qui se trouvent en dessous. -
Page 54: Commandes Des Éléments De Surface
AVANT L’UTILISATION DES COMMANDES DES ÉLÉMENTS DE SURFACE Types d’éléments de surface Utilisation d’ustensiles appropriés Les éléments radiants de surface sont situés sous la surface de Le type d’ustensile utilisé et sa dimension influencent le réglage la table de cuisson en vitrocéramique. Les cercles incrustés nécessaire à... - Page 55 RÉGLAGE DES COMMANDES DES ÉLÉMENTS DE SURFACE Suggestions de réglages pour l’élément de Éléments de surface radiants simples surface radiant (tous les modèles) Les réglages suggérés ci-dessous sont basés sur une cuisson effectuée avec des casseroles d’aluminium de poids moyen avec couvercles.
- Page 56 RÉGLAGE DES COMMANDES DES ÉLÉMENTS DE SURFACE Éléments radiants doubles de surface (certains modèles) Les symboles sur le dosseret servent à indiquer quelle spirale de l’élément radiant double va chauffer. Le symbole indique que seul le serpentin intérieur chauffera. Le symbole indique que les serpentins intérieur et extérieur chaufferont.
- Page 57 RÉGLAGE DES COMMANDES DES ÉLÉMENTS DE SURFACE Maintien au chaud (certains modèles) Sélection de la température : reportez-vous au Tableau La zone de maintien au chaud sert à maintenir les aliments des réglages recommandés pour la zone de maintien au cuits à...
-
Page 58: Mise En Conserve
RÉGLAGE DES COMMANDES DES ÉLÉMENTS DE SURFACE Mise en conserve Lisez et respectez les points suivants lorsque vous effectuez ATTENTION des mises en conserve à l’aide de votre cuisinière. IMPORTANT • Les éléments de surface radiants peuvent sembler avoir refroidi une fois éteints. Cependant, la surface en vitrocéramique risque d’être encore très chaude et NE PLACEZ JAMAIS un ustensile de cuisson sur deux peut causer des brûlures si vous la touchez avant qu’elle... -
Page 59: Fonctions Des Commandes Du Four (540 Avec Sonde)
FONCTIONS DES COMMANDES DU FOUR LISEZ ATTENTIVEMENT LES INSTRUCTIONS AVANT D’UTILISER LE FOUR. Pour bien utiliser votre four, familiarisez-vous avec les différentes fonctions des touches du four décrites ci-dessous. TIMER ON•OFF BAKE (cuisson au BROIL (cuisson CONVECT (cuisson à CONVECT CONVERT Touches 0 à... -
Page 60: Réglage Des Commandes Du Four
RÉGLAGE DES COMMANDES DU FOUR Réglage de l’horloge Lorsque la cuisinière est branchée pour la première fois ou s’il y a eu interruption de l’alimentation, « 12:00 » clignote sur l’afficheur. Fig. 2 Fig. 3 REMARQUE Fig. 1 Le fait de passer de la fonction de cuisson continue à la Pour régler l’horloge (ex. - Page 61 RÉGLAGE DES COMMANDES DU FOUR Modification du mode d’affichage de la température du four Par défaut, le tableau de commande est réglé pour afficher la température du four en Fahrenheit. L’affichage peut être modifié pour indiquer des degrés Fahrenheit ou Celsius. Pour changer le mode d’affichage de la température : Fig.
- Page 62 RÉGLAGE DES COMMANDES DU FOUR Minuterie Quick Reheat (préchauffage rapide) La minuterie vous aide à surveiller votre temps de cuisson sans Cette fonction permet de préchauffer le four rapidement. Pour des résultats optimaux, utilisez cette fonction lorsque vous nuire au processus de cuisson. La minuterie peut être réglée cuisez avec une seule grille.
- Page 63 RÉGLAGE DES COMMANDES DU FOUR Bake (cuisson au four) Bake Time (temps de cuisson) Utilisez le mode de cuisson au four pour préparer la plupart des Une durée de cuisson peut être ajoutée pour la plupart des repas dont la recette exige une cuisson normale. Un signal modes de cuisson au four.
- Page 64 RÉGLAGE DES COMMANDES DU FOUR Delay start (mise en marche différée) Utilisez cette touche pour programmer une mise en marche Lorsque la durée de cuisson programmée s’est écoulée : différée pour la plupart des modes de cuisson ou pour la 1.
- Page 65 RÉGLAGE DES COMMANDES DU FOUR Convect (convection) Avantages de la cuisson à convection — Les aliments cuisent uniformément. — Vous pouvez utiliser plusieurs grilles. — Aucun ustensile de cuisson spécial n’est requis. La cuisson à convection permet de faire circuler uniformément l’air chaud à...
- Page 66 RÉGLAGE DES COMMANDES DU FOUR Cuisson au gril à convection Conversion à la convection (certains modèles) La fonction de conversion à la convection vous permet Utilisez le mode de cuisson au gril à convection pour cuire des d’utiliser la cuisson à convection avec n’importe quelle recette viandes plus épaisses qui nécessitent une exposition directe à...
- Page 67 RÉGLAGE DES COMMANDES DU FOUR Sonde L'utilisation de la sonde vous permet d'obtenir de meilleurs IMPORTANT résultats lorsque vous cuisinez des aliments tels que des rôtis, du jambon ou une volaille. Cette fonction peut également être utilisée efficacement avec d’autres types d’aliments, comme les •...
- Page 68 RÉGLAGE DES COMMANDES DU FOUR Sonde (suite) Insertion correcte de la sonde : Choisir le réglage qui sera activé lorsque la température cible de la sonde sera atteinte • Insérez toujours la sonde de sorte que la pointe se trouve au Votre four est réglé...
- Page 69 RÉGLAGE DES COMMANDES DU FOUR Sonde (suite) Connecteur de la sonde Prise Poignée Températures internes de cuisson recommandées par l’USDA : Type d’aliments Temp. interne Viande hachée et mélanges de viande Bœuf, porc, veau, agneau 71 °C (160 °F) Dinde, poulet 74 °C (165 °F) Bœuf, veau, agneau frais Mi-saignant†...
- Page 70 RÉGLAGE DES COMMANDES DU FOUR Sonde (suite) REMARQUES • Lors du processus de cuisson, la température interne de l’aliment s’affiche par défaut. Pour voir la température Fig. 1 Message d’erreur de la sonde : cible, appuyez une fois sur la touche .
- Page 71 RÉGLAGE DES COMMANDES DU FOUR Gril Utilisez le mode de cuisson au gril pour cuire des viandes qui nécessitent une exposition directe à la chaleur radiante et obtenir des résultats de brunissement optimaux. Lorsque vous faites une cuisson au gril, disposez toujours les grilles pendant que le four est froid.
- Page 72 RÉGLAGE DES COMMANDES DU FOUR Réglage de la fonction Pizza Programmation du four pour le maintien au chaud : La fonction Pizza comporte deux réglages. Vous pouvez utiliser cette fonction pour faire cuire de la pizza surgelée ou fraîche. Étape Appuyez sur 1.
- Page 73 RÉGLAGE DES COMMANDES DU FOUR Ajustement de la température du four Rétablir les réglages par défaut Votre nouvel appareil dispose de réglages de commande par Votre four a été réglé et testé en usine de façon à fournir une défaut. Avec le temps, l’utilisateur peut modifier ces réglages. température de cuisson précise.
- Page 74 RÉGLAGE DES COMMANDES DU FOUR Pour régler la fonction Sabbat (à utiliser durant le sabbat et les fêtes juives) Pour programmer le four à 177 °C (350 °F) et activer la Pour obtenir plus de renseignements et des fonction Sabbat : directives d’utilisation ou pour consulter la liste Étape Appuyez sur...
- Page 75 RÉGLAGE DES COMMANDES DU FOUR Réglage de la fonction de sabbat (suite) Pour éteindre le four, mais conserver la fonction REMARQUES Sabbat : Appuyez sur CANCEL (annuler). • Si la mise en marche différée doit être réglée plus de 12 heures à l’avance (maximum de 24 heures), l’afficheur Pour désactiver la fonction Sabbat : doit être réglé...
-
Page 76: Autonettoyage
AUTONETTOYAGE Avant d’utiliser l’autonettoyage À lire avant de démarrer l’autonettoyage Un four autonettoyant se nettoie à des températures qui se IMPORTANT situent bien au-dessus des températures de cuisson normales. Si elle est utilisée correctement, la fonction d’autonettoyage éliminera toutes les saletés dans le four ou les réduira en une •... - Page 77 AUTONETTOYAGE À lire avant de démarrer l’autonettoyage (suite) IMPORTANT ATTENTION • Il est normal que des odeurs se dégagent pendant Pour éviter les brûlures, faites preuve de prudence en l’autonettoyage, spécialement lors du premier cycle ouvrant la porte du four après un cycle d’autonettoyage. d’autonettoyage.
- Page 78 AUTONETTOYAGE Programmer une mise en marche différée pour Si vous devez annuler le cycle d’autonettoyage : le cycle d’autonettoyage 1. Appuyez sur la touche (annuler). Exemple : Pour programmer un cycle d’autonettoyage 2. Si le cycle d’autonettoyage a chauffé le four à une avec une mise en marche à...
-
Page 79: Entretien Et Nettoyage
ENTRETIEN ET NETTOYAGE Recommandations de nettoyage Type de surface Recommandation Pour un nettoyage général, utilisez de l’eau chaude savonneuse et un chiffon. Pour les taches • Boutons de commande rebelles et la graisse accumulée, appliquez un détergent liquide directement sur la saleté. (certains modèles) Laissez agir pendant 30 à... -
Page 80: Entretien De La Table De Cuisson
ENTRETIEN ET NETTOYAGE Entretien de la table de cuisson Nettoyage de la table de cuisson IMPORTANT ATTENTION Un nettoyage régulier et approprié est essentiel au maintien Avant de nettoyer la table de cuisson, assurez-vous que les du bon état de votre table de cuisson en vitrocéramique. commandes sont à... - Page 81 ENTRETIEN ET NETTOYAGE Nettoyage de la table de cuisson (suite) Papier d’aluminium et revêtements de four (suite) Ne recouvrez pas la sole ou les grilles du four avec un AVERTISSEMENT revêtement ou du papier d’aluminium. L’utilisation d’un revêtement N’utilisez AUCUN produit de nettoyage pour table de à...
-
Page 82: Retrait Et Remise En Place De La Porte Du Four
ENTRETIEN ET NETTOYAGE Retrait et remise en place de la porte du four ATTENTION Emplacements des charnières une fois la • Pour éviter les blessures lorsque vous retirez ou replacez la porte du four porte du four, suivez attentivement les instructions et tenez complètement ouverte toujours la porte du four ouverte en éloignant vos mains des charnières. - Page 83 AVANT DE FAIRE APPEL AU SERVICE APRÈS-VENTE Solutions aux problèmes courants • Problème Causes possibles Solutions L’heure clignote sur Panne électrique. Appuyez sur CANCEL (annuler), puis réglez l’heure de l’horloge. l’afficheur. Appuyez sur CANCEL (annuler) pour effacer l’affichage et arrêter le signal Le tableau de commande Le système de commande de four a sonore.
- Page 84 AVANT DE FAIRE APPEL AU SERVICE APRÈS-VENTE • Solutions aux problèmes courants Problème Causes possibles Solutions Le four ne fonctionne Mauvais réglage du four. Assurez-vous que les commandes du four sont correctement réglées à la fonction pas. souhaitée. Reportez-vous à la section Réglage des commandes du four et consultez les instructions relatives à...
- Page 85 AVANT DE FAIRE APPEL AU SERVICE APRÈS-VENTE Solutions aux problèmes courants • Problème Causes possibles Solutions L’heure du jour n’est pas réglée La fonction de cuisson Réglez l’horloge à la bonne heure avant de programmer une mise en marche au four ou correctement.
- Page 86 AVANT DE FAIRE APPEL AU SERVICE APRÈS-VENTE • Solutions aux problèmes courants Problème Causes possibles Solutions Le four dégage La porte du four est fermée. Assurez-vous que la porte du four est ouverte lors de la cuisson au gril. beaucoup de fumée durant la cuisson au La viande est placée trop proche Descendez la grille pour laisser plus de place entre les aliments et l’élément...
- Page 87 AVANT DE FAIRE APPEL AU SERVICE APRÈS-VENTE Solutions aux problèmes courants • Problème Causes possibles Solutions Il y a des égratignures Les grosses particules telles que le Assurez-vous que la table de cuisson et le fond de l’ustensile sont propres avant ou des éraflures sur la sel et le sable qui se retrouvent entre de les utiliser.
- Page 88 GARANTIE SUR LES GROS APPAREILS ÉLECTROMÉNAGERS Votre appareil est couvert par une garantie limitée d’un an. Pendant un an à partir de la date d’achat d’origine, Electrolux assumera les coûts des réparations ou du remplacement des pièces de cet appareil si ce dernier présente un défaut de matériau ou de fabrication, à...