
Related Manuals for First Alert DWS-401


Summary of Contents for First Alert DWS-401
-
Page 1: Security System
SECURITY SYSTEM CAMERAS INCLUDED USER’S MANUAL Model DWS-401 1 Camera Included... -
Page 2: Introduction
BRK Brands, Inc. is a subsidiary of Jarden Corporation (NYSE: JAH). First Alert® is a registered trademark of the First Alert Trust. To obtain warranty service, contact the Consumer Affairs Division at 1-800-323-9005, Monday through Friday, 7:30 a.m. - 5 p.m., Central Standard Time. -
Page 3: Product Features
IntrOduCtIOn KEY PRODUCT FEATURES MAIn dESCrIPtIOn Four channel MPEG-4 wireless digital video recorder suitable for applications such as high-end residential - new or remodel, light commercial, small busi- ness/retail, small warehouse or small grocery. PrOduCt FEAturES • 2.4 GHz Digital Frequency Hopping Spread Spectrum (FHSS) Technology • MPEG-4 Compression • Supports real-time AV preview and recording up to VGA@25 FPS(Single Camera Mode) or QVGA@25fps/CH (Multiple camera mode) -
Page 4: Table Of Contents
IntrOduCtIOn TABLE OF CONTENTS CONTENTS ection eScription umber Introduction Safety Product Overview What is in the Box DVR Controls Top Panel Side Panel & Display Indicators Installation Installing Cameras & Setting up the Wireless Receiver System Operation 10-24 Main Menu Screens Camera Setup 11-12 Camera Pairing... -
Page 5: Safety
First Alert / BRK Brands, Inc., could void the user’s authority to operate the equipment. We, First Alert / BRK Brands, Inc. declare under our sole responsibility that the device to which this declaration relates: Complies with Part 15 of the FCC Rules. Operation is subject to the following two conditions: (1) this device may not cause harmful interference, and (2) this device must accept any interference received, including interference that may cause undesired operation. -
Page 6: Product Overview
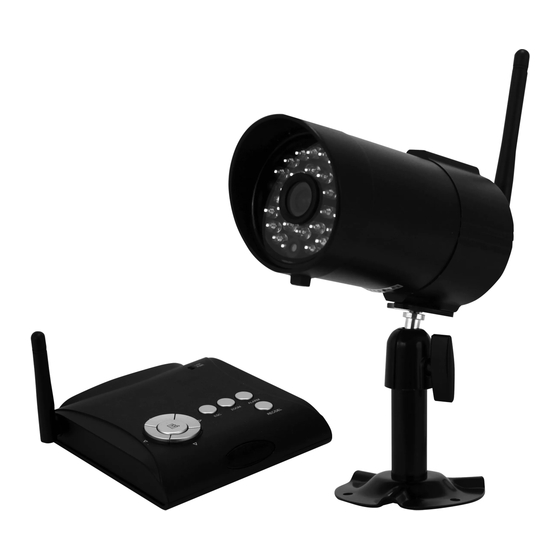
24 HOUR VIDEO SURVEILLANCE PROTECTED BY 2 Window Digital Wireless Camera, Warning Decals Antenna and Stand SECURITY SYSTEM CAMERAS INCLUDED USER’S MANUAL Model DWS-401 1 Camera Included SEC24 Media Playback AV Cable MPEG-4 NIGHT VIDEO MICRO SD AUDIO INDOOR/OUTDOOR COMPRESSION... -
Page 7: Dvr Controls
PrOduCt OVErVIEW DVR CONTROLS tOP PAnEL Receiver IR Remote CONTROLS unction eScription Power unit On and Off or enable “Mute” Feature. Hold button for several seconds to Power/Mute Button turn unit On or Off. Briefly press button to toggle “Mute” On or Off. Link &... -
Page 8: Side Panel & Display Indicators
PrOduCt OVErVIEW CONNECTIONS & INDICATORS SIdE PAnEL CONNECTIONS unction eScription DC 5V /1A Power Port Connect Power Adaptor. AV Out Connect to a Monitor or TV through RCA inputs Reset Powers unit off Memory Card Slot Insert 2GB to 32GB Micro SD Memory Card (4GB Micro SD Card w/adaptor included) dISPLAY IndICAtOrS INDICATORS nDicator... -
Page 9: Installation
InStALLAtIOn CAMERAS & WIRELESS RECEIVER InStALLInG CAMErAS 1. Select the position for the camera and secure the camera stand. (Screws and anchors are supplied. Use an appropriate screw type for the mounting surface.) 2. Screw the camera onto the bracket. 3. -
Page 10: System Operation
SYStEM OPErAtIOn MAIN MENU MAIn MEnu The Main Menu screen is used to control the various functions of the DVR system. It contains the following sub menu icons: Camera Setup, Record Setup, Event List, System Setup, Alarm Buzzer, Zoom, Scan Activated Cameras and Memory Card Overwrite. Camera Setup-Main Menu Record Setup-Main Menu Event List-Main Menu... -
Page 11: Camera Setup
SYStEM OPErAtIOn CAMERA SETUP CAMErA SEtuP MEnu Select CAMERA SETUP, press MENU key once to enter sub-menu. Camera Setup-Main Menu CAMERA PAIRING Camera Setup-Sub Menu Camera Setup-Pairing to select the camera to set up (1-4). to select PAIRING, BRIGHTNESS and CAMERA ON/OFF settings. -
Page 12: Camera Brightness Adjustment
SYStEM OPErAtIOn CAMERA SETUP CAMERA BRIGHTNESS ADJUSTMENT Camera Setup-Adjust Brightness With BRIGHTNESS section highlighted, use to to adjust camera brightness. CAMERA ACTIVATION Camera Setup-Camera Activation With ACTIVATION section highlighted, use to enable or disable camera. Press ESC to return to main menu. NOTE: Ensure the cameras are paired to the receiver for SCAN or QUAD to function properly camera “ON”... -
Page 13: Recorder Setup Menu
SYStEM OPErAtIOn RECORDER SETUP rECOrdEr SEtuP MEnu Select RECORDER SETUP, press MENU key once to enter sub-menu. Record Setup-Main Menu RECORD SCHEDULE Record Schedule Setup Menu to select time block. Page 13... -
Page 14: Recorder Setup
SYStEM OPErAtIOn RECORDER SETUP RECORD SCHEDULE - CONTINUED Recorder Schedule Setup - Options Set There are three different recording options available to chose from. Press MENU key to switch between different recording mode. M: MOTION (REC only when motion detected) S: SCHEDULE (record between selected times for each day) X: MANUAL (manual REC) The system will record video from all 4 channels simultaneously with MOTION, SCHEDULE and MANUAL... -
Page 15: Motion Detection Sensitivity
SYStEM OPErAtIOn RECORDER SETUP MOTION DETECTION SENSITIVITY Recorder Setup-Motion Detection Sensitivity to select MOTION DETECTION SENSITIVITY section. Use to highlight camera for setup. to adjust sensitivity level: OFF / LV1 / LV2 / LV3 (LV3 is most sensitive). Press ESC to save and exit. FORMAT MEMORY CARD Recorder Setup-Format Memory Card to select FORMAT STORAGE, press... -
Page 16: Setup Mask Area
SYStEM OPErAtIOn RECORDER SETUP SETUP MASKING AREA Masking Area Setup Grid Masking Area Setup Menu This screen allows you to setup areas where you do not want motion to be detected. Use to select MASKING AREA SETUP menu. Use to highlight camera (1-4) for setup. Use to navigate to the grid where no motion detection is desired. -
Page 17: Playback
SYStEM OPErAtIOn PLAYBACK PLAYBACK Playback-Date Folder Menu This screen allows you to playback recorded video. Use to select the Date folder you want to view. Press MENU to confirm selection and enter selected folder. Playback-Time Grid Menu to select Hour (each block represent one hour time), Press MENU to confirm selection and enter selected folder. - Page 18 SYStEM OPErAtIOn PLAYBACK PLAYBACK - CONTINUED Channel Record Indicators NOTE: The channel indicator 1, 2, 3, 4 in a SOLID square indicates recording type for that channel only. (See 1 at left). The channel indicator 1, 2, 3, 4 all in Hollow squares indicate recording type effects all four channels.
-
Page 19: System Setup
SYStEM OPErAtIOn DATE & TIME SETUP SYStEM SEtuP System Setup Menu DATE & TIME SETUP Date and Time Setup Menu Select SYSTEM SETUP and press MENU to enter sub-menu. Use to highlight and adjust: YEAR / MONTH / DATE / HOUR / MINUTE. Use adjust each section and press MENU to confirm adjustment. -
Page 20: Power Saving
SYStEM OPErAtIOn POWER SAVING POWER SAVING Power Saving Setup Menu Select SYSTEM SETUP, press MENU to enter. Use to select POWER SAVING. to highlight SCREEN OFF AFTER 5 MINUTES IDLE / SCREEN OFF AFTER 10 MINUTES IDEL / SCREEN ALWAYS ON. Press MENU to confirm selection. -
Page 21: Multi-Channel Idle Display
SYStEM OPErAtIOn MULTI CHANNELS IDLE DISPLAY SETUP MULTI CHANNELS IDLE DISPLAY SETUP Multi Channels Idle Display Setup Menu Select SYSTEM SETUP, press MENU to enter. Use to select MULTI CHANNELS IDLE DISPLAY. to highlight DISPLAY QUAD DURING IDLE / AT 5 SEC INTERVALS / AT 10 SEC INTERVALS / AT 15 SEC INTERVALS. -
Page 22: Tv Out Setup (Ntsc/Pal)
SYStEM OPErAtIOn TV OUT & LANGUAGE SETUP TV OUT SETUP (NTSC OR PAL) TV Out Setup Menu Select SYSTEM SETUP, press MENU to enter. Use to select TV OUTPUT. to highlight NTSC or PAL. Press MENU to confirm selection. Press ESC to save and exit. NOTE: Changing the TV system may affect display image scale LANGUAGE Default Menu... -
Page 23: Alarm Buzzer
SYStEM OPErAtIOn ALARM BUZZER & ZOOM SETUP ALArM BuZZEr Alarm Buzzer Menu Select ALARM BUZZER, press MENU to toggle buzzer ON or OFF. When motion is detected by a camera, then a buzzer sound will be triggered by the monitor. ZOOM Zoom Menu Select ZOOM, press... -
Page 24: Scan Activated Channels
SYStEM OPErAtIOn SCAN ACTIVATED CAMERAS & MEMORY CARD OVERWRITE SCAn ACtIVAtEd CAMErAS Scan Activated Cameras Select SCAN ACTIVATED CAMERAS, press MENU to begin camera scan mode. NOTE: (1) Camera ON/OFF setting in CAMERA SETUP section will affect which camera(s) can be displayed during IDLE DISPLAY. - Page 25 PC OPErAtIOn PC PLAYBACK SOFTWARE PC PLAYBACK SOFtWArE The Sec24 Media Player is specifically designed to playback on your PC recorded files from the Micro SD card. You must install the software provided on the CD that is included with your DVR Kit. The following is an overview of the software.
-
Page 26: Pc Playback Software And Installation
PC OPErAtIOn PLAYBACK SOFTWARE - INSTALLATION PLAYBACK SOFTWARE - INSTALLATION Insert the CD into the CD-ROM of your PC. Click on MY COMPUTER, double click on the drive where the CD-ROM is assigned by the PC (for example: E:\). In this drive you will find the following icon. If Windows 7 is running on your PC, please right click on icon “20111027_Sec24 Media Player_v1.0.9.44”... - Page 27 PC OPErAtIOn PLAYBACK SOFTWARE - INSTALLATION Follow the screens as shown below to complete the installation process. The following icon should have been placed on your desktop. Double click the Sec24 Media Player icon on the desktop to start the software. Click on “Load”...
-
Page 28: Appendix
COnnECt tO YOur WIrEd dVr SECurItY SYStEM Connecting First Alert wireless camera (DWS-401) to our wired DVR systems or other wired DVR systems is very easy. More importantly, all of the features and recording options inherent in the wired DVR such as schedule recording, mask field, enhanced motion detect, remote internet and mobile phone access, e-mail alerts and alarm functions all work as they should. -
Page 29: Troubleshooting
APPEndIX TROUBLESHOOTING trOuBLESHOOtInG TROUBLE SHOOTING rror oSSible auSe olutionS Cable from power adapter is loose or • Confirm that all cables are connected correctly. System is not receiving power is unplugged. No power at electrical • Confirm that the power adapter is securely connected to the back of the unit. or is not powering up outlet. -
Page 30: System Map
APPEndIX SYSTEM MAP SYStEM MAP Channel 1 Activation Channel 2 Camera Setup Brightness Channel 3 Pairing Channel 4 Schedule Motion Sensitivity Cam 1 Cam 2 Cam 3 Cam 4 Recorder Setup SD Card Format Cam 1 Cam 2 Cam 3 Cam 4 Motion Area Record Time... -
Page 31: Specifications
APPEndIX SPECIFICATIONS tECHnICAL SPECIFICAtIOnS SPECIFICATIONS eVice arameter peciFication Channels Video Format NTSC (default)/PAL 2.4 GHz secure digital wireless with 24 transmission channels using Frequency Wireless Parameters Hopping Spread Spectrum (FHSS) technology Compression Format MPEG-4 Recording Resolution 320 x 240 Communication Range Approximately 500 feet (150 meters) open space line of sight Recording Modes Manual/Schedule/Motion Detection... -
Page 32: Warranty
PRODUCT LIMITED WARRANTY BRK Brands, Inc., (“BRK”) the maker of First Alert® brand products warrants that for a period of one year from the date of purchase (the “Warranty Period”), this product will be free from defects in material and workmanship. BRK, at its sole option, will repair or replace this product or any component of the product found to be defective during the Warranty Period. - Page 33 BRK Brands, Inc. ©2012 a Jarden Corporation Company (NYSE:JAH) 3901 Liberty Street Road, Aurora, IL 60504-8122 Phone: 630-851-7330 Tech Services: 800-323-9005 www.brkelectronics.com M08-0426-002...