England's Stove Works 25-EPI Installation And Operation Manual
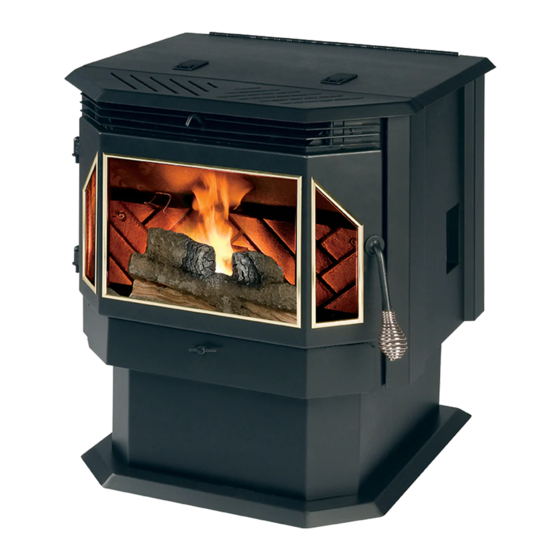
Evolution pellet insert & insert kit
Hide thumbs
Also See for 25-EPI:
- Installation & operation manual (62 pages) ,
- Installation & operation manual (62 pages)
Table of Contents
Advertisement
EVOLUTION PELLET INSERT & INSERT KIT
INSTALLATION & OPERATION MANUAL
MODEL NUMBERS:
Failure to follow these instructions can result in property damage, bodily injury
or even death. For your safety and protection, follow the installation
instructions outlined in this manual. Contact your local building or fire officials
about restrictions and installation inspection requirements (including permits) in
Please read this entire manual before installation and use of this pellet fuel-
burning appliance. Keep children, furniture, fixtures and all combustibles away
25-EPI
SAFETY NOTICE
your area.
CAUTION
from any heating appliance.
SAVE THESE INSTRUCTIONS
55-SHPEPI
55-TRPEPI
Rev. 8/2008
Advertisement
Table of Contents

Related Manuals for England's Stove Works 25-EPI


Summary of Contents for England's Stove Works 25-EPI
- Page 1 (including permits) in Please read this entire manual before installation and use of this pellet fuel- burning appliance. Keep children, furniture, fixtures and all combustibles away SAVE THESE INSTRUCTIONS 25-EPI 55-SHPEPI SAFETY NOTICE your area.
-
Page 2: Model Number
• Use of outside combustion air is mandatory with this unit. • Do not operate with the hopper open; lid must be shut and tightly latched during operation. Note: England’s Stove Works does not recommend using a pellet stove as your only source of heat. Model Number________________________... -
Page 3: Table Of Contents
Introduction • Introduction...4 Specifications • Unit Dimensions ...5 • Heating Specifications ...6 • EPA Compliance...6 Installation • Insert Assembly ... 7-8 • Clearances to Combustibles...9 • Venting Introduction...10 • Venting Guidelines ...10 • Addition Venting Information ...11 • Approved Venting Methods o Full Chimney Reline ...12 •... -
Page 4: Introduction
Thank you for purchasing this fine product from England’s Stove Works! England’s Stove Works was started, and is still owned by, a family that believes strongly in a “Do It Yourself” spirit; that’s one reason you found this product at your favorite “Do It Yourself” stove. -
Page 5: Specifications
Unit Dimensions Minimum Fireplace Dimensions SPECIFICATIONS • Unit Height (In Fireplace) • Unit Depth (In Fireplace) • Unit Width (In Fireplace) • Bottom to Flue Collar • Left Side to Flue Collar • Unit Width (Outside Fireplace) • Unit Depth (Outside Fireplace) •... -
Page 6: Heating Specifications
*- This unit was not tested for efficiency; the efficiency shown is a default value normally attained by similar, certified pellet burning appliances. ** - Heat output, burn rate and maximum burn time are heavily dependent on the type of pellets burned in the stove; as such, these numbers may vary. -
Page 7: Installation
5. Lay the Rear Hopper Cover Plate Assembly on the top of the hopper lid; be certain the assembly is centered on the stove and that all edges line up. Use the predrilled holes as a drilling template. Without removing the hopper lid gasket material, use a 1/8”... - Page 8 Cover Plate to the hopper of the stove while carefully holding the lid in place to be certain in remains centered on the stove. A set of clamps or an extra set of hands is very useful at this point of the conversion, but not required.
-
Page 9: Clearances To Combustibles
Clearances to Combustibles Unit Clearances to Combustibles Clearance to Mantle (A) • INSTALL VENT AT CLEARANCES SPECIFIED BY THE VENT MANUFACTURER. • HOT! Do not touch! Severe burns or clothing ignition may result. • Glass and other surfaces are hot during operation. • Keep children away. •... -
Page 10: Venting Introduction
• ALWAYS install vent pipe in strict adherence with the instructions and clearances included with your venting system. • DO NOT connect this pellet stove to a chimney flue which also serves another appliance. • DO NOT install a flue pipe damper or any other restrictive device in the exhaust venting system of this unit. -
Page 11: Addition Venting Information
(i.e. Do NOT use venting pipe from one manufacturer and a termination cap from another). • A FULL chimney relining is required when installing this stove as an insert. o For chimneys 15 ft. or shorter, 3 in. pellet liner may be used. -
Page 12: Full Chimney Reline
Approved Venting Method: Full Chimney Relining RTV silicone. • Secure the outside air pipe to the stove using a hose clamp or other mechanical fastener. The outside air pipe may be run to the top of the chimney system and terminated (as shown above), or may be run down through the ash dump, in the case of a masonry fireplace. -
Page 13: Outside Air Hook-Up
The best choice for outside air connection is the one which uses the shortest distance or outside air pipe. • If it is not feasible to use the included outside air hookup kit in your stove installation, other materials may be used provided the following rules are... -
Page 14: Floor Protection
• The 25-EP requires a non-combustible hearth if the current hearth of the fireplace does not extend the required distance from the front of stove. Follow the diagram below to determine if the current fireplace hearth is sufficient. • If the current fireplace hearth is not large enough to accommodate this insert, a hearth extension pad (which is designed and sold specifically for this purpose) can be used. -
Page 15: Daily Operation
Lighting a Fire • In order for this stove to operate, the hopper must first be filled with pellet fuel. Lift the hopper lid using the flush-mount handle and pour the pellet fuel directly into the hopper. - Page 16 • The fuel feed rate and combustion air during start-up is determined by the control board, so the stove may be started on any heat range, although we recommend starting the stove on Heat Range 5 to help ensure a strong fire is initiated.
-
Page 17: Control Board Settings
This initiates the shut down sequence, and the stove will remain in shut down mode until it has cooled down. • To increase the heat output of the stove, press the “Up” heat range button. The number in the heat range display window will increase, signifying that the control board is now adjusting the heat output to your desired level. -
Page 18: Error Codes
“E-Code” shutdown, it means there are currently no errors and the stove will begin normal operating. This error code is not used on this stove. If it displayed in the control board windows, please contact customer service and they will diagnose the cause of the false code. -
Page 19: Power Failure
If the power to the unit is interrupted for approximately three minutes or less, the unit will resume operation when power is restored according to the following table: Unit’s State Before Power Loss State When Power Returns Start-Up Shut-Down If the power is interrupted for more than (approximately) three minutes, the unit will be “OFF”... -
Page 20: Thermostat Installation
THERMOSTAT OPERATION Thermostat Installation 1. Unplug the unit and remove the back panel of the stove. 2. Locate the thermostat connect block, labeled J18, on the rear of the control board, near the bottom (See image below and pg. 43 of this manual for a control board diagram). -
Page 21: Thermostat Operation
• During thermostatic operation, the stove will burn at whatever heat range and blower speed the control board has been set to. • When the call for heat is gone (i.e. the room is up to temperature), the stove will enter the thermostatic shutdown sequence. -
Page 22: Important Notes
• Ashes should only be removed when the stove has been shutdown and been allowed to cool thoroughly. Hot embers can remain under ashes long after the fire has gone out, so always be extra careful when handling any ashes from this and any stove. -
Page 23: Daily Ash Removal
• Because of the open design of the firebox, the majority of the ash will already be in the ash pan. Open the main door of the stove and use an old paint brush or putty knife to move ash from around the burnpot into the ash pan below. -
Page 24: Cleaning The Burnpot
• Always allow the stove to finish the shut-down cycle and cool completely before performing any maintenance inside the firebox. • Open the main door of the stove and remove the burnpot by lifting the front edge first and then simultaneously lifting up and out on the rear of the burnpot. -
Page 25: Bi-Weekly
Similarly, always be certain the stove is completely cool and that ALL ashes are cool before vacuuming. • Clean-out tees and other low spots in venting systems are areas prone to fly ash accumulation. -
Page 26: Baffle Removal
Allowing the baffle to slide down to the cradle and then tilting it down and pulling it out of the stove through the main loading door. • As soon as the baffle is out of the stove, the area where fly-ash accumulates on the firebox shelf will be clear. -
Page 27: Important Notes
Maintenance” sections. • Intervals between monthly cleanings will depend on the duration that stove is burning on a daily basis. A stove which is operated continuously will need more frequent monthly cleanings than a stove which is used periodically as supplemental heat. -
Page 28: Exhaust Chamber
MONTHLY MAINTENANCE Exhaust Chamber Cleaning The exhaust chamber of the stove was intentionally designed as an ash accumulation area. Allowing ash to accumulate here prevents excess ash build-up in the combustion blower and the venting system. Similarly, the exhaust chamber is easily accessible via the two exhaust chamber clean-out ports located in the firebox. -
Page 29: Venting Pipe
• Horizontal runs of pipe, such as from the exhaust connection on the stove to transition to vertical, will accumulate fly ash and should be inspected carefully and brushed clean. -
Page 30: Important Notes
Using extra attention to detail and being certain to be very thorough in the end of season cleaning will help increase the operating life of the stove and venting system. -
Page 31: Exhaust Blower
A 12” socket extension will likely be necessary to reach all of the screws. • Lift the exhaust blower up and out of the stove. The gasket which seals the exhaust blower to the exhaust blower tube is fragile, so take extra care when removing the blower. - Page 32 • With the exhaust blower removed, use a utility vacuum to remove any ash accumulation in the exhaust blower tube. • Use a soft paint brush and carefully remove any ash accumulation from the inside of the exhaust blower and from the exhaust blower fan blade. •...
-
Page 33: Convection Blower
Any dust that has built up on the fan blades can usually be easily removed with a vacuum or a soft paint brush. As always, be certain the stove is cool and unplugged before servicing any components within the unit. -
Page 34: Checking Gaskets
An airtight seal at the door openings and hopper lid opening is crucial to proper stove performance. Any air leaks at this areas can not only cause a dirty, inefficient burn but can also pose a serious safety threat. Because of this, gaskets should always be maintained in good condition. -
Page 35: Trouble Shooting Guide
Blown Fuse High Pellet Consumption Squeaking Noise Pinging or Rattling Noise "E‐1" Code On Control Board 1. Vacuum bypass chip missing. TroubleShooting Guide Support at 1‐800‐245‐6489. Cause 1. Bad auger motor. 2. Foreign matter jamming auger. 3. Vacuum sensor. 1. Improper exhaust connection. 1. Loose thermal sensor. 2. Blower speed set higher than heat range, causing stove to cool and blower to cycle. 3. Loose connection. 1. Loose connection. 2. Bad blower. 3. Bad vacuum sensor. 1. Bad exhaust blower. 2. Excessive pellet moisture. 3. Excessive ash build‐up. 4. Low quality pellets. 1. Power surge. 2. Exposed wire. 3. Electrical component shorting. 3. Check motors and blowers for 1. Low quality or non‐uniformly sized pellets. 1. Obstruction in auger tube. 2. Blower Noise. 1. Foreign material in blower. 2. Loose exhaust fan set screw. ... - Page 36 1. Loose thermal sensor. 2. Control board settings. 3. Failure to light pellets. 1. Convection blower failure 2. Partially blocked flue. 3. Using fuel other than premium wood pellets. 1. The hopper is empty. 2. The hopper lid was left open too long during refueling. 3. Component failure. 4. Blower speed is set too high, cooling firebox too rapidly. 1. Check both sides of thermal sensor connection (exhaust blower and control board). 2. Start stove on minimum Heat Range 5 to ensure a good fire is started. 3. Check igniter for buildup or failure. 1. Check convection blower for proper function, replace if necessary. 2. Check flue for obstructions. 3. Use ONLY premium wood pellets in this stove. 1. Refill the hopper with pellets and restart the stove. 2. Keep the hopper lid open for the shortest interval possible when refueling. The safety switch stops the auger when the hopper lid is open. 3. An auger motor failure or combustion motor failure can ...
-
Page 37: Replacing Components
2. Remove the insert from the fireplace far enough to grant access to the auger motor at the rear, center of the unit. 3. Locate the auger motor assembly at the rear of the stove and begin by loosening the two allen set screws on either side of the cast iron auger motor coupler. -
Page 38: Convection Blower
4. After loosening and remove the four screws which hold the blower to stove, remove the blower from the stove. 5. Installation of the new blower is performed exhaust in reverse of removal;... -
Page 39: Vacuum Switch
2. Remove the right side panel and the back panel as previously detailed. 3. Locate the vacuum sensor as shown in the diagram below. 4. Disconnect the stove wiring harness and vacuum hose from the vacuum sensor, taking note of where connections were made. -
Page 40: Gaskets
England’s Stove Works. Never replace ceramic glass with tempered or any other type of glass. -
Page 41: Control Board
This part can be removed from the unit by loosening the two outside screws and pulling the board back to the inside of the stove. The rear access panel should be removed prior to removing the control board. A 6-amp “quick-blow” fuse is used on this Control Board. -
Page 42: Wiring Diagram
• Press the “Off” button and let the appliance completely cool BEFORE unplugging the appliance and beginning any maintenance or component replacement. • Risk of shock if appliance is not unplugged before service. Page | 42 WIRING DIAGRAM PU-CBEP Control Board Diagram Caution –... -
Page 43: Optional & Standard Accessories
The log set is somewhat fragile and care should be taken not to drop it or strike it with any objects; however, the log set is made from a special ceramic material and should last a long time. -
Page 44: Exploded Parts Diagram
ILLUSTRATED PARTS DIAGRAM Auger Motor Assembly Steel Door Assembly Page | 44... -
Page 45: Parts List
REPLACEMENT PARTS LIST Part Number Gaskets AC‐HLG AC‐DGKEP AC‐GGK PU‐CBG AC‐GGK PU‐CGEP Electrical Components PU‐CHA PU‐076002B PU‐4C442 AC‐HLS CU‐VS CU‐047042 PU‐CBEP Cast Iron CA‐AMPP Steel CA‐AC IP‐25EP PU‐ECCEP PU‐BPCEP PU‐BPEP CA‐40 PU‐AFEP AC‐GSEP PU‐SKEP PU‐SPSEP PU‐ITEP PU‐APEP Glass AC‐G40 AC‐G41 Misc CU‐RG AC‐CFBEP AC‐LSEP ... -
Page 46: Warranty Details
2. Electrical components, accessory items, glass and the painted surface of the stove are covered for one (1) year from the date of purchase. Conditions and Exclusions 1. Damage resulting from over-firing will void your warranty. - Page 47 Procedure Purchaser must give notice of claim of defect within the warranty period and pay transportation to and from a service center designated by the manufacturer. The deal from which the unit was purchases or the factory, at our option, will perform the warranty service.
-
Page 48: Warranty Reg. Form
WARRANTY REGISTRATION for England’s Stove Works® Purchaser Information I. Purchased By (Name) _________________________________________ II. Address ____________________________________________________ III. City_______________________State________Zip Code ____________ IV. Telephone Number ___________________________________________ V. Email Address _______________________________________________ Dealer Information VI. Purchased From _____________________________________________ VII. Address ___________________________________________________ VIII. City_______________________ State________ Zip Code __________ Unit Information *Refer to the sticker on the back of the manual or box to complete this section. - Page 49 (30) days from the original date of purchase. Use any of these three easy ways to send your warranty information in! Mailing Address England’s Stove Works, Inc. Customer Service Department P.O. Box 206 Monroe, Virginia 24574 Fax Number (434) 929-4810 –...