Onkyo RBX-500 Instruction Manual
Owner's manual english
Hide thumbs
Also See for RBX-500:
- Instruction manual (20 pages) ,
- Quick manual (2 pages) ,
- Instruction manual (100 pages)
Table of Contents
Advertisement
Available languages
Available languages
Quick Links
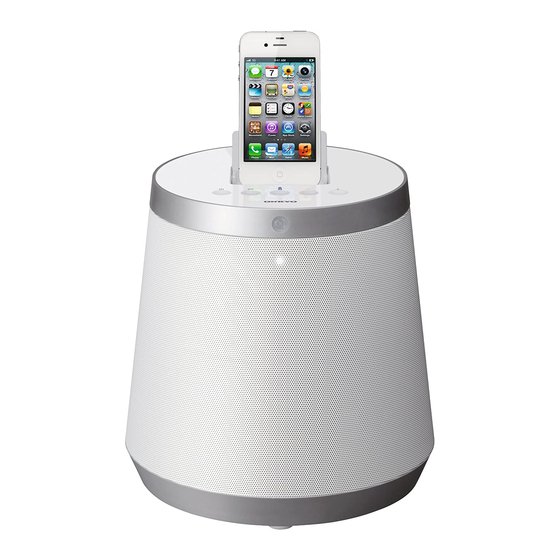
Dock Music System
RBX-500
Instruction Manual
Thank you for purchasing an Onkyo Dock Music
System. Please read this manual thoroughly before
making connections and plugging in the unit.
Following the instructions in this manual will enable
you to obtain optimum performance and listening
enjoyment from your Speaker.
Please retain this manual for future reference.
Manuel d'instructions
Nous vous remercions d'avoir choisi la station d'accueil
Onkyo. Veuillez lire attentivement ce manuel avant de
brancher l'unité et de la mettre sous tension.
Suivez toutes les consignes figurant dans ce manuel
d'instructions pour tirer le meilleur parti de votre
station d'accueil et bénéficier d'un plaisir d'écoute
inégalé.
Veuillez conserver ce manuel pour référence ultérieure.
Manual de instrucciones
Le agradecemos que haya adquirido un sistema de
música con base de Onkyo. Lea atentamente este
manual antes de realizar conexiones y enchufar la
unidad.
Si sigue las instrucciones de este manual, podrá
disfrutar del sonido y de un rendimiento óptimo de
su nuevo altavoz.
Conserve este manual como referencia futura.
English
Français
Introduction
.................. En-
Introduction
................... Fr-
Introducción
................. Es-
Connections
................. En-
Branchements
Conexiones
................... Es-
Enjoying Audio Sources
..........................................En-
Écoute de sources audio
...........................................Fr-
Cómo disfrutar de las
fuentes de audio
Appendix
......................En-
Annexes
.........................Fr-
Apéndice
......................Es-
Español
2
2
2
7
7
.............. Fr-
7
11
11
11
.......Es-
14
14
14
Advertisement
Chapters
Table of Contents

Related Manuals for Onkyo RBX-500


Summary of Contents for Onkyo RBX-500
-
Page 1: Instruction Manual
RBX-500 ....En- Introduction ....Fr- Introducción ....Es- Instruction Manual Thank you for purchasing an Onkyo Dock Music System. Please read this manual thoroughly before Connections ....En- making connections and plugging in the unit. Branchements ....Fr- Following the instructions in this manual will enable... -
Page 2: Important Safety Instructions
WARNING: The lightning flash with arrowhead symbol, within an equilateral TO REDUCE THE RISK OF FIRE OR ELECTRIC SHOCK, DO triangle is intended to alert the user to the presence of uninsulated NOT EXPOSE THIS APPLIANCE TO RAIN OR MOISTURE. "dangerous voltage"... - Page 3 FCC and IC Information: FCC&IC Radiation Exposure Statement This device complies with Part 15 of the FCC This equipment complies with FCC radiation Rules and RSS-210 of the IC Rules. Operation is exposure limits set forth for an uncontrolled subject to the following two conditions: (1) environment and meets the exemption from This device may not cause harmful the routine evaluation limits in section 2.5 of...
-
Page 4: Precautions
If water or any other liq- user-serviceable. If you cannot turn on the unit, uid gets inside this unit, have it checked by your contact your Onkyo dealer. Onkyo dealer. 3. Care—Occasionally you should dust the unit all 8. -
Page 5: Table Of Contents
Contents Supplied Accessories Make sure you have the following accessories: Important Safety Instructions ....2 Precautions ..........4 Supplied Accessories ......... 5 Main unit ............. 7 Remote controller (RC-847S) Top panel and front panel........7 Rear Panel...............7 A lithium battery (CR2025) is loaded in the remote Remote controller ..........9 controller. - Page 6 How to use Remote controller Battery change Remove the insulation sheet before use. In replacing the battery, ensure to use the specified model. With pushing the stopper in sideways, Insulation sheet pull out the battery holder. Backside of remote controller When using the remote controller, point it toward the remote control sensor, as shown below.
-
Page 7: Main Unit
Main unit Top panel and front panel For detailed information, see the pages in parentheses. (Power) button iPod/iPhone dock ( page 11) Switches ON/Standby of the power alternately. Connects with iPod or iPhone. When the power is ON, the power indicator Light receiving area for remote controller lights up in white color. - Page 8 Main unit —Continued Connect AC adapter To an AC wall outlet (Plug type varies from country to country.) DC plug Notes: Insert the DC plug of AC adapter into Do not use any other AC adapter than the the DC IN jack of the main unit. attached one, and do not use the attached AC adapter with other devices.
-
Page 9: Remote Controller
Main unit —Continued Remote controller Buttons the beginning of the current track, and pressing the button twice is for returning to the pre- vious track. (REPEAT) button Switches the REPEAT modes of iPod/iPhone con- nected with the dock. (3D SOUND) button Switches 3D sound effect in the order shown below: NORMAL... -
Page 10: Power On/ Off The Main Unit
Power ON/ OFF the main unit Power on the main unit Power off the main unit Press (Power button) either on Press (Power button) either on the main unit or on the remote the main unit or on the remote controller. -
Page 11: Play Music
Connect iPod/iPhone with the dock. Insert an iPod/iPhone in the connector of the dock firmly. When RBX-500 is in the standby Compatibility of iPod/iPhone mode, the power will automatically turns on.. This unit can work with the following iPod/iPhone;... -
Page 12: Play Music Through Wireless (Bluetooth)
In case that equalizer or bass booster of a • In case that the Bluetooth device displays a Bluetooth device is activated, sound may be selection screen for registration, select "Onkyo distorted. RBX-500". • In case that a passkey (also called password or PIN code) is required, input "0000". -
Page 13: Connect With Line In Terminal And Play Music
Play music —Continued Disconnecting Bluetooth Connect with LINE IN terminal and play music To disconnect a Bluetooth device from the unit, either press the button on the main unit or An external device can be connected and music can button on the remote controller. Turning off the be played in the main unit. -
Page 14: Troubleshooting
• Delete the registered data of "Onkyo RBX-500" at the Bluetooth device side again, and try pairing again. Bluetooth connection cannot be made •... -
Page 15: Features
The Bluetooth word mark and Bluetooth logo are all Unit 6 cm cone (Satellite) 10cm cone (Subwoofer) trademarks that are owned by the Bluetooth SIG and licensed out for use to Onkyo. that are incorporating ■ Bluetooth Bluetooth wireless technology into their products. QDID : B019744 Version 2.1 + EDR... -
Page 16: Instructions Essentielles De Sécurité
ATTENTION: Un symbole d’éclair fléché dans un triangle équilatéral est destiné à AFIN DE REDUIRE LES RISQUES D’INCENDIE ET DE DECHARGE ELECTRIQUE, attirer l’attention de l’utilisateur sur le fait que certains organes NE PAS EXPOSER CET APPAREIL A LA PLUIE OU A L’HUMIDITE. internes non-isolés de l’appareil sont traversés par un courant électrique assez dangereux pour constituer un resque d’électrocution. - Page 17 Informations de la Federal Communication peuvent obtenir les informations relatives à Commission (FCC) et d’Industrie Canada (IC) l’exposition aux radiofréquences et à la Ce produit répond aux exigences de la section conformité, valables au Canada, auprès du 15 de la réglementation FCC et de la norme représentant canadien Burnport Holdings Ltd.
-
Page 18: Précautions
N’utilisez jamais de liquide pénètre à l’intérieur de l’appareil, faites- chiffons rêches, de dissolvant, d’alcool ou le vérifier par votre revendeur Onkyo. d’autres solvants chimiques car ceux-ci 8. Remarques concernant la manipulation pourraient endommager la finition ou faire •... -
Page 19: Accessoires Fournis
Rubriques Accessoires fournis Vérifiez la présence des éléments suivants : Instructions essentielles de sécurité..2 Précautions ..........4 Accessoires fournis........5 Unité principale .......... 7 Télécommande (RC-847S) Face supérieure et face avant ......7 Face arrière ............7 La télécommande contient une pile au lithium Télécommande ............9 (CR2025). - Page 20 Utilisation de la télécommande Remplacement de la pile Retirez le film protecteur avant utilisation. Lors du remplacement de la pile, veillez à utiliser le type spécifié. Film protecteur Poussez le cache sur le côté, puis tirez sur le logement de la pile. Face arrière de la télécommande Lors de l'utilisation de la télécommande, orientez-la...
-
Page 21: Unité Principale
Unité principale Face supérieure et face avant Pour en savoir plus, consultez les pages indiquées entre parenthèses. Bouton (Alimentation) Dock pour iPod/iPhone ( page 11) Permet de mettre l'unité sous tension ou en Permet de connecter un iPod ou un iPhone. veille. - Page 22 Unité principale —Suite Branchement de l'adaptateur secteur Vers une prise murale (les types de secteurs variant d'un pays à l'autre). Fiche DC Notes : Insérez la fiche DC de l’adaptateur N'utilisez jamais un adaptateur secteur autre secteur dans le port DC IN de l’unité que celui fourni avec l'unité...
-
Page 23: Télécommande
Unité principale —Suite Télécommande Boutons Bouton / Permet de sélectionner la piste précédente ou suivante de l'iPod/iPhone connecté à la station ou d'un dispositif connecté via Bluetooth. Durant la lecture, appuyez sur le bouton pour revenir au début de la piste en cours et appuyez deux fois sur le bouton ... -
Page 24: Mise Sous Tension/Hors Tension De L'unité Principale
Mise sous tension/hors tension de l'unité principale Mise sous tension de l'unité Mise hors tension de l'unité principale principale Appuyez sur le bouton Appuyez sur le bouton (Alimentation) de l'unité principale ou (Alimentation) de l'unité principale ou de la télécommande. de la télécommande. -
Page 25: Lecture De Musique
Insérez fermement l'iPod/iPhone sur le connecteur de la station d'accueil. Si le RBX-500 est en mode veille, il se mettra Modèles d'iPod/iPhone compatibles automatiquement sous tension. Cette unité est compatible avec les modèles suivants : •... -
Page 26: Lecture De Musique Via La Connexion Sans Fil (Bluetooth)
• En cas d'affichage d'un écran permettant la sélection du dispositif à enregistrer, sélectionnez « Onkyo RBX-500 ». • Si un mot de passe (également appelé clé ou code PIN) est requis, saisissez « 0000 ». -
Page 27: Connexion À Partir Du Port Line In Et Lecture De Musique
Lecture de musique —Suite Connexion à partir du port LINE IN et Lancez la lecture de la musique du lecture de musique dispositif compatible Bluetooth. Il est possible de connecter un périphérique externe Notes : et de lire sa musique grâce à l'unité principale. En cas d'activation de l'égaliseur ou de l'amplificateur de basses du dispositif compatible Bluetooth, une distorsion du son... -
Page 28: Dépannage
Le rétablissement des réglages d'usine restaure tous • Effacez les données enregistrées de l’Onkyo les réglages par défaut. RBX-500 sur le dispositif Bluetooth, puis faites Toutes les informations d'appariement Bluetooth une nouvelle tentative d’appariement. sont donc effacées et la procédure d'appariement doit être réitérée si nécessaire. -
Page 29: Caractéristiques
Bluetooth SIG, concédées sous licence à Unité Cône de 6 cm (Satellite) Onkyo en vue d'intégrer la technologie sans fil Cône de 10 cm (Haut-parleur) Bluetooth à ses produits. QDID : B019744 ■ Bluetooth Version 2.1 + EDR... -
Page 30: Instrucciones De Seguridad Importantes
ADVERTENCIA: El símbolo de rayo con cabeza de flecha, inscrito en un triángulo equilátero, PARA REDUCIR EL RIESGO DE INCENDIOS O DE DESCARGAS ELÉCTRICAS, tiene la finalidad de avisar al usuario la presencia de “tensiones peligrosas” NO EXPONGA ESTE APARATO A LA LLUVIA NI A LA HUMEDAD. no aisladas dentro de la caja del producto que son de magnitud suficiente como para constituir un riesgo de descargas eléctricas a personas NO DESMONTE LA CUBIERTA ni ABRA EL GABINETE. - Page 31 A continuación, seque otro líquido en el interior de esta unidad, hágalo la unidad inmediatamente con un paño limpio. revisar por su distribuidor Onkyo. No utilice paños abrasivos, alcohol, ni 8. Notas acerca del manejo de la unidad disolventes químicos de ningún tipo ya que con...
- Page 32 La marca y logotipo Bluetooth son marcas registradas de Bluetooth SIG y Onkyo fue autorizado a usarlas para incorporar la tecnología inalámbrica Bluetooth en sus productos. QDID : B019744 iPhone, iPod, iPod classic, iPod nano, iPod shuffle e iPod touch son marcas comerciales de Apple Inc.,...
- Page 33 Contenido Accesorios suministrados Asegúrese de que dispone de los accesorios Instrucciones de seguridad importantes..2 siguientes: Precauciones..........3 Características ..........4 Accesorios suministrados ......5 Controlador remoto (RC-847S) Unidad principal......... 7 Panel superior y panel frontal......7 El controlador remoto usa una batería de litio Panel posterior .............7 (CR2025).
- Page 34 Cómo usar el controlador remoto Cambio de baterías Retire la hoja aislante antes de usar. Al cambiar la batería, asegúrese de usar el modelo especificado. Hoja aislante Empuje el tope hacia un lado, tire del soporte de la batería. Parte trasera del controlador remoto Para utilizar el controlador remoto, apunte hacia el sensor del controlador remoto del sintonizador tal...
-
Page 35: Unidad Principal
Unidad principal Panel superior y panel frontal Para más información, consulte las páginas entre paréntesis. Botón (Alimentación) Base iPod/iPhone ( página 11) Alternadamente cambia entre conexión/puesta en Se conecta a iPod o iPhone. reposo. Cuando está conectada la alimentación, el Área de recepción de luz para controlador indicador de alimentación se ilumina de blanco. - Page 36 Unidad principal —Continúa Conexión del adaptador de CA A un toma de corriente de CA (tipo de conector varía de país en país.) Enchufe de CC Notas: Inserte el enchufe de CC del adaptador No use ningún otro adaptador de CA que no de CA en el conector DC IN de la unidad sea el incluido, y no use el adaptador de CA principal.
-
Page 37: Controlador Remoto
Unidad principal —Continúa Controlador remoto Botones Botón / Selecciona la pista siguiente o anterior del iPod/iPhone conectado con la base o un dispositivo conectado a través de Bluetooth. Durante la reproducción, presione el botón para volver al comienzo de la pista actual, y presione dos veces el botón ... -
Page 38: Principal
Conexión/desconexión de la unidad principal Conexión de la unidad principal Desconexión de la unidad principal Oprima (botón de alimentación) en la unidad principal o en el Oprima (botón de alimentación) en controlador remoto. la unidad principal o en el controlador remoto. -
Page 39: Reproducir Música
Conecte el iPod/iPhone en la base. de entrada cambia automáticamente a iPod. Inserte firmemente un iPod/iPhone en el conector de la base. Si el RBX-500 está en el modo de reposo, la alimentación se conectará Compatibilidad de iPod/iPhone automáticamente. -
Page 40: Reproduzca La Música Inalámbricamente (Bluetooth)
• En caso de que el dispositivo Bluetooth exhiba botón , y vuelva a pulsar el botón . una pantalla de selección para el registro, seleccione "Onkyo RBX-500". • En caso que se necesite una clave (también llamada contraseña o código PIN, introduzca "0000". -
Page 41: Conecte Con El Terminal Line In Y Reproduzca Música
Reproducir música —Continúa Conecte con el terminal LINE IN y Use el dispositivo Bluetooth para reproduzca música reproducir música. Se puede conectar un dispositivo externo y se puede Notas: reproducir música en la unidad principal. En caso que el ecualizador o reforzador de graves de un dispositivo Bluetooth esté... -
Page 42: Solución De Problemas
La reposición hace que todos los ajustes vuelvan a las • Borre otra vez, del lado del dispositivo Bluetooth, condiciones de fábrica. los datos registrados del "Onkyo RBX-500", e Debido a que se borra toda la información de intente emparejar nuevamente. -
Page 43: Especificaciones
Especificaciones ■ General Salida máximo real 5 W 6 ch, 4 Ω (Satélite) 10 W 1 ch, 4 Ω (Subwoofer) (THD+N 1% o menos, 6,1 canales (Simultáneo)) Fuente de alimentación y 100 - 240 V de CA, 50/60 Hz voltaje Consumo de energía 30 W Consumo eléctrico sin... - Page 44 1301, 555 Tower, No.555 West NanJin Road, Jin an, Shanghai, China 200041, Tel: 86-21-52131366 Fax: 86-21-52130396 http://www.cn.onkyo.com/ C1208-1 SN 29401363 (C) Copyright 2012 Onkyo Corporation Japan. All rights reserved. * 2 9 4 0 1 3 6 3 *...