
Related Manuals for Ariens 915163-Zoom XL 42


Summary of Contents for Ariens 915163-Zoom XL 42
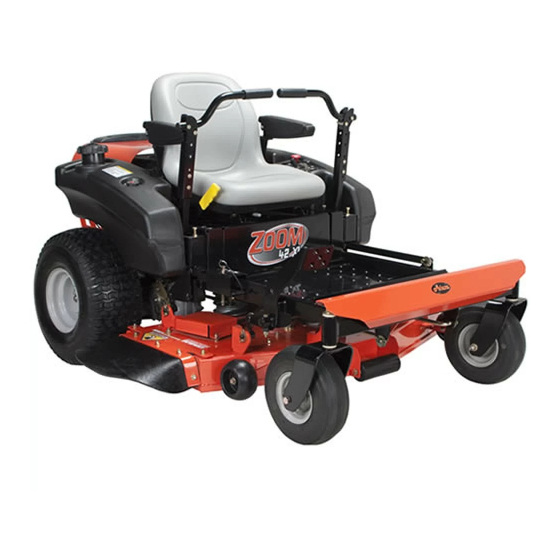
- Page 1 Zoom XL. Owner/Operator Manual Manuel Du Proprietaire/Utilisateur Models 915163 - Zoom XL 42 915165 - Zoom XL 48 915167 - Zoom XL 54 ENGLISH 04043500 10/10 Printed in USA FRAN(_AIS...
-
Page 2: Table Of Contents
Visite a su distribuidor If the engine manual is not available, contact o vaya a www.ariens.com para the engine manufacturer for a replacement obtener una lista de idiomas manual. - Page 3 6. Fill out a product registration card and service information. All claims meeting return the card to the Ariens Company or requirements during the limited warranty go to www.ariens.com. period will be honored, whether or not the DISCLAIMER product registration card is returned.
-
Page 4: Safety
[,."Y-'1 al=1i'I WARNING: This cutting machine is capable of amputating hands HAZARDOUS SITUATION! If not DANGER: IMMINENTLY and feet and throwing objects. avoided, WILL RESULT in death or Failure to observe the safety serious injury. instructions in the manuals and on decals could result in serious injury or death. - Page 5 Figure 2 1. Caution! Keep people away from unit while operating. • Maximum Tongue weight: 30 Ibs. • Maximum Trailer weight: 300 Ibs. • Do not use hitch with bagger attached. Shut off engine, remove key, • Do not use on steep hills or slopes. and read manual before you •...
- Page 6 6. Hot Surfaces! 5. Danger! To Avoid Serious Injury or Death DO NOT touch parts which are hot from operation. ALWAYS allow parts to cool. Read the operator's manual. OL1801 OL1801 7. Caution! Keep children and others away from unit while operating. OL1802 No smoking.
- Page 7 Only trained adults may operate unit. Training components can only be adjusted by an includes being familiar with controls and Ariens Company dealer or an authorized actual operation. engine manufacturer's service center. NEVER operate unit after or during the use of Contact your Ariens Company Equipment medication, drugs or alcohol.
- Page 8 DO NOT o perate unit i fsafety interlock Use extra care while operating machines with system i sdamaged ordisabled. Check safety grass catcher or other attachments. They can interlock before each u se. affect stability of the machine. ALWAYS remove key toprevent unauthorized Avoid starting, stopping, or turning on a use.
- Page 9 Replace fuel cap securely and clean u p DO NOT c hange engine governor settings or spilled fuel. over-speed engine. NEVER fill c ontainers inside avehicle orona Fumes from engine exhaust can cause injury truck o rtrailer bed with aplastic liner. Always ordeath.
- Page 10 WARNING: AVOID INJURY. Read and understand the entire Safety section before proceeding. Tools Required Adjustable wrench 9/16" wrench Petroleum jelly or dielectric grease. Unpack Unit Remove unit and all other components from the shipping container. Engage transmission bypass lever (see MOVING UNIT MANUALLYon page 16).
- Page 11 Check Safety Interlock System Discharge Chute in Transport Position WARNIN G: Safety interlock failu re and improper operation of unit can result in death or serious injury. Check system before each use to make sure it is functioning properly. See Safety Interlock System on page 13. Check function of all controls See OPERATION on page 13.
- Page 12 [_o]_ij_[o_ r-'_ _I m]I _ 1 _i uL_"] Figure 5 8. Mower Lift Pedal 1. Ignition Switch 2. PTO Switch 9. Mower Deck 3. Throttle Lever 10. Discharge Chute 4. Seat 11. Fuel Gauge 12. Choke Control 5. Steering Levers 13.
-
Page 13: Controls And Features
Pull the choke lever the choke lever aWay from our Ariens dealer for repairs. toward the operator position when the engine starts to run Test... - Page 14 Timer (TMR1): measures the time s pent on individual jobs. Press and hold t he toggle button toreset the timer tozero. TMR1 will t hen start measuring engine run time until itisreset tozero a gain. Service Alert ( Chg O il, C hg HOil & Filter, SVC Airfilter): reminds operators ofthe maintenance...
- Page 15 GASOLINE Adjusting Seat Lift adjustment lever and slide seat forward or IMPORTANT: ALWAYS use gasoline that backward to the desired position. meets the following guidelines: Clean, fresh gasoline. A minimum of 87 octane/87 AKI (91 RON). High altitude use may require a different octane.
- Page 16 MOVING UNIT MANUALLY 3. Turn ignition key to start position and release once the engine has started. 4. Pull the choke lever toward operator position when the engine is warm. Wait or bypass transmission and coast until the engine is running smoothly WARNING: DO NOT disengage downhill.
- Page 17 (see Parking MOVING UNIT MANUALLY on page 16). Push unit. If unit rolls, Brake contact your Ariens Dealer. Clean Unit Clean engine, battery, seat, mower deck, etc. of all dirt and debris. Do not use solvents, hard cleaners, or abrasives.
- Page 18 Interval Task Action Follow Perform scheduled engine Engine maintenance. Refer to Engine Manual Manual for detailed instructions. Mainten- NOTE: To drain the oil, use the oil Each Use ance drain hose (1) supplied with unit, not Schedule the drain plug that is shown in the Engine Manual.
- Page 19 OPENING AND CLOSING HOOD REPLACING MOWER BLADE To open, pull up on the back of the hood until Remove (Figure 12) hood hits the hood stop and push down on back of hood to close (figure 10). CAUTION: Mower blades are sharp and can cut you.
- Page 20 LEVELLING AND ADJUSTING The Forward Pitch Of The Mower PITCH OF MOWER DECK Blades (Figure 14): Should be 0.0 in. (0.0 mm) to 1/4 in. NOTE: Adjust on a level surface, with the tires inflated to the correct air pressure (see (6.35 mm) pitched forward.
- Page 21 Adjusting The Mower Deck To Adjust Mower Blade Height And Pitch (Figure 17): NOTE: Adjusting the mower deck will adjust the height and pitch of the mower blades. 1. Adjust the trunnions first and re-take the three measurements required to level and adjust the pitch of the mower deck.
- Page 22 SERVICING BATTERY Install (Figure 1. Install battery on the unit with battery NOTE: Unit comes equipped with a hold-down bracket. maintenance-free battery that requires no regular maintenance except cleaning the 2. Connect positive (+) cable first, then terminals and periodic charging. negative (-) cable.
- Page 23 Removal and Installation on page 22). NOTE: When adjusting steering levers for the first time it is recommended that you make Jump-Starting adjustments in the following order. Ariens does not recommend jump-starting 1. Adjust Steering Lever Height your unit. Jump-starting can damage engine 1.
-
Page 24: Operation
Turning adjustment bolt counter Rotate this end away from the the operator clockwise to increase steering lever position tomove t he steering levers in. travel. Rotate this end away f rom the operator position tomove the steering levers out. Figure 21 3. - Page 25 Install (Figure 1. Install hydrostatic belt on idler, electric clutch, pulley, and hydrostatic transmission pulleys. 2. Connect idler spring. 3. Install clutch stop. 4. Connect electric clutch connector. 5. Install PTO belt (see REPLACING BELT on page 24). 1. Idler Spring 2.
- Page 26 The hydraulic fluid should beatthe cold fillline ofthe expansion tank. 1. Drain Plug 2. Oil Filter 3. Filter Guard 4. Mounting Hardware Figure 26 Purging the Hydraulic System WARNING: This adjustment requires operating the engine. Figure 25 Use extreme care to avoid contact with moving parts and hot Change Hydraulic Fluid and Filter surfaces.
-
Page 27: Storage
22). Spark plug wire(s) Connect spark plug wire(s) or loose or spark replace spark plug(s). Refer to plug(s) faulty. Engine Manual for detailed instructions. Faulty electrical Contact your Ariens Dealer. system. Faulty engine. Contact your Ariens Dealer. GB - 27... - Page 28 Air filter cartridge Clean or replace air filter cartridge. plugged. Refer to Engine Manual for detailed instructions. Faulty engine. Contact your Ariens Dealer. Unit does not 1. The transmission Disengage transmission bypass move with bypass lever is lever (see on page 17).
- Page 29 (see REPLACING MOWER BLADE on page 19). [,,,"_o,]:11 _7_,I z_K,,,'_ P_'T__o];_[_,,,,_ Be sure to always use genuine Ariens parts See your authorized Ariens dealer to add to keep your unit running like new. these optional accessories to your unit.
- Page 30 ___o_,,,_ Model Number 915163 915165 915167 Model Zoom XL 42 Zoom XL 48 Zoom XL 54 Kawasaki Kawasaki FR691 Engine FR651 Displacement - in.3 (cc) 45.5 (746) Max Governed RPM 3600 + 0 (May be different from 3600 - 50 maximum RPM) Speed Forward Max.
- Page 31 (b)(2). If any such part fails during the period of warranty coverage, it must be repaired or replaced by the Ariens Company. Any such part repaired or replaced under the warranty must be warranted for a time not less than the remaining warranty period.
-
Page 32: Service Parts
Gravely, orParker service representative. (7.)Throughout the e vaporative emission control system's warranty period set out insubsection (b)(2), the Ariens Company must maintain asupply ofwarranted parts sufficient tomeet the expected demand for s uch parts. (8.)Manufacturer-approved replacement parts must be used inthe performance... -
Page 33: Warranty
Ariens will be free from defects in material and workmanship for a period of two years after the date of purchase. An authorized Ariens dealer (Ariens brand products), Gravely dealer (Gravely brand products), or Countax dealer (Countax brand products) will repair any defect... - Page 34 90 days of the warranty period, a defective battery will be replaced free of charge. If the applicable warranty period is more than 90 days, Ariens Company will cover the prorated cost of any defective battery, for up to 12 months after the date of purchase.
- Page 35 Ariens Company 655 West Ryan Street Brillion, WI 54110-1072 920-756-4688 Fax 920-756-2407 www.ariens.com A WARNING The engine exhaust from this product contains chemicals known to the State of California to cause cancer, birth defects or other reproductive harm. An _,'_..__i&_...
- Page 36 Zoom XL_ Manual del propietario/operador Models 915163 - Zoom XL 42 915165 - Zoom XL 48 915167 - Zoom XL 54 04040802 10/10 Printed in USA ESPA_IOL...
- Page 37 Este manual se incluye en la documentaci6n idiomas diferentes del ingles en su distribuidor. Visite a su distribuidor entregada junto con la unidad. Consulte este o vaya a www.ariens.com para manual cuando necesite recomendaciones obtener una lista de idiomas de mantenimiento del motor.
- Page 38 No ponga la tarjeta de registro del producto a Ariens. la unidad en marcha a no ser que todos los controles funcionen tal y como se describe en este manual.
- Page 39 DE RESPONSABILIDAD en el momento de su publicaci6n. Algunos Ariens se reserva el derecho a interrumpir, equipamientos descritos en este manual realizar cambios y afiadir mejoras a los pueden ser opcionales. Algunas ilustraciones...
- Page 40 Figura 2 1. iPrecaucibn! Mantengase siempre alejado del area de descarga. No dirija la descarga hacia otras • Peso maximo de la lengOeta: 30 Ibs. personas. • Peso maximo del remolque: 300 Ibs. • No usar el enganche con la Mantener a terceros alejados embolsadora acoplada.
- Page 41 5. iPeligrof Para evitar lesiones Antes de efectuar cualquier tipo graves o incluso la muerte de inspecci6n, reparaciones, etc., desactivar la TDF, detener la unidad y el motor, activar el freno de Lea el Manual del operador. estacionamiento y sacar la Ilave. OL1801 6.
- Page 42 Qnicamente por un distribuidor condiciones de luz y visibilidad. Las estadisticas indican que los operadores de Ariens Company o por un centro de servicio mayores de 60 afios se hallan implicados autorizado del fabricante del motor. P6ngase un porcentaje...
- Page 43 NO toque las piezas de la unidad que podrian NUNCA Ileve pasajeros, especialmente estar calientes como consecuencia de su si son nifios, aunque las cuchillas esten desactivadas. funcionamiento. Permita que las piezas enfrien antes de proceder al mantenimiento, Usar precauci6n extrema al aproximarse ajuste...
- Page 44 Desplacese lentamente y deje una distancia Evite las descargas electricas. Los objetos contacto con ambos tenninales de la bateria libre extra para detenerse. Tenga especial cuidado al cargar o descargar mismo tiempo pueden sufrir dafios y al mismo la unidad desde o hacia un remolque o camion.
- Page 45 Las cuchillas del cortacesped estan afiladas Cierre el paso de combustible (si corresponde) podrian cortarle. Envuelva las cuchillas o Ileve deje que el motor se enfrie completamente antes de cubrir o almacenar la unidad en un guantes y tenga cuidado cuando las repare.
- Page 46 Coloque la tolva de descarga en la Ajuste el asiento posicion de funcionamiento Consulte Ajuste de/asiento en la pagina 15. Revise el sistema de interbloqueo de seguridad iADVERTENCIA7 No la ponga en funcionamiento a menos que la tolva de descarga este en la ADVERTENCIA: Un fallo del posiciSn de funcionamiento.
- Page 47 Si la unidad no lea y comprenda toda la secci6n funcionara como debe, p6ngase en contacto de Seguridad. con su concesionario Ariens para realizar reparaciones. CONTROLES Y FUNCIONE8 Consulte figure 4 para Iocalizar todos los controles y funciones. Sistema...
- Page 48 Control del estrangulador Pru- Palanca Frenode Motor estaciona- direcci6n miento motor frio. Presione la palanca del estrangulador alejandola de Posici6n Activado Arranca la posici6n del operador para punto gado arrancar un motor frio. Tire de la muerto palanca del estrangulador hacia Posici6n Activado...
- Page 49 La alerta comienza lacuenta atras d os horas NOTA: Para detener la unidad, mover ambas antes delahora d emantenimiento. palancas a la posici6n neutral. El h orSmetro muestra lapalabra "Now" NOTA: Para hacer arrancar el motor, las parpadeando cuando Ilega a lahora palancas direccionales deben estar en la demantenimiento.
- Page 50 IMPORTANTE: iNO LO LLENE EN EXCESO! Ajuste del asiento Este equipo y/o su motor pueden incluir Suba la palanca de ajuste y deslice el asiento componentes del sistema de emisiones hacia delante o hacia atras hasta alcanzar la evaporativas, necesarios para cumplir con posici6n deseada.
- Page 51 IMPORTANTE: Los combustibles oxigenados enexceso oreformulados (combustibles mezclados con alcoholes eteres) pueden daSar elsistema de combustible oprovocar problemas rendimiento. Si s eproduce algQn problema no deseado, utilice gasolina con un porcentaje menor dealcohol oeter. Estabilizador de combustible La gasolina que permanezca en el sistema de combustible durante largas temporadas...
- Page 52 IMPORTANTE: Dependiendo dela TRANSPORTE DE LA UNIDAD temperatura ambiente, dejar que elmotor se caliente devarios segundos avarios minutos. Apague SIEMPRE el motor, accione el freno de estacionamiento, retire la Ilave y cierre la Apagado del motor valvula de corte del combustible o purgue el 1.
- Page 53 MANUAL DE LA UNIDAD en la estaciona pagina 16).. Empuje la unidad. Si la unidad rueda, p6ngase en miento contacto con el concesionario Ariens. Limpie toda la suciedad y los residuos del motor, la bateria, el asiento, Limpieza de la la plataforma del cortacesped, etc.
- Page 54 Intervalo Tarea _Accibn Realice el mantenimiento Siga el programa programado del motor. Consulte el Manual del motor para obtener manteni- instrucciones detalladas. miento del Cada uso NOTA: Para drenar el aceite, utilice manual del la manguera de drenaje de aceite motor (1) suministrada con la unidad, no...
- Page 55 APERTURA DE LA PLACA DE ACCE80 DE LA PLATAFORMA ADVERTENClA: LESIONES. Antes de proceder, lea EVITE LAS 1. Instale el pasador de ajuste en el primer y comprenda toda la secci6n de orificio de ajuste (figura 10). Seguridad. 2. Active el freno de estacionamiento. INCLINAClON DEL ASIENTO 3.
- Page 56 Posici6n de corte m&s baja: 3,8 cm +0,64 cm (1-1/2 pulg. + 1/4 pulg.) Posici6n de corte m&s alta 1. Arandela plana 11,4 cm +0,64 cm (4-1/2 pulg. + 1/4 pulg.) 2. Arandela achaflanada 3. Perno hexagonal 5/8 pulg. 1. Plataforma de corte 4.
- Page 57 La inclinacion de las cuchillas corte de lado a lado (Figura 14): Debe estar dentro de un limite de 6,35 mm (1/4 pulg.) segQn Io medido a cada lado de la plataforma de corte. NOTA: Se debe Ilevar a cabo la medici6n cuando los extremos de las cuchillas del cortacesped esten perpendiculares...
- Page 58 MANTENIMIENTO DE LA BATERiA Instalacion (Figura 1. Coloque la bateria en la unidad haciendo NOTA: La unidad viene equipada con una uso de su soporte de retenci6n. bateria que no requiere mantenimiento, excepto la limpieza de los bomes y su carga 2.
- Page 59 1. Quite los tornillos de montaje que conectan Arranque por puente la palanca de direcci6n al brazo de la Ariens no recomienda el arranque por puente direcci6n pivotante. Mueva hacia arriba de la unidad ya que se pueden daSar los...
- Page 60 NOTA: El lateral de la unidad gire indicando 2. Ajuste la anchura de las palancas que la rueda lateral gira mas lentamente que de direccion la otra rueda. O la rueda que gira mas rapido 1. Afloje la tornilleria de la base del brazo tiene que ir mas despacio o la rueda que va de la direcci6n pivotante.
- Page 61 SUSTITUCION DE LA CORREA 2. Enganche un extractor en el agujero de la polea tensora y tire del brazo de la DE LA TDF polea tensora hacia el exterior de la unidad hasta que la correa de la TDF Extraccion (Figura pueda ser dirigida alrededor de la polea 1.
- Page 62 1\ 6 El nivel del liquido hidraulico debe estar en la linea de Ilenado en fio del dep6sit_ de expansi6n. 1. Correa hidrostatica 2. Polea de la transmisi6n hidrostatica 3. Polea 4. Embrague electrico 5. Polea tensora 6. Resorte de la polea tensora Figura 23 Revise el nivel del fluido hidraulico (Figura...
- Page 63 8.Repita lasoperaciones pasos 1-7 para Purga del sistema hidraulico elotro transeje. 9.Siga l asinstrucciones delasecci6n ADVERTENCIA: Este ajuste "Para afiadir liquido hidraulico:" en la debe hacerse con el motor en pagina 27. marcha. Tenga cuidado de evitar el contacto con piezas en movimiento y superficies calientes.
- Page 64 Consulte el manual del motor defectuosa(s). para obtener instrucciones detalladas. Sistema electrico P6ngase en contacto con el defectuoso. concesionario Ariens. Motor defectuoso. P6ngase en contacto con el concesionario Ariens. El motor Estrangulador Desactive el estrangulador. activado.
- Page 65 DE LA CORREA direccionales. HIDROSTATICA en la pagina 26). Transmisi6n P6ngase en contacto con el defectuosa. concesionario Ariens. La TDF o las El interruptor de Oprimir el interruptor de presencia del cuchillas presencia del operador sentandose en el asiento. operador no esta cortac_sped oprimido.
- Page 66 Ajuste de la velocidad de avance y ser ajustadas. retroceso en la pagina 25). La transmisi6n P6ngase en contacto con el concesionario Ariens. hidrostatica y!o la articulaci6n requieren ser ajustadas. La transmisi6n P6ngase en contacto con el Aunque las concesionario Ariens.
- Page 67 I_I_._T. -] m]= 1:I_I_Ii_o] P_'_o_;_[o_ Consulte con su distribuidor autorizado AsegOrese de usar siempre piezas genuinas de Arienspara mantener su unidad Ariens para a_adir estos accesorios funcionando como nueva. opcionales a su unidad. Pieza n °. Descripci6n Pieza n °.
- Page 68 I:F,,,___o,]_o_]_,,,,_ N_mero de modelo 915163 915165 915167 Modelo Zoom XL 42 Zoom XL 48 Zoom XL 54 Modelo Kawasaki KawasakiFR691 FR651 Cilindrada del motor - pulg. 3 (cc) 45.5 (746) RPM regidas (pueden ser 3 600 + 0 diferentes de las RPM maximas) 3 600 - 50 Velocidad Velocidad maxima hacia delan_e-...
- Page 69 Ariens sustituir& sin cargo alguno para el comprador original, cualquier bloque de baterias y/o subconjunto que presente algt3n fallo por defectos en mater!ales o fabricaci6n durante an afio a contar desde la fecha de compra.
- Page 70 12 meses a partir de la fecha de compra, en base a prorrateo. Durante los primeros 90 dias del periodo de garantia, se sustituira una bateria defectuosa sin cargo alguno. Si el periodo aplicable de garantia supera los 90 dias, Ariens asumira el coste prorrateado de cualquier bateria defectuosa, hasta Ilegar a los 12 meses a partir de la fecha de la compra.
- Page 71 LA GARANTiA: • Como propietario de un equipo peque_o off-road, usted es responsable del mantenimiento requerido que se indica en su manual del usuario. Ariens Company le recomienda que conserve todos los recibos que cubran el mantenimiento de su equipo peque_o off-road, aunque Ariens...
- Page 72 Ariens, Gravely o Parker y sin cargo alguno para el propietario. (5.) Si perjuicio de Io dispuesto en la subsecci6n (4) anterior, los servicios o reparaciones...
- Page 73 Ariens Company 655 West Ryan Street Brillion, WI 54110-1072 920-756-4688 Fax 920-756-2407 www.ariens.com A WARNING The engine exhaust from this product contains chemicals known to the State of California to cause cancer, birth defects or other reproductive harm. An _,'_..__,!g_...