Table of Contents
Advertisement
Quick Links
Advertisement
Table of Contents

Related Manuals for AEG Electrolux FAVORIT 89020 I


Summary of Contents for AEG Electrolux FAVORIT 89020 I
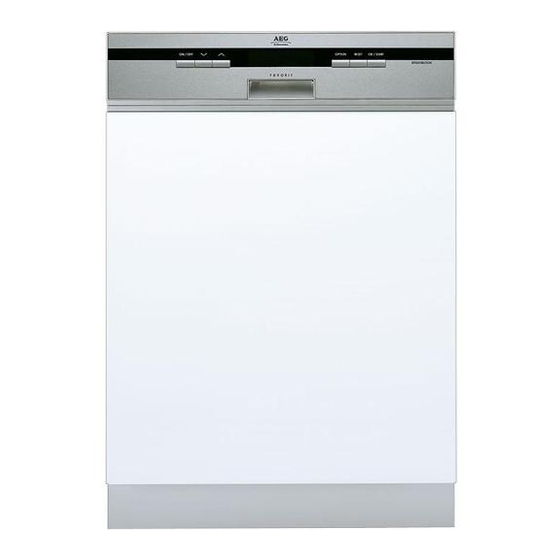
- Page 1 FAVORIT 89020 I User manual Dishwasher...
-
Page 2: Table Of Contents
Contents Thank you for choosing one of our high-quality products. To ensure optimal and regular performance of your appliance please read this instruction manual carefully. It will enable you to navigate all processes perfectly and most efficiently. To refer to this manual any time you need to, we recommend you to keep it in a safe place. -
Page 3: Operating Instructions
Safety information Operating instructions Safety information In the interest of your safety and to ensure the correct use, before installing and first using the appliance, read this user manual carefully, including its hints and warnings. To avoid unnecessary mistakes and accidents, it is important to ensure that all people using the appliance are thoroughly familiar with its operation and safety features. -
Page 4: Installation
Product description • Keep children well away from the dishwasher when the door is open. Installation • Check your dishwasher for any transport damage. Never connect a damaged machine. If your dishwasher is damaged contact your supplier. • All packaging must be removed before use. •... -
Page 5: Internal Light
Control panel Rinse aid dispenser Rating plate Filters Lower spray arm Upper spray arm Internal light This appliance has an internal light that comes on when you open the door and goes off when the door is closed. WARNING! Visible led radiation, do not stare into the beam. Internal light equipped with LED lamp CLASS 2 in accordance with IEC 60825-1: 1993 + A1: 1997 + A2: 2001. -
Page 6: Display
Control panel Display This row of individual lamps is divided in two sections: Program menu and Options menu. Washing programmes: during the progress of the programme these little bars indicate the phase of the washing programme: prewash - main wash - rinses - drying. In this row several details are displayed: –... -
Page 7: Reset Button
Control panel Option menu Option submenu DELAY START Allows the start of the selected washing programme to be delayed for between 1 and 19 hours. The countdown will decrease with steps of 1 hour. Only in the last hour the decrease is in minutes. Once the count- down has elapsed the washing programme will start automatically. -
Page 8: First Use
First use 3. If you want to set a different language use the up and down scrolling buttons until the required language appears in the display. Press OK / START to confirm. First use Before using your dishwasher for the first time: •... -
Page 9: Setting Manually
Use of dishwasher salt Setting manually The dishwasher is factory set at position 2. 1. Open the dishwasher door. 2. Remove the lower basket from the dish- washer. 3. Turn the water hardness dial to position 1 or 2 (see table). 4. -
Page 10: Use Of Rinse Aid
Use of rinse aid You are reminded of this by a displayed message REFILL SALT . This occurs only at the start and at the end of the washing programme; during the running of the programme the indication for salt refilling is not active. The refilling salt message can remain visible for 2-6 hours after the salt has been replenished, assuming the dishwasher remains switched on. -
Page 11: Adjusting The Dosage Of Rinse Aid
Daily use This occurs only at the start and at the end of the washing programme; during the running of the programme the indication for rinse aid refilling is not active. Adjusting the dosage of rinse aid According to the finish and drying results obtained, adjust the dose of rinse aid by means of the 6 position selector (position 1= minimum dosage, position 6= maximum dosage). -
Page 12: The Lower Basket
Loading cutlery and dishes • Plastic items and pans with non stick coatings have a tendency to retain water drops; these items will not dry as well as porcelain and steel items. • Light items (plastic bowls etc.) must be loaded in the upper basket and arranged so they do not move. -
Page 13: The Cutlery Basket
Loading cutlery and dishes To make it easier to load larger dishes, all rear plate racks in the lower basket can be folded down. The cutlery basket WARNING! Sharp knives and other items of cutlery with sharp edges must be laid in the cutlery tray or in the upper basket because of the risk of injury. -
Page 14: Beer Glasses
Loading cutlery and dishes 2. Place forks and spoon in the cutlery basket with their handles pointing downwards. For larger utensils, such as whisks, leave off one half of the cutlery grid. The cutlery basket can be opened out. Always make sure that you put your hand around both parts of the two-part handle when removing it from the dishwasher. - Page 15 Loading cutlery and dishes You can replace the beer glass holders with 2 sup- plied cup racks. You can use them as: • cup shelves • champagne glass holders. Do these steps to remove beer glass holders 1. Pull upwards and push lightly on the hooks from below.
-
Page 16: The Upper Basket
Loading cutlery and dishes 2. Push them forwards to fix the support again. WARNING! Do not hold the support with the hand. This can cause injury. Place the hand under the support on the lower basket. The upper basket Load smaller, fragile crockery and long, sharp cut- lery in the upper basket. -
Page 17: Adjusting The Height Of The Upper Basket
Loading cutlery and dishes • For glasses with long stems, fold the glass rack to the right, otherwise fold it away to the left. • The row of spikes on the left of the upper basket is also in two parts and can be folded away. -
Page 18: Use Of Detergent
Use of detergent 1. Pull out the upper basket completely. 2. Holding the upper basket by the handle, raise it as far as it will go and then lower it vertically. The upper basket will latch into the lower or the upper position. WARNING! After loading your machine always close the door, as an open door can be a hazard. -
Page 19: Multitab Function
Multitab function 2. Fill the detergent dispenser (1) with deter- gent. The marking indicates the dosing levels: 20 = approximately 20 g of detergent 30 = approximately 30 g of detergent. 3. All programmes with prewash need an ad- ditional detergent dose (5/10 g) that must be placed in the prewash detergent cham- ber (2). -
Page 20: Washing Programmes
Washing programmes Once the programme is running, the "Multitab function " can NO longer be changed. If you want to exclude the "Multitab function " you have to cancel the programme setting and then deactivate the "Multitab function ". In this case you have to set a washing programme (and desired options) again. If the drying results are not satisfactory we recommend that you: 1. - Page 21 Washing programmes Programme Degree of Type of Programme description Consumption val- soil load Normal Crockery ENERGY soil and cutlery 55° 1 HOUR Normal Crockery soil and cutlery 45° GLASS Normal Delicate soil crockery and glass- ware PREWASH Partial load (to be com- pleted later in the day)
-
Page 22: Select And Start A Washing Programme
Select and start a washing programme Select and start a washing programme 1. Check that the baskets have been loaded correctly and that the spray arms are free to rotate. 2. Check that the water tap is opened. 3. Press the ON/OFF button. 4. -
Page 23: Unloading The Dishwasher
Unloading the dishwasher Unloading the dishwasher • Hot dishes are sensitive to knocks. The dishes should therefore be allowed to cool down before removing from the appliance. • Empty the lower basket first and then the upper one; this will avoid water dripping from the upper basket onto the dishes in the lower one. -
Page 24: Cleaning The Spray Arms
Care and cleaning 3. Turn the handle about 1/4 a turn anti- clockwise and remove the filter system. 4. Take hold of the coarse filter ( A ) by the handle with the hole and remove from the microfilter ( B ). 5. -
Page 25: Prolonged Periods Of Non-Operation
What to do if… Prolonged periods of non-operation If you are not using the machine for any prolonged period of time you are advised to: 1. Unplug the appliance and then turn off the water. 2. Leave the door ajar to prevent the formation of any unpleasant smells. 3. - Page 26 What to do if… Display message and malfunction Possible cause and solution • intermitted audible signal • Close the water tap and contact your local • Service Force Centre. appears in the display Anti-flood device is activated The programme does not start. •...
-
Page 27: Technical Data
Technical data The wash results are not satisfactory There are streaks, milky spots or a bluish coating • Decrease rinse aid dosing. on glasses and dishes Water drops have dried onto glasses and dishes • Increase rinse aid dosing. • The detergent may be the cause. Contact the detergent manufacturer’s consumer care line. -
Page 28: Levelling
Water connection Levelling Good levelling is essential for correct closure and sealing of the door. When the appliance is correctly levelled, the door will not catch on either side of the cabinet. If the door does not close correctly, loosen or tighten the adjustable feet until the machine is perfectly level. Water connection Water supply connections This appliance can be connected to either a hot (max. -
Page 29: Water Outlet Hose Connection
Water connection WARNING! Warning! Dangerous voltage. Water outlet hose connection The end of the drain hose can be connected in the following ways: 1. To the sink outlet spigot, securing it to the underside of the work surface. This will prevent waste water from the sink running into the machine. -
Page 30: Electrical Connection
Electrical connection Electrical connection WARNING! Safety standards require the appliance to be earthed. Prior to using the appliance for the first time, ensure that the rated voltage and type of supply on the rating plate match that of the supply where the appliance is to be installed. The fuse rating is also to be found on the rating plate. - Page 32 To buy accessories, consumables and spare parts at our online shop please visit: www.aeg- electrolux.co.uk...