Table of Contents
Advertisement
DCR-DVD92/DVD92E/DVD103/DVD602/
SERVICE MANUAL
Ver. 1.4 2007. 09
Revision History
Revision History
Link
Link
SPECIFICATIONS
SPECIFICATIONS
• INSTRUCTION MANUAL is shown at the end of this document.
DCR-DVD92/DVD92E/DVD103/DVD602/DVD602E/DVD653/DVD653E
9-876-865-41
DVD602E/DVD653/DVD653E
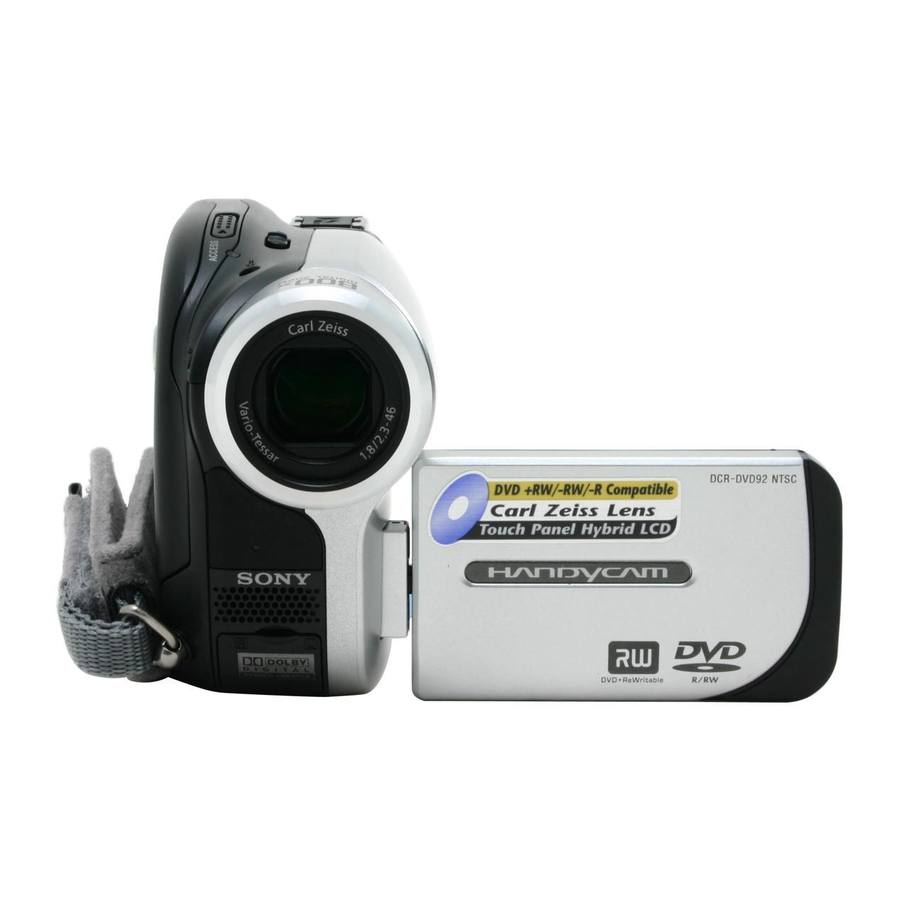
Photo : DCR-DVD92E
ACCESSORIES
ACCESSORIES
DIGITAL VIDEO CAMERA RECORDER
Sony EMCS Co.
LEVEL
DCR-DVD92/DVD103
DCR-DVD92E
North European Model
DCR-DVD602E/
DVD653E
DCR-DVD602
DCR-DVD92/DVD103/
DVD602/DVD602E/
DVD653/DVD653E
DCR-DVD653/DVD653E
DCR-DVD92
DCR-DVD103
DCR-DVD653E
Hong Kong Model
SELF DIAGNOSIS FUNCTION
SELF DIAGNOSIS FUNCTION
Published by Kohda TEC
RMT-835
1
US Model
Canadian Model
AEP Model
UK Model
Australian Model
Chinese Model
Korea Model
E Model
Tourist Model
Brazilian Model
Argentina Model
2007I0800-1
©2007.09
Advertisement
Table of Contents

Related Manuals for Sony DVD653E - PAL DVD Camcorder


Summary of Contents for Sony DVD653E - PAL DVD Camcorder
- Page 1 Hong Kong Model Link Link SPECIFICATIONS ACCESSORIES SELF DIAGNOSIS FUNCTION SPECIFICATIONS ACCESSORIES SELF DIAGNOSIS FUNCTION • INSTRUCTION MANUAL is shown at the end of this document. DIGITAL VIDEO CAMERA RECORDER 2007I0800-1 DCR-DVD92/DVD92E/DVD103/DVD602/DVD602E/DVD653/DVD653E ©2007.09 Sony EMCS Co. 9-876-865-41 Published by Kohda TEC...
-
Page 2: Specifications
SPECIFICATIONS Minimum 11 1x (lux) (F1.8) General System illumination 0 lx (lux) (in the NightShot Power 7.2 V (battery pack) Video MPEG2/JPEG (Still images) plus function) requirements 8.4 V (AC adaptor) compression format Average power During camera recording using “Exif” is a fi le format for still images, consumption Audio compression DCR-DVD92/DVD602/DVD92E/ (when using the DCR-DVD92/DVD602/DVD92E/... - Page 3 MARK 0 ON THE SCHEMATIC DIAGRAMS AND IN THE PARTS CRITIQUES POUR LA SÉCURITÉ DE FONCTIONNEMENT. NE LIST ARE CRITICAL TO SAFE OPERATION. REPLACE THESE REMPLACER CES COMPOSANTS QUE PAR DES PIÈSES SONY COMPONENTS WITH SONY PARTS WHOSE PART NUMBERS DONT LES NUMÉROS SONT DONNÉS DANS CE MANUEL OU APPEAR AS SHOWN IN THIS MANUAL OR IN SUPPLEMENTS DANS LES SUPPÉMENTS PUBLIÉS PAR SONY.
- Page 4 Ver 1.1 2005. 05 Checking supplied accessories. Make sure that the following accessories are supplied with your camcorder. Note: This item is supplied with the unit as an accessory, but is not prepared as a service part. Power cord (Main lead)(1) AC power adaptor (1) NP-FP50 battery pack (1) A/V connecting cable...
-
Page 5: Self-Diagnosis Display
SELF-DIAGNOSIS FUNCTION SELF-DIAGNOSIS FUNCTION SELF-DIAGNOSIS DISPLAY When problems occur while the unit is operating, the self-diagnosis When problems occur while the unit is operating, the counter of the function starts working, and displays on the viewfinder, or LCD viewfinder or LCD screen consists of an alphabet and 4-digit number, screen what to do. - Page 6 Power cord (Main lead)(1) Power cord (Main lead)(1) (US, CND model) (US, CND model) 0 1-790-107-22 0 1-790-107-51 AC power adaptor (1) AC power adaptor (1) (AC-L25A/L25B) (AC-L25A/L25B) 0 1-477-534-11 0 1-479-288-13 2006G1600-1 DCR-DVD92/DVD92E/DVD103/DVD602/DVD602E/DVD653/DVD653E ©2006.07 Sony EMCS Co. 9-876-865-82 Published by Kohda TEC...
- Page 7 Checking supplied accessories. Power cord (Main lead)(1) (CH model) 0 1-782-476-51 • Abbreviation : Chinese model Other accessories 2-587-623-91 MANUAL, INSTRUCTION (SIMPLIFIED CHINESE) 2-587-623-91 MANUAL, INSTRUCTION (SIMPLIFIED CHINESE) (DVD602E:E/DVD653E:E,JE) (DVD602E:E,CH/DVD653E:E,JE,CH) 2007I0800-1 DCR-DVD92/DVD92E/DVD103/DVD602/DVD602E/DVD653/DVD653E ©2007.09 Sony EMCS Co. 9-876-865-88 Published by Kohda TEC...
- Page 8 Digital Video Camera Recorder Easy Handycam Recording/ Operating Guide Playback Playback on DVD devices Using the Recorded disc DCR-DVD92/DVD103/DVD203/ DVD403/DVD602/DVD653/DVD703/ Using the Setup items DVD803 Editing on DVD Handycam Dubbing Using a Computer Troubleshooting Additional Information © 2005 Sony Corporation...
- Page 9 The model and serial numbers are located on the bottom. Record the serial number in the space provided below. Refer to these numbers whenever you call upon your Sony dealer regarding this This symbol is intended to product. alert the user to the presence of uninsulated “dangerous...
-
Page 10: Regulatory Information
Trade Name: SONY These limits are designed to provide reasonable Model No.: DCR-DVD103 protection against harmful interference in a Responsible Party:Sony Electronics Inc. residential installation. Address: 16450 W. Bernardo Dr, San Diego, CA This equipment generates, uses, and can radiate 92127 U.S.A. - Page 11 These points are normal. Zeiss lens, which was developed jointly Exposing the LCD screen, the viewfi nder, by Carl Zeiss, in Germany, and Sony • or the lens to direct sunlight for long Corporation, and produces superior images.
-
Page 12: About The Disc
/playback, we recommend that you use the moisture with a soft, dry cloth. Do Sony discs or discs with an not use solvents such as benzine, cleaners for VIDEO CAMERA mark for your intended for vinyl LPs or antistatic splay, DVD Handycam. -
Page 13: Table Of Contents
Table of Contents Enjoying with your DVD Handycam What you can do with your DVD Handycam ..........10 Choosing a disc ..................13 Getting Started Step 1: Checking supplied items .............16 Step 2: Charging the battery pack ............17 Step 3: Turning the power on, and holding your camcorder ....20 Step 4: Adjusting the LCD screen and viewfi... - Page 14 To adjust the exposure for backlit subjects To adjust the focus for an off center subject To fi x the exposure for the selected subject To record in mirror mode To add special effects To use a tripod Playback To play back the images in sequence To use PB zoom Recording/playback To check the remaining battery...
- Page 15 Table of Contents (continued) PICT.APPLI..................63 Special effects on pictures or additional functions on recording/playback (PICT.EFFECT/D.EFFECT/SLIDE SHOW,etc.) DISC SET ..................65 Settings for discs (FORMAT/FINALIZE/UNFINALIZE, etc.) STANDARD SET ................65 Settings while recording on a disc or other basic settings (REC MODE/LCD/VF SET/USB SPEED, etc.) TIME/LANGU.
- Page 16 Troubleshooting Troubleshooting ..................87 Warning indicators and messages ............101 Additional Information Using your camcorder abroad ...............105 About the “InfoLITHIUM” battery pack ...........107 Maintenance and precautions ...............109 Using the Strap Belt as a wrist strap .............113 Attaching the Shoulder Strap ..............113 Specifi cations ..................114 Index ......................117...
-
Page 17: Enjoying With Your Dvd Handycam
Enjoying with your DVD Handycam What you can do with your DVD Handycam Your DVD Handycam records images on an 8cm DVD disc. You can enjoy your DVD Handycam in ways that are different from those of other media. This makes it easier to record and view images. A VISUAL INDEX screen that shows the disc contents at a glance Movies and still images are recorded on the same... - Page 18 Playing back the recorded disc on other DVD devices You can play back a disc on other DVD players or on the DVD drive of a computer if you fi nalize it. You can also create a DVD menu that helps you to fi...
- Page 19 What you can do with your DVD Handycam (continued) DVD functions different from those of tape media Easy to record, then to play back recordings without rewinding You can start recording and check the recorded images without rewinding or fast forwarding. Images are stored on the free space on the disc automatically.
-
Page 20: Choosing A Disc
This kind of disc can be overwritten repeatedly, of disc can even when the disc is full, if you format* it. Features be recorded only once Use Sony discs or discs with a mark. Depending on the place you bought, the disc • has a mark. - Page 21 (82) computer and editing them DVD discs recorded by Sony DVD Handycam are designed to be played back on home DVD players, DVD recorders, and computer DVD drives. DVD-RWs recorded in the VR mode must be played back on DVD playback equipment that supports the VR mode. Note that playback on all home DVD players, DVD recorders, and computer DVD drives may not be guaranteed.
- Page 22 How to choose a disc The fi gure below helps you to choose the best disc for your purpose. Do you want to use the disc repeatedly? No. I do not want to delete Yes. I want to use one disc images once I record them.
-
Page 23: Step 1: Checking Supplied Items
Cleaning cloth (1) supplied with your camcorder. Shoulder strap (1) (p.113) If any of the following items are not included, contact your nearest Sony dealer. 8cm DVD-R DMR30 (1) (p.13) (Except for DCR-DVD92/DVD602) Shoe cover (1) (p.81) (Except for DCR-DVD403/DVD803) Attached to the camcorder. -
Page 24: Step 2: Charging The Battery Pack
Step 2: Charging the battery pack You can charge the battery after attaching the “InfoLITHIUM” battery pack (P series) Connect the AC Adaptor to the (p.107) to your camcorder. DC IN jack on your camcorder. DC IN jack cover Open the DC IN jack cover to connect the AC Adaptor. - Page 25 Step 2: Charging the battery pack (continued) To remove a battery pack For DCR-DVD92/DVD103/DVD602/DVD653 Slide the BATT release button in the Continuous Typical direction of the arrow while pressing down Battery pack recording recording time time the Projection in the center of the BATT ...
- Page 26 Playback time On the battery pack Before changing the battery pack, slide the • Approximate time (min.) available when POWER switch up to OFF (CHG). you use a fully charged battery pack. The CHG (charge) lamp fl ashes during • charging, or BATTERY INFO (p.37) will not For DCR-DVD92/DVD103/DVD602/DVD653 be correctly displayed under the following...
-
Page 27: Step 3: Turning The Power On, And Holding Your Camcorder
Step 3: Turning the power on, and holding your camcorder To record or play back, slide the POWER When you set the POWER switch to • (Movie) or (Still), the lens cover opens switch to turn on the respective lamp. up (Except for DCR-DVD92/DVD602). -
Page 28: Step 4: Adjusting The Lcd Screen And Viewfi Nder
Step 4: Adjusting the LCD screen and viewfi nder The LCD screen The viewfi nder Open the LCD screen 90 degrees to the You can view pictures using the viewfi nder camcorder ( ), then rotate it to the best to avoid wearing down the battery, or when ... -
Page 29: Step 5: Using The Touch Panel
Step 5: Using the touch panel You can play back recorded pictures (p.29, Changing the language setting 33), or change the settings (p.52) using the touch panel. You can change the on-screen displays to show messages in a specifi ed language. -
Page 30: Step 6: Setting The Date And Time
Step 6: Setting the date and time Set the date and time when using this camcorder for the first time. If you do not Select the desired geographical set the date and time, the [ CLOCK SET] area with , then touch screen appears every time you turn on your camcorder or slide the POWER switch down. -
Page 31: Step 7: Inserting A Disc
Step 7: Inserting a disc A new 8cm DVD-R, DVD-RW, or Disc cover OPEN switch DVD+RW is required for recording (p.13). • Remove dust or fi ngerprints from the disc beforehand, using the cleaning Pickup lens cloth supplied with your camcorder (p.5). - Page 32 Touch [YES] [YES]. Close the disc cover. Your camcorder starts recognizing the Touch when [Completed.] inserted disc. It may take some time to recognize the appears. disc depending on the disc type and When the formatting is completed, you condition.
-
Page 33: Step 8: Selecting The Aspect Ratio (16:9 Or 4:3) Of The Recording Picture (Dcr-Dvd203/Dvd403/Dvd703/Dvd803)
Step 8: Selecting the aspect ratio (16:9 or 4:3) of the recording picture (DCR-DVD203/DVD403/DVD703/DVD803) By recording in the 16:9 (wide) mode, You cannot change the aspect ratio in the • following cases: you can enjoy wide-angle, high-resolution – when the POWER switch is set to pictures. -
Page 34: Easy Handycam
Easy Handycam – using your camcorder with automatic settings Operate your camcorder with ease With this Easy Handycam operation, most of the camera settings are automatically adjusted optimally, which frees you from detailed adjustment. Since only basic functions become available and screen font size increases for easy viewing, even fi... -
Page 35: Recording With Ease
Easy Handycam – using your camcorder with automatic settings (continued) Recording with ease During the EASY Handycam operation, Movies [REC MODE], Still images [QUALITY] and [IMAGE SIZE] are recorded with the default settings (p.62, 65). Slide the POWER switch down repeatedly to light up the (Movie) or... -
Page 36: Playing Back With Ease
Playing back with ease Slide the POWER switch down repeatedly to light up the (Play/Edit) lamp. The VISUAL INDEX screen appears on the LCD screen. Make sure the EASY lamp lights up in blue. If not, press EASY to light it up (p.27). VISUAL INDEX screen Previous 6 pictures... -
Page 37: Preparation For Playing Back On A Dvd Player (Finalizing)
Easy Handycam – using your camcorder with automatic settings (continued) Preparation for playing back on a DVD player ( Finalizing) With Easy Handycam operation, your DVD Handycam sets up the following options automatically. Therefore, you can fi nalize a disc easily. –... - Page 38 Touch the LCD screen in the following steps. Touch Touch Touch Touch Touch Touch Do not apply shock or vibration to your camcorder, and do not disconnect the AC adaptor during • fi nalizing. The shorter the amount of material recorded, the longer it takes for fi...
-
Page 39: Recording
Recording LENS COVER* PHOTO Opens in accordance with the setting of POWER switch the POWER switch. REC START/STOP REC START/STOP Except for DCR-DVD92/DVD602 Slide the POWER switch down repeatedly to light up the respective lamp. : To record movies Slide the POWER switch in the direction of : To record still images... -
Page 40: Playback
Playback Slide the POWER switch down repeatedly to light up the (Play/Edit) lamp. The VISUAL INDEX screen appears on the LCD screen. Disc type Previous 6 pictures Appears with the Next image on each of the 6 pictures tab that was lastly Movie tab played back. -
Page 41: Functions Used For Recording/Playback, Etc
Functions used for recording/playback, etc. Do not remove your fi nger from the power • zoom lever , when you operate it. If you do so, the sound of the lever moving may be recorded. You cannot change the zoom speed with the •... -
Page 42: To Use The Fl Ash
The fl ash charge lamp fl ickers when charging • appears while recording or playing back • the fl ash, and remains lit when the battery in 5.1ch mode, however the 5.1ch surround charge is complete. sound will be converted to 2ch to be output on your camcorder. -
Page 43: To Fi X The Exposure For The Selected Subject
Functions used for recording/playback, etc.(continued) DCR-DVD403/DVD803: To fi x the exposure for the selected subject ........ See [SPOT METER] on page 56. To record in mirror mode ..... Open the LCD screen 90 degrees to the camcorder ( ), then rotate it 180 degrees ... -
Page 44: Recording/Playback
Touch the portion that you want to Other part names and functions display in the center of the LCD screen. Built-in 4CH microphone (DCR- Adjust the magnifi cation with W (Wide DVD403/DVD803) angle)/T (Telephoto). When an external microphone (optional) is connected, it takes precedence over the To cancel, touch [END]. -
Page 45: Checking/Deleting The Last Scene (Review/Review Deleting)
Checking/Deleting the last scene (Review/Review deleting) You can check or delete the last recorded Deleting the last scene ( Review scene. deleting) (DVD-RW/DVD+RW However, you cannot delete it if: only) – you have removed the disc. – you have recorded the new scenes. If the checked scene is unnecessary, you can delete it on the spot. -
Page 46: Indicators Displayed During Recording/Playback
Indicators displayed during recording/playback Recording movies Recording still images Remaining battery (approx.) (37) Image size (Except for DCR-DVD92/ DVD103/DVD602/DVD653) (62) Recording mode ( or or ) (65) 2016 × 1512 (DCR-DVD403/DVD803)/ Recording status ([STBY] (standby) or 1152 ×... - Page 47 Indicators displayed during recording/playback (continued) ( ) is a reference page Center Indicators on the LCD screen and viewfi nder Indicator Meaning NightShot/NightShot When you can change the setup items, or plus (35) during recording or playback, following indicators displayed. Super NightShot/Super NightShot plus (59) Upper Center...
-
Page 48: Remote Commander (Except For Dcr-Dvd92/Dvd602)
Remote Commander (Except for DCR-DVD92/DVD602) Remove the insulation sheet before using DATA CODE (p.67) the Remote Commander. PHOTO (p.28, 32) The on-screen image when you press this Insulation sheet button will be recorded as a still image. SCAN/SLOW (p.29, 33) ... -
Page 49: Playing The Picture On A Tv
Playing the picture on a TV Connect your camcorder to the wall outlet using the supplied AC adaptor for this operation (p.17). Refer also to the instruction manuals supplied with the devices to be connected. (Yellow) (White) (Red) A/V jack S VIDEO VIDEO AUDIO VCRs or TVs... - Page 50 • When you play back a picture recorded in 16:9 aspect ratio on a 4:3 TV not compatible with the 16:9 signal, set [TV TYPE] to [4:3]. When your TV is monaural (When your TV has only one audio input jack) Connect the yellow plug of the A/V connecting cable to the video input jack and connect the white (left channel) or the...
-
Page 51: Making The Disc Compatible With Playback On Dvd Players Or Dvd Drives (Finalizing)
Making the disc compatible with playback on DVD players or DVD drives ( Finalizing) Finalizing allows the recorded disc to be played back on other DVD players (DVD player/ DVD recorder etc.,) or the DVD-drive on your computer. The fi nalizing procedure differs depending on the disc type. - Page 52 Step 1: Preparing for fi nalizing Steps for fi nalizing Follow the steps below. • It takes from a minute to a few hours Place your camcorder in a for fi nalizing. The shorter the amount of stable position. Connect the AC material recorded on the disc, the longer Adaptor to the DC IN jack on your it takes for fi...
- Page 53 Making the disc compatible with playback on DVD players or DVD drives (Finalizing) (continued) Select the desired one from 4 Touch [PHOTOMOVIE]. types of pattern with Touch [YES]. Select [NO] if you do not create a Photomovie. Touch Select [NO MENU] if you do not create a DVD menu.
- Page 54 When you have fi nished entering Touch ,when [Completed] characters, touch appears. The disc title changes to the one you When using a DVD-R/DVD-RW entered. (VIDEO mode)/DVD+RW, fl ashes after fi nalizing is completed when the POWER switch is set to Touch [END].
-
Page 55: Playing Back A Disc On Dvd Players, Etc
Playing back a disc Playing back a disc on a on DVD players, etc. computer with a DVD drive installed • Do not use the 8cm CD adaptor with an 8cm DVD as it may cause a malfunction. • Make sure that a vertically installed DVD •... - Page 56 The date the disc was fi rst used is Playing back still images recorded on the volume label of the disc. Still images stored on the disc are displayed in the JPEG format. <e.g.> Note that erasing or changing the original When the disc was fi...
-
Page 57: Recording Additional Scenes After Fi Nalizing
Recording additional scenes after fi nalizing You can record additional material on the When using a DVD+RW fi nalized DVD-RWs (VIDEO mode)/ DVD+RWs by following the steps below if If you have created a Photomovie or a there is space to record on the disc. DVD menu in fi... -
Page 58: Deleting All Of The Scenes On The Disc (Formatting)
Deleting all of the scenes on the disc ( Formatting) Formatting makes the recorded disc new and reusable by deleting all the Turn on the power by sliding the data recorded on the disc. The recording POWER switch down. capacity of the disc is recovered by formatting it. -
Page 59: Using The Setup Items
Using the Setup items Slide the POWER switch down to light up the respective lamp. : Settings for movies Slide the POWER switch while pressing the green : Settings for still images button in the center only MODE when the POWER switch : Settings for viewing/editing is in the OFF (CHG) (CHG) - Page 60 Touch [SETUP]. Select the desired setup item. Touch to select the item, then touch . (The process in step is the same as that in step Select the desired item. You can also touch the item directly to select it. •...
-
Page 61: Setup Items
Setup items Available setup items ( ) vary depending on the position of a lamp. *These functions are available during Easy Handycam operation. Position of lamp: Movie Still Play/Edit CAMERA SET (p.56) − PROGRAM AE −... - Page 62 Position of lamp: Movie Still Play/Edit DISC SET (p.65) FORMAT* FINALIZE* UNFINALIZE DISC TITLE STANDARD SET (p.65) − − REC MODE − − VOLUME* − − ...
-
Page 63: Camera Set
CAMERA SET Settings to adjust your camcorder to the recording conditions (EXPOSURE/WHITE BAL./ BEACH&SKI*( ) STEADYSHOT, etc.) The default settings are marked with . The indicators in parentheses appear when the items are selected. Select to prevent people’s faces from See page 52 for details on selecting appearing dark in strong light or refl... - Page 64 AUTO The white balance is adjusted automatically. OUTDOOR ( The white balance is set to the brightness Touch the point where you want to fi x and of the outdoor environment or daylight adjust the exposure on the screen. under fl...
- Page 65 CAMERA SET (continued) To adjust the focus automatically, touch AUTO SHUTTER [AUTO] in step Automatically activates the electronic It is easier to focus on the subject by moving • shutter to adjust the shutter speed when the power zoom lever towards T (telephoto) to recording in bright conditions if you set it adjust the focus, then towards W (wide angle) to [ON] (the default setting).
- Page 66 LOW( Do not use NightShot/NightShot Plus and • [SUPER NS] or [SUPER NSPLUS] in bright Makes the fl ash level lower. places. This may cause a malfunction. The setting returns to [NORMAL] when • Do not cover the infrared port with your fi ngers •...
- Page 67 CAMERA SET (continued) × Touch [SETUP] CAMERA SET [SELF-TIMER] × Up to 20 zoom is performed optically, [ON] × and after that, up to 800 zoom is performed digitally. appears. Press REC START/STOP to record For DCR-DVD203/DVD703 movies, or PHOTO to record still images.
-
Page 68: Still Set
STILL SET Settings for still images (BURST/QUALITY/IMAGE SIZE, etc.) The default settings are marked with . When viewed on a 16:9 wide The indicators in parentheses appear when screen TV the items are selected. See page 52 for details on selecting setup items. - Page 69 STILL SET (continued) Number of still images recordable on QUALITY a disc (approx.) FINE ( 640× 2016× 1152× Records still images at the fi ne image 1512 quality level. STANDARD ( 2150 5100 DVD-R 1750 4100 8100 Records still images at the standard image DVD-RW quality level.
-
Page 70: Pict.appli
PICT.APPLI. Special effects on pictures or additional functions on recording/ playback (PICT.EFFECT/D.EFFECT/SLIDE SHOW, etc.) Fading out Fading in The default settings are marked with . WHITE FADER The indicators in parentheses appear when the items are selected. See page 52 for details on selecting setup items. - Page 71 PICT.APPLI (continued) OLD MOVIE You can repeat the slide show by touching • The default setting is set to [ON] (repeat slide Adds an old movie effect to pictures. show). The scene is recorded in the WIDE (16:9) mode. DEMO MODE PICT.
-
Page 72: Disc Set
STANDARD SET DISC SET Settings while recording on a disc or Settings for discs other basic settings (FORMAT/FINALIZE/UNFINALIZE, etc.) (REC MODE/LCD/VF SET/USB SPEED, See page 52 for details on selecting etc.) setup items. The default settings are marked with . FORMAT The indicators in parentheses appear when the item is selected. - Page 73 STANDARD SET (continued) STEREO For DCR-DVD92/DVD602 Plays back with main and sub sound (or WIDE STEREO stereo sound). Records 2 channel sound with more presence. Plays back with main sound or the left STEREO channel sound. Records normal stereo sound. The setting returns to [WIDE STEREO] when •...
- Page 74 LCD COLOR USB SPEED (Except for DCR- You can adjust the color on the LCD screen DVD92/DVD602) You can select data transfer speed used to transfer data to your computer. Low intensity High intensity AUTO Sends data by switching automatically ...
- Page 75 STANDARD SET (continued) DATE/TIME REMOTE CTRL (Remote control) (Except for DCR-DVD92/DVD602) The default setting is [ON] so that you can use the Remote Commander (p. 41). Date Set to [OFF] to prevent your camcorder • from responding to a command sent by other Time equipment’...
-
Page 76: Time/Langu
TIME/LANGU. (CLOCK SET/AREA SET/LANGUAGE, etc.) A.SHUT OFF (Auto shutter off) The default settings are marked with . The indicators in parentheses appear when 5 min the item is selected. The camcorder is automatically turned off See page 52 for details on selecting when you do not operate your camcorder setup items. -
Page 77: Customizing Personal Menu
Customizing Personal Menu You can add desired setup items to Deleting a setup item Personal Menu, and customize Personal Menu settings for each POWER switch position. This is convenient if you add Touch [P-MENU SET frequently used setup items to Personal ... - Page 78 Arranging the order of setup items displayed on Personal Menu Touch [P-MENU SET [SORT]. If the desired setup item is not displayed touch Touch the setup item you want to move. Touch to move the setup item to the desired place. Touch To sort more items, repeat steps 2 to 4.
-
Page 79: Editing The Original Data
Editing the original data This function is available only for DVD-RWs (VR The selected scene is marked with . mode). Press and hold the image on the LCD screen to confi rm the image. Touch “Original data” refers to the recorded to return to the previous screen. - Page 80 If the movie is added in the Playlist, dividing • the original movie does not affect the movie in Touch the scene to be divided. the Playlist. The playback of the selected movie starts. Touch at the point at which you want to divide the movie into scenes.
-
Page 81: Creating The Playlist
Creating the Playlist This function is available only for DVD-RWs (VR mode). A Playlist is a list showing thumbnails of the still images and movies that you have selected. The original scenes are not The selected scene is marked with . changed even though you edit or delete the Press and hold the image on the LCD scenes in the Playlist. - Page 82 (Playlist) tab Touch the Insert the disc with movies added [EDIT]. into a Playlist. (Playlist) tab Touch the [EDIT]. Touch [MOVE]. Touch [ERASE]. Select the scene to be moved. Select the scene to be deleted from the list. The selected scene is marked with .
- Page 83 Creating the Playlist (continued) • The original scenes are not changed even Dividing a movie within the though you divide scenes within the Playlist. Playlist Converting all the still images on a disc to a movie fi le Slide the POWER switch down ( Photomovie) repeatedly to light up (Play/...
-
Page 84: Playing The Playlist
Playing the Playlist It may take more time to create a Photomovie • This function is available only for DVD-RWs as more still images are recorded on the disc. (VR mode). Still images which are not compatible with your • camcorders, such as ones shot using a digital still camera and then copied to a computer Slide the POWER switch down... -
Page 85: Dubbing
Connecting to a VCR or TV Connect your camcorder to the wall outlet using the supplied AC adaptor for this operation (p.17). Refer also to the instruction manuals supplied with the devices to be connected. (Yellow) (White) (Red) A/V jack S VIDEO VIDEO AUDIO VCRs or TVs... -
Page 86: Dubbing To Vcr/Dvd Devices
Dubbing to VCR/DVD devices You can copy pictures played back on your camcorder to other recording devices, such Start the playback on your as VCRs or DVD recorders. camcorder, and record it on the After dubbing them to an HDD (hard recording device. -
Page 87: Recording Images From A Tv Or Vcr/Dvd Device (Except For Dcr-Dvd92/Dvd602)
Recording images from a TV or VCR/DVD device (Except for DCR-DVD92/DVD602) You can record pictures or TV programs from a VCR or TV onto a disc using your Start playing the cassette or the camcorder. disc on the playback device, or select a TV program. -
Page 88: Jacks To Connect External Devices
Jacks to connect external devices Pull up the Active Interface Shoe shoe cover. The Active Interface Shoe supplies power to optional accessories such as a video light, a flash, or a microphone. The accessory can be turned on or off as you operate the POWER switch on your camcorder. -
Page 89: Before Referring To The "First Step Guide" On Your Computer
Before referring to the " First Step Guide" on your computer When you install the Picture Package The CD-ROM (supplied) includes the • software on a Windows computer from following software. the supplied CD-ROM, you can enjoy the – USB Driver following operations by connecting your –... -
Page 90: Using A Computer
Installing software Memory: 128 MB or more (256 MB or more You need to install the software to your recommended) Windows computer to enjoy editing your recorded video and still images. The Hard disk: installation is required only for the fi rst Available memory required for installation: time. - Page 91 Installing software (continued) Click [Install]. Select where to save the Depending on the operating system software, then click [Next]. on the computer, a message appears notifying you that “First Step Guide”, cannot be installed automatically with the InstallShield Wizard. In such a case, manually copy “First Step Guide”...
- Page 92 Click [Next], then follow the Make sure [Yes, I want to restart on-screen instructions to install my computer now.] is checked, “ImageMixer Easy Step DVD.” then click [Finish]. The computer turns off once, then starts up again automatically (Restart). The If the [Installing Microsoft (R) short-cut icons for [Picture Package DirectX(R)] screen is displayed,...
-
Page 93: Viewing "First Step Guide
– When the HTML version of “First Step the respective owners thereof. License Guide” is not installed automatically. of Picture Package by Sony Corporation would not be construed as conferring to you by implication, estoppel or otherwise, any license or right to use the Music... -
Page 94: Troubleshooting
Troubleshooting If you run into any problems using your camcorder, use the following table to troubleshoot the problem. If the problem persists, remove the power source and contact your Sony dealer. Overall operations/Easy Handycam The camcorder does not operate even when the power is set to on. - Page 95 The CHG (charge) lamp fl ashes while the battery pack is being charged. • Attach the battery pack to the camcorder correctly (p.17). If the problem persists, disconnect the AC Adaptor from the wall outlet and contact your Sony dealer. The battery pack may be damaged.
- Page 96 A problem occurs when the camcorder is connected to the AC Adaptor. Turn off the power, and disconnect the AC Adaptor from the wall outlet. Then, connect it • again. LCD screen/viewfi nder An unknown picture appears on the screen. The camcorder is in [DEMO MODE] (p.64).
- Page 97 Troubleshooting (continued) Disc The disc cannot be removed. Make sure the power source (battery pack or AC Adaptor) is connected correctly (p.17). • Remove the battery pack from the camcorder, then attach it again (p.17). • Attach a charged battery pack to the camcorder (p.17). •...
-
Page 98: Adjusting The Image During Recording
The external fl ash (optional) does not work. The power of the fl ash is not turned on, or the fl ash is not attached correctly. • The actual recording time for movie is less than the expected approximate recording time. When you record an object that moves fast, the time available for recording may shorten •... - Page 99 Troubleshooting (continued) A vertical band appears when recording a bright subject. This phenomenon is called the smear effect. This is not a malfunction. • Tiny spots in white, red, blue, or green appear on the screen. The spots appear when you are recording in [SUPER NS] or [SUPER NSPLUS] , or •...
-
Page 100: Playing Back A Disc On Your Camcorder
Playing back a disc on your camcorder You cannot play back a disc. Slide the POWER switch down repeatedly to light up (Play/Edit). • Check out the disc compatibility (p.13). • Insert a disc with the recording side facing your camcorder (p.24). •... -
Page 101: Setup Items
Troubleshooting (continued) Playback freezes for an instant between the scenes. The image may freeze for an instant between scenes depending on the DVD device being • used. Playback does not move to the previous scene when you press . If playback crosses 2 titles made automatically by your camcorder when is pressed, •... - Page 102 You cannot use [SPOT FOCUS]. You cannot use [SPOT FOCUS] together with [PROGRAM AE]. • You cannot use [ SUPER NS] or [SUPER NSPLUS]. The NIGHTSHOT or NIGHTSHOT PLUS switch is not set to ON. • You cannot use [SUPER NS] or [SUPER NSPLUS] together with: •...
-
Page 103: Dubbing/Connecting To Other Devices
Troubleshooting (continued) You cannot use [ PICT.EFFECT]. You cannot use [PICT.EFFECT] together with [OLD MOVIE]. • You cannot view [SUR MONITOR]. You cannot view the [SUR MONITOR] either you are not recording in 5.1ch surround • recording or together with [FADER]. You cannot adjust [ LCD BL LEVEL]. - Page 104 No sound is heard when playing back a disc. The audio will not be output when you connect a device via the S video plug only. Connect • the white and red plugs of the A/V connecting cable, too (p.78). You cannot dub correctly using the A/V connecting cable.
- Page 105 3 Click [Hardware] tab. 4 Click [Device Manager]. The [Device Manager] window appears. 5 Make sure that [SONY DDX-C1000 USB Device] appears in [DVD/CD-ROM drives], [Generic volume] in [Storage volumes], and [USB Mass Storage Device] in [Universal Serial Bus controllers] respectively.
- Page 106 3 Click [Hardware] tab. 4 Click [Device Manager]. The [Device Manager] window appears. 5 Make sure that [SONY DDX-C1000 USB Device] appears in [DVD/CD-ROM drives], [Generic volume] in [Storage volumes], and [USB Mass Storage Device] in [Universal Serial Bus controllers] respectively.
- Page 107 Troubleshooting (continued) [Cannot start Easy Handycam with USB connected] or [Cannot cancel Easy Handycam with USB connected] appears on the screen of your camcorder. You cannot start or cancel the Easy Handycam operation while the USB cable is connected. • Disconnect the USB cable from your camcorder fi...
-
Page 108: Warning Indicators And Messages
Some symptoms you can fi x by yourself. facility. Inform them of the 5-digit If the problem persists even after you have code, which starts from “E.” tried a couple of times, contact your Sony dealer or local authorized Sony service 100-1001 (Warning indicator facility. - Page 109 Warning indicators and messages (continued) Description of warning (Battery level warning) messages Slow fl ashing The battery pack is nearly used up. If messages appear on the screen, follow • the instructions. Depending on the operating, • environment, or battery conditions, ...
- Page 110 Format error Disc movie area full Cannot record movies The disc recorded in the different • format code from your camcorder. Delete unnecessary scenes (p.72). • Formatting the disc may enable you to use the disc on your camcorder (DVD- Scene number full RW/DVD+RW only) (p.51).
- Page 111 Warning indicators and messages (continued) Easy Handycam Cannot divide You cannot divide still images • Cannot start Easy Handycam converted to a movie. Cannot cancel Easy Handycam You cannot divided a movie that is • (p.27) extremely short. Cannot start Easy Handycam with Data protected USB connected (p.27) The disc has been protected with...
-
Page 112: Using Your Camcorder Abroad
Using your camcorder abroad Power supply System Used in You can use your camcorder in any NTSC Bahama Islands, Bolivia, countries/regions using the AC Adaptor Canada, Central America, supplied with your camcorder within the Chile, Colombia, Ecuador, AC 100 V to 240 V, 50/60 Hz range. Guyana, Jamaica, Japan, Korea, Use a commercially available AC plug Mexico, Peru, Surinam, Taiwan,... - Page 113 Using your camcorder abroad (continued) Simple setting of the clock by time difference You can easily set the clock to the local time by setting a time difference when using your camcorder abroad. Set [AREA SET] and [DST SET]/[SUMMERTIME] in the TIME/ LANGU.
-
Page 114: About The "Infolithium" Battery Pack
About the “ InfoLITHIUM” battery pack This unit is compatible with an Frequent use of the LCD screen or a frequent • playback, fast forward or reverse operation “InfoLITHIUM” battery pack (P series). wears out the battery pack faster. It is Your camcorder operates only with an recommended that you use a large capacity “InfoLITHIUM”... -
Page 115: Battery Life
About the “ InfoLITHIUM” battery pack (continued) How to store the battery pack If the battery pack is not used for a long time, • fully charge the battery pack and discharge it on your camcorder once a year to maintain the proper function. -
Page 116: Maintenance And Precautions
• The indication will not appear when the casing, unplug your camcorder and have it moisture condenses on the camera lens. checked by a Sony dealer before operating it any further. If moisture condensation has occurred Avoid rough handling, disassembling, Turn off your camcorder, and leave it for •... - Page 117 Maintenance and precautions (continued) You use your camcorder after a squall or a • Touch [SETUP] shower. STANDARD SET [CALIBRATION] You use your camcorder in a hot and humid • place. The screen changes to 16:9 ratio when •...
- Page 118 On the pickup lens To charge the pre-installed rechargeable battery • Do not touch the lens inside the disc cover. Keep the disc cover closed except when Your camcorder has a pre-installed inserting and removing the disc, to keep dust rechargeable battery to retain the date, out.
- Page 119 Remote Commander may shorten, or the Remote Commander may not function properly. In this case, replace the battery with a Sony CR2025 lithium battery. Use of another battery may present a risk of fi re or explosion.
-
Page 120: Using The Strap Belt As A Wrist Strap
Using the Strap Belt Attaching the as a wrist strap Shoulder Strap This is useful for carrying your camcorder. You can attach the Shoulder Strap to the hook for the Shoulder Strap. Open the hook and loop fastener of the hand pad ()and remove it from the ring (). -
Page 121: Specifi Cations
Specifi cations System DCR-DVD403/DVD803 5.9 mm (1/3 type) CCD (Charge Coupled Device) Video MPEG2/JPEG (Still images) compression Gross: Approx. 3 310 000 pixels format Effective (Movie): Audio compression DCR-DVD92/DVD602 Approx. 2 048 000 pixels format Dolby Digital 2ch Effective (Still): Dolby Digital Stereo Creator Approx. -
Page 122: Additional Information
For movies: DCR-DVD103/DVD203/DVD403/ 42.8 - 495mm (1 11/16 - 19 1/2 DVD653/DVD703/DVD803 in.) (16:9 mode) 45 - 450mm (1 13/16 - 17 3/4 Audio/Video 10 pin connector in.) (4:3 mode) input/output Input/Output auto switch For still images: Video signal: 1 Vp-p, 75 Ω 37 - 370mm (1 1/2 - 14 5/8 in.) (ohms), unbalanced Luminance signal: 1 Vp-p, 75... - Page 123 Specifi cations (continued) Storage -20°C to + 60°C (-4°F to Rechargeable battery pack temperature + 140°F) NP-FP50:DCR-DVD92/DVD103/ Dimensions DCR-DVD92/DVD103/ DVD203/DVD602/DVD653/DVD703 (Approx.) DVD203/DVD602/DVD653/ DVD703: Maximum DC 8.4V 57 × 87 × 131mm (2 1/4 × 3 output voltage 1/2 × 5 1/4 in.) (w×h×d) Output voltage DC 7.2V DCR-DVD403/DVD803...
-
Page 124: Index
Index Numeric CLOCK SET ......23 Fixing the exposure ....36 COLOR SLOW S FLASH LEVEL ..... 58, 91 4ch surround recording ..66 (Color Slow Shutter) ..59, 95 FLASH MODE ....58 5.1ch surround recording ..34 Computer ......82 FLASH SET ...... - Page 125 Index (continued) Playlist SETUP ROTATE ....68 ADD ......74 Shoulder Strap ....113 NightShot/NightShot plus ..35 DIVIDE ......76 SLIDE SHOW ...... 64 NIGHT SHOT, Erase ......74 Software ....... 83 NIGHTSHOT PLUS .... 35 MOVE ......75 Speaker .........
- Page 126 USB SPEED ......67 “InfoLITHIUM” is a trademark of Sony • USB driver ......82 Corporation. Using abroad ...... 105 Picture Package is a trademark of Sony • Corporation. Microsoft, Windows, and Windows Media are • either registered trademarks or trademarks of Microsoft Corporation in the United States VF B.LIGHT...
- Page 127 Printed on 100% recycled paper using VOC (Volatile Organic Compound)-free vegetable oil based ink. Printed in Japan...
-
Page 128: Revision History
Reverse 987686545.pdf Revision History S.M. Rev. Ver. Date History Contents issued 2005.02 Official Release — — 2005.05 Correction-1 • Correction of adjustments S.M. correction: Page 4 2006.07 Supplement-1 • Change of supplied accessories (DI06-004) 2006.09 Supplement-2 • Addition of chinese model for (DI06-070) DCR-DVD602E/DVD653E 2007.09...