Epson LX-300 Service Manual
Terminal printer
Hide thumbs
Also See for LX-300:
- Service manual (106 pages) ,
- User manual (100 pages) ,
- Manual (17 pages)
Table of Contents
Advertisement
Quick Links
Advertisement
Chapters
Table of Contents

Related Manuals for Epson LX-300


Summary of Contents for Epson LX-300
-
Page 1: Service Manual
EPSON TERM NAL PR NTER LX-300 SERVICE MANUAL EPSON... - Page 2 THE POWER SUPPLY CABLE MUST BE CONNECTED, USE EXTREME CAUTION IN WORKING ON POWER SUPPLY AND OTHER ELECTRONIC COMPONENTS. REPAIRS ON EPSON PRODUCT SHOULD BE PERFORMED ONLY BY AN EPSON CERTIFIED REPAIR TECHNICIAN. MAKE CERTAIN THAT THE SOURCE VOLTAGE IS THE SAME AS THE RATED VOLT- AGE, LISTED ON THE SERIAL NUMBER/RATING PLATE.
-
Page 3: Product Description
Includes a step-by-step guide for product d isassembly and assembly. CHAPTER 4. ADJUSTMENTS Includes a step-by-step guide for adjustment. CHAPTER 5. TROUBLESHOOTING Provides Epson-approved techniques for adjustment. CHAPTER 6. MAINTENANCE Describes preventive maintenance techniques and lists lubricants and adhesives required to service the equipment. APPENDIX Describes connector pin assignments, circuit diagrams, circuit board component layout and exploded diagram. - Page 4 ..REVISION SHEET Revision Page Issue Date Revision issue April Rev. A 6, 1994...
- Page 5 TABLE OF CONTENTS PRODUCT DESCRIPTION CHAPTER 1. CHAPTER 2. OPERATING PRINCIPLES DISASSEMBLY AND ASSEMBLY CHAPTER 3. ADJUSTMENTS CHAPTER 4. TROUBLESHOOTING CHAPTER 5. MAINTENANCE CHAPTER 6. APPENDIX vi -...
-
Page 6: Table Of Contents
CHAPTER 1 Product Description Table of Contents 1.1 FEATURES 1.2 SPECIFICATIONS 1.2.1 Hardware Specifications ........1-2 1.2.1.1 Paper Handling Specifications . - Page 7 .P.::k List of Figures (’. Exterior View of the LX-300....... 1-1 Figure 1-1.
-
Page 8: Features
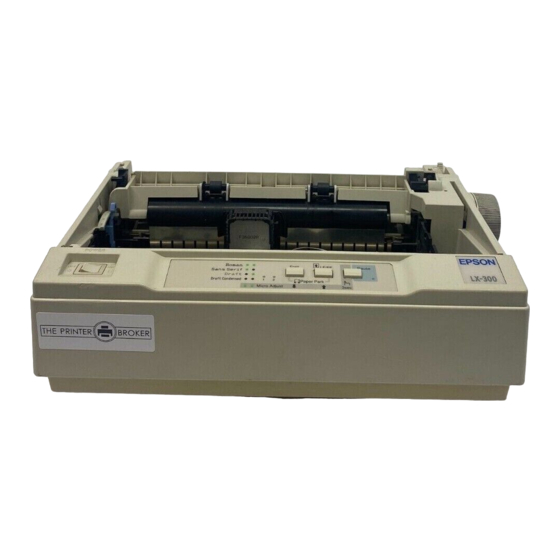
Product Daadption LX-300 Service Manual FEATURES The LX-300 is a small, light-weight, 9-pin serial impact dot-matrix color printer suitable for personal use. The major features of this printer areas follows: 0 Fast printing of 10-cpi draft characters at 220 cps... -
Page 9: Specifications
LX-300 Sarvice Mimual Product Description 1.2 SPECIFICATIONS . /- :.,, ,. : f This section provides detailed information about the LX-300. 1.2.1 Hardware Specifications Serial impact dot matrix Printing method: 9 wires Pin configuration: 0.29 mm Pin diameter: Figure 1-2. Pin Configuration Printing direction: Bidirectional with logic seeking for draft text with monochrome printing. -
Page 10: Paper Handling Specifications
Product Description LX-XXI Sarvka Manual Handling Specifications 1.2.1.1 Paper Friction feed or tractor (push and pull) feed Feeding system: Feeding method Manual insertion (top entry) and feeding with the Cut sheets: optional cut sheet feeder (CSF) Push and pull tractor feeding Continuous paper: li~ in~, 1A in~, or pr~ammable feeding in in~ments Feeding pitch:... -
Page 11: Paper Specifications
LX-WI Service Manual Product Description 1.2.1.2 Paper Specifications ‘-’; Table 1-4. Specifications for Cut Sheet Papar (Manual Insertion) 182 mm -257 mm (7.2 in. -10.1 in.) Width 182 mm -364 mm (7.2 in. -14.3 in.) Length in.) Thickness 0.065 mm -0.14 mm (0.0025 in. -0.0055 52.3-90 g/m2 (14 -24 lb.) Weight Plain paper, recycled paper... -
Page 12: Printable Area
Prvduct Description LX-300 Service Manual Table 1-8. Specifications for Continuous Paper with a Label 63.5 mm (min.) x 23.8 mm (min.) [ 2.5 in. (min.) 15/16 in. (min.)] Label size (W x L) 101.6 mm -254 mm (4.0 in. x 10.0 in.) -
Page 13: Figure 1-5. Printablearea Forcontinuous Paper
LK300 Service Manual Product Description Cut Sheets Using the 3 mm 10.12”1. mm,mum Figure 1-4. Printable Area for Cut Sheets Using the CSF Continuous paper 101.6 t-m-n - 2S4 nun [4” - 10~, masinwm f“’. - . ; . PfintaM9 Area —... -
Page 14: Ribbon Specifications
Description Prvduct LX4tW Service Manual Roll paper 213 mm -219 mm [8.38’ - 8.62’] > [0.12” 203.2 mm [8’J maximum minimum Printable Area when a mm is used. ‘ 9.8 (0.39”) or more paper widthof216 f 3 Figure 1-6. Printable Area for Roll Paper 1.2.1.4 Ribbon Specifications Ribbon cartridge (mono): #8750... -
Page 15: Electrical Specifications
LX-300 Service Manual Product Description 1.2.1.5 Electrical Specifications Table 1-10. Electrical Specifications 220-240 V Version Description 120 V Version 220-240 VAC 120 VAC Rated voltage 198-264 VAC 103.5-132 VAC Input voltage range 50-60 Hz Rated frequency range 49.5 -60.5 Hz Input frequency range 0.5 A... -
Page 16: Firmware Specifications
Bulgaria (Bulgaria) Not supported Suppofted * N~P= National Language Support Bitmap fonts: EPSON NLQ Roman EPSON NLQ Saris Serif EPSON DRAIT 10.5 points Character size Character matrix Draft 10 cpi; 11 horizontal dots, 9 vertid dots NLQ 10 cpi; 23 horizontal dots, 18 vertical dots... -
Page 17: Table 1-13. Printing Speed
LX-W) Service Mhnual Product Description Table 1-13. Printing Speed ‘x: Maximum Print Speed [cps] ,:’ Printable Ch~m&:er Printing Mode Columns Monochrome Color 220 (165) 165 (1 65) 10 cpi Draft 12 cpi 264 (198) 198 (198) Draft 188 (141) 17.1 cpi Draft condensed 220 (165) 20 cpi... -
Page 18: Interface Specifications
Prvduct Description LX-3(3O Service Manual 1.3 INTERFACE SPECIFICATIONS has parallel interface and serial interface, one of which can be selected in default setting LX-300 mode. Auto selection is also available. 1.3.1 Parallel Interface Specifications is equipped with an 8-bit parallel interface, standard. The LX-300 8-bit parallel Data format:... - Page 19 ~s and signal functions for the 8-bit parallel interface. -1 . . . Pin Assignments for Parallel Interface —- Description }.. . The STROBE pulse is used to read the input data. The pulse width must be more than 0.5 p.s. Input data is latched after the falling edge of this signal.
-
Page 20: Serial Interfacespecifications
Product Description LX-3(IO Service Manual 1.3.2 Serial Interface Specifkations The LX-300 is equipped with an 8-bit serial interface, standard. EIA-232D serial Data format: Asynchronous Synchronization: By DTR signal and X-ON/X-OFF protocol Handshaking: DTR and X-OIVX-OFF Protocol X-OWX-OFF Buffer Space State X-OFF Less than 256 bytes Busy... -
Page 21: Operating Instructions
UiWtJ Service Mhnual Product Description 1 . 4 O P E R A T I N G I N S T R U C T I O N S .“ “II This section describes control panel operation ~ctions, self-test, hexadecimal dump, ~n ~ ~ demonstration functions, and printer initialization methods. -
Page 22: Hexadecimal Dump Function
Pfvduct LMacription LX#O Service Manual 1.4.3 Hexadecimal Dump Function The hexadecimal dump is a useful tool for troubleshooting data control problems. This section describes how to run a hex dump. Turn on the printer while holding down the LF/FF and FONT buttons. 2. -
Page 23: Printer Initialization
LXiWO Service Manual Product Description 1.4.7 Printer Initialization There are two types of initialization: hardware initialization and software initialization. 1.4.7.1 Hardware Initialization Hardware initialization is performed by: . Turning on the printer. . Sendiny@e parallel interface the~signal. (If the INIT signal is active when the printer is turned on, hardware initialization is started when the ~ signal becomes imctive.) When hardware initialization is performed: . -
Page 24: Changing The Defaultsettings
Product Description LX-300 Service Manual 1.4.8.2 Changing the Default Settings You can change some parameters that the printer refers to at printer initialization. To enter the default setting mode, turn on the printer while holding down the FONT button. The printer prints out the firmware version. If paper is not loaded, insert a sheet of paper. -
Page 25: Table 1-21 Shape Of Zero
LX300 Service M%ual Product Description Character Spacing Table 1-20. Character Spacing FONT Light 2 PAUSE Light FONT Light 1 10 cpi 12 cpi Table 1-21. Shape of Zero Space of Zero FONT FONT Light 2 PAUSE Light Light 1 Table 1-22. Skip Over Perforation FONT Light 1 FONT Light 2 PAUSE Light SkipOver-Petioration Skip skip... -
Page 26: Table 1-25. Page Length
Product Lkactiption LX-3(IO Service Manual Table 1-24. Auto Line Feed Auto Line Feed FONT Light 1 FONT Light 2 PAUSE Light Table 1-25. Page Length Page Length FONT Light 1 FONT Light 2 PAUSE Light 11 inches 12 inches 8.5 inches 70/6 inches Table 1-26. -
Page 27: Table 1-30. Parity Bit
U-300 Service Manual Product Description Table 1-30. Parity Bit ((’’” Parity Bit FONT Light 2 PAUSE Light FONT Light 1 None Even Table 1-31. Data Length Data Length FONT Light 2 PAUSE Light FONT Light 1 bits bits Table 1-32. ETX/ACK ETX/ACK FONT Light 1 FONT Light 2 PAUSE Light... -
Page 28: Figure 1-9. C130 Main Board Component Layout
Ptvduct Daactiption LX-3(IO Sarvice Manual 1.5 MAIN COMPONENTS main components of the LX-300 is designed for easy removal and repair. The main components are; C130 MAIN BOARD: Control board C130 PSB/PSE (120V / 220-240V) BOARD: Power supply board M-3G1O: Printer mechanism 9 Housing MAIN Board 1.5.1 C130... - Page 29 CHAPTER 2 Operating Principles Table of Contents 2.1 PRINTER MECHANISM OPERATION 2.1.1 Printing Mechanism......... 2-1 2.1.2 Carriage Movement Mechanism .
- Page 30 List of Figures Srintheadoperation principles ......z-l Figure 2-1. Figure 2-2. :arriage Movement Mechanism ......2-2 Friction Advance Mechanism.
-
Page 31: Printer Mechanism Operation
Operating Ptinciph3 LX-3(XI Service Manual 2.1 PRINTER MECHANISM OPERATION l%is section describes the M-3G1O printer mechanism and explains how it works. 2.1.1 Printing Mechanism The printer mechanism is composed of the printhead, ink ribbon, and ribbon mask. The printhead is a 9-pin head for impact dot printing. Each wire has own drive coil, which causes the wire to move in and out of the printhead to print each dot. -
Page 32: Carriage Movement Mechanism
LX-WI Service Mimual Operating Principles 2.1.2 Carriage Movement Mechanism The carriage of the carriage assembly, CR motor assembly, timing movement mechanism consists belt, driven pulley, HP sensor, etc. The CR motor assembly drives tie tifig belt. me carriage comected to the timing belt, which is moved by the CR motor assembly. Figure 2-2 assembly is shows the carriage movement mechanism. -
Page 33: Paper Handling Mechanism
LX-300 Sewica Manual Operating Principla 2.1.3 Paper Handling Mechanism the paper is fed to the printer, advanced to the specified position, and During normal operation, These paper handling operations are performed by various paper ejected from the printer. handling mechanisms, such as the tractors, rollers, and gears. This section describes the paper handling mechanism for this printer. - Page 34 LX-300 Service Manual Operating Principles Table 2-2. PF Motor Assembly Specifications Requirement Categov 4-phase, 48-pole, PM-type stepping motor Type 31.5 -38.5 VDC Drive Voltage 56 ohms f (per phase, at 25°C, 77°F) Coil Resistance 800,900,1000,1200,1300 pps Drive Pulse Frequency Constant-voltage 1-2 phase excitation...
- Page 35 Operating Ptincipla LX-300 Sarvica Manual Pull Tractor Method The pull tractor advances paper in basically the same way as the push tractor. When the push tractor is installed at the paper exit instead of paper entrance, the tractor functions as a pull tractor instead of a push tractor, pulling the paper out of the printer mechanism.
- Page 36 U400 Smdce Manual Operatjng Prjncjples Pull Tractor Method Push - The push-pull tractor method is a combination of the push method, using the standard tractor, and , ~’ “ the pull method, using an optional tractor. The operate simultaneously to push and two traders pull the paper through the printer mechanism.
-
Page 37: Ribbon Advance Mechanism
Operating Principb LX~lW Service Manual 2.1.4 Ribbon Advance Mechanism The ribbon is held between the ribbon advance roller (ribbon driven gear) and the ribbon pressure roller. When the carriage moves on the CR guide shaft from left to right and vice versa, the timing belt turns the belt driven pulley. -
Page 38: Ribbon Shift Mechanism
LX-300 Service Manual Operating Principles 2.1.5 Ribbon Shift Mechanism This printer can be equipped with a color upgrade kit to print in color. The printer performs color printing unidirectionally. The option is composed of the color ribbon shift mechanism. The Color ribbon feed mechanism is shared in common with black ribbon feed mechanism, and the shift mechanism shifts the ribbon cartridge up and down. -
Page 39: Platen Gapadjustment Mechanism
Operating Pdncipb LX-300 Service Manual Color Ribbon Cartridge Fulcrum LEVER,CS -—- HOLDER, CARTRIDGE,COLOR Pinion of MOTOR ASSY.,CS Color Shift Cam Color Shift Cam Follower Figure 2-9. Color Shift Mechanism 2.1.6 Platen Gap Adjustment Mechanism ‘The platen gap (the gap between the platen and the printhead) can be adjusted to allow the printer to use paper of different weights or thicknesses. -
Page 40: Power Supply Operation
LXXX) Service Mimual Operating Principles 2.2 POWER SUPPLY OPERATION ( ( “+ powered either of two power supply boards: the C130 F’SB (120V) board The printer can be assembly or the C130 PSE (230V) power supply. The function of these two boards is the same, except for a difference in primary circuitry. -
Page 41: Power Supply Circuit Operation
Operating Principk LX300 Sarvica Manual 2.2.2 Power Supply Circuit Operation Figure 2-11 shows a block diagram of the power supply circuitry. When AC power is supplied to the printer from an external power source, a filter circuit removes the noise. l%e AC voltage then undergoes full-wave rectification and is smoothed to produce the direct current supply voltage. -
Page 42: Control Circuit
LX-300 Service Manual Operating Principles CONTROL CIRCUIT ( : “ The control circuit consists of the C130 MAIN board assembly. This -on describes the major components and explains how the board works. Circuit Operation Overview 2.3.1 Control The printer’s system IC contains a CPU (pPD78C10A-type) that mm at 14.74 MHz, a gate array (E05A79-type) and a main RAM ( 8KB SRAM). -
Page 43: Power On Reset Circuit
Oparating Principk LX-300 Sarvice Manual 2.3.2 Power On Reset Circuit When the power supply is turned on, the VL goes up to +9 VDC immediately, but reset IC output (IC A2, Pin 6) is delayed for approximately 80- 1 ma before going up to +9 VDC. The system IC level signal ‘~om the res&... -
Page 44: Paper End Sensor Circuit
LX-300 Service Mhnual Operating Principles 2.3.4 Paper End Sensor Circuit .<.;~!$ This comector switch for sensing the paper end. me system IC receives a signal printer has a # , ;;: (HIGH or LOW) from the connector switch and recognizs a paper end. The comector switch is closed (LOW) when there is no paper on the platen and is open (HIGH) when paper is present. -
Page 45: Carriage Motordrivecircuit
LX-300 Sarvica Manual Operating Pdnoipk Carriage Motor Driver Circuit 2.3.6 Figure 2-17 shows the carriage motor driver arcuit. The carriage motor driver uses an open-loop, constant-current drive arrangement. The motor is driven with 2-2 phase excitation and 1-2 phase excitation. driver IC (Al) detects the amount of current in the carriage motor coils and The ~rriage motor regulates the current. -
Page 46: Paper Feed Motordrivecircuit
LX-3(M Service Manual Operating Principles 2.3.7 Paper Feed Motor Driver Circuit Figure 2-18 shows the paper feed motor driver circuit, an open-100P, constant-voltage drive with ‘: {“ 1-2 phase excitation. The ports (pins 137- on the system IC (ICI) are used to control the stepping motor. The pulse 140) signal IC1 controls four transistors and the stepping motor. -
Page 47: Interface Circuit
Opamting Principk LX-300 Sanka Manual 2.3.9 Interface Circuit Figure 2-20 shows the parallel interface circuit block diagram. Data from the host mmputer is latched within the system IC by a WOOSTROBE signal. The system IC outputs a BUSY signal automatically to stop the host computer from sending further data. The CPU block reads the data latched in the gate array block periodically without generating an interrupt. -
Page 48: Eeprom Control Circuit
LX#Xl Service Manual Operating Principles 2.3.10 EEPROM Control Circuit “-% EEPROM control arcuit block diagram. ‘The EEPROM (A5) contains such Figure 2-22 shows the information as the top-of-form position. The EEPROM is non-volatile memory, so information is not lost if the printer is powered off. Since the EEPROM is a serial I/O-type device, the CPU converts 8-bit data into serial data. -
Page 49: Color Ribbon Sensorcircuit
operating Ptincipk3 LX-300 Sarvica Manual 2.3.12 Color Ribbon Sensor Circuit The printer’s color ribbon arcuitry in shown in the figure below. The CPU receives signals (HIGH or LOW) from the mechanical switch. lle signal is HIGH when a color ribbon is installed and is LOW otherwise. - Page 50 CHAPTER 3 Disassembly and Assembly Table of Contents 3.1 OVERVIEW 3.1.1 Disassembly Precautions ........3-1 3.1.2 TOOk3 .
- Page 51 List of Figures Figure 3-1. Procedure for Disassembling the Printer..... Removing the Printhead....
-
Page 52: Overview
Disasaambly and Asaambly L.XWO Service Manual 3.1 OVERVIEW This section describes various points to note when disassembkg and assembling the printer. 3.1.1 Disassembly Precautions Follow the precautions below when disassembling the printer. Before disassemblin~ assemblin~ or adjusting the printer, disconnect the power supply AC power socket. -
Page 53: Service Checksafterrepair
LXXX) Service Jl&mual Disassembly and Assembly Checks After Repair 3.1.3 Service Before returning the printer after provides a record to service, use the checklist in Table 3-3, Whib make servicing and shipping more effiaent. Table 3-3. Inspection Checklist for Repaired Printer Is Check Required? Check Item to... -
Page 54: Specifications Forscrews
Disassembly and Assembly LX-300 Service Manual 3.1.4 Specifications for Screws following sections for small parts, such as screws and Table 3-4 lists the abbreviations used in the washers. Table 3-4. Screw Abbreviations Part Name Abbreviation Cross-recessed pan head B-tight screw... -
Page 55: Disassembly And Assembly
LX-300 Service Manual Disassembly and Assembly DISASSEMBLY AND ASSEMBLY This section descnibes the procedures for disassembling and assembling the main components of Simply tie reverse the printer. When the procedure for installing a component is of the procedure for removing the component, no description of the installation is given. Arty points of special concern follow the description of the procedure. - Page 56 Disassamb& and Assembly LX-3W Sanka Manual 3.2.1 Removing the Printhead Remove the COVER ASSY.,PRINTER, EDGE GUIDE ASSY., ribbon cartridge, TRACTOR ASSY., PLATEN KNOB, and optional color upgrade kit. Remove the CPB (M3 x 14) screw attaching the printhead. 3. Remove the printhead. 4.
-
Page 57: Removing The Roller Assy.,Eject
LX-300 Service Manual Disassembly and Assembly 3.2.2 Removing the HOUSING ASSY.,UPPER Remove the COVER ASSY.,pM~R, EDGE GUIDE AssY., ribbon c=tidge, TRACI’OR ASSY., PLATEN KNOB, and optional color upgrade kit. 2. Remove the 4 CPB (M4 x 14) screws attaching the HOUSING ASSY.,UPPER to the HOUSING,LOWER. -
Page 58: Removing The Board Assy.,Main And Psb/Pse
DisassembiyandAssembly LX-31M Service Manual 3.2.3 Removing the BOARD ASSY.,MAIN and PSB/PSE Remove the COVER ASSY.,PRINTER, EDGE GUIDE ASSY., ribbon cartridge, TIUU30R ASSY., PLATEN KNOB, and optional color upgrade kit. 2. Remove the HOUSING ASSY.,UPPER (see Section 3.2.2). 3. Discomect the 3 flexible flat cables (FFCS) and 6 connectors from the BOARD ASSY.,MAIN and PSB/PSE. -
Page 59: Removing The Board Assy.,Main
LX&Xl Service M%ual Disassembly and Assembly Removing the BOARD ASSY.,MAIN 3.2.3.1 fl::y Remove the FFC of the BOARD ASSY.,PSB/I’SE from comector CN2 of the BOARD %. . . ASSY.,MAIN. 2. Remove the CBC (M3 x8) screw and the3 CB USCAC (M3 x 8) 3. -
Page 60: Removing The Printer Mechanism
DisassembiyandAssamblY LX- Service Manual 3.2.4 Removing the Printer Mechanism Remove the COVER ASSY.,PRINTER, EDGE GUIDE ASSY., ribbon cartridge, TRACT’OR AS5Y., PLATEN KNOB, and optioml color upgrade kit. 2. Remove the HOUSING ASSY.,UPPER (see Section 3.2.2). 3. Remove the connectors and FFCS from the BOARD ASSY.,MAIN. 4. -
Page 61: Removing The Motor Assy.,Pf
LX-3.X) Service Manual Disassembly and Assembly 3.2.4.1 Removing the MOTOR ASSY.,PF Remove the printer mechanism (see Section 3.2.4). Remove the GROUNDING SPRING,PLATEN that secures the platen shaft. (see Section 3.2.43) 3. Remove the CBB (M3 x attaching the MOTOR ASSY.,PF to the FRAME,LIGHT. 8) screw Release the clip holding the MOTOR ASSY.,PF from the FRAME,RIGHT. -
Page 62: Removing The Motor Assy.,Cr
Disasaambly and Assambly LX-31M Service Manual 3.2.4.2 Removing the MOTOR ASSY.,CR Remove the Printer Mechanism (see Section 3.2.4). 2. Remove the BELT TENSION SPRING from the hook on the MOTOR ASSY.,CR and the hook on the FRAME, BASE. 3. Remove the TIMING BELT from the PULLEY DRIVE. 4. -
Page 63: Removing The Platen
LX-WI Service Manual Disassembly and Assembly Removing the PUiTEN 3.2.4.3 .fl \ Remove the printer mechanism (see Section 3.2.4). Remove the GROUNDING SPRING,PLATEN that secures the platen shaft. 3. Remove the GEAR,25 FRAME,RIGHT. from the 4. Disengage the teeth of the 2 BUSHING 11s and rotate them. 5. -
Page 64: Removing The Detector,Pe
Disassembly and Assambly LX-300 Service Manual Removing the DETECTOR,PE 3.2.4.4 Remove the printer mechanism (see Section 3.2.4). 2. Remove the PLATEN (see Section 3.2.4.3). 3. Release the SHAFT FRICTION of the PAPER GUIDE,UPPER from the clips on the FRAME,RIGHT and LEFT. -
Page 65: Removing The Detector,Hp
LX-3(IQ Service Manual Disassembly and Assembly Removing the DETECTOR,HP 3.2.4.5 Remove the printer mechanism (see Section 3.2.4). 2. Release the 2 clips attaching the DETECTOR,HI’ and remove it. The clips can be accessed through holes in the FRAME,BASE; to release the clips, push each with a pair of tweezers. Figure 3-14. -
Page 66: Removing The Carriage Assy
Disassembly and Assembly LX300 Service Manual Removing the CARRIAGE ASSY. 3.2.4.7 Remove the printer mechanism (see Section 3.2.4). Remove the BELT TENSION SPRING from the hook MOTOR ASSY.,CR (see Section on the 3.2.4.2), and remove the TIMING BELT of the CARRIAGE ASSY. from the PULLEY DRIVE. 3. -
Page 67: Removing The Ribbon Drive Gear Assembly
Disassembly and Assembly LX-3tM Service Mhnual 3.2.4.8 Removing the Ribbon Drive Gear Assembly Remove the printer mechanism (see Section 3.2.4). A!.,+, 2. Release the3 hooks attaching the COVER,RD to the FRAME,LEFI’. 3. Remove the COVER,RD. Remove the BELT TENSION SPRING between the hook on tie MOTOR ASSY.,CR and the hook on the FRAME,BASE (see Section 3.2.4.2). -
Page 68: Removing The Board Assy.,Interface
DiaassemblyandAssembly LX-300 Samica Manual 3.2.5 Removing the BOARD ASSY.,INTERFACE Remove the printer mechanism (see Section 3.2.4). 2. Remove the GROUNDING PLATE connecting the SHIELD PLATE,I NIERFACE and the SHIELD PLATE. 3. Remove the CBB (M3 and the CBT(M3 x 10) screw attaching the COVER,BO’IIOM x8) screw to the HOUSING,LOWER. -
Page 69: Removing The Roller Assy.,Driven
Service LXi300 M5nual Disassembly and Assembly Removing the ROLLER ASSY.,DRIVEN 3.2.6 Remove the COVER,PRINTER. 2. Remove the CF (M2.6 x 8) screw attaching the ROLLER ASSY.,DRTVEN. 3. Remove the ROLLER ASSY.,DRIVEN. CF(M2.6X8) ROLLER, DRIVEN I SPRING,73 7° & “ ’ i ,’... -
Page 70: Disassembling And Assembling The Optional Color Upgrade Kit
Dkassembly and Assembly LX-WI Service Manual and Assembling the Optional Color Upgrade Kit 3.2.7 Disassembling 3.2.7.1 Removing the MOTOR ASSY.,CS 1. Remove the CBB (M3 x 8) screw attaching the MO~R ASSY.,CS to the COVER,CS. 2. Release the 2 clips attached to the COVER,CS. 3. - Page 71 CHAPTER 4 Adjustments Table of Contents 4.1 ADJUSTING THE PRINTER MECHANISM 4.1.1 Platen Gap Adjustment ........4-1 4.2 DEFAULTS, MACHINE INFORMATION S~lNGS, AND BIDIRECTIONAL ADJUSTMENT 4.2.1 Default Settings.
-
Page 72: Adjusting The Printer Mechanism
Adjuatmenta LX-3U0 Service Manual 4.1 ADJUSTING THE PRINTER MECHANISM This section describes the adjustments you may need to make to the printer mechanism. 4.1.1 Platen Gap Adjustment If you have rotated or reassembled the CR guide shaft assembly or the parallelism adjustment bushina or if printing is abnormal, you must adjust the platen and the printhead. -
Page 73: Bidirectional Adjustment
LX-300 Service Mimuai Adjustments 4.2 DEFAULTS, MACHINE INFORMATION SEITINGS, AND BIDIRECTIONAL ADJUSTMENT 4.2.1 Defaults and Machine Information Settings procedure below when the main board assembly is replaced. Perform the Comect the printer to a PC. Turn the printer on. Load paper into the printer by pressing the LF/FF button. You can use either cutsheet or continuous paper. - Page 74 Adjustments LX41M Sarvka Manual 11. Press Y, then Enter. The default setting table appears on the display: SW& Valid Add Function English Message language Single Tractor control PC-437 Character table 11 inch Page length 1 inch skip over perforation Intetface selection 9600 bps Bit rate NONE...
- Page 75 LX&M Service Mhnua/ Adjustments 4.2.2 Bidirectional Adjustment printer is This prmedure n=ssary when the LX-3W reassembled section describes the adjustment or when parts are reinstalled or replaced. T’his pr~ure is also n=es=q if the main board assembly has been replaced. Notes: .
- Page 76 Adjustments LX&M Service Manual Type 1 to select Bi-D Adjustment then press Enter. After 10 line feeds, the printer prints 5 rows of H characters in both draft and LQ modes. When the printer begins bidirectional printin& the message “Bi-D TEST PRINTING” appears on the display. After printing is complete, the following message appears on the display: Bi-D INPUT Draft: -...
- Page 77 Chapter 5 Troubleshooting Table of Contents 5.1 OVERVIEW 5.2 UNIT LEVEL TROUBLESHOOTING 5-11 5.3 REPAIRING THE MAIN BOARD ASSEMBLY 5-13 5.4 REPAIRING THE PRINTER MECHANISM List of Figures Figure 5-1. Troubleshooting Procedure....... 5-1 Figure 5-2.
- Page 78 Tmubkahooting LX+Otl Manual Service 5.1 OVERVIEW Follow the procedure in the flowchart below to identify printer problems. ( The Fault is corrected ) Figure 5-1. Troubleshooting Note: If the power supply board assembly is fautty, it must be replaced as a whole unit. No field repair should be performed on it, except for the replacement of fuse F1.
- Page 79 LX-300 Service Manual Troubleshooting Printhead l!’ - . . . H ..,,, Pin No. Head 6 8 4 9 2 C351 C : COMMON View A Figure 5-2. Printhead Connector Pin Alignment Table 5-2. Printhead Driver Test Points Test Method...
- Page 80 Ttvubleshooting LX-300 Service Manual Table 5-4. Motor Coil Resistance Test Points Test Method Common Motor Test Pin (Set Meter to Ohms. Disconnect Meter Reading >onnector Board Motor from Main and Check it Number Number Number with Printer Power Off.) Place one lead on pin 3 or 4 and the...
-
Page 81: Unit Level Troubleshooting
LX-300 Swvfce Manual Troubleshooting UNIT LEVEL TROUBLESHOOTING , -~--:, may be able to identify the defective unit just from the symptom displayed. The table below E ;,’ provides the symptoms for a number of failures, so that ~ easily identify the problem. Once the m-oblem has been identified, refer to the flowchart listed in the right-hand cAmn of the table bel;w to determine the cause of the problem. - Page 82 Tfvubleshooting LX-300 Service Manual Printer fails to operate when the power is on. Use correct AC input voltage. No fluctuation from AC 120V version is 103.5 -132V voltage range is permitted. 230V version is 198- 284V TYES PSWPSE blow? Measure the VP(+35VDC) at pin 1 and 2 of CN2 on BOARD ASSY.,PSWPSE.
- Page 83 LX-WI Service Mhnual Troubleshooting Abnormal carriage operation. connectors CN2 - CN8 Reinsert connectors connecting the BOARD ASSY, MAIN ~ correclly. and the Prinler Mechanism? See the troubleshooting item for the PRINTER MECHANISM .( Section5.4) ault corrected? Rev.A...
- Page 84 Tmubleshootina LX-3(M Service Manual self-test, normal. 3. Printing is faulty during but carriage operation is Uss correctAC input voltage. AC input voltage normal? No fluotuatkn from AC voftage 120V version is 103.5 -132V 230V version is 198- 264V range is permitted. Hold down the LF/FF button and turn on the printer to start printing the self-test.
- Page 85 LXMO Service Manual Troubleshooting Abnormal paper feed. START Load the pape correctly. ‘T Reinsert the connector CN6 correctly. fault corrected? $ ..See the troubleshooting Replace the BOARD the PRINTER items for ASSY.,MAIN. MEcHANlsM.(sect.5.4) Replace the BOARD the troubleshooting ASSY.,MAIN.
- Page 86 Tmublaatmoting LX-300 Service Manual 5. Abnormal control panel operation. Replace the switches on the BOARD ASSY.,MAIN. Replace the BOARD fault corrected? ASSY.,MAIN. Refer to the other troubleshooting items. 9’ Rev:A...
- Page 87 LX-300 Service Manual Troubleshooting Data sent by the host compute?’ is printed incorrectly. START Print the self-test. Refer to the other troubleshooting items. Check the default setting..‘..- Replace the interface cable ‘ from the host conmputer.
-
Page 88: Repairing The Main Board Assembly
Thwbleahooting Service LX-3(XI Manual 5.3 REPAIRING THE MAIN BOARD ASSEMBLY a defective main board assembly. It describes This section provides instructions for repairing causes, and t%eckp-oints. Checkpoints refer to pro~r waveforms, various symptoms, likely resistance values, and other values to be checked when evaluating the operation of any potentially faulty component. - Page 89 LX-300 Service Mimual Troubleshooting Table 5-8. Repair of Problem in the main board assembly (Continued) 5-12 Rev.A...
-
Page 90: Repairing The Printer Mechanism
Tivu6/eahoot/ng LX-300 Service Manual 5.4 REPAIRING THE PRINTER MECHANISM For detailed procedures for replacing or adjusting parts, refer to Chapter 3, Disassembly and Assembly, and Chapter 4, Adjustments. If a problem or symptom recurs following an attempted repair, refer to Table 5-10 to try find other potential causes. - Page 91 LX-300 Service Manual Troubleshooting Table 5-9. Repairing the Printer Mechanism (Continued) Solution Cause Check Point Symptom Problem Measure the printhead coil Replace the resistance. It should be printhead (and approximately 33.3 ohms. If drivers, if printhead The printhead A particular shorted, ak) necessary).
- Page 92 Troubleshooting LX-300 Semice Manual Table 5-9. Repairing the Printer Mechanism (Continued) Cheek Point Solution Cause Symptom Problem The ribbon feeds properly only when the carriage Move the carriage manually; Replace the moves ‘ ‘ The planetary ~h=k whether the Pknetay The ribbon dlrectlon (I.e., ribbon feed...
- Page 93 CHAPTER 6 Maintenance Table of Contents 6.1 PREVENTIVE MAINTENANCE 6.2 APPLYING LUBRICATION List of Figures Figure 6-1. LX-300 Lubrication Points....... . 6-2 List of Tables Table 6-1.
- Page 94 6.2 APPLYING LUBRICATION EPSON recommends that the printer be lubricated at the points illustrated in Figure 61. Table 6-2 lists each point along with its recommen ded lubricant. The recommended lubricants are EPSON G-20, G26 and O-2, all of which have been tested extensively and found to comply with the needs of this printer.
- Page 95 LX-300 Service Manual Maintenance k.-.. f ’ : Figure 6-1. LX-300 Lubrication Points Rev.A...
- Page 96 Appendix Table of Contents A.1 CONNECTOR SUMMARY A.2 CIRCUIT DIAGRAM A.3 CIRCUIT BOARD COMPONENT LAYOUT A-10 A.4 EXPLODED DIAGRAM A-14 A.5 CASE OUTLINE DRAWING List of Figures Figure A-1. Cable Connections ........A-1 Figure A-2.
- Page 97 LX3W Service Mhnual Appendix A.1 CONNECTOR SUMMARY Table A-1 sumrnari zes the Figure A-1 illustrates how the primary components are comected. functions and sizes of the connectors. I printer Mechanism MOTOR ASSY.,PF Release Lever Position Sensor BOARD ASSY., PSB I PSE El’...
- Page 98 Appendix LX-300 Service Manual A-1. Connector Summary Table ,. .,, Pins Function Connector Board — Parallel, serial interface CR motor assembly PF motor assembly PSWPSE board assembly Printhead PE sensor Main HP sensor Board Release lever position sensor Assembly CS motor assembly (optional)
- Page 99 LX-31M Service Manual Appandix Table A-5. Connector Pin Assignments - CN5 Function Signal Name Head data 7 HD 7 HD 1 Head data 1 Head data 5 HD 5 Head data 3 HD 3 HDCOM Common (VP) HDCOM Common (VP) HDCOM Common (VP) HD 2...
- Page 100 LX41M Service Manual Appendix m l - — Figure A-3. C130 PSB Board Assembly Circuit Diagram Rev.A...
- Page 101 Appendix LX-3(M Sarvice Manual \ > \ m=== M=F? u-la! Figure A-4. C130 PSE Board Assembly Circuit Diagram Rev.A...
- Page 102 IX-3tM Service Mhnuai Appendix A.3 CIRCUIT BOARD COMPONENT LAYOUT ‘n’ “ ‘:3 RL= — Figure A-5. C130 MAIN Board Assembly Component Layout Figure A-6. C130 PSB/PSE Board Assembly Component Layout Rev.A...
- Page 103 Appandix LX-3(M Samica Manual A.4. EXPLODED DIAGRAM %--0 %--”—-”—l ..Figure A-7. LMOO Exploded Diagram (1) A-10 Rev.A...
- Page 104 LX- Service Manual Appendix Rev.A...
- Page 105 Appendix LX-WW Service Manual Table A-10. Part No. Reference Table Description Ref. No. Description ~ef.No. DETECTOR, LEAF,B1 HOUSING ASSY.,LOWER HARNESS,TR INSULATOR LEVER, DISENGAGE INSULATOR COMPRESSION SPRING,200 SHIELD PLATE TRACTOR REDUCTION GEAR COVER ASSY.,PRINTER PAPER FEED REDUCTION GEAR ROLLER, DRIVEN HOLDER, ROLLER, DRIVEN C.B.B.
- Page 106 LX-3W Service Manual Appendix Table A-10. Part No. Reference Table (Continued) Description Description ?ef.No. Ref. No. P-ROM TCNOO LEVER, G, ADJUST TRACTOR,LEIT BUSHING, PARALLEL, ADJUST TRACTOR, RIGHT SHAIT,FRICTION SHAH,TR GEAR,34 SHAIT,GUIDE,TR SPURGEAR,25 PAPER SUPPORT C.P.B. SCREW (M3 SPURGEAR,17 COMPRESSION SPRING,800 RETAINING RING TYPE-E(5) COMPRESSION SPRING,500 RETAINING RING TYPE-E(6)
- Page 107 Appendix Sewice LX-WI Manual A.5 CASE OUTLINE DRAWING — — — — — (’ 132rnrn l&J Figure A-9. LX-300 Case Outline Drawing A-1 4 Rev.A...