
Related Manuals for Cerwin-Vega XD3


Summary of Contents for Cerwin-Vega XD3
- Page 1 Instruction Manual (English) – Page 1 Manuel d'instruction (français) – Page 14 Manual de instrucciones (español) – página 27 Gebrauchsanleitung (Deutsch) – Seite 40...
-
Page 2: Important Safety Instructions
NOTE: Cerwin-Vega!, LLC cannot be held responsible for damage, and, or including data loss caused by improper use of the unit and or the applications provided for use with the unit. - Page 3 CAUTION TO PREVENT ELECTRIC SHOCK, MATCH WIDE BLADE OF PLUG TO WIDE SLOT FULLY INSERT. The unit and power supply should only be connected to a power supply outlet only of the voltage and frequency marked on its casing. Protect the power cable from being walked on or pinched particularly at plugs, convenience receptacles, and the point where they exit from the apparatus.
- Page 4 OUTDOOR ANTENNA GROUNDING If an outside antenna is connected to your tuner or tuner-preamplifier, be sure the antenna system is grounded so as to provide some protection against voltage surges and built-up static charges. Article 810 of the National Electrical Code, ANSI/NFPA No. 70-1984, provides information with respect to proper grounding of the mast and supporting structure, grounding of the lead-in wire to an antenna discharge unit, size of grounding conductors, location of antenna discharge unit, connection to grounding electrodes and requirements for the grounding electrode.
-
Page 5: Package Contents
Signal purity must be maintained by using low noise amplifiers that don’t disappoint when the volume is set to high. And, if it has the Cerwin-Vega! name, the bass has to be in-your-face. -
Page 6: Product Features
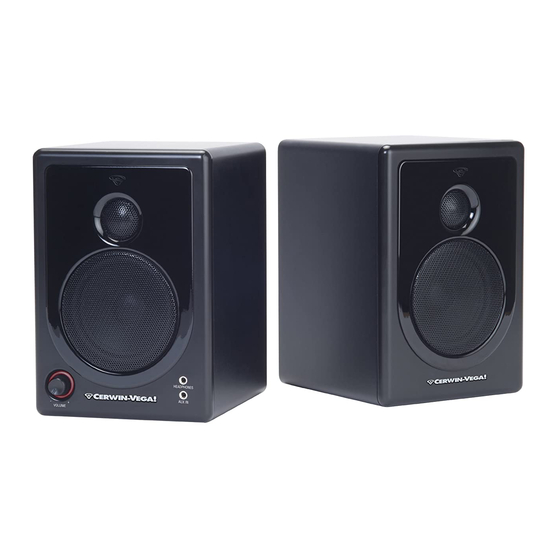
Product Features ① ¾”Tweeter Both left and right speakers features a precise 3/4" silk dome tweeter with protective magnetic shielding. The tweeter delivers high frequency sound and is further naturalized with internal damping technology to minimize unwanted resonance. ② 3” Woofer with Vega -Bass Below the tweeter is a durable 3”... - Page 7 ③ Illuminated Volume Knob The volume control knob controls both left and right speaker volume at the same time. Turning the volume control knob in a clock-wise direction will increase the speaker volume. Turning the volume control know in a counter- clock-wise direction will decrease the speaker volume.
-
Page 8: Power Switch
⑦ Speaker Out Connection & Speaker Input Connection For complete stereo sound, the right speaker must be connected to the left speaker. Using the supplied 2-conductor speaker cable, connect the ‘output to right speaker’ to the ‘input front left speaker’. Be sure to note the color polarity to maintain the best audio performance. - Page 9 QUICK START Placement For the best listening experience, place the XD3 speaker system in the optimal position. The left and right speakers should be placed at a vertical height leveled with the main user’s head. The left and right speakers should be placed so that it is in an equilateral triangle with the main user.
- Page 10 Connections STEP A: Situate the left and right speakers in the desired locations. Connect the 2-conductor speaker wire in between the left and right speakers. STEP B: Connect the output from the computer or portable media player to the input of the left speaker. STEP C: Set the volume knob, located on the front of the left speaker, to the most counter-clockwise position.
-
Page 11: Block Diagram
If you do not have access to the Internet or a computer, please contact via telephone at 954-949-9600 Option #2 and request a product registration/warranty form to be mailed to you for completion or mail us at: Cerwin-Vega 772 S. Military Trail Deerfield Beach, FL 33442... -
Page 12: Troubleshooting Tips
Please note that product and warranty registration gives Cerwin-Vega! permission to send you information about new and existing products and promotions. If you do not wish to be contacted regarding new products and promotions, please opt out during the product/warranty registration process. -
Page 13: Bad Sound
Check that the source (computer or portable media player) volume level is set to a level that can properly send a signal to the monitors. Also verify that the volume knob on the XD3 speaker is turned to the full clockwise position. If the right speaker does not produce audio, than check both sides of the 2- conductor wire that is connected to the left and right speaker. - Page 14 XD3 USER GUIDE REV B © 2011 CERWIN-VEGA, LLC. This document is copyright protected. No part of this manual may be copied or reproduced in any form without prior written consent from CERWIN-VEGA. CERWIN-VEGA shall not be liable for operational, technical, or editorial...
-
Page 15: Mesures De Securite Importantes
électroniques dans votre région. NOTE : Cerwin-Vega!, LLC ne peut être tenu responsable de dommages et, ou y compris la perte de données causée par une mauvaise utilisation de l'unité et ou les applications fournies pour une utilisation avec l'unité. - Page 16 5. Le câble d'alimentation de l'unité devrait être débranché de la prise murale lorsque c'est d'être inutilisée pendant une longue période de temps. 6. Utilisez uniquement des pièces jointes/accessoires spécifiés par le fabricant. N'utilisez pas ce produit près d'une source d’eau, telle qu’une baignoire, un lavabo, un évier ou un bac à laver, dans un sous-sol humide ou près d'une piscine.
- Page 17 b. Raccordez le fil conducteur de l'antenne et les fils de terre à la maison au moyen d'isolateurs muraux espacés de 122 à 183 cm (4 à 6 pieds). c.Installez l’unité de décharge de l’antenne aussi près que possible du point d’entrée du fil antenne dans la maison.
-
Page 18: Contenu De L'emballage
- quand vous voulez recréer ces ambiances au salon à la maison - ceux qui savent se tournent toujours vers Cerwin-Vega ! Lors de la création d'une enceinte pour salon ou applications informatiques, l'objectif est d'optimiser la reproduction sonore tout en réduisant le... - Page 19 Caractéristiques du produit ① Tweeter ¾" Les deux enceintes gauche et droite sont dotées d'un tweeter 3/4" à dôme en soie précis avec un blindage magnétique de protection. Le tweeter reproduit un son à haute fréquence et il s'adapte encore mieux avec la technologie d'amortissement interne afin de réduire toute résonance indésirable.
- Page 20 augmenter le volume des enceintes. Tournez le bouton volume dans le sens antihoraire pour baisser le volume des enceintes. Lorsque l'enceinte est allumée, un anneau rouge de lumière contourne le bouton. ④ Prise casque ⅛” Une prise casque stéréo est idéalement située sur la face avant de l'enceinte. Utilisez une prise stéréo ⅛"...
- Page 21 ⑧ Sélecteur Vega -Bass Le sélecteur Vega-Bass offre un moyen rapide pour adapter le système d'enceintes XD3 à vos préférences personnelles. Avec le sélecteur Vega-Bass réglé sur "On", l'enceinte XD3 augmente la réponse des graves (augmentation de gain des basses fréquences). Avec le sélecteur Vega-Bass réglé sur "Off", l'enceinte XD3 assure une réponse plus naturelle et régulière.
-
Page 22: Démarrage Rapide
Démarrage rapide Emplacement Pour obtenir la meilleure position d'écoute, placez le système d'enceintes XD3 dans un emplacement optimal. Les enceintes gauche et droite doivent être placées à hauteur de la tête de l'utilisateur principal. Les enceintes gauche et droite doivent former un triangle équilatéral avec l'utilisateur principal. Un triangle équilatéral signifie que les distances entre les enceintes gauche et droite et l'utilisateur principal sont égales. - Page 23 Connexions Étape A : Placez les enceintes gauche et droite aux endroits choisis. Connectez les enceintes gauche et droite avec le câble d'enceinte à 2 conducteurs. Étape B : Connectez la sortie de l'ordinateur ou lecteur multimédia portable à l'entrée de l'enceinte gauche. Étape C : Réglez le bouton volume, situé...
-
Page 24: Schéma De Principe
954-949-9600 Option n ° 2 et demander un enregistrement du produit / de garantie sous forme d'être envoyé à vous pour l'achèvement ou courriel à: Cerwin-Vega 772 S. Military Trail Deerfield Beach, FL 33442 ATTN: Product Registration/Warranty... - Page 25 S'il vous plaît noter que l'enregistrement du produit et la garantie donne Cerwin-Vega! la permission de vous envoyer des informations sur les produits existants et nouveaux et les promotions. Si vous ne souhaitez pas être contacté au sujet de nouveaux produits et promotions, s'il vous plaît retirer pendant le processus d'enregistrement du produit / garantie.
- Page 26 deux prises RCA situées à l'arrière ou à la prise "AUX IN" ⅛" située sur la face avant). Vérifiez que le niveau de volume de la source (ordinateur ou lecteur multimédia portable) est réglé à un niveau qui peut envoyer un signal vers les moniteurs.
- Page 27 P +32.2.645.05.00 • F +32.2.645.05.05 CERWIN-VEGA! EST UNE MARQUE DÉPOSÉE DE CERWIN-VEGA, LLC. GUIDE DE L'UTILISATEUR XD3 REV B © 2011 CERWIN-VEGA, LLC. Ce document est protégé par les lois sur les droits d'auteur. Aucune partie de ce manuel ne peut être copiée ou reproduite sous quelque forme que ce soit sans le consentement écrit préalable de CERWIN-VEGA.
-
Page 28: Instrucciones Importantes De Seguridad
Nota: Cerwin-Vega!, LLC no se hace responsable de los daños y, o incluso la pérdida de datos causada por uso indebido de la unidad y o las aplicaciones que se proporciona para su uso con la unidad. - Page 29 1. Proteger el cable de alimentación de ser caminó sobre o pinza especialmente en tapones, recipientes de conveniencia y el punto donde salen del aparato. 2. No en contra del objetivo de seguridad de la clavija polarizada o tipo de conexión a tierra. Un enchufe polarizado tiene dos módulos con uno más amplio que el otro.
- Page 30 a. Utilice hilo de cobre n.° 10 AWG (5.3mm ), hilo de aluminio n.° 8 AWG (8.4mm²), hilo de bronce o acero recubierto con cobre n.° 17 AWG (1.0mm²), o superiores, como hilos de puesta a tierra. b. Asegure los hilos de entrada y conexión a tierra en la casa con aisladores distanciadores separados entre 4y 6 pies (1.22 y 1.83 m).
- Page 31 La pureza de la señal debe conservarse mediante la utilización de amplificadores de bajo ruido que no decepcionen cuando el volumen es muy alto. ¡Y esto lo tiene Cerwin-Vega! El nombre, que todo bajo debe portar con orgullo.
-
Page 32: Características Del Producto
Características del producto ① Membrana de agudos de ¾” Los altavoces izquierdo y derecho presentan una precisa membrana de agudos de 3/4" de seda con escudo magnético protector. La membrana de agudos permite un sonido de alta frecuencia y además, está naturalizada con tecnología amortiguadora interna para reducir la resonancia indeseada. - Page 33 volumen del altavoz disminuirá. Cuando el altavoz está encendido, un anillo rojo se iluminará alrededor de la perilla. ④ Enchufe de auricular de ” ⅛ Un enchufe de ‘Head phone’ (auricular) está perfectamente colocado al frente del altavoz. Utilice una clavija estéreo de ⅛” desde el auricular e insértela en el enchufe para ‘Head phone’...
- Page 34 la ganancia de frecuencia baja). Con el selector e Vega-Bass puesto en ‘Off’ (apagado), el altavoz XD3 se adaptará a una respuesta natural más uniforme. ⑨ Botón de encendido El botón de encendido está ubicado en la parte trasera del altavoz izquierdo. Para utilizar el sistema de altavoces XD3, compruebe que el botón de encendido está...
- Page 35 GUÍA RÁPIDA Colocación Para la mejor sensación auditiva, coloque el sistema de altavoces XD3 en una posición óptima. Los altavoces izquierdo y derecho deberán colocarse nivelados a una altura vertical con respecto a la cabeza del usuario principal. Los altavoces izquierdo y derecho deberán colocarse de modo que formen un triángulo equilátero con el usuario principal.
- Page 36 Conexiones PASO A: Coloque los altavoces izquierdo y derecho en las posiciones deseadas. Conecte el cable del altavoz bidireccional entre los altavoces izquierdo y derecho. PASO B: Conecte la salida desde el ordenador o el reproductor de medios portátiles en la entrada del altavoz izquierdo. PASO C: Ajuste la perilla de volumen, ubicada en el frente del altavoz izquierdo, en la posición más alta en sentido contrario a las agujas del reloj.
-
Page 37: Diagrama De Bloque
954-949-9600 opción # 2 y solicitar un registro del producto / garantía de forma que se enviará para que lo complete o correo electrónico a: Cerwin-Vega 772 S. Military Trail Deerfield Beach, FL 33442 ATTN: Product Registration/Warranty... -
Page 38: No Hay Sonido
Tenga en cuenta que el registro del producto y la garantía da Cerwin-Vega! permiso para enviarle información sobre productos nuevos y existentes y las promociones. Si usted no desea ser contactado en relación con nuevos productos y promociones, por favor, optar por no durante el proceso de registro del producto / warranty. - Page 39 adecuadamente una señal a los monitores. Compruebe también que la perilla de volumen en el altavoz XD3 está completamente desplazada en el sentido de las agujas del reloj. Si el altavoz derecho no genera audio, revise que ambos extremos del cable bidireccional estén conectados con los altavoces izquierdo y derecho.
- Page 40 P +32.2.645.05.00 • F +32.2.645.05.05 CERWIN-VEGA! ES UNA MARCA REGISTRADA DE CERWIN-VEGA, LLC. MANUAL DE USUARIO XD3 REV B © 2011 CERWIN-VEGA, LLC. Este documento está protegido por los derechos de autor. Ninguna parte de este manual podrá ser copiado reproducida en forma alguna sin previo consentimiento por escrito de CERWIN-VEGA.
-
Page 41: Wichtige Sicherheitshinweise
WICHTIGE SICHERHEITSHINWEISE VORSICHT: DAS BLITZZEICHEN MIT DEM PFEILSYMBOL IM GLEICHSCHENKLIGEN DREIECK WARNT BENUTZER VOR NICHT ISOLIERTEN GEFÄHRLICHEN STROMSPANNUNGEN INNERHALB DES GERÄTES, DIE EVENTUELL STROMSCHLÄGE BEI PERSONEN VERURSACHEN KÖNNTEN. WARNUNG: DAS AUSRUFEZEICHEN IM GLEICHSCHENKLIGEN DREIECK WEIST BENUTZER AUF WICHTIGE BETRIEBS- UND WARTUNGSANWEISUNGEN (REPARATUREN) BEIM PRODUKT HIN. HINWEIS: DAS HANDSYMBOL IM GLEICHSCHENKLIGEN DREIECK WEIST BENUTZER AUF BESONDERE INFORMATIONEN UND ANLEITUNGEN BEZÜGLICH DES GERÄTEBETRIEBES HIN UND SOLLTE VOR DER ERSTEN INBETRIEBNAHME DES GERÄTES VOLLSTÄNDIG DURCHGELESEN WERDEN. - Page 42 VORSICHT: ZUR VERMEIDUNG EINES STROMSCHLAGES DEN PASSENDEN STECKER GANZ IN DIE STECKDOSE EINSTECKEN. Das Gerät und Netzteil sollten nur an eine Steckdose mit der auf dem Gerätegehäuse angegebenen Stromspannung und Amplitude eingesteckt werden. Das Stromkabel vor Knicken und Darauftreten - besonders an Steckern, Steckleisten und am Gerät selbst - schützen.
- Page 43 BEISPIEL FÜR EINE ANTENNENERDUNG GEMÄSS NEC ANLEITUNG IN ARTIKEL 810 - FÜR RADIO UND FERNSEHGERÄTE: HINWEIS FÜR CATV SYSTEM EINBAU: Diese Information weist die CATV Systeminstallateure darauf hin, dass der Artikel 820 - 40 des NEC die Richtlinien für eine korrekte Erdung und insbesondere wie das Erdungskabel im Erdreich an das Erdungssystem des Gebäudes möglichst nahe am Kabeleingang angeschlossen wird, vorgibt.
- Page 44 Mit dem Lautsprecheranlagen-Knowhow von über 50 Jahren für Konzerte, Filme, PA und Diskotheken - und wenn Sie dieses Gefühl zu Hause auf ihrem Schreibtisch erleben wollen - dann liegen Sie bei Cerwin-Vega genau richtig! Bei dem Bau eines Lautsprechers für Desktop- und Computeranwendungen liegt das Ziel bei verbesserter Klangausgabe in einem vergleichsweise kleinem Gehäuse.
- Page 45 Produktfunktionen ① 19mm (¾”)Tweeter In den Lautsprechern ist ein präzise klingender 19mm (3/4") Hochton aus Seide mit Abschirmungsmagneten eingebaut. Der Hochton besitzt einen Hochfrequenztonbereich und ist mit einem Schalldämpfer ausgestattet, der unerwünschte Resonanzen verringert und so einen natürlichen Klang ermöglicht. ②...
- Page 46 ④ 3,5mm (1/8”) Kopfhörerbuchse Eine Stereo "Kopfhörerbuchse" ist bequem auf der Vorderseite des Lautsprechers erreichbar. Steckern Sieeinen 3,5mm (1/8") Stereoklinkenstecker des Kopfhörers in die Kopfhörerbuchse. Wenn ein Kopfhörer in die Buchse eingesteckt wird, ist der Ton der Lautsprechern automatisch stummgeschaltet. ⑤...
- Page 47 ⑨ Netzschalter Der Netzschalter befindet sich auf der Rückseite des linken Lautsprechers. Damit das XD3 Lautsprechersystem verwendet werden kann, den Netzschalter auf "ON" stellen. Wenn das XD3 Lautsprechersystem ausgeschaltet werden soll, den Netzschalter auf "OFF" stellen. ⑩ AC Netzkabelbuchse Die "AC INPUT" Buchse sollte zur Verwendung des XD3 Lautsprechersystems mit einem Stromkabel an eine Steckdose angeschlossen sein.
- Page 48 SCHNELLSTARTANLEITUNG Aufstellen Richten Sie das XD3 Lautsprechersystem möglichst optimal aus, um die beste Hörerfahrung zu machen. Der rechte und linke Lautsprecher sollten in Kopfhöhe des Zuhörers in senkrechter Position aufgestellt werden. Der linke und rechte Lautsprecher sollten dreieckförmig zum Zuhörer hin aufgestellt werden.
- Page 49 Anschlüsse SCHRITT A: Den linken und rechten Lautsprecher am gewünschten Ort aufstellen. Das 2-Wege Lautsprecherkabel zwischen dem rechten und linken Lautsprecher verlegen und anschließen. SCHRITT B: Ausgangsbuchse am Computer oder am tragbaren Medienplayer an die Eingangsbuchse des linken Lautsprechers anschließen. SCHRITT C: Den Lautstärkeregler auf der Vorderseite des linken Lautsprechers einstellen und entgegen dem Uhrzeigersinn bis zum Anschlag drehen.
-
Page 50: Technische Daten
Wenn Sie keinen Zugang zum Internet oder einem Computer, wenden Sie sich bitte telefonisch unter 954-949-9600 Option # 2 und fordern Sie eine Gewährleistung / Garantie Formular aus, um Sie für die Fertigstellung oder mail uns an per Post: Cerwin-Vega 772 S. Military Trail Deerfield Beach, FL 33442 ATTN: Product Registration/Warranty... -
Page 51: Kein Strom
Bitte beachten Sie, dass Produkt-und Garantie-Registrierung Cerwin-Vega gibt! Erlaubnis zur Zusendung von Informationen über neue und bestehende Produkte und Promotions. Wenn Sie nicht möchten, dass in Bezug auf neue Produkte und Aktionen kontaktiert werden, bitte Opt-out bei der Produktentwicklung / warranty Registrierungsprozess. Sie werden weiterhin wichtige Produkt-Updates zu Ihrer gekauften Cerwin-Vega zu erhalten! Produkte. - Page 52 Der Lautstärkeregler auf der XD3 Lautsprecherbox sollte ebenfalls voll im Uhrzeigersinn bis zum Anschlag aufgedreht sein. Wenn der rechte Lautsprecher keine Tonwiedergabe hat, beide Enden des 2- Wege Lautsprecherkabels überprüfen, das am linken und rechten Lautsprecher angeschlossen ist. Die Enden des 2-Wege Kabels sollten blank liegen (ohne Isolation) und fest in die Anschlussklemmen eingesteckt sein.
- Page 53 XD3 BENUTZERHANDBUCH REV. B © 2011 CERWIN-VEGA, LLC. Dieses Dokument ist urheberrechtlich geschützt. Kein Teil dieses Handbuches darf ohne vorheriges schriftliches Einverständnis von CERWIN-VEGA kopiert oder in anderer Form vervielfältigt werden. CERWIN-VEGA haftet nicht für betriebsbedingte, technische oder redaktionelle Fehler/Auslassungen in diesem Dokument.