Yamaha Disklavier Mark III series Operation Manual
Playback models
Hide thumbs
Also See for Disklavier Mark III series:
- Operation manual (58 pages) ,
- Advanced operation manual (39 pages) ,
- Brochure & specs (20 pages)
Table of Contents
Advertisement
Advertisement
Table of Contents

Related Manuals for Yamaha Disklavier Mark III series


Summary of Contents for Yamaha Disklavier Mark III series
- Page 2 If these corrective measures do not produce satisfactory results, please contact the local retailer authorized to distribute this type of product. If you can not locate the appropriate retailer, please contact Yamaha Corporation of America, Electronic Service Division, 6600 Orangethorpe Ave, Buena Park, CA 90620 The above statements apply ONLY to those products distributed by Yamaha Corporation of America or its subsidiaries.
-
Page 3: Special Message Section
DO NOT modify this unit or commission others to do so unless specifically authorized by Yamaha. Product performance and/or safety standards may be diminished. Claims filed under the expressed warranty may be denied if the unit is/has been modified. -
Page 4: Important Safety Instructions
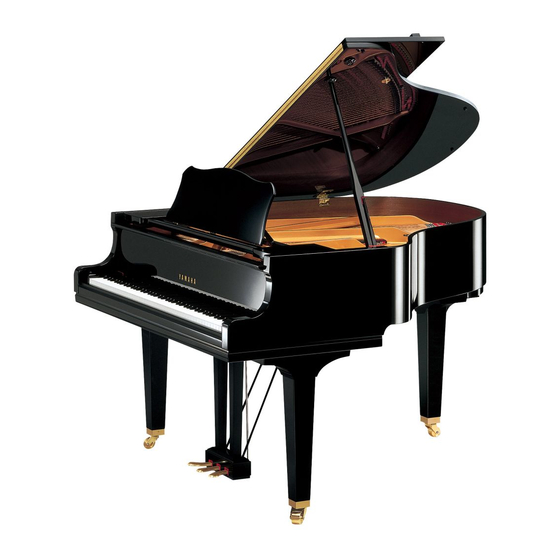
2. Main Power Supply Verification: Yamaha products are manufactured specifically for the supply voltage in the 10. The power supply cord (plug) should be disconnected area where they are to be sold. - Page 5 Mounting the Control Unit to the Grand Piano Installation du boîtier de commande sur un piano à queue Montieren des Steuergerätes an den Flügel (1) Retirer les quatre vis sur les (1) Entfernen Sie die vier (1) Remove the four screws côtés du boîtier de Schrauben von den Seiten des from the sides of the Control...
- Page 6 (4) Schließen Sie das Steuerkabel (4) Raccorder le câble de (4) Insert the control cable into an den D-SUB-Anschluss auf commande au connecteur D- the D-SUB connector on the der Rückseite des SUB situé au dos du boîtier back of the Control Unit, Steuergerätes an, und ziehen de commande, puis serrer then securely tighten the two...
- Page 7 Mark III Series Playback Models Operation Manual...
- Page 8 Yamaha pianos the world’s finest. Before using your Disklavier piano, please read this manual thoroughly and retain it for future reference.
- Page 9 Important Read the following before operating the Disklavier. Warnings Cautions • Do not locate the Disklavier in a place subject • Turn off all audio devices when connecting to to excessive heat, low temperatures, or direct the Disklavier. Refer to the user’s guide for sunlight.
- Page 10 • Use a soft, dry cloth to clean the Disklavier. • Do not install the dry batteries with the “+” However, if you discover a stain, carefully use and “–” poles reversed. Misaligning the poles a soft damp cloth to remove it. of dry batteries can lead the dry batteries to be charged or shorted or it can cause them to heat up, leak electrolyte or burst which in turn may...
-
Page 11: Table Of Contents
Table of Contents Basic Operations Balancing the Ensemble Volume (TG Master Chapter 1 Setting Up Your Disklavier Balance) ............21 Items Supplied with the Disklavier ....1 Changing the Tempo ........22 Connecting the Control Unit ......1 Transposing a Song ......... 22 Connecting the Power Cable ...... -
Page 12: Advanced Operations
Chapter 11 Using the AUX Connectors Playing the Piano Parts on the Tone Generator ............39 AUX OUT ............42 Displaying Ensemble Voices ......40 AUX IN ............. 43 Selecting Tracks for the Piano Parts ....41 Advanced Operations Chapter 12 Storing and Managing Controlling the Disklavier in Real Time .. -
Page 13: Setting Up Your Disklavier
Chapter 1 Setting Up Your Disklavier This chapter provides information on the supplied items and how to set up your Disklavier. Items Supplied with Connecting the Control the Disklavier Unit Check that the following items are supplied with Make sure that the control cable extending from your Disklavier: the piano is firmly connected to the TO CONTROL CABLE FOR PIANO connector on... -
Page 14: Connecting The Power Cable
Connecting the Power Battery Replacement When the remote control fails to work from a Cable distance, replace the batteries. • Replacement batteries should be UM-3, AA, Connect the Disklavier’s power cable to an AC R6P, or LR6 type. wall outlet. •... -
Page 15: Basic Disklavier Terminology
MIDI An acronym for Musical Instrument Digital Yamaha XG is an extension of the GM (General Interface. MIDI allows electronic musical MIDI) format. With greater polyphony, more instruments to communicate with each other. voice, and effects, it improves song compatibility between MIDI devices. -
Page 16: Chapter 2 Names Of Parts And Their Functions
Chapter 2 Names of Parts and Their Functions This chapter describes the functions of the buttons and other parts of the Disklavier. Control Unit — Front Panel CONTROL UNIT DKC55 GENERAL INSTRUMENT PLAY/PAUSE VOLUME –10 –8 –6 –4 –2 STOP DRIVE SONG SELECT/REV •... -
Page 17: Control Unit - Rear Panel
[ENTER] button [METRONOME] button Used to select and execute functions. Used to access the metronome. [REPEAT] button Selector button Used to select one of the Repeat functions: ALL, Used to select the feature you want to adjust from RPT or RND. among Volume, Tempo, Tranpose, and Balance. -
Page 18: Amplifier, Speakers & Foot Controller
AUX OUT L/L+R, R speakers. Used to connect external audio equipment. Foot Controller connector AUX IN L/L+R, R Connect the optional YAMAHA FC-4, FC-5 or Used to connect external audio equipment. FC-7 foot controller here. VOLUME knob Amplified speakers Used to adjust the volume of the on-board... -
Page 19: Silent Control Box (For Models With Silent System Playback)
Silent Control Box (for models with Silent system playback) SILENT VOLUME HEADPHONES REVERB [SILENT] button HEADPHONES jacks Used to engage the Silent system. Connect HPE-170 stereo headphones or other The acoustic piano is silenced and sound is output standard stereo headphones here for listening to from the digital piano. - Page 20 [STOP] button Used to stop playback. [PART SELECT] buttons For L/R and Ensemble songs, these buttons are used to choose which part will play: left-hand part, right-hand part, or both parts. [SEARCH] button Used to access the Search function. [DRIVE] button Used to select a disk.
-
Page 21: Floppy Disks And Memory Disks Floppy Disks
Chapter 3 Floppy Disks and Memory Disks The Disklavier can play back songs stored on floppy disks such as PianoSoft and PianoSoft . Plus song disks or on its internal Memory Disks. Accidental Erasure Protection Floppy Disks Floppy disks have an erasure protection tab which protects valuable song data against accidental Besides PianoSoft and PianoSoft . -
Page 22: Memory Disks
Inserting & Ejecting Floppy Memory Disks Disks The Disklavier has 16 Mbytes (1 Mbyte × 16 Memory Disks) of internal flash memory for Inserting storing song data. They are numbered 0 to 9 and Carefully insert the disk into the disk drive shutter A to F. -
Page 23: Chapter 4 Turning On/Off Your Disklavier
Chapter 4 Turning On/Off Your Disklavier This chapter describes how to turn on and off your Disklavier and how to set the internal calendar. Turning your Disklavier on/off is a basic and very important procedure. Always be sure to follow the steps described below when you turn on or off your Disklavier. -
Page 24: Setting The Internal Calendar
Setting the Internal A display similar to the following appears, Calendar with the clock stopped and the hours display flashing. The Disklavier has an internal calendar that can be set from 1/1/1985 00:00:00 to 12/31/2084 23:59:59. Set the calendar accurately so that the Flashes Disklavier displays the correct current time during Stop mode. -
Page 25: Chapter 5 Display (Lcd)
Chapter 5 Display (LCD) Various information is shown in the display (LCD: Liquid Crystal Display) on the Control Unit. This chapter describes some of the frequently displayed indications. Counter Display Song Number Playing time is indicated in one of two formats: The number of the selected song is displayed in Minutes and seconds, as shown below. - Page 26 For L/R and Ensemble songs, two meters will Continuous pedal data (half pedal) can actually appear, one for the left-hand part and one for the position a pedal anywhere within its normal range right-hand part, as shown below. (from fully up to fully down). It is indicated by parentheses around the time display as shown below.
-
Page 27: Basic Playback
Chapter 6 Basic Playback You can play back PianoSoft and PianoSoft . Plus song disks on your Disklavier, as well as custom recordings stored on floppy disks using other recordable Disklavier pianos. You can also play back songs you store on the Memory Disks. ☛... -
Page 28: Pausing Playback
Pausing Playback Press [PLAY/PAUSE]. PLAY/PAUSE Press [PLAY/PAUSE]. PLAY/PAUSE The PLAY/PAUSE indicator lights and song No.1 starts playing. The time display starts counting up and the Playback stops and the PLAY/PAUSE velocity meters show the velocity of the indicator flashes. piano part notes currently being played, as shown. -
Page 29: Selecting Songs With The Control Unit
Using the Number Pad Selecting Songs with the Control Unit To select a song from 1 to 9, press the corresponding number button. Press [SONG SELECT ] to select the next song. SEARCH Press [SONG SELECT ] to select the previous song. SONG SELECT/REV •... -
Page 30: Fast Preview & Review
Fast Preview & Review Fast Forward & Reverse During song playback, Fast Preview and Review In Pause mode, fast forward and reverse allow allow you to quickly search through a song with you to quickly locate a desired position in a song. the piano still playing. -
Page 31: Adjusting The Volume
Adjusting the Volume Press [PLAY/PAUSE] to continue normal playback. Press [STOP] to engage Pause You can adjust the playback volume with the mode. Control Unit or with the remote control as described below. Since all piano songs are recorded at the maximum volume level of 0, If you fast forward a song all the way to the volume can be decreased down to –10, the softest end, Pause mode is engaged. -
Page 32: Adjusting The Tone
Adjusting the Tone On the Control Unit, press the Selector until the VOLUME indicator lights. Then press You can also adjust the tone using the BASS and [–/NO] to decrease or [+/YES] to TREBLE knobs on the Amplifier, if necessary. increase the volume. -
Page 33: Balancing The Ensemble Volume (Tg Master Balance)
Balancing the Adjust the level so that the Ensemble voices played by the internal XG tone Ensemble Volume generator are balanced with the volume of (TG Master Balance) the Disklavier piano. Press the Selector until the When playing back PianoSoft . Plus or Ensemble VOLUME indicator lights. -
Page 34: Changing The Tempo
Changing the Tempo Transposing a Song You can speed up or slow down the playback Playback can be transposed up or down by up to tempo. Slowing down the playback tempo can be two octaves. This is useful, for example, when useful when practicing a difficult piano part. -
Page 35: Silent System Playback
What is the Silent Quiet Mode and Silent System? Mode The Disklavier incorporates Yamaha’s innovative There are two modes to the Silent system: Quiet Silent system, in which a push of the [SILENT] mode and Silent mode. You can select either button keeps the hammers from striking the mode to suit your surroundings. -
Page 36: Engaging The Silent System
REVERB You can listen to playback through the headphones. Two sets of headphones can be connected simultaneously. In this case, the two headphones should be of the same model. Note: For optimum results, YAMAHA HPE-170 headphones (optionally available) are recommended. -
Page 37: Applying Reverb Effects
Applying Reverb Engage the Silent system. Effects Press [FUNC.]. A piano sounds differently depending on the size of the room in which it is played. These room FUNC. reverberations are referred to as “reverb” in this manual. The FUNC. indicator lights and the The Disklavier’s reverb effects can simulate Function menu appears. -
Page 38: Canceling Keyboard Movement
Canceling Keyboard Note: This setting is saved when the Disklavier is turned off. Movement Note: During playback in Silent or Quiet mode, pedal movement of the left and Normally, when songs are played back on the right pedals is canceled, and cannot be Disklavier, the piano keys move up and down as enabled. -
Page 39: Changing The Polyphony Setting
Changing the Press [>] until the c cursor is next Polyphony Setting the Poly parameter, then use the [–/NO] and [+/YES] buttons to select the number of polyphonic Polyphony refers to the number of notes that can notes: 32 or 64. be sounded simultaneously. -
Page 40: Tuning The Digital Piano
Tuning the Digital Piano The Silent digital piano is automatically tuned to match the internal XG tone generator. If you want to re-tune the Silent digital piano, follow the procedures outlined in “Tuning the Tone Generator (TG Master Tune)” on page 38. Disengaging the Silent System Press the [SILENT] button so that... -
Page 41: Repeat Playback
Chapter 8 Repeat Playback This chapter describes various repeat playback functions that you may want to use for entertainment and study purposes. You can repeatedly play back songs or specific passages within a song. All Song, Single Song, Random Repeat There are three Repeat modes (ALL, RPT, RND) as described below. -
Page 42: Segment A~B Repeat
Segment A~B Repeat Press [PLAY] to play back the specified section. In Segment A~B Repeat, playback is repeated between two specified points in a song: point A PLAY and point B. This function is useful when practicing or memorizing a difficult section of a song. -
Page 43: Segment A~ (Return & Pause) Repeat
Segment A~ (Return & In this case, playback stops, the song returns to point A, and Pause mode is Pause) Repeat engaged. In Segment A~ Repeat, playback can be Point A Press the [REV] button repeatedly restarted from a specified point in a SONG 1 SONG 2 SONG 3... -
Page 44: Starting Playback From A Specified Point (Search)
Starting Playback from If the time value is less than 10, that is, between 00:01 and 09:59, remember to a Specified Point press [0] first to set the first digit to zero. (Search) If you enter a value higher than the entire song time, the search goes to the end of the Playback can be started from a specified point in a song. -
Page 45: Chapter 9 Useful Functions For Learning Piano
Chapter 9 Useful Functions for Learning Piano This chapter describes useful functions for piano study, such as practicing one hand while the Disklavier plays the other, operating the pedals, and using the built-in metronome. Canceling the Left- A part can also be canceled by Hand or Right-Hand using the [PART SELECT] buttons on the remote control. -
Page 46: Operating The Pedals Yourself
Operating the Pedals Using the Built-in Yourself Metronome During playback, the Disklavier pedals play the You can sound the built-in metronome to practice pedal data that was recorded with the song. If, playing songs on the Disklavier. however, you want to practice your pedal playing, With each beat of the metronome a digital click is you can cancel pedal playback and play them produced by the Control Unit. -
Page 47: Playback With The Metronome
Playback with the The following table shows the metronome parameters that can be set. Metronome Parameter Range Default Notes 1 Click ON/OFF If set to off, For songs recorded with the metronome using the the volume measures and beats time format, you can sound indicators the metronome along with song playback. -
Page 48: Adjusting The Metronome Volume (For Models With Silent System Playback)
Foot Controller (for models with Silent system playback) In Silent and Quiet modes, you can listen to An optional Yamaha foot switch or foot controller playback with the metronome turned on. The can be used to operate various Disklavier volume of the metronome can be adjusted in a functions. -
Page 49: Playback
Using a Foot Controller to Control the Tempo By connecting an optional Yamaha FC-7 controller pedal, playback tempo can also be controlled. The following table shows which functions can be controlled using the controller pedal. Current Mode Pedal Down Pedal Up...