Table of Contents
Advertisement
Quick Links
Advertisement
Table of Contents

Related Manuals for Cal Spas LTR20111058


Summary of Contents for Cal Spas LTR20111058
- Page 1 LTR20111058, Rev. B 4/27/11...
-
Page 2: Table Of Contents
Cal Spas Chemicals . . . . . . . . . . . . . . . . . . . -
Page 3: Important Safety Instructions
Important Safety Instructions READ AND FOLLOW ALL INSTRUCTIONS . WARNING: DANGER -- Risk of injury: To reduce the risk of injury, do not permit children to The suction fittings in this spa are sized to match use this product unless they are closely supervised the specific water flow created by the pump. -
Page 4: Save These Instructions
DANGER -- Risk of electric shock: • Replace a damaged power cord immediately. • Do not bury the power cord. • Connect to a grounded, grounding-type receptacle only. WARNING: People with infectious diseases should not use a spa or hot tub. WARNING: To avoid injury, exercise care when entering or exiting the spa or hot tub. -
Page 5: Preparing For Your New Portable Spa
Preparing for Your New Portable Spa Most cities and counties require permits for exterior construction and electrical circuits. In addition, some communities have codes requiring residential barriers such as fencing and/or self-closing gates on property to prevent unsupervised access to the property by children. Your dealer can provide information on which permits may be required and how to obtain them prior to the delivery of your spa. -
Page 6: Electrical Installation
RESET button. If the GFCI does not reset, unplug the m) from and not exceeding 10 feet (3.0 m) from the spa and call your local Cal Spas dealer for service. DO inside wall of the spa (NEC 680.43(A)). NOT USE THE SPA! Do not use extension cords. - Page 7 230V / 50 Hz All 230V spas must be permanently connected (hard- Use copper wire with THHN insulation. Do not use aluminum wire. wired) to the power supply. These instructions de- scribe the only acceptable electrical wiring procedure. When wires larger than #6 AWG are required, install Spas wired in any other way will void your warranty a junction box near the spa and use #6 AWG wire and may result in serious injury.
-
Page 8: Rcd Wiring Diagram
RCD Wiring Diagram GREEN/ GREEN/ YELLOW YELLOW (Ground) (Ground) CIRCUIT BOARD GREEN/ YELLOW (Ground) 2011 Genesis Portable Spa LTR20111058, Rev. B www.calspas.com... - Page 9 Circuit Board Connection 2011 Genesis Portable Spa LTR20111058, Rev. B www.calspas.com...
-
Page 10: Filling And Powering Up Your Portable Spa
Filling and Powering Up Your Portable Spa Never fill your spa with soft water. Soft water makes it impossible to maintain the proper water chemistry and may cause the wa- ter to foam, which will ultimately harm the finish of the spa and void your warranty. Once the spa has been placed on an approved Presoak the filters in spa water. -
Page 11: Operating Your Spa
Operating Your Spa Electronic Control Operation Initial Start up When first powered up, your spa will perform a self-diagnostic check and go into priming mode. When the control panel displays PR, IMMEDIATELY do the following: Press the JETS button to turn on the pump and let it run for 10 seconds. -
Page 12: Automatic Time Outs
Automatic Time outs These features will automatically turn themselves off To set filtration time, turn off the power to the spa during periods of continuous use: at the time of day you would like one of the filtration cycles to begin, then turn back on after 30 seconds. •... -
Page 13: Diagnostic Messages
Diagnostic Messages Message Meaning Action Required No message 1) Spa temperature is unknown. 1) After pump has been running for 2 minutes tem- on display perature will be displayed. 2) Spa is in Economy or Sleep 2) In Economy or Sleep mode, the pump may be off mode. - Page 14 Message Meaning Action Required Overheat protection (spa is shut- DO NOT ENTER THE WATER! down). One sensor has detected Remove the spa cover and allow spa to cool below 118˚F (48˚C) at the heater. 107˚F (42˚C). Press any button on the topside dis- play to reset spa.
-
Page 15: Jets
Jets LED Light Operation Almost all of the jets in your spa are adjustable. Press the LIGHT button on the topside control pan- Rotating the face of an adjustable jet to the left el to turn the spa light on. If your spa has LED (counter-clockwise) will decrease the amount of lights, they will also light up at the same time as water flow through the jet. -
Page 16: Clear Water Plan
Clear Water Plan Contents of this section: This section is intended for new spa owners with no experience with water chemistry. Everyone’s ex- Testing and Adjusting Spa Water perience with maintaining water quality is different, Sanitation but there are some general concepts you need to Filtration know. -
Page 17: Testing And Adjusting Spa Water
Low TA can be corrected by adding Cal Spas “pH-Alkalinity Up”. If the CH is too low, add Cal Spas “Liquid Hardness Increaser”. If the TA is too high, the pH level will tend to be too high and may be difficult to bring down. -
Page 18: Sanitation
Do not use a floater. When you begin with fresh water, add 2 ounces of Cal Spas Go Brom. Open all of the jets and run the spa at high speed. This is your base bromine level as the tablets will take a while to dissolve. -
Page 19: Shocking The Water
Do not use chlorinating shock, which will damage your spa’s jets and pump seals. The only shock you should use is Cal Spas Oxidizer Shock. It is an easy way to maintain either chlorine or bromine chemical plans. For best results use the directions below. -
Page 20: Cleaning The Filter
Remove the filter by turning it counterclockwise, unscrewing the bottom threads, then pulling it up and out. Place the dirty filter into a bucket of water deep enough to cover the filter. Add 8 oz of Cal Spas “Liquid Filter Cleaner” to the bucket of water. -
Page 21: Starting The Spa With Fresh Water
Pour in 16 oz of Cal Spas “Metal Protector” in the cals. Damage to the spa or spa’s components from center of the spa. -
Page 22: Maintenance Schedule
We recommend that your spa water be changed every 4 to 6 months. You may find the need to change your spa water more frequently with heavy use. When empty, your spa should be cleaned with a non-abrasive cleaner, such as Cal Spas™ All Surface Cleaner, and then rinsed thoroughly. 2011 Genesis Portable Spa LTR20111058, Rev. -
Page 23: Troubleshooting Water Clarity Problems
Troubleshooting Water Clarity Problems Problem Probable Causes Possible Solutions Cloudy Water • Dirty filter • Clean filter • Excessive oils / organic mat- • Shock spa with sanitizer • Add sanitizer • Improper sanitization • Adjust pH and/or alkalinity to recommended •... -
Page 24: Cleaning And Maintenance
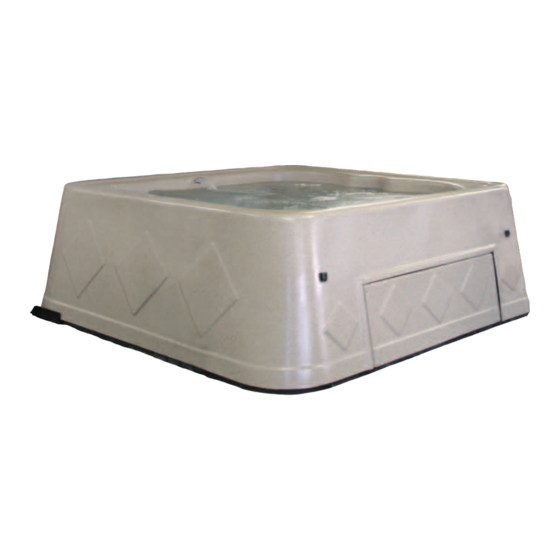
Cleaning and Maintenance Removing the Access Panel You will need to remove the access panel in order to drain your Genesis spa. Unplug the spa. Remove the screws from the access panel. Remove the access panel and set it aside. Replace the access panel when you are finished. -
Page 25: Winterizing (Cold Climate Draining)
Winterizing (Cold Climate Draining) In many areas of the country, the temperature drops Open all filter covers. below 32˚F (0°C). We recommend that you always Remove the filter baskets and filters. have your spa full of water and running at normal spa Drain your spa completely as described in the in- temperatures (80˚F to 100˚F, 26.7°C to 37.8°C). -
Page 26: Covering Your Spa
It accomplishes this without leaving an oily residue behind that is normally associated with common automotive vinyl pro- tectants. Cal Spas Vinyl and Leather Cleaner should be used sparingly. Incorrect usage may cause water clarity issues. -
Page 27: Cleaning The Shell
Cal Spas Fast Sheen is a non-oil based wax that is specifically formulated to protect the spa’s finish from the chemicals and minerals associated with normal spa use. -
Page 28: Appendix
Appendix Replacement Parts Jets Covers ELE 2” Euro No Eyeball G418T 72” x 72” Basic Rust 4” - 2.5” ACC01200616 PLU282050W Basic Gray 4” - 2.5” ACC01200617 Basic Slate 4” - 2.5” ACC01200618 MED 3” Directional for 2 Jet Body Basic Palomino 4”... -
Page 29: Limited Warranty
This limited warranty is effective for Genesis portable spas manufactured after January 1, 2011. Cal Spas portable spas are warranted to be free from defects in material and workmanship. This warranty starts from date of manufacture and ends either by specified time-frame listed below, owner-transfer, reloca- tion, or installation of any component other than by manufacturer. - Page 30 • Damage caused by continued operation of this spa with either a known or an unknown problem. See your Cal Spas dealer for a copy of the applicable warranty, details, and any questions you may have re- • Damage caused by tri-chlor, acids, chlorine tab- garding the warranty coverage on your spa.
-
Page 31: Cal Spas Chemicals
Cal Spas Chemicals 2011 Genesis Portable Spa LTR20111058, Rev. B www.calspas.com... -
Page 32: East Ninth Street Pomona, Ca
Locating the product serial number The serial number of your spa is located on a metal plate attached to the base of the equipment pack inside the equipment area of the spa. You will need this number to properly register your spa and activate coverage. Write this information in the space provided below.