Table of Contents
Advertisement
Advertisement
Table of Contents
Troubleshooting

Related Manuals for Bushnell TROPHY CAM 119425C2


Summary of Contents for Bushnell TROPHY CAM 119425C2
- Page 1 ROPHY AM™ INSTRUCTION MANUAL Model#s: 119425C2 / 119426C Lit# 98-1573/02-12...
-
Page 3: Table Of Contents
TABLE OF CONTENTS PAGE # Table of Contents Important Note Introduction Aboout the Trophy Cam Applications Parts and Controls Installing the Batteries and SD Card Loading Batteries Using an External Power Source Inserting the SD Card Using the TROPHY CAM The OFF, ON and SETUP Modes OFF Mode 10-11... -
Page 4: Table Of Contents
TABLE OF CONTENTS (continued) PAGE # Reviewing Images Directly from the SD Card Reviewing Images by Connecting the Camera to a Computer Downloading the Photos/Videos Troubleshooting/FAQs 28-32 Technical Specifications Warranty FCC Compliance Statement... -
Page 5: Important Note
IMPORTANT NOTE Congratulations on your purchase of one of the best trail cameras on the market! Bushnell is very proud of this little unit and we are sure you will be pleased with it as well. We appreciate your business and want to earn your trust. Please refer to the notes below and the instructions in this manual to ensure that you are completely satisfied with this product. -
Page 6: Introduction
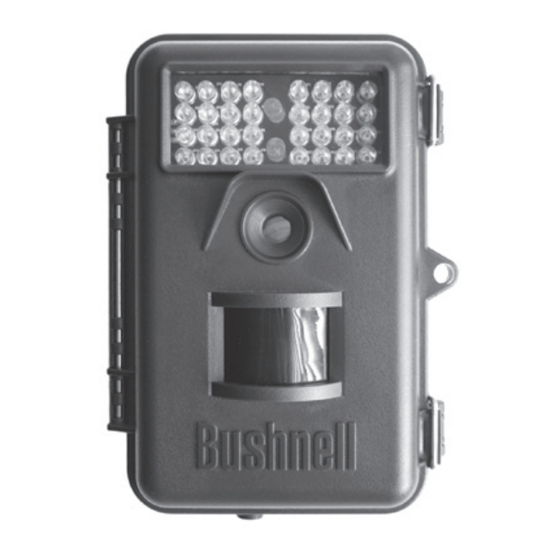
INTRODUCTION About the TROPHY CAM The Bushnell Trophy Cam is a digital scouting camera. It can be triggered by any movement of game in a location, detected by a highly sensitive Passive Infra-Red (PIR) motion sensor, and then take high quality pictures (up to 8MP still photos), or video clips. - Page 7 camera to Photo mode (still camera icon), and the UP key can set the camera to Video mode (movie camera icon). The RIGHT key also serves as the manual shutter (“SHOT”) button of the camera and the OK key switches the camera to the Playback (“REPLAY”) mode. These secondary functions are indicated by icons or text above the key as shown in Fig.
-
Page 8: Installing The Batteries And Sd Card
4 or 8, be sure to insert each battery with correct polarity (negative or “flat” end against the long spring of each battery slot). Bushnell recommends using eight new lithium AA (Energizer® brand) or alkaline AA batteries. NiMh Rechargeable batteries are not recommended, as the lower voltage they produce can cause operational issues. -
Page 9: Inserting The Sd Card
source with the power input jack of the Trophy Cam, making sure that the polarity is correct. Note: The power connector is a 4.0x1.7mm coaxial DC power plug with positive “tip” (inside pin) polarity (Radio Shack P/N 274-1532 or equivalent). If both an external power source is connected and batteries are installed, the Trophy Cam will be powered by the external power source. -
Page 10: Using The Trophy Cam
especially when a card has been used in other devices (see “Changing Menu Parameter Settings” for details). • To take out the SD card, just gently push in the card (do not try to pull it out without pushing in first). The card is released from the slot and ready to be removed when you hear the click. -
Page 11: On Mode
in the OFF mode the Trophy Cam still consumes power at a very low level. Therefore, it’s a good idea to take the batteries out of the battery compartment if the camera will not be used for a long time. ON Mode Anytime after the batteries and SD card have been inserted, you can switch on the camera. -
Page 12: Setup Mode Shortcut Keys/Functions
Fig. 3: SETUP Information Screen SD Card Status Image Size (Resolution) Still Photo Mode Battery Level Date:Month-Day- Y ear Time Stamp Time Field Scan On Hour:Minute:Second # of Photos Taken Remaining Photo Capacity SETUP Mode Shortcut Keys/Functions As mentioned earlier in “Parts & Controls”, four of the keys below the LCD have secondary, “shortcut”... -
Page 13: Using The Setup Menu To Change Settings
USING THE SETUP MENU TO CHANGE SETTINGS The main purpose of the SETUP mode is to allow you to change the settings of the camera’s parameters (12-13 different ones are available) so your Trophy Cam operates exactly the way you want it to. You will do this by entering the SETUP Menu and pressing the keys below the LCD display, which will show you each parameter and its setting. -
Page 14: How Parameter Settings Are Displayed
How Parameter Settings Are Displayed Some more detail regarding how the settings for a parameter are indicated on the display: • Only one setting is displayed at a time, starting with the current setting for the parameter when it is first selected (Fig. 4a). To change the setting, use the UP/DOWN keys to display the new setting you want (Fig. -
Page 15: Examples-Changing The Settings Of Some
EXAMPLES-Changing the Settings of Some Common Parameters Following this page, you will find tables listing all of the parameters found in the SETUP Menu, along with their possible settings (or range of settings), and a detailed description of what the parameter controls and what the settings do. -
Page 16: Field Scan Feature
FIELD SCAN FEATURE Field Scan is a revolutionary new feature for the Bushnell Trophy Cam, which allows you to monitor your food plots or field edges with time lapse images or video. When set to “On”, the Trophy Cam will take a photo... - Page 17 5. After you finish setting the last time setting (Stop minutes), another press of the RIGHT key will take you to the setting for Interval. This lets you control how often a photo or video clip is recorded during the block of time you defined with the Start and Stop settings.
-
Page 18: The Setup Menu-Parameters And Settings List
The SETUP Menu-Parameters and Settings List w/Descriptions Parameter Settings Description (Bold=default) Mode Camera or Selects whether still photos or Video video clips are captured when the camera is triggered. Image Size 3M Pixel, 5M Sets resolution for still photos (only affects Pixel, 8M Pixel to 3, 5 or 8 megapixels. - Page 19 The SETUP Menu-Parameters and Settings List w/Descriptions Parameter Settings Description (Bold=default) Interval 10S (second) Selects the length of time that the default, camera will “wait” until it responds with a 60M to any additional triggers from (minute) to1S the PIR after an animal is first (second) range detected and remains within the of settings...
- Page 20 The SETUP Menu-Parameters and Settings List w/Descriptions Parameter Settings Description (Bold=default) Format Execute Deletes (erases) all files stored on a card to prepare it for reuse. Always format a card that has been previously used in other devices. Caution! Make sure you have downloaded and backed up any files you want to preserve first! Press OK to execute, press...
-
Page 21: The Setup Menu-Parameters And Settings List
The SETUP Menu-Parameters and Settings List w/Descriptions Parameter Settings Description (Bold=default) Field Scan On, Off Turns Field Scan (Time Lapse) recording mode on/off. Pressing OK with On selected will go to the Set Field Scan screen, which allows you to set the Start and Stop times in hours (0-24) and minutes (00-59).This is setting the time each day for recording... -
Page 22: Mounting And Positioning The Trophy Cam
MOUNTING AND POSITIONING the TROPHY CAM Mounting After you’ve set up the camera’s parameters to your personal preferences at home or in your truck, you’re ready to take it outside and slide the power switch to “ON”. When setting up the Trophy Cam for scouting game or other outdoor applications, you must be sure to mount it in place correctly and securely. -
Page 23: Sensing Angle And Distance Test
Two optional mounting accessories, a “Bear Safe” metal camera box (model # 119653C) and Deluxe Tree Bracket (model# 119652C) are also available-please see your Bushnell dealer or website for more details. Sensing Angle and Distance Test To test whether the Trophy Cam can effectively monitor the area you choose, this test is recommended to check the sensing angle and monitoring distance of the Trophy Cam. -
Page 24: Playing Back/Deleting The Photos/Videos
and Sensor Level parameters. Please note, the PIR is strongly sensitive to ambient temperature. The greater the temperature difference between the environment and your subject, the farther the possible sensing distance. The average sensing distance is about 45 ft. Before leaving the camera unattended, please check for the following: •... -
Page 25: Deleting Photos Or Videos
Connecting an external video monitor to review images Cable from “TV Out” Deleting Photos/ Video Files In SETUP mode, it is possible to delete the photo or video files-just the most recent one, or all of them. This can be useful if an SD card is full but doesn’t have any images you want to keep, and you don’t want to remove the card and insert a new one- or if you trigger a photo during testing that you know you won’t need. -
Page 26: Reviewing Images Directly From The Sd Card
Reviewing Images Directly From the SD Card This is the most popular method of viewing images. Since unmounting the camera and taking it to your computer isn’t very convenient, you may find it easier to just take the card out. By removing the SD card (swapping it for a new empty card if you like) and taking it to your home or campsite to view the images by using an SD card “reader”... -
Page 27: Downloading The Photos/Videos
DOWNLOADING the PHOTOS/VIDEOS To download your photos/videos to a PC or Mac, first make sure the Trophy Cam power switch is in the OFF position. Connect the supplied cable to the camera’s USB port, then directly to a main USB port on your computer-do not use front panel/keyboard USB ports or unpowered “hubs”. -
Page 28: Troubleshooting/Faqs
Make sure that you are using a good quality name brand SD card in your camera. Bushnell recommends SanDisk® brand SD Cards up to 32GB. Our experience indicates that poor quality SD cards can sometimes reduce your Trophy Cam battery life. - Page 29 Make sure that you have installed at least 4 batteries (the required minimum #) in the battery compartment, starting at the top, filling battery spaces 1-4 with no “gaps”. Bushnell recommends using 8 Energizer® Lithium AA batteries in all Trophy Cams. Make sure that the batteries are installed correctly, observing proper polarity.
- Page 30 If this is seen on a consistent basis, then the sensor may need servicing. Please contact Bushnell customer service. 7. Short video clips—not recording to the length set a. Check to make sure that the SD card is not full.
- Page 31 Troubleshooting / FAQ Try to avoid setting the camera up on small trees that are prone to being moved by strong winds. Remove any limbs which are right in front of the camera lens. PIR Sensor LED Flashes/Doesn’t Flash When the camera is in the “Setup” mode, a special LED on the front of the camera will flash when it senses motion.
-
Page 32: Troubleshooting/Faqs
Troubleshooting / FAQ Camera takes continuous images of no subject A camera has what is known as a “false trigger” if the PIR sensor thinks that there is motion and heat in front of the camera lens when there is no subject in the image. -
Page 33: Technical Specifications
Technical Specifications Image Sensor 5 Megapixel Color CMOS Maximum Pixel Size 3264x2448 (8MP) Lens F=3.1; FOV=50°; Auto IR-Cut-Remove (at night) IR-Flash Range 36’-45’ (12m-15m) Display Screen B&W Display: 24x32mm(1.5”) Memory Card SD or SDHC Card, Maximum capacity 32GB Internal RAM 32MB 8MP= 3264x2448;... -
Page 34: Warranty
This warranty does not cover damages caused by misuse, improper handling, installation, or maintenance provided by someone other than a Bushnell Authorized Service Department. Any return made under this warranty must be accompanied by the items listed below: 1. -
Page 35: Fcc Compliance Statement
· Consult the dealer or an experienced radio/TV technician for help. The device does not contain any user-serviceable parts. Repairs should only be made by an Authorized Bushnell repair center. Unauthorized repairs or modifications could result in permanent damage to the equipment, and will void your warranty and your authority to operate this device under Part 15 regulations. - Page 36 For further questions or additional information please contact: Bushnell Outdoor Products 9200 Cody, Overland Park, Kansas 66214 (800) 423-3537 • www.bushnell.com ©2012 Bushnell Outdoor Products...