Table of Contents
Advertisement
Advertisement
Table of Contents

Summary of Contents for White 2221
- Page 2 If it still does not fit, contact a qualified electrician to install the proper outlet. Do not change the plug in any way. WHITE SEWING MACHINE Record in space provided below the Serial No. and Model No. of this appliance.
- Page 3 When using an eiectñcal appliance, basic safety precautio ns should always be followed, including the following: —To — An applianc e should never be left unattend ed when plugged in. Always unplug this applianc e from the electric outlet immediately after using and before cleaning. ——To Do not allow to be used as a toy.
- Page 4 Keep fingers away from all moving parts. Special care is required around the sewing machine needle. 2. Always use the proper needle, plate. The wrong plate can cause the needle to break. Do not use bent needles. Do not pull or push fabric while stitching. It may deflect the needle causing it to break.
- Page 5 .1.2 1. NAME AND FUNCTION OF PARTS 2. ACCESSORIES 4-10 3. BEFORE SEWING A. Converting machine B. Connecting Foot Controller and Power Cord C. Changing Needle D. Changing Foot E. Winding Bobbin F. Lower Threading G. Upper Threading H. Drawing up Lower Thread 11-12 4.
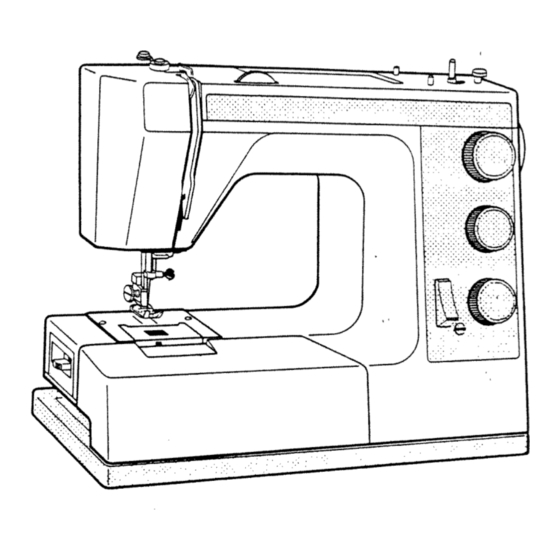
- Page 7 ÂME AND FUNCTION OF PARTS 11. Spool Pin (Retractable): hread Guide: To mount spool of thread. To guide thread for bobbin winding. Retracts when not in use. p Thread Guide: To sew with twin needles. ro lead upper thread. 12. Pattern Selector: ke-Up Lever: To select the stitch pattern, turns both ways.
- Page 8 The accessories come with your machine as stan dard equipment and are stored in extension table. --3—...
- Page 10 • • ,--••-•- •-—— •— • —--—-.——.- .•---•• ——••-- . ‘S...
- Page 12 E. Winding Bobbin Pull up spool pin. (2) Put spool on spool pin. Draw thread from spool pin through thread guide as following number ©and©. (3) Wind thread clockwise around bobbin several times. (4) Push down bobbin on spindle as far as it will go. (5) Push bobbin towards handwheel and press down foot controller.
- Page 16 “.
- Page 17 F. Needle Position Control When pattern 7 is selected and the manual stitch width dial is activated, you can move the needle between center and left needle positions. Use left position for fine fabrics as not to pull material down into needle plate. Use gene,i purpose foot.
- Page 19 NEEDLE THREAD Cotton REMARKS FABRIC European U.S. Size Point Mercerized Covered European Polyester, 15x1 Cotton Cotton Style Silk, Nylon Regular Loosen Silk 65-70 ‘ERY SHEER: Lace, upper Nylon e. Chiffon, Net tension Silk 65-70 I Regular one or ;H::R: cuse Crepe, 50-70 Nylon ivin,...
- Page 20 —---—- -------...
- Page 21 ‘S” TØ...
- Page 22 cZi ,zWNG Set machine as shown. thread-tension for zigzag stitching Better-looking zigzag stitching requires less upper tension than straight stitching. Loosen upper ten sion slightly. wrong side right side For thin fabric or any fabric easy to be wrinkled place a piece of paper underneath which will give neater finish.
- Page 24 Always make a test buttonhole in a piece of material you are working with and check satin stitch spac ing. Use slightly loose tension on top for neater fin- sb, buttonhole twist thread is recommended. O3cm(118) Det9rmining length ‘ (Not for stretch fabrics) and thickness of button Measure diameter for bar tack.
- Page 28 shown are all used whh stretcn and knit fabrics. These are special utility stitches built in the machine for your quick selection. 6 Rickrack briar stretch 8 Slraight stretch Decoration stitch 16 Overcast stretch Cvricck stretch overlock stretch Adjusting stretch stitch balance In stretch stitch sewing, the stretch stitch adjuster should usually be in a neutral position (between When sewing some fabrics, you...
- Page 29 Ovenccxng sch sews a oercasts seam and edge of fabric at the same time. This pattern is suitable for thin jersey material. Use ball point needle to get better stitch performance. 01cm Set machine as shown. This pattern is suitable for thick jersey materials. 05cm —24—...
- Page 30 .iICHwJ( Used for hemming skirts, trousers, suits, etc., without stitches showing on right side of material. For elastic materials, use pattern 1 5—4 1—2 wrong side), and Fold material as shown place it under foot. (1) ..for thick materials. .for thin materials. iron It is preferable to baste or hem beforehand.
- Page 31 Mending a rip Sew middle of tear first then sew on either side. A piece of gauze can be placed underneath for reinforáement. -‘I Patching Place patch over worn part. Sew along edge of patch on right side. Trim away worn part close to seam on wrong side.
- Page 32 ____...
- Page 39 24. PIN TUCKING Use sheer material and tighten lower thread a little. Attach quilting guide. Mark first line with pencil or tailor’s chalk and sew. From second line, sew following seam of first line with guide. adjusted by mov —34—...
- Page 40 Your new machine requires regular cleaning and oiling for satisfactory performance. A machine which is used for a few hours a day needs to be cleaned and oiled once a month. Un plug machine before cleaning or oiling. Disassem bling bobbin case (for cleaning) presser foot and needle.
- Page 41 Oiling Apply a few drops of oil around face of hook and to center hole. After oiling, wipe excess oil with a piece of cloth. Assembling bobbin case Reverse procedure used for disassembling bobbin case. Tighten screw firmly. —36—...
- Page 43 .rjing Unplug machine. Open face cover. Unscrew bulb counterclockwise to remove it. Install new bulb. Plug in machine. Bulbs can be purchased at your nearest dealer. While not in use, make sure your machine is unplugged. —38—...


