Table of Contents
Advertisement
Advertisement
Table of Contents

Related Manuals for Brother P-Touch 2730


Summary of Contents for Brother P-Touch 2730
- Page 1 USER’S GUIDE Read this User’s Guide before you start using your P-touch. INTRODUCTION Keep this User’s Guide in a handy place for future reference. GETTING STARTED EDITING A LABEL LABEL PRINTING USING THE FILE MEMORY MAINTAINNING YOUR P-TOUCH TROUBLESHOOTING APPENDIX INDEX...
- Page 2 Service & Support > Warranty. For warranty service (repair) of your Brother product you will need to retain a copy of your sales docket and contact the Support Centre for location of the nearest Authorised Warranty Centre (AWC).
- Page 3 • The enclosed interface cable should be used in order to ensure compliance with the limits for a Class B digital device. • Changes or modifications not expressly approved by Brother Industries, Ltd. could void the user's authority to operate the equipment.
- Page 4 Compilation and Publication Notice Under the supervision of Brother Industries, Ltd., this manual has been compiled and published, covering the latest product’s descriptions and specifications. The contents of this manual and the specifications of this product are subject to change without notice.
-
Page 5: Table Of Contents
Contents How to use the P-touch ....................4 Safety Precautions ......................6 General Precautions...................... 9 Symbols Used in this Guide ..................10 GETTING STARTED ................11 Unpacking Your P-touch ..................... 11 General Description..................... 12 LCD Display & Keyboard..................... 13 LCD Display ......................13 Key Names and Functions.................. - Page 6 INTRODUCTION Entering Accented Characters ..................29 Setting Character Attributes ..................30 Setting Character Attributes by Label ..............30 Setting Character Attributes by Each Line.............30 Setting Auto Fit Style .....................34 Setting Label Attributes ....................35 Using Auto-Format Layouts ..................38 Using Templates - Example creating an Asset Tag..........38 Using Block Layouts ....................42 Using Time &...
- Page 7 MAINTAINING YOUR P-TOUCH............71 Resetting the P-touch....................71 Resetting data to factory settings (Downloaded data is not reset.)....... 71 Resetting data to factory settings (Downloaded data is reset.)......71 Maintenance........................ 71 Cleaning the Unit ....................71 Cleaning the Print Head..................72 Cleaning the Tape Cutter..................
-
Page 8: How To Use The P-Touch
INTRODUCTION How to use the P-touch Create a label with the P-touch GETTING STARTED • Prepare the P-touch. P. 11 CREATING A LABEL • Entering and Editing text. In addition to entering text, the P-touch has a P. 23 large range of formatting options. •... -
Page 9: Getting Started
Create a label by connecting your P-touch to a PC GETTING STARTED This P-touch can be used as a stand alone desktop P-touch or it can be connected to a PC/Mac and used with the included P-touch Editor software to create more elaborate labels. -
Page 10: Safety Precautions
INTRODUCTION Safety Precautions To prevent injury and damage, important notes are explained using various symbols. The symbols and their meanings are as follows: Indicates a potentially hazardous situation which, if not avoided, WARNING could result in death or serious injuries. Indicates a potentially hazardous situation which, if not avoided, CAUTION may result in minor or moderate injuries. - Page 11 Failure to observe this may result in an DO NOT use the AC adapter in places accident or damage. Brother shall not of high humidity such as bathrooms. assume any responsibility for any DO NOT use a damaged adapter cord accident or damage resulting from not or power plug.
- Page 12 INTRODUCTION CAUTION Battery Follow these guidelines to avoid liquid leakage, heat or battery rupture. DO NOT use old and new batteries DO NOT set the positive and negative together. end in the wrong position. DO NOT mix alkaline batteries with Remove the batteries if you do not other type batteries.
-
Page 13: General Precautions
• Depending on the environmental conditions and the applied settings, some characters or symbols may be difficult to read. • Use only Brother TZ tapes with this machine. Do not use tapes that do not have the mark. • DO NOT pull or apply pressure to the tape in the cassette. Otherwise the tape cassette or printer may be damaged. -
Page 14: Symbols Used In This Guide
INTRODUCTION Symbols Used in this Guide The following symbols are used throughout this guide to indicate additional information. This symbol indicates information or directions that may result in damage or injury if ignored, or operations that will result in errors. This symbol indicates information or directions that may help you understand and use the P-touch more efficiently. -
Page 15: Getting Started
Software Installation Guide not printed. You can download the PDF version of the User's guide, please go to http://solutions.brother.com The Software Installation Guide may be provided on CD, not printed. You can download the PDF version of the Software Installation Guide, please go to http://solutions.brother.com... -
Page 16: General Description
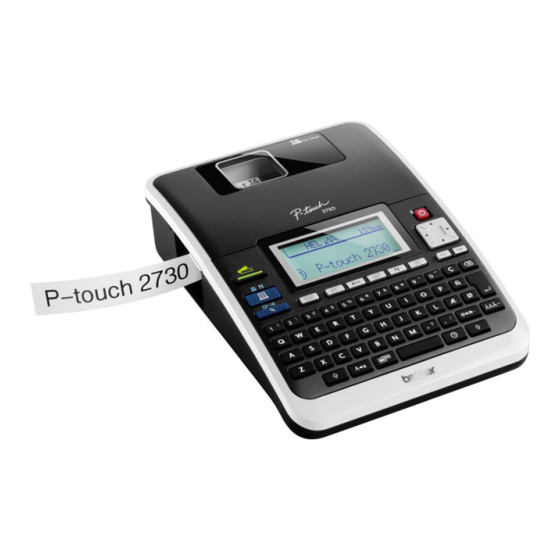
GETTING STARTED General Description Tape cassette compartment Tape compartment cover LCD display Tape viewer Tape exit slot Keyboard Print head Tape cutter Release lever When shipped from the factory, the LCD display is covered with a protective sheet to prevent damage. Remove this sheet before using the P-touch. AC adaptor connector Battery compartment cover... -
Page 17: Lcd Display & Keyboard
LCD Display & Keyboard LCD Display 1. Line number 5.~8. Style guidance Indicates line number within the label Indicates the current font (5), layout. character size (6), character style (7) and frame (8) settings. 2. Cursor 9. Tape length Characters are entered to the left of the cursor. -
Page 18: Key Names And Functions
GETTING STARTED Key Names and Functions The default language is "English". 1. Power 6. Print Turns the P-touch on and off. • Prints the current label design onto the tape. 2. Cursor ( • Opens the Print Options menu when •... - Page 19 10. Text 18. Symbol • Enables character attributes for the Use this to select and enter a symbol label to be set. from a list of available symbols. • Character attributes can be set for 19. Backspace each line of the label when the Text Deletes the character to the left of the menu is opened in combination with cursor.
-
Page 20: Power Supply
GETTING STARTED Power Supply Battery After making sure that the power is off, remove the battery compartment cover on the back of the machine. If the batteries are already in the machine, remove them. Make sure that the power is turned off when replacing batteries. -
Page 21: Ac Adapter
• Use only the adapter, which is designed exclusively for your P-touch. Failure to observe this may result in an accident or damage. Brother shall not assume any responsibility for any accident or damage resulting from not using the specified AC adapter. -
Page 22: Inserting A Tape Cassette
Inserting a Tape Cassette Tape cassettes of 3.5mm, 6mm, 9mm, 12mm, 18mm, or 24mm width can be used in your P-touch. Use only Brother tape cassettes with the mark. • If the new tape cassette has a cardboard stopper, be sure to remove the stopper before inserting the cassette. -
Page 23: Turning Power On/Off
Insert the tape cassette into the tape compartment, with the end of the tape facing the machine's tape exit slot, and press firmly until you hear a click. When inserting the tape cassette, make sure that the tape and ink ribbon do not catch on the print head. -
Page 24: Feeding Tape
GETTING STARTED Feeding Tape Feed & Cut The Feed & Cut function feeds 23mm of blank tape then cuts the tape. • Be sure to feed tape to remove any slack in the tape and ink ribbon after inserting the tape cassette. -
Page 25: Lcd Display
LCD Display LCD Contrast You can change the contrast setting of the LCD display to one of five levels (+2, +1, 0, -1, -2) to make the screen easier to read. The default setting is “0”. Press the Setup key to display the Setup menu, select “LCD Contrast” using the key, and then press the OK or Enter key. -
Page 26: Back Light
GETTING STARTED Back Light You can change the back light setting either to ON or OFF. The display is easier to see with the back light ON. The default setting is "ON". Press the Setup key to display the Setup menu, select "Backlight" using the key, and then press the OK or Enter key. -
Page 27: Editing A Label
EDITING A LABEL Entering and Editing Text Entering Text from the Keyboard The keyboard of your P-touch can be used in the same way as a standard computer keyboard. Using Text Reminder When a character is entered, the machine remembers character sequences beginning with the character entered from a history of all printed character sequences to date, and displays a list of options from which to select. -
Page 28: Adding A New Line
EDITING A LABEL Adding a New Line To end the current line of text and start a new line, press the Enter key. A return mark appears at the end of the line and the cursor moves to the start of the new line. •... -
Page 29: Deleting Text
Deleting Text Deleting one character at a time To delete a character from an existing line of text, move the cursor to the character to the right of the position you want to start deleting text and then press the Backspace key. -
Page 30: Entering Symbols
EDITING A LABEL Entering Symbols In addition to the symbols available on the keyboard, there are various symbols (including international and extended ASCII characters) available with the symbol function. To enter a symbol, use the Symbol function (see below). Alternatively, hold down the Shift key and then press a key on the keyboard to enter the symbol printed on the selected key's upper-right corner. -
Page 31: Using Symbol Update Function
Using Symbol Update Function You can create your personal category of symbols by using the Symbol Update Function. The "Personal category" will appear first when selecting the symbols to help you locate the desired symbols quickly. Press the Setup key to display the Setup menu, and then select "Symbol Update"... - Page 32 EDITING A LABEL Symbol List Category Symbols Personal Category Refer to “Using Symbol Update Function” on page 27 for details. Punctuation Business Mathematics Brackets Arrows Unit International Number Pictograph Electrical Audio_Visual Signs Communication Vehicle Sports Nature Others The use of the CE mark is strictly governed by one or more European Council directives. Ensure that any labels you produce which use this mark conform with the relevant directives.
-
Page 33: Entering Accented Characters
Entering Accented Characters The P-touch can display and print a set of accented characters such as other language specific characters. Enter the character you wish to change to an accented character. Caps mode can be used with the Accent function. Press the Accent key. -
Page 34: Setting Character Attributes
EDITING A LABEL Setting Character Attributes Setting Character Attributes by Label Using the Text key, you can select a font and apply size, width, style, line, and alignment attributes. Press the Text key. The current settings are displayed. Select an attribute using the key, and then set a value for that attribute using the key. - Page 35 Setting Options Attribute Value Result (Helsinki) (Brussels) (USA) (Florida) Font (Belgium) (San Diego) (Los Angeles) (Calgary) Setting Character Attributes...
- Page 36 EDITING A LABEL Attribute Value Result When Auto is selected, the text is Auto automatically adjusted to print in the largest size available for each tape width. 48pt 42pt 36pt Size 24pt 18pt 12pt x3/2 Width x2/3 x1/2 Setting Character Attributes...
- Page 37 Attribute Value Result Normal (Bold) (Outline) (Shadow) (Solid) Style (Italic) I+BLD (Italic Bold) I+OUT (Italic Outline) I+SHD (Italic Shadow) I+SLD (Italic Solid) (Vertical) Line (Underline) (Strikeout) Setting Character Attributes...
-
Page 38: Setting Auto Fit Style
EDITING A LABEL Attribute Value Result Left Center Align (Alignment) Right Just (Justify) Setting Auto Fit Style When "Size" is set to "Auto" and "Length" is set to a specific length, you can select the way of reducing the text size to fit within the label length. When "Text Size"... -
Page 39: Setting Label Attributes
Setting Label Attributes Using the Label key, you can create a label with a frame around the text and specify the label length and tab length. (Cut Options which may be needed when printing a label can also be set by using the Label key. Refer to “Tape Cutting Options” on page 57.) Press the Label key. - Page 40 EDITING A LABEL Frames Attribute Value Result Frame Setting Label Attributes...
- Page 41 Attribute Value Result Frame The length of the label can be set within the range 30mm - Length 300mm. When Auto is selected, the length of the label is automatically adjusted based on the amount of text entered. The length of the tab can be set within the range 0mm -100mm. Tab Length The default setting is 50mm.
-
Page 42: Using Auto-Format Layouts
EDITING A LABEL Using Auto-Format Layouts Using the Auto-Format function you can quickly and easily create labels for a variety of purposes, such as file tabs, equipment labels, name badges, etc. Simply select a layout from the templates or block layouts, enter the text and apply formatting as desired. Symbols and accented characters can also be used in auto-format layouts. - Page 43 Press the OK or Enter key. The template text entry screen is displayed. • Caps mode can be used when entering text. • The “Text Reminder” function (predictive text) is also enabled when entering text with the Auto-Format function. Refer to “Entering and Editing Text” page 23 details on predictive text.
- Page 44 EDITING A LABEL Templates Attribute Value Details Binder Spine 1 (24 mm x 219 mm) Binder Spine 2 (18 mm x 219 mm) File Folder Tab (12 mm x 82 mm) Divider Tab (Hanging Folder) (12 mm x 42 mm) Asset Tag (18 mm x 70 mm) Template Name...
- Page 45 Attribute Value Details Address Label 1 (24 mm x 70 mm) Address Label 2 (18 mm x 70 mm) Name Badge 1 (24 mm x 72 mm) Name Badge 2 (18 mm x 72 mm) Template Name Name Badge 3 (12 mm x 72 mm) CD Case Spine 1 (6 mm x 113 mm)
-
Page 46: Using Block Layouts
EDITING A LABEL Using Block Layouts Press the Auto-Format key to display the Auto-Format screen, and then select “Block Layouts” using the key. Press the OK or Enter key to display the Tape Width screen, and then select a tape width using the key. - Page 47 • Press the Escape key to return to the previous step. • Refer to the Block Layouts table for a list of available block layouts. • To print multiple copies, sequentially numbered copies, or a mirror image of the label, with the print menu displayed hold down the Shift key and press the Print key to display the Print Options menu.
- Page 48 EDITING A LABEL Attribute Value Details 2LineA 2LineB 3Line 1+2LineA Block layout (18 mm tape) 1+2LineB 1+3Line 1+4Line 1+5Line 2LineA 2LineB Block layout (12 mm tape) 3Line 1+2Line Using Auto-Format Layouts...
-
Page 49: Using Time & Date Function
Attribute Value Details 2LineA Block layout 2LineB (9 mm tape) 1+2Line Block layout 1+2Line (6 mm tape) Using Time & Date Function You can add time and date to your label by positioning the cursor on the text screen to the position you wish to add time/date and then pressing the Time key. -
Page 50: Time & Date Format Setting
EDITING A LABEL Time & Date Format Setting You can select from various formats of date and time to add to your label. Also, the indication of time can be selected between analog and digital style. The format applied in this setting will also be applied for the clock display which appears on the screen when you press the Display key. -
Page 51: Time Stamp Setting
Attribute Value 11:59 PM (Time) 23:59 The date and time used for the value is a sample setting. When a format is selected, the date and time set in the clock setting will appear in the selected format style. Time Stamp Setting [Timing] You can select whether to print the date/time of when you press the Time key or the date/time of when you press the Print key to add to your label. -
Page 52: [Time Stamp Format]
EDITING A LABEL [Time Stamp Format] You can select which information to use when adding date and time to your label. Four options (Date, Time, Date and Time or Time and Date) are available. Press the Setup key to display the Setup menu, select "Time Stamp Setting" using the key, and then press the OK or Enter key. -
Page 53: Creating A Bar Code Label
Press the OK or Enter key. The Forward screen is displayed. Set the amount of year, month, week, day, hour, and minute to increase from the currently set clock when using the Time & Date function using the key. To move to the next parameter, use the key. -
Page 54: Setting Bar Code Parameters
EDITING A LABEL Setting Bar Code Parameters Press the Setup key to display the Setup menu, select “Bar Code Setup” using key, and then press the OK or Enter key. The Bar Code Setup screen is displayed. Select an attribute using the key, and then set a value for that attribute using the key. -
Page 55: Entering Bar Code Data
Entering Bar Code Data Press the Bar Code key. The Bar Code Input screen is displayed. • Up to five bar codes can be entered on a label. Type in the bar code data. Special characters can be entered in the bar code when using the CODE39, CODABAR, CODE128 or GS1-128 (UCC / EAN-128) protocols. -
Page 56: Editing And Deleting A Bar Code
EDITING A LABEL CODE128, GS1-128 (UCC / EAN-128) Code Special Character Code Special Character Code Special Character (SPACE) FNC3 FNC2 FNC4 FNC1 Editing and Deleting a Bar Code • To edit the bar code data position the cursor beneath the bar code mark on the data entry screen and then open the Bar Code Input screen. -
Page 57: Label Printing
LABEL PRINTING Label Preview Using the Preview function you can check the layout of the label before printing. Press the Preview key. An image of the label is displayed on the screen. The length of the label is shown in the lower-right corner of the screen. Press the key to scroll the preview to the left or right. -
Page 58: Printing A Single Copy
LABEL PRINTING Printing a Single Copy Make sure that the appropriate tape cassette is inserted and ready for printing. Press the Print key. "Printing...Copies" is displayed while the labels are being printed. To stop printing, press the Power key to turn off the P-touch. There are several other messages that may appear when you press the Print key. -
Page 59: Auto-Numbering Labels
Auto-numbering Labels Using the numbering function you can create a set of sequentially numbered labels from a single label format. Make sure that the appropriate tape cassette is inserted and ready for printing. Hold down the Shift key and press the Print key to display the print options screen, and then select "Numbering"... -
Page 60: Mirror Printing
LABEL PRINTING • Press the Escape key to return to the previous step. • The tape is automatically cut after each copy is printed. Refer to “Tape Cutting Options” on page 57 to change this setting. • The figures shown on the screen during printing indicate the “count / number of copies”. •... -
Page 61: Tape Cutting Options
Tape Cutting Options The tape cutting options allow you to specify how the tape is fed and cut when printing labels. In particular, the “Chain” and “No Cut” options greatly reduce the amount of wasted tape by using smaller margins and eliminating blank sections cut between labels. - Page 62 LABEL PRINTING Tape Cutting Setting Description Example Automatically cuts the tape after each label is Large printed, leaving a margin of 24 mm on each Margin 24 mm 24 mm end. 23 mm Automatically cuts a piece of blank tape Small before printing the first label and then cuts the Margin...
-
Page 63: Adjusting The Label Length
Adjusting the Label Length You can adjust the length of the printed label in levels of -5 to +5. Press the Setup key to display the setup menu, select "Adjust Length" using the key, and then press the OK or Enter key. Select "Adjust Length"... -
Page 64: Printing From The Label Collection
LABEL PRINTING Printing from the Label Collection Printing a label from the Label Collection Stored in the Machine Pages 61 to 63 show the many labels that are stored in your Label Collection. Printing these pre-designed labels saves you time. Press the Label Collection key. - Page 65 Label Collection List Category Label Files (12 mm tape only) Office Signage (24 mm tape only) * Labels are for illustrative purposes only. Printing from the Label Collection...
- Page 66 LABEL PRINTING Category Label Caution (24 mm tape only) Shipping (18 mm tape only) (18 mm tape only) * Labels are for illustrative purposes only. Printing from the Label Collection...
- Page 67 Category Label Retail (24 mm tape only) Personal (12 mm tape only) * Labels are for illustrative purposes only. Printing from the Label Collection...
-
Page 68: Downloading A New Label Collection Category (Windows ® Only)
Turn the machine on and connect the USB cable. Double-click the [P-touch Update Software] icon. The following method can also be used to start the P-touch Update Software. Click [Start], and then select [All Programs] - [Brother P-touch] - [P-touch Update Software]. Click the [Machine update] icon. ®... - Page 69 Select the [Printer], ensure that [The machine is connected correctly.] is displayed, and then click [OK]. Select the [Language], select the check box next to the label collection to be downloaded and/or software to be updated, and then click [Transfer]. Click "Click here for details"...
- Page 70 LABEL PRINTING The screen on the right is displayed on your computer while the software is being updated screen. The screen on the right appears on the machine's LCD display. Do not turn off the machine during the update process. Click [OK] to complete the update.
-
Page 71: Downloading A New Label Collection Category To P-Touch Editor / Updating P-Touch Editor Software
• The following method can also be used to start the P-touch Update Software. • Click the [Start], and then select [All Programs] - [Brother P-touch] - [P-touch Update Software]. • If a message is displayed notifying the user that the Editing Software (P-touch Editor) is the latest version when started, click [Yes] and then proceed to step 3. - Page 72 LABEL PRINTING The installed label collection will be saved to the P-touch Editor [Label Collection] tab. ® Downloading a new Label Collection Category (Windows only)
-
Page 73: Using The File Memory
USING THE FILE MEMORY You can store up to 99 of your most frequently used labels in the file memory. Each label is stored as a file, allowing you to quickly and easily recall your label when needed again. • When the file memory is full, each time you save a file you will need to overwrite one of your stored files. -
Page 74: Printing A Stored Label File
USING THE FILE MEMORY Printing a Stored Label File Press the File key to display the File screen. Select "Print" using the key. Press the OK or Enter key. The file number of a stored label is displayed. The label text is also displayed to identify the label. Select a file number using the key, and then press the Print, OK or Enter key to print the selected label. -
Page 75: Maintaining Your P-Touch
MAINTAINING YOUR P-TOUCH Resetting the P-touch You can reset the internal memory of your P-touch when you want to clear all saved label files, or in the event the P-touch is not operating correctly. Resetting data to factory settings (Downloaded data is not reset.) Turn off the machine. -
Page 76: Cleaning The Print Head
MAINTAINING YOUR P-TOUCH Cleaning the Print Head Streaks or poor quality characters on printed Print head labels generally indicates that the print head is dirty. Clean the print head using a cotton swab or the optional print head cleaning cassette (TZ-CL4). -
Page 77: Troubleshooting
TROUBLESHOOTING What to do when... Problem Solution The screen ‘locks’, or Refer to “Resetting the P-touch” on page 71 and reset the the P-touch does not internal memory to the initial settings. If resetting the P-touch respond normally. does not solve the problem, disconnect the AC adapter and remove the batteries for more than 10 minutes. - Page 78 TROUBLESHOOTING Problem Solution The P-touch stops • Replace the tape cassette if striped tape is visible, as this while printing a label. indicates that you have reached the end of the tape. • Replace all batteries or connect the AC adapter directly to the P-touch.
-
Page 79: Error Messages
Error Messages When an error message appears on the display, follow the directions provided below. Message Cause/Remedy Battery Weak!* The installed batteries are getting weak. Check The following are likely causes. Battery! • The batteries are installed with the negative and positive ends the wrong way round. - Page 80 TROUBLESHOOTING Message Cause/Remedy Tape Width There are more than two lines of text when you press the Limit! Print or Preview key while using 9 mm or 6 mm tape. Limit Max 2 Lines* the number of lines to two, or replace with a larger width tape cassette.
- Page 81 Message Cause/Remedy Incorrect The value entered for setting the tape length, tab length, Value!* multiple copies or numbering function is invalid. Enter a valid value for the setting. Select Other The tape length set using the tape length setting is shorter Cut Option!* than the total length of the left and right margins applied for the "Large Margin"...
-
Page 82: Appendix
APPENDIX Specifications Main Unit Item Specification Display Character display 16 characters x 3 lines (128 dot x 48 dot), Backlit Screen contrast 5 levels (+2, +1, 0, -1, -2) Printing Print method Thermal Transfer Print head 128 dot / 180 dpi Print height 18mm max. -
Page 83: Index
INDEX AC adapter ........17 Power Supply ........16 Accented Character List ....29 Auto power-off time ......19 Return mark ........13 Battery ..........16 size ............30 Block Layouts ........43 Special Character List .......51 Specifications ........78 Caps mode ........13 style ...........30 contrast .......... - Page 84 Printed in China LW6576001...