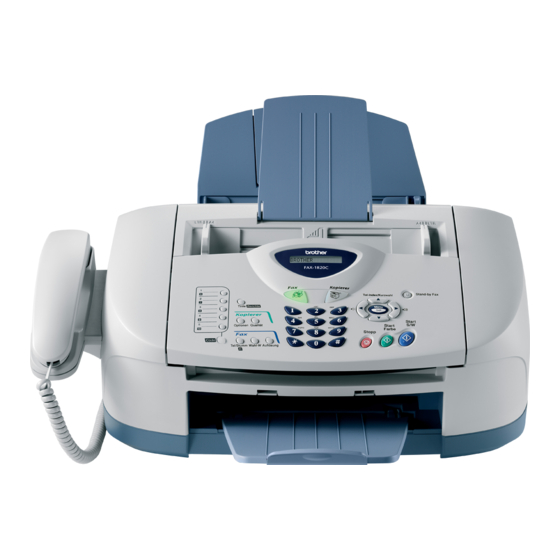
Brother FAX-1820C Quick Setup Manual
Hide thumbs
Also See for FAX-1820C:
- User manual (189 pages) ,
- Software user's manual (66 pages) ,
- Quick setup manual (17 pages)
Table of Contents
Advertisement
Quick Links
Before you can use the machine, you must set up the hardware.
To help you get started in setting up the machine, please read this "Setup Guide" and
follow the simple instructions.
Setting Up the Machine
Setup is Complete!
To find the best solution for your problem or question, access the Brother Solutions Center,
http://solutions.brother.com
Keep this "Quick Setup Guide" and User's Guide in a convenient place for quick and easy
reference at all times.
Advertisement
Table of Contents

Related Manuals for Brother FAX-1820C

Summary of Contents for Brother FAX-1820C
-
Page 1: Setting Up The Machine
Setting Up the Machine Setup is Complete! To find the best solution for your problem or question, access the Brother Solutions Center, http://solutions.brother.com Keep this “Quick Setup Guide” and User’s Guide in a convenient place for quick and easy... -
Page 2: Carton Components
■ Getting Started Carton Components Quick Setup Guide User’s Guide . Control Panel . Top Cover One Touch Labels ADF Document Support Paper Tray Power Cord ADF Document Output Support Output Paper Support Telephone Line Cord Telephone Handset Handset Curled Cord Black Magenta Yellow... -
Page 3: Control Panel
Control Panel 1. One Touch keys 5. Stop/Exit 9. Mode keys 2. Shift 6. Start keys 10. Liquid Crystal Display (LCD) 3. Fax and telephone keys 7. Power Save key 11. Copy keys (Temporary Settings) 4. Dial Pad 8. Navigation keys 12. -
Page 4: Table Of Contents
Table of Contents Setting Up the Machine 1. Removing the Protective Parts ................. 4 2. Install Handset....................4 3. Attaching the Paper Tray and Supports ............5 4. Loading Paper ....................5 5. Install Phone Line and Power Cord ..............6 6. -
Page 5: Removing The Protective Parts
Setting Up the Machine Removing the Protective Install Handset Parts Connect the curled handset cord to the machine and the other end to the handset. Remove the protective tape and paper in the ADF. Open the control panel cover by pulling it toward you (1), and then lift the top cover toward the back (2). -
Page 6: Attaching The Paper Tray And Supports
Attaching the Paper Tray Loading Paper and Supports You can load up to 100 sheets of 80 g/m paper. Insert the paper tray from above into the For more details, see “Paper Capacity of back of the machine. the Paper Tray” in Chapter 2 of the User’s Guide. -
Page 7: Install Phone Line And Power Cord
Setting Up the Machine Install Phone Line and If you are sharing one phone line with an external telephone, connect it as shown Power Cord below. Connect the power cord. (Example for the U.K.) If you are sharing one phone line with an external telephone answering machine, Power Cord connect it as shown below. -
Page 8: Installing The Ink Cartridges
Remove the white shipping cover by pulling Installing the Ink it towards you. Cartridges Warning If ink gets in your eyes irrigate them with water immediately, and if irritation occurs consult a doctor. Make sure that the power is turned on. The LCD shows;... - Page 9 We also strongly Press the cover down until it clicks. recommend that you continue to use only Genuine Brother Brand replacement ink cartridges. Using or attempting to use potentially incompatible inks and/or cartridges in your...
-
Page 10: Colour Block Quality And Alignment Check
Step A: Colour Block Quality Colour Block Quality and Check Alignment Check The LCD shows: After the cleaning cycle is finished, the LCD Is Step "A" OK? shows; 1.Yes 2.No Set Paper and Press Start Check the quality of the four colour blocks formed by the short lines printed on the Make sure the paper is loaded in the paper sheet. - Page 11 Setting Up the Machine Step B: Alignment Check The LCD shows: Is Step "B" OK? 1.Yes 2.No Check the 600 dpi and 1200 dpi test print to see if No.5 most closely matches the OK sample (No.0). Press if No.5 matches No.5 600 DPI 1200 DPI...
-
Page 12: Setting The Date And Time
Menu/Set Dial pad Stop/Exit Setting the Date and Time The machine displays the date and time, and prints it Enter the two digits for the day on the dial on every fax you send. pad, and then press Menu/Set. Press Menu/Set. Day:01 (e.g. -
Page 13: Setting Your Station Id
Setting Up the Machine Menu/Set Dial pad Stop/Exit Setting Your Station ID You should store your name and fax number to be Press Three Four printed on all fax pages that you send. time times times times Press Menu/Set. Press Press Enter your fax number (up to 20 digits) on the dial pad, and then press Menu/Set. -
Page 14: Selecting A Receive Mode
Press Chapter 5 of the User’s Guide. Using the FAX as a Printer or for PC-FAX Send You can download the Brother Printer Driver and ■ Please download the Printer Driver first PC-FAX Send driver from the Brother Solutions before connecting the machine to your Center for use with your machine.