Table of Contents
Advertisement
Introduction
§ Features and capabilities
§ Basic operations
Setup
§ Menu
§ Keyboard functions
§ Memory functions
Tutorial
Installation of labels and ribbon
Working with the menu and function keys
Printing
Saving and serializing labels
Cleaning
§ Basic cleaning instructions
Troubleshooting
Frequently Asked Questions
Operational Exercise
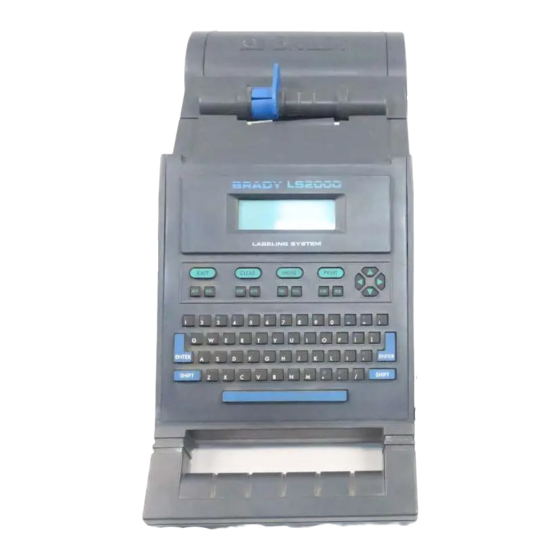
LS2000 Portable Printer
Advertisement
Table of Contents

Related Manuals for Brady LS2000


Summary of Contents for Brady LS2000
- Page 1 LS2000 Portable Printer Introduction § Features and capabilities § Basic operations Setup § Menu § Keyboard functions § Memory functions Tutorial Installation of labels and ribbon Working with the menu and function keys Printing Saving and serializing labels Cleaning § Basic cleaning instructions Troubleshooting Frequently Asked Questions Operational Exercise...
- Page 2 Introduction The LS2000 portable printing machine is a shuttle head impact type of printer. It has a stepper motor drive mechanism for fast printing. It is capable of printing on labels and sleeves. Label registration is accomplished by optically sensing a “cut-out” in each label insuring proper label alignment and precise registration.
-
Page 3: Basic Operations
Basic operations Cursor and editing keys This group of keys is used to control the movement of the cursor and enables text editing. The function of each key is described below: Enter Activates a screen selection or, when used while composing a legend, inserts a non-visible end of line character and moves the cursor down to the next line. -
Page 5: Function Keys
Function keys The use of each function key while in the TEXT EDITOR is described in below: Exit Backs you out one level in the menu tree. Press this key to terminate or pause the printing of markers. Press this key to move from a sub menu back to the main menu or from the main menu to the TEXT EDITOR screen. - Page 6 Menu Printer Format Allows for three formats for printing; wiremarker, component and strip. These formats are the same as for the BMXC+ and the I.D. PRO Plus. Tear bar Allows for adjusting the location of the label relative to the Tear bar (set by pressing enter). It moves in increments of .00625".
- Page 7 Menu (continued) System Select this function if you would like all number sixes (6) and nines (9) to be underlined or if you would like to be warned before a legend is truncated (cut-off). Type There are five settings in this selection: Small = 16 cpi Medium = 12 cpi Large = 8 cpi...
-
Page 8: Platen Gap Adjustment
Other LS2000 features Platen gap adjustment This is the amount of spacing between the platen and the printhead. It allows for proper label advancement and print resolution when printing a label. The gap adjustment is set by the platen gap adjustment knob (see page 12) in conjunction with the label material used. - Page 9 Material guide for platen gap setting Stock code Material Gap setting B-122 Permanent paper B-292 Self-laminating vinyl 2 or 3 B-319 Non-shrink BradySleeve 3 or 4 B-321 Heat shrink BradySleeve 3 or 4 B-322 Self-extinguishing BradySleeve 3 or 4 B-341 Heat-shrink PermaSleeve 5 or 6 B-502...
- Page 11 Tutorial Before using, plug the unit into the AC adapter/charger to ensure that the battery will be properly charged. Remember that the battery pack MUST be charged for 16 hours before using the unit on battery power alone. Install the ribbon cartridge by tilting the exposed portion of the ribbon down along the front side of the clear plastic shield (closest to the front of the unit) see ribbon on page 12.
- Page 12 To serialize a legend enter the text required and place the cursor under the number(s) to be serialized. Press the Serial key for each character to be serialized. You will hear a series of beeps to indicate that your command was accepted and the character position will be blinking on your display.
- Page 13 Examples of terminal block printing.
-
Page 15: Cleaning And Maintenance
Cleaning and Maintenance The LS2000 Labeling System has a rugged printer assembly. To keep it in top operating condition, it should be cleaned once a month! Read the following guidelines for maintaining the five major areas of the printer: Drive Roller Lint and dust may build up on the drive roller resulting in the slipping of markers as they feed through the printer. -
Page 16: Removing The Platen Assembly
WARNING: Excessive force on the optic eye bracket will cause misalignment of the optic eye and the printer will have to be sent to W.H. Brady Inc. for recalibration 1. Remove the ribbon. 2. Loosen the two (2) platen removal screws in the platen assembly until they pop loose from the printer frame. -
Page 17: Printhead Mask
Cleaning and Maintenance (continued) Printhead mask The printhead mask is a clear, thin, plastic shield with seven holes punched in it. It is located between the platen assembly and the printer assembly. The mask may build up with ink and adhesive, causing smearing or label-jamming problems. -
Page 18: Error Messages
Troubleshooting and most commonly asked questions Q. My labels aren’t advancing. A. Check to see if there is a label stuck in the material path. Be sure that the material is inserted into the material guide correctly. Is the material guide in the proper guide slot? Is the drive roller, platen mask, and material clamp clean? Remove the platen assembly. - Page 19 If unit must come in for repair 1. An RMA form must be obtained from Brady’s Technical Support Center by calling 800\643-8755 between 7am – 7pm Central time. 2. When ready to ship the unit , write up a short note stating the symptoms and enclose any samples that show the problem.