Table of Contents
Advertisement
Advertisement
Table of Contents

Related Manuals for Olivetti OFX 180


Summary of Contents for Olivetti OFX 180
- Page 1 OFX 180 INSTRUCTIONS...
- Page 2 Direzione @ Home/Office 11020 ARNAD (Italy) Via Jervis, 77 - 10015 IVREA (Italy) Copyright © 2003, Olivetti All rights reserved The manufacturer reserves the right to make any changes to the machine described in this manual, at any time, and without prior warning.
-
Page 3: Table Of Contents
ABLE OF CONTENTS IRST ECTION EFORE USING IT OW TO START AT ONCE CONSULTING THE MANUAL ............I INSTALLATION CONDITIONS OPERATING PRECAUTIONS ............I INSTALLATION PRECAUTIONS ............ I CONNECTION TO THE TELEPHONE LINE AND ABOUT THE INSTALLATION AND SETUP PARAMETERS .... I POWER SUPPLY PACKAGE CONTENTS .............. - Page 4 ABLE OF CONTENTS ECOND ECTION INSTALLATION TROUBLESHOOTING GUIDE TO CONNECT IT TO THE TELEPHONE LINE ......1 WHAT HAPPENS IF THERE IS A POWER FAILURE ....24 TO CONNECT THE TELEPHONE HANDSET ......3 WHAT HAPPENS IF THE PAPER OR INK HAS RUN OUT ..24 TO CONNECT IT TO THE POWER SUPPLY ........
-
Page 5: Efore Using It
During storms we recommend you unplug the device from sole. both the power outlet and the telephone line so as to • The list of Olivetti customer assistance centres (Olivetti Customer eliminate all risk of damage. Service). • In case of a voltage drop or power failure, it will not be possible to make or receive telephone calls as the keypad will be disabled. -
Page 6: About The Fax Machine
BOUT THE FAX MACHINE ONSOLE EDUCTION KEY Reduces or enlarges the docu- ments to be copied (only with the document inserted in the ADF). ESOLUTION KEY Adjusts the resolution of the documents to be copied (only with the document inserted in the ADF). - Page 7 BOUT THE FAX MACHINE ONSOLE RX MODE RESOL. CONTR. S. DIAL LAST TX EXTERNAL CLEAR PAUSE OOK KEY ONTRAST KEY TOP KEY AST TX PAUSE KEY Adjusts the contrast of the documents to be sent Accesses the line: it is Unloads a document from the ADF.
-
Page 8: Components
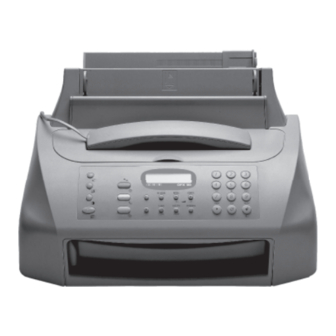
BOUT THE FAX MACHINE OMPONENTS The figure shows the external and internal parts of the fax machine. (ASF) LAIN PAPER FEED COMPARTMENT Adjustable to the following paper sizes: A4, Letter and Legal. Maximum capacity: 40 sheets (80gr/m APER SUPPORT EXTENSION ONNECTION SOCKETS APER ADJUSTING LEVER APER GUIDES... -
Page 9: Ow To Start At Once
OW TO START AT ONCE This section provides a basic description of the fax machine, by explaining its installation procedures and those regarding its basic and immediate use, even if only with its minimum capabilities. For a more comprehensive use of the fax machine, see the corresponding section. As this section has been especially designed so as to guide you to a gradual and systematic approach of the fax machine, it is advisable to read the topics in the order in which they are presented. -
Page 10: Setting Some Parameters (Indispensable For Correct Functioning)
OW TO START AT ONCE Connect the fax machine to the power supply IMPORTANT IMPORTANT Before connecting it, remove the band that blocks the print The plug of the power supply cable may vary from country head carriage by pulling the flap upwards (see picture be- to country. -
Page 11: To Set The Date And Time
OW TO START AT ONCE O SET THE DATE AND TIME COUNTRY COUNTRY TO BE SELECTED The first time that you connect the fax machine to the Argentina AMERICA LATINA power supply and every time there is a voltage drop, Australia NZL/AUSTRALIA you need to set the date and time as described below. -
Page 12: Setting Up The Fax Machine
OW TO START AT ONCE ETTING UP THE FAX MACHINE Feed the print paper into the machine IMPORTANT By means of the adjusting lever (see picture below) push the sheets until they adhere to the left and right side of the paper feed compartment. - Page 13 OW TO START AT ONCE Insert the print head IMPORTANT The print head provided with the machine allows you to print up to 80 pages*, whereas the spare print heads, with a greater capacity, allow you to print up to 500 pages*. * Based on Test Chart ITU-TS n.1 (black coverage = 3,8%).
-
Page 14: Transmissionx
OW TO START AT ONCE • Check that the numbered scale is not interrupted at any point and that the black areas do not present any hori- IMPORTANT zontal white lines: if these conditions, which confirm that the print head has been inserted correctly and is working When the print head is about to run out of ink, the display properly, are respected, set the value 1. - Page 15 OW TO START AT ONCE To start sending. O SEND A DOCUMENT WITH THE RECEIVER If the document is sent correctly, once this operation has RAISED been completed, the display will show the message "TX COMPLETED" for a few seconds and then the initial stand- by status.
- Page 16 OW TO START AT ONCE ECEPTION You can set up the fax machine to receive the documents sent by your correspondents in three separate modes, that you may access by pressing the key: manual reception, automatic reception and automatic reception in the "PHONE/FAX" mode. "...
- Page 17 OW TO START AT ONCE SING THE TELEPHONE When you engage the line by lifting the telephone handset, you may use all the telephone functions available on ordinary telephones sold on the market. These also include the R function (REGISTER RECALL, activated by pressing the key, with previous setting see "To set it up for the telephone line", section "Installation") which provides access to the special services made available by the company that manages the telephone network.
-
Page 19: Installation
NSTALLATION If the telephone system has more than one socket, you can con- O CONNECT IT TO THE TELEPHONE LINE nect the additional telephones to any of the free sockets providing your system’s sockets are handled in parallel, that is: if you can As the connection to the telephone line of the fax machine is still hear the dialling tone when the receivers of the telephones regulated by national standards that vary from one country to... - Page 20 CONNECTION ALL SOCKETS FOR CONNECTION TO TELEPHONE LINE Connection sockets LINE MERGENCY TELEPHONE CONNECTION ERMANY ALL SOCKETS FOR CONNECTION TO TELEPHONE LINE Connection sockets LINE MERGENCY TELEPHONE CONNECTION USTRIA ALL SOCKETS FOR CONNECTION TO TELEPHONE LINE Connection sockets LINE MERGENCY TELEPHONE...
-
Page 21: To Connect The Telephone Handset
O CONNECT THE TELEPHONE HANDSET O ADD PAPER 1. Insert the connector of the handset cable into the socket marked with the symbol on the fax machine. 2. Place the handset in its seat. O CONNECT IT TO THE POWER SUPPLY n o t E 1. -
Page 22: To Install The Print Head
O INSTALL THE PRINT HEAD UTOMATIC PRINT HEAD NOZZLE CLEANING AND TESTING PROCEDURE Once the print head has been inserted, the fax machine starts the nozzle cleaning and checking procedure, which is com- pleted by: • the printing, on the sheet loaded automatically, of a diagnostic test sheet containing: a numbered scale, for checking the flow of ink and the electrical circuits of the print head nozzles. -
Page 23: To Change The Date And Time
O CHANGE THE DATE AND TIME O SET YOUR FAX NUMBER If the date and time shown on the display are not correct, The display shows: you can change them at any time. Until the display shows: Enter your fax number. To enter a space, press |/}. -
Page 24: To Set It Up For The Telephone Line
Press |/} to view the other available option: O SET IT UP FOR THE TELEPHONE LINE The display shows: O CONNECT IT TO A PUBLIC LINE The fax machine is set up to be connected to a public line. In Press |/} to view the other dialling mode: any case, it is a good idea to check that: •... -
Page 25: Basic Transmission And Reception Operations
ASIC TRANSMISSION AND RECEPTION OPERATIONS Now that your fax machine has a name and number, you can use it to: O PLACE THE DOCUMENT IN THE ADF • send documents (also in broadcast mode, from the memory, or by polling) Place the document, without forcing, on the automatic document feeder (ADF) with the side to be sent face down and then fit the cheeks •... -
Page 26: To Hear The Dialling Tone When Sending Adocument
n o t e To start sending. If you have entered any incorrect digits: position the cursor, If the document is sent correctly, once this operation has using the |/} keys, to the incorrect digit and overwrite it with been completed, the display will show the message "TX the correct one;... - Page 27 n o t e O CHANGE DELETE A BROADCAST TRANSMISSION THAT EXTERNAL Automatic code dialling is activated by pressing the IS ALREADY SET before dialling the correspondent’s number. If the fax machine is connected to a private line (PBX), the EXTERNAL key is to be pressed twice before dialling the corre- Until the display shows:...
-
Page 28: Manual Reception
CANCEL SETTING? – To clear the setting. The fax ma- The fax machine starts to save the document. Once saved, chine returns to its initial standby status. the display shows the message "DOC.N. XXXX" and then: CHANGE PARAM.? – To change the correspondent’s number or the time at which you want to send the document. -
Page 29: To Set One-Touch And Speed Dialling
The action taken by the fax machine in this reception mode If there are any incorrect numbers, position the cursor on depends on who is calling: the incorrect number using the |/} keys and overwrite it - If the caller is another fax machine, after two rings your with the correct number. - Page 30 To associate a telephone number only without hav- O CHANGE DELETE A ONE TOUCH DIALLING KEY OR ing to store a fax number first: SPEED DIALLING CODE Follow the procedure to associate a fax number and a name until the display shows: Follow the one-touch dialling or speed dialling procedure until the display shows: - For one-touch dialling...
-
Page 31: To Print Reports And Lists
- If the power failed during or after the transmission or recep- O SEND A DOCUMENT WITH SPEED DIALLING tion of a document in the memory, when power is restored, the fax machine will automatically print a report indicating the total Place the document in the ADF. - Page 32 O ENABLE DISABLE THE AUTOMATIC PRINTING OF THE • Received Id Number (and, sometimes, name) of BROADCAST TRANSMISSION REPORT theselected correspondent. This number corresponds to the number you dialled, only if the correspondent set his own fax number correctly. Otherwise, it may be dif- Until the display shows: ferent or not be present at all.
- Page 33 n o t e O PRINT THE SETUP PARAMETERS AND THE ONE TOUCH If you chose "PRINT OUT:EXIT", press the key to DIALLING AND SPEED DIALLING SETTINGS return the fax machine to the initial stand-by mode. Until the display shows: ISTS At any time, you can print complete lists of the installation and The display shows:...
-
Page 34: To Make A Call
O MAKE A CALL When you engage the line by lifting the telephone handset, you O TELEPHONE BY RUNNING A SEARCH IN may use all the telephone functions available on ordinary telephones THE PHONE BOOK sold on the market. These also include the R function (REGISTER RECALL, activated by pressing the key) which provides access to the special serv- Do not place the document in the ADF. -
Page 35: To Make A Copy
O MAKE A COPY n o t E HAT DOCUMENTS CAN BE COPIED If you want to abort the copy in progress, press the key twice: the first time to unload the document from the ADF Before making a copy, make sure that the document respects the and the second time to return the fax machine to the initial characteristics described in "What documents may be used", stand-by mode. -
Page 36: More Sophisticated Operations
ORE SOPHISTICATED OPERATIONS N O T E THER USEFUL RECEPTION SETTINGS If you choose the "SURPLUS:AUTO" setting, the fax ma- chine will print the surplus text on another sheet providing the surplus exceeds 12 mm. O REDUCE THE PRINTING AREA OF A DOCUMENT RECEIVED If you choose the "SURPLUS:ON"... - Page 37 O CHANGE THE RING VOLUME O DISPLAY THE CALLER ID This function, which may be activated by the telephone company on Until the display shows: request by the user, is only available in some countries and conforms to the ETSI ETS 300 778-1 standard. This function tells you immediately who is calling.
- Page 38 Call the fax machine with the desired frequency so that the Press |/} to view the other available values: "3", "4", "8", fax machine detects it. The display shows: "10" or "OFF". For exemple: "4". To confirm your choice. To return the fax machine to the initial stand-by mode. To return the fax machine to the initial stand-by mode.
-
Page 39: Other Useful Transmission Settings
THER USEFUL TRANSMISSION SETTINGS O REGULATE THE SPEAKER VOLUME If the volume of the dialling tones and connection signals is O ENABLE DISABLE REPETITION OF A FAILED too low or too high, regulate it using the TRANSMISSION FROM THE MEMORY keys. -
Page 40: Sending/Receiving A Document In Polling Mode
O SET UP THE AUTOMATIC RESOLUTION ENDING RECEIVING A DOCUMENT IN POLLING MODE If you do not select the type of resolution before sending a document, the fax machine will send it automatically with the default resolution setting (in this case: STANDARD). IRST OF ALL WHAT POLLING IS If you like, you can set it up and have documents sent... - Page 41 O CHANGE DELETE A POLLING RECEPTION THAT HAS BEEN SET Until the display shows: The display shows: The display shows: Press |/} to view the other available option: "CANCEL SETTING?". To confirm your choice. CANCEL SETTING? - To cancel the setting. The fax ma- chine returns to its initial stand-by status.
-
Page 42: Troubleshooting Guide
ROUBLESHOOTING GUIDE OR MINOR PROBLEMS HAT HAPPENS IF THERE IS A POWER FAILURE In the case of a power failure, the fax machine keeps the The list below may be used as a guide to the solution of minor prob- lems. -
Page 43: Error Codes
RROR CODES The error codes printed both on the transmission report and the activity report consist of two digits indicating the cause of the error. To save space, the two-digit code without any message is printed on the activity report. CODE MESSAGE CAUSE OF ERROR... -
Page 44: Signals And Messages
IGNALS AND MESSAGES • You aborted the copy operation by pressing the key. Any problems that may arise are generally indicated by acoustic • An error occurred during the document copying phase, prevent- signals (accompanied, in some cases, by visual signals: error ing it from being printed: check the type of fault on the display and correct it. - Page 45 Reception continues in the memory because an error occurred dur- You have put a telephone call on hold by pressing the key: ing the reception of a document, preventing it from being printed: check the type of fault on the lower line of the display and correct it. press the key again to resume the conversation with the corre- spondent.
-
Page 46: Maintenance Operations
AINTENANCE OPERATIONS At this point, the fax machine automatically cleans the O REPLACE THE PRINT HEAD print head and tests the nozzles, printing out the result of the diagnostic test. Examine the diagnostic test result with n o t E reference to "To install the print head", section "Installa- tion". -
Page 47: To Clean The Electrical Contacts Of The
Remove the print head and do the following opera- O CLEAN THE NOZZLES OF THE PRINT HEAD tions: • check that there are no foreign bodies on the print N O T E nozzles; if there are, remove them carefully, taking care not to touch the electrical contacts;... -
Page 48: To Clean The Optical Reader
O REMOVE JAMMED DOCUMENTS AND O CLEAN THE OPTICAL READER SHEETS OF PRINTING PAPER Dust accumulating on the glass surface of the optical reader may cause problems in the scanning of documents. To avoid these prob- During transmission or copying, a document could get jammed lems, the glass should be cleaned every now and again as follows: (this condition is signalled by the display showing the message: "RE- With the fax machine disconnected from the power socket:... -
Page 49: Technical Data
ECHNICAL DATA ENERAL CHARACTERISTICS RANSMISSION CHARACTERISTICS Model ......Desktop transceiver Transmission speed ..11s (9600 bps MMR) Display ......LCD 16 + 16 char. ADF capacity ....5 sheets A4, Letter and Legal Capacity memory ..(*) 21 pages Dimensions ECEPTION CHARACTERISTICS Width ...... -
Page 50: Index
NDEX Acoustic signals 27 Line characteristics ADF 7 private line 6 Automatic redial 8 public line 6 Line signals 21 Lists list of installation parameters 15 Buzzer volume 21 one-touch dialling and speed dialling settings 15 setup parameters 15 Connection connecting an emergency telephone 1 Maintenance operations connecting the fax machine 1... - Page 51 Reception Technical data automatic reception 10 characteristics of optical reader 31 with recognition of the type of call 10 communication characteristics 31 manual reception 10 environmental conditions 31 surplus text 18 general characteristics 31 to change the number of rings 19 power supply characteristics 31 to change the remote control code 20 reception characteristics 31...
- Page 52 Monochrome print head part numbers Single-block print head: P/N 84431 W (FPJ 20) Single-block print head with pigmented ink: P/N B0042 C (FPJ 22)
- Page 53 293383Y...