
Related Manuals for Nakajima AE-710


Summary of Contents for Nakajima AE-710
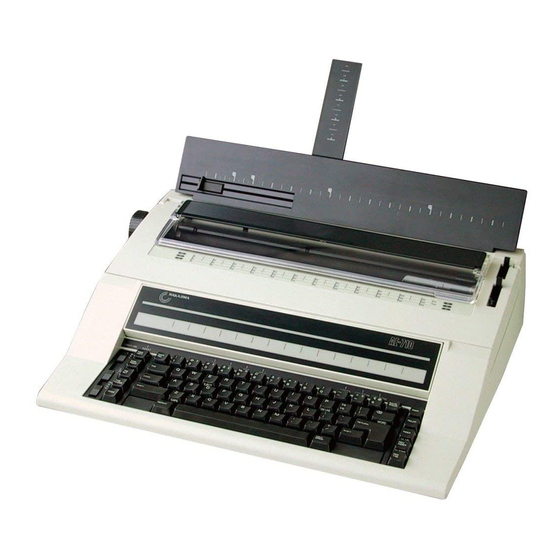
- Page 1 NAKAJIMA First in quality and relinbility J l r - OPERATION MANUAL AE-710 ELECTRONIC OFFICE TYPEWRITER...
- Page 2 FOR USA ONLY NOTE: This equipment has been tested and found to comply with the limits for a Class B digital device, pursuant to Part l5 of the FCC Rules. These limits are designed to provide reasonable protection against harmful interference in a residential installation. This equipment generates, uses and can radiate radio frequency energy and, if not installed and used in accordance with the instructions, may cause harmful interference to radio communications.
- Page 3 Your new electronic typewt'iter increaies your typing efficiency through use of the most advanced technology. Some of the many outstanding features of your typewriter are: | 5.0 inch paper capacity Easy-to-change 100-characterdrop-in printwheel l0 line correction memory (700 characters max.) Five format memory Pitch selector: lO, 12, 15 and PS (proportional spacing) Line space selector: l,l-l/2...
-
Page 4: Table Of Contents
TABLE OF CONTENTS INTRODUCTION Rules For Safe Opcration Part Names And Functions Key Functions GETTING STARTED Unpacking S e t t i n g U p . . . T u r n i n g O n T y p e w r i t e r ..Inserting/Ejecting Paper Typing Controls M a r g i n s... -
Page 5: Rules For Safe Opcration I
INTRODUCTION Rules For Safe Operation Make sure you are using the proper power as stated on the name plate at the back of the typewriter Your typewriter is a highly sophisticated mechanism. Never attempt to repair it yourself lf repair becomes necessary, take it to the nearest authorized service center. -
Page 6: Part Names And Functions
Part Names And Functions \ , , \\----zl//' ) \^\... - Page 7 12. POWER CORD 1. PLATEN KNOB Used to manually ro{ate 13. PLATEN (ROLLER) the platen. Rolls paper in and out. PAPER GUIDE f4. PAPER BAIL & BAIL ROLLERS Provides consistent placement Holds paper against the platen. of paper. 15. RIBBON GUIDE 3.
-
Page 8: Key Functions
Key Functions Keyboard with letter-type function keys ao .,9 ' [-,ry] fT--A [_l n i--l f-] f-_l n I [ 'n I L]J L_J LJ LJ t lL--,l r- Keyboard with symbol-type function keys... - Page 9 12. HALF SPACE KEY I. MARGIN RELEASE KEY Moves the carrier one half space to Releases the margins to type beyond the right. them or set new ones. 13. RETURN KEY 2. LEFT MARGIN KEY Returns the carrier to the left margin Sets the left margin.
-
Page 10: Unpacking
GETTING STARTEI) Unpacking Before using your typewriter, be sure to remove the packing materials as described in the unpacking instructions. Setting Up l) Insert the paper support panel. 2) Raise the page end indicator located on the back of the paper support panel. -
Page 11: " Turning On Typewriter
" Turning On Typewriter I ) Plug the appropriate end of the power cord into the typewriter 2) Plug the other end of the power cord into an outlet of the proper voltage/frequency as specified on the name plate at the back of the tvpewriter. -
Page 12: Inserting/Ejecting Paper Tj
Inserting/Ejecting Paper Inserting paper I ) Adjust the paper guide on the paper support panel to the desired position. The paper guide ensures consistent placement of your paper. 2) Insert a sheet of paper behind the platen aligned with the paper euide, 3) Pull the paper bail lever toward you as far as it goes. -
Page 13: Typing Controls
Typing Controls Impression control This control determines the printing impact (how hard the printwheel strikes the paper). Select the proper impact depending on the type of printwheel, ribbon, paper or the number of multiple copies. The largest dot represents the heaviest impact. Line space selector This selector determines the spacing of the lines d o u b l e s p a c i n g ( 3 l i n e s p e r i n c h ) -
Page 14: Margins
Margins Preset margins Whcn you I'irst turn on the rypcw,rirer, the preset margins are used. T ' h c s e s c t t i n g s p r o v r d e y o u w i r h r t u n d a r d o n e i n c h l e f t a n d o n e i n c h r i g h t r n a r g i n s f i l r c a c h p i t c h s e l c c t i o n . -
Page 15: Tabs
Tabs Setting a tab @ (tr) I ) Use the Space bar or the Backspace key to position the canier at the point where you want to set a tab. 2) Press the Tab set key. A beep sounds to signal that the tab has been set. -
Page 16: Corrections L2
Corrections Your typewriter has an automatic correction memory. It remembers the last 700 characters typed within the last l0lines and will correct any or all of those characters. Characters typed outside the correction memory can be corrected easily using the manual correctlon. - Page 17 Automatic word correction (correcting words within the correction memory) l) Use the lndex key or Reverse index key to position the print point indicator on the line which contains the word to be corrected. The line locator (red line) marked on the card holder position carrier should be line up below the line.
- Page 18 Manual correction (correcting characters outside the correction memory) I ) Use the Index key or Reverse index key to position the print point indicator on the line which contains the error. The line locator (red line) marked on the card holder should be line up below the line.
-
Page 19: Typing Functions
TYPING FUNCTIONS The letter below shows you some of the sample usage ol'the typing functions on your typewriter. " T o o 1 s f o r E v e r y o n e " C o n s o L r d a t e d T o o . -
Page 20: Paragraph Indention
Paragraph Indention - l - h i s f u n c t i o n c r c a t c s a t c m p o r a r y l e f t m a r g i n t o i n d e n t s e v e r a l l i n e s s u c h a s a p a r a g r a p h l ) P o s i t i o n t h c c a r r i c r a t t h c p o i n t w h e r c v c l u w a n t t o s e t t h e I-r'rpENT-l... - Page 21 5) Type the decimal point (Comma or Period key). The numbers and the decimal point are printed, aligning the decimal point at the tab position. Then type the number following the decimal polnt. Note: When typing numbers without a decimal point or when typing words, you have 3 options to print them out.
-
Page 22: Automatic Centering
Automatic Centering This function centers text evenly between the left and right margrns. I ) Hold down the Code key and press the AUTO CENTER key. A beep sounds and the canier automatically advances to the center position between the left margin (or indent position) and the right margin. -
Page 23: Automatic Carrier Return
Automatic Carrier Return This function automatically returns the carrier at the end of each line without pressing the Return key. l) Hold down the Code key and press the AUTO RETURN key. A beep sounds to signal that the function has been activated. 2) Type text. -
Page 24: Automatic Underlining
Automatic Underlining This function underlines individual words (no spaces) or all characlers automatically. Automatic full underlining I ) Hold down the Code key and press the "X X" key. A beep I - u I sounds to signal that the function has been activated. 2) Type the text to be underlined. -
Page 25: B O L D T Y P I N
Bold Typing This function makes words stand out from the rest of the text. Use this function to emphasize titles, highlight information, etc. Code key and press the BOLD key. A beep rl that the function has been activated. {ll of the characters will be printed in boldface 3) To cancel bold typing, hold down the Code key and press the BOLD key again. -
Page 26: Framing (Line Drawing)
Micro Up/lVlicro Down/lVlicro Back Space Use this function to align the pnnt point indicator to an ext.ct position such as a previously typed letter or position on a pre-printed form. Hold down the Code key and press the Index key. Paper will a d v a n c e l / l 6 l i n e ( l / 9 6 i n c h ) e a c h t i m e t h i s k e v c o m b i n a t i o n i s pressed. - Page 27 Creating frame by drawing vertical and horizontal lines l) First draw the top and bottom horizontal lines of the frame. Hold down the Shift key and press the Hyphen key, then press the Repeat key to draw a horizontal line. Note: Setting margins at the desired width makes it easier to draw horizontal lines of the same length.
-
Page 28: Format (Margin And Tab) Memory
Format (Margin And Tab) Memory This l'unction stores up to 5 kinds of formats (margin and tab s c t t i n g s ) i n t h e m c m u r y . Storing a format I , t S c t t h c d e s i r e d m a r g i n s a n d t a b s a s u s u a l . -
Page 29: How To Change Accessories Ribbon Cassette
HOW TO CHANGE ACCESSORIES Ribbon Cassette Removing ribbon cassette I ) Turn off the typewriter and open the top cover. 2) Hold the cassette as shown and pull up the ribbon cassette arms Note: Check the amount of ribbon remaining through the ribbon cassette window. - Page 30 Ribbon select setting Your typewriter can use either correctable carbon or multi-strike ribbons. Set the ribbon selection in accordance with the ribbon you use. Correctable carbon ribbon is selected for the lact<1ry setting. To select the multi-strike ribbon, hold down the Code key and press the key to the left of the Right shifi key.
-
Page 31: Correction Tape
Correction Tape Removing correction tape l) Open the top cover and remove the ribbon cassette as explained under "Removing ribbon cassette". 2) Remove the left hnd right spools from the spindles. Note: Be sure not to pull the spindle hub when removing the left spool. 3) Grasp both spools and bring them back to straighten the tape. -
Page 32: P R I N T W H E E
Printwheel Removing printwheel l) Open the top cover and remove the ribbon cassette as explained u n d e r " R e m o v i n g r i b b o n c a s s e t t e " . 2) Pull the printwheel set/release lever toward you. - Page 33 SUPPLIES Ribbon cassette There are two types of ribbons that can be used on your typewnter. Correctable carbon ribbon Your typewriter comes with this ribbon. This ribbon provides excellent corection performance with the lift-offconection tape. The carbon surface ofthe ribbon is transferred to the paper as you type, so it is not reusable.
-
Page 34: R E M O V I N G P L A T E
MAINTENANCE Removing Platen The platen on your typewriter is removable making it easier to clean or to remove jammed paper. Removing the platen 1.1 Turn off the typewriter. Open the top cover and move the carrier all the way to the right. 2) Pull open the paper bail toward you. -
Page 35: C L E A N I N
Cleaning Do not attempt to disassemble the typewriter to clean rt. Dust the typewriter lightly, using only a dry clorh. Never use water or solvents such as thinner, alcohol, etc. to clean your typewriter. Be careful not to drop any items (especially pins, paper clips, nail files, etc.) into the typewnrer when the top cover is opened. - Page 36 Printed in Indonesia 001 -02548-01 20001201 YK A E 7 1 O E...