
Related Manuals for Nautilus Sport Series


Summary of Contents for Nautilus Sport Series
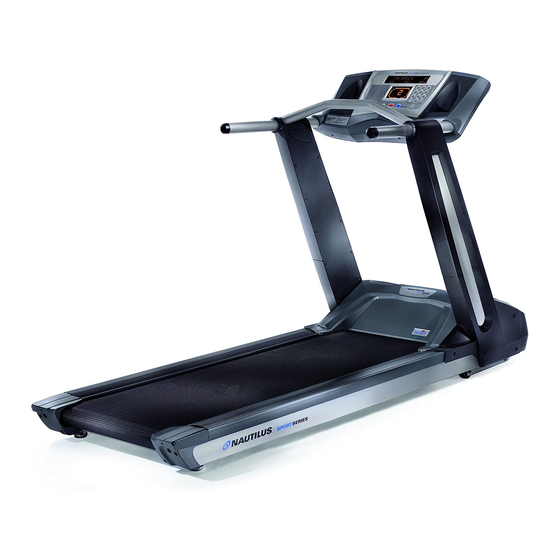
- Page 1 Be Strong. ™ T514 Model: T516 Model: T518 Model: AssEMBLy MAnuAL Sport SerieS Base Model: T514, T516, T518 Display Model: LE, LE-X, LC P/N: 000-4844 Rev D (12/2005)
- Page 3 All treAdmillS Are not creAted equAl. Thank you for purchasing your Nautilus® Sport Series treadmill. For more than 30 years Nautilus has been producing the world’s finest fitness equipment used in health clubs and homes around the globe. We hope this product meets your every expectation and is a valuable tool on the road to accomplishing all your fitness goals.
-
Page 4: Table Of Contents
HARDWARE AND TOOL LIST BASE ASSEMBLy GUIDE DISPLAy ASSEMBLy GUIDE WARRANTy IMPORTANT CONTACT NUMBERS For detailed instructions and inFormation on how to use and care For your nautilus ® sport series treadmill, model t514, t516 and t518, reFer to the owner’s manual. -
Page 5: Base/Display Serial Number Location
Approvals Meets: safety - EN 60335-1, EMC Directive 89/336/EEC - European Union (EU), EN 61000-6-3 EN 61000-6-1 Meets: UL1647 3rd Ed Csa C22.2 No. 68-92 CaN patent information U.s. and International Patents Pending Nautilus® Sport Series Treadmill Assembly Manual... -
Page 6: Product Specifications
0.5 - 12 mPh 0.5 - 12 mPh (0.8 - 19.3 KPh) (0.8 - 19.3 KPh) (0.8 - 19.3 KPh) Optional Workout Software my Nautilus™ Software, my Nautilus™ Software, heart Strong™ Software, heart Strong™ Software, my Nautilus™ lX my Nautilus™ lX Shipping Weight Approx. -
Page 7: Important Safety Precautions
12. Keep the area underneath and around the treadmill clear. Nautilus® sport series treadmill , could result in serious injury Position the treadmill on a clean, level surface and do not or death. -
Page 8: Important Safety Precautions
If the power cord is damaged, it must be • Do not remove the treadmill motor covers: dangerous voltages replaced with a power cord from Nautilus, Inc. are present. Components such as the motor, controller, and display are serviceable only by qualified service personnel. -
Page 9: Before You Assemble
Nautilus® Sport Series treadmill, turning toward on the treadmill. the right will tighten, turning towards the left Put your Nautilus® machine mat in place in your will loosen. An easy way to remember this is selected workout area before you start assembly by remembering the expression, “lefty loosey,... -
Page 10: Parts List
pArtS liSt Part: top Motor Cover sticker (t514) Qty: 1 P/N: 000-4810 Part: top Motor Cover sticker (t516) Qty: 1 P/N: 000-4826 Part: Base Frame assembly Qty: 1 Part: top Motor Cover sticker (t518) Qty: 1 P/N: 000-4827 Part: Left Upright Cap Qty: 1 P/N: 000-4725 Part: top Plastic Motor Cover... - Page 11 Part: rear Console access Panel P/N: 000-4706 P/N: 000-4706 Qty: 1 P/N: 000-4718 Part: Front Motor Cover sticker (t514/516) Qty: 1 P/N: 000-4833 Part: LE Display Front (shown in console) Qty: 1 P/N: 000-4722 Nautilus® Sport Series Treadmill Assembly Manual...
-
Page 12: Hardware And Tool List
HArdwAre And tool liSt During the assembly process a 1/2 socket with ratchet will be required. this tool is not provided. HarDWare BaG (p/N: 000-4775) - NOtE: ILLUstratIONs arE NOt tO sCaLE. the hardware Bag contains the following individual parts and tools. item: hex head Bolts (5/16 - #18 x 1 1/2) item: Flat Washers (5/16) item: hex head Bolts (5/16 - #18 x2) -
Page 13: Base Assembly Guide
ASSembly guide the following instructions provide direction in assembling the base units for the Nautilus® Sport Series treadmill models t514, t516 and t518. All instructions in the manual are given with the orientation of standing on the treadmill facing the console. the console is the front, while the rear roller is the back. - Page 14 bASe ASSembly guide step 1: Continued NOtE: You may need to loosen the motor pan bolts (see step 2 for location) and move the front cross support bracket towards the front of the base assembly for the Upright supports to fully fit onto the brackets. 1-3 Verify that the wiring harness connectors are accessible at the top and bottom of the right Upright assembly.
-
Page 15: Connecting The Wiring Harness
& Wiring wires do not become pinched or Connections come into contact with any moving part. The treadmill will not work and an electric shock hazard may be present. Nautilus® Sport Series Treadmill Assembly Manual... - Page 16 bASe ASSembly guide step 4: placing the Console Assembly Figure 4: step 4 placing Console Assembly Locate the following for this step: Console Assembly Parts: • assembly from step 3 • Console assembly 4-1 slide Console assembly mounting Bracket into Upright supports.
-
Page 17: Securing Left Side On Console Assembly
R AiSeD eDge iS Ne X t imPORtANt! tO the uPRight SuPPORt DuRiNg iNStAll AtiON. See hARDWARe StAcK iN FiguRe 5. 5-2 tighten all bolts on the left side securely, including Upright support bolts installed in step 1 . Nautilus® Sport Series Treadmill Assembly Manual... - Page 18 bASe ASSembly guide step 6: securing the right side on Console Assembly Figure 6: step 6 securing Console Assembly Locate the following for this step: Parts: • assembly from step 5 hex head Bolt Flat Washer Hardware: star Washer • 3 Hex Head Bolts (5/16 - #18 x 1) •...
- Page 19 Locate the following for this step: Parts: • assembly from step 6 • Left Upright Hardware Cap • right Upright Hardware Cap 7-1 Install Left Upright Hardware Cap. 7-2 repeat process for right Upright Hardware Cap. Nautilus® Sport Series Treadmill Assembly Manual...
- Page 20 bASe ASSembly guide step 8: installing Top Motor Covering Figure 8: step 8 installing Top Motor Cover Locate the following for this step: Top Motor Cover Parts: • assembly from step 7 • top Plastic Motor Covering 8-1 Place top plastic piece onto mounting points. step 9: installing Front Motor Cover sticker Figure 9: step 9 Top Motor Cover sticker Locate the following for this step:...
- Page 21 Head screws on the inside of the Left Upright support assembly. 10-2 Install 4 self Drilling Metal screws on the outside of the Left Upright support assembly and Left Upright Cover. 10-3 repeat process for right Upright Cover. Nautilus® Sport Series Treadmill Assembly Manual...
-
Page 22: Installing Front Motor Covering
bASe ASSembly guide step 11: installing Front Motor Covering Figure 11: step 11 installing Front Motor Cover Locate the following for this step: Parts: • assembly from step 10 • Front Plastic Motor Covering Hardware: • 3 self Drilling Metal screws (#8 x 3/4) Base Assembly tools: •... - Page 23 T518: Front Motor Cover sticker step 13: inspecting Base Assembly Congratulations! Now that you have assembled your Nautilus® sport series treadmill base, Model t514, t516 or t518, it is VErY IMPOrtaNt to tighten all screws and bolts, failure to visually check and test and visually inspect the treadmill.
-
Page 24: Display Assembly Guide
ASSembly guide the following instructions provide direction in completing the console units for the Nautilus® Sport Series treadmill displays le, le-X and lc. All instructions for assembling the display are given with the orientation of standing on the treadmill facing the console. the console is the front, while the rear roller is the back. - Page 25 • 4 stainless steel screws (#10 x 5/8) tools: • Phillips screw Driver 2-1 Install Display into Console assembly. mAKe SuRe thAt the imPORtANt! WiRiNg hARNeSS cABleS DO NOt BecOme PiNcheD. 2-2 secure the Display with 4 stainless steel screws. Nautilus® Sport Series Treadmill Assembly Manual...
- Page 26 diSplAy ASSembly guide step 3: Connecting the Wiring harness Figure 3: step 3 Connecting Wiring Harness Locate the following for this step: Parts: • treadmill assembly from step 1 3-1 Connect the Wiring Harness from the Console assembly to the display, making sure to match the pin connectors.
-
Page 27: Installing Rear Access Panel
CongrATuLATions! assembly of your Nautilus® sport series treadmill is now complete. Be sure to fully inspect your Nautilus® sport series failure to visually check and test treadmill before plugging in and using for the first assembly before use can cause time. -
Page 28: Warranty
Nautilus, inc. election, to the return of the purchase price required. Any product sold or placed in an application not of the exercise product in question. -
Page 29: Important Contact Numbers
For technical assistance and a list of distributors of your machine and the date of purchase available when in your area, please call or fax one of the following you contact the appropriate Nautilus office listed below. numbers. oFFiCEs in ThE uniTED sTATEs: inTErnATionAL CusToMEr sErViCE: •... - Page 32 © 2005 Nautilus, Inc. all rights reserved. Nautilus, the Nautilus logo, My Nautilus, Heart strong, Changing the Game in Health and Fitness, rEaCt, rOC, remote Operation Control, supersoft, Hyperdrive, Be strong are either registered trademarks or trademarks of Nautilus, Inc.