Table of Contents
Advertisement
Quick Links
ESI
1. Introduction to WaMi Rack 192 Series ___________________________________ 4
2. Description of WaMi Rack 192 Series ___________________________________ 6
3. Hardware Installation ________________________________________________ 8
1.
System Requirement __________________________________________ 8
2.
Preparation for hardware installation ____________________________ 9
3.
Installing WaMi Rack 192 Series PCI card _______________________ 10
4. WaMi Rack 192 Series Software Installation _____________________________ 12
5. WaMi Rack 192 Series Console________________________________________ 19
1.
Pull Down Menu_____________________________________________ 20
2.
Clock ______________________________________________________ 22
3.
SAMPLE RATE _____________________________________________ 23
4.
INPUT 3,4 __________________________________________________ 23
5.
SPDIF(Digital Type Selector) __________________________________ 23
6.
MONITOR _________________________________________________ 23
7.
MONIT ____________________________________________________ 23
8.
Input level fader & meter _____________________________________ 23
9.
Output level fader & meter ____________________________________ 24
10. SPDIF Output Meter _________________________________________ 24
11. MME Output Meter __________________________________________ 24
6. Setting in Applications_______________________________________________ 25
1.
Windows Multimedia setup ___________________________________ 26
2.
5.1 channel for DVD Player application _________________________ 27
3.
ASIO 2.0- Cubase, Logic, Nuendo ______________________________ 29
4.
Sonar/Cakewalk _____________________________________________ 32
5.
Sound Forge ________________________________________________ 34
INDEX
2
WaMi Rack 192 Series
Advertisement
Table of Contents

Related Manuals for ESI WaMi Rack 192 series


Summary of Contents for ESI WaMi Rack 192 series
-
Page 1: Table Of Contents
WaMi Rack 192 Series INDEX 1. Introduction to WaMi Rack 192 Series ___________________________________ 4 2. Description of WaMi Rack 192 Series ___________________________________ 6 3. Hardware Installation ________________________________________________ 8 System Requirement __________________________________________ 8 Preparation for hardware installation ____________________________ 9 Installing WaMi Rack 192 Series PCI card _______________________ 10 4. - Page 2 WaMi Rack 192 Series Wave Lab __________________________________________________ 35 Giga Studio (v. 2.20.42 or higher) _______________________________ 36 Using Direct Wire ____________________________________________ 37 7. Specifications ______________________________________________________ 42 * All features and specifications subject to change without notice.
-
Page 3: Introduction To Wami Rack 192 Series
WaMi Rack 192 Series 1. Introduction to WaMi Rack 192 Series Thank you for choosing WaMi Rack 192 Series of ESI. There are WaMi Rack 192X and WaMi Rack 192L with same out look and features except the quality of A/D & D/A converters of each product. - Page 4 5. DirectWire feature WaMi Rack 192 Series supports DirectWire function that is provided by E-WDM supported products from ESI. This unique feature will simplify the hassles of wiring externally for inter- driver/inter-application audio data transfer. Especially when you use software synthesizers or...
-
Page 5: Description Of Wami Rack 192 Series
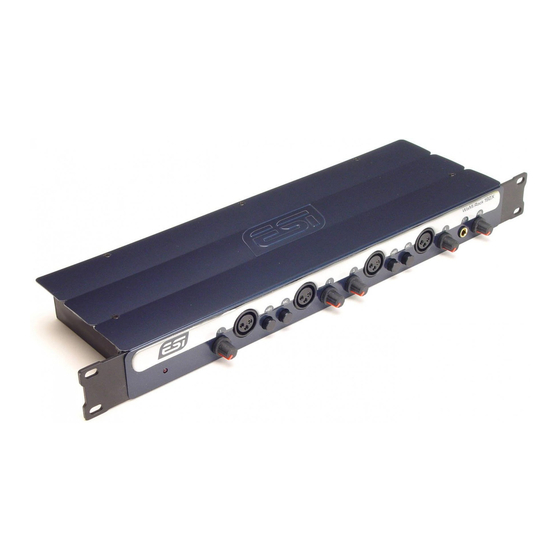
WaMi Rack 192 Series 2. Description of WaMi Rack 192 Series Here are the short descriptions of WaMi Rack 192 Series’s outlook. 1. Front Panel 1) MIC/Line Input Level knob: Control the amount of input level through XLR type of each MIC input or Line input through the TRS connectors on the rear panel of WaMi Rack 192 Series. -
Page 6: Pci Card
WaMi Rack 192 Series 1) MIDI I/O : WaMi Rack 192 Series provides 1in 1out 16ch MIDI I/O 2) Line Input : 4 analog Line Input ports with balanced TRS phone connector 3) Monitor out : Stereo low-Z XLR type monitor output 4) Line Out : 8 analog Line Output ports with balanced TRS phone connector D-Sub connector : Connect WaMi Rack 192 Series breakout box with PCI card on the computer through this connector... -
Page 7: Hardware Installation
WaMi Rack 192 Series 3. Hardware Installation WaMi Rack 192 Series requires couple of installation procedure: ‘PCI card installation’, and ‘Driver installtion’. The ‘PCI card installation’ step includes install the WaMi Rack 192 Series PCI card into the PCI slot. ‘Driver installation’ is having the operating system in your computer recognize WaMi Rack 192 Series and building the communication channel. -
Page 8: Preparation For Hardware Installation
WaMi Rack 192 Series 2. Preparation for hardware installation WaMi Rack 192 Series PCI card and other components in the computer can be easily damaged by electrical shock. You need to use an anti-static device that can discharge the static electricity of your body to avoid potential static damage to the cards. 1. -
Page 9: Installing Wami Rack 192 Series Pci Card
WaMi Rack 192 Series 3. Installing WaMi Rack 192 Series PCI card Please look for an empty PCI slot. If you do not know which one is an actual PCI slot, please, read the following; There are 3 kinds of slots in most of recent computers. The PCI slot is most common and is used for different types of devices from the soundcard to the modem. - Page 10 WaMi Rack 192 Series Close the computer case.
-
Page 11: Wami Rack 192 Series Software Installation
WaMi Rack 192 Series 4. WaMi Rack 192 Series Software Installation After completing the installation of hardware for WaMi Rack 192 Series, you need to install its driver software to use it. The software installation is not too hard, even for computer beginners. - Page 12 WaMi Rack 192 Series 2. Choose ‘Search for the best driver in these locations’ and Specify the location of the driver. Insert the provided Driver CD into the CD-Rom drive and select ‘Include this location in the search’ and click ‘Browse’...
- Page 13 XP.” You can simply ignore it and just select ‘Continue Anyway’. Though, the message is appeared, the driver is completely tested and verified by manufacture (ESI) and safe to use it. 4. First WaMi Rack 192 Series driver will be installed.
- Page 14 WaMi Rack 192 Series 5. Windows will automatically install second driver. It’s same as above procedure.
- Page 15 WaMi Rack 192 Series...
- Page 16 WaMi Rack 192 Series 6. Windows will continuously install more drivers from WaMi Rack 192 EWDM Wave2 to Wave5. And finally Windows will recognize and install ‘WaMi Rack 192 EWDM Midi’ at the end of the session. Though, several devices will be detected and installed, just follow above step 1 ~4. When your system keeps asking restart the computer, just ignores that and keep going to install.
- Page 17 Manager’. Check the devices under ‘Sound, video and game controllers’, if they are installed correctly. According to the unit, Controller name of the very bottom of Device list will be changed like “WaMi Rack 192L EWDM Controller by ESI” or “WaMi Rack 192X EWDM Controller by ESI”.
-
Page 18: Wami Rack 192 Series Console
WaMi Rack 192 Series 5. WaMi Rack 192 Series Console If you complete the WaMi Rack 192 Series hardware driver installation, you need to learn about the WaMi Rack 192 Series Console. This console is what you can control your setup for the WaMi Rack 192 Series. The WaMi Rack 192 Series Console is built for easy to use. -
Page 19: Pull Down Menu
WaMi Rack 192 Series 1. Pull Down Menu The WaMi Rack 192 Series console includes a pull down menu bar that contains the configuration menus for the Console. 1. File - Exit File – Exit will close the WaMi Rack 192 Series Console window but it will not shut down the Console. - Page 20 WaMi Rack 192 Series latency depends on your situation. Generally, higher latency is fit for Multi-track recording software using multiple tracks. Process time maybe longer, but it’s stable. Lower latency is fit for software synthesizer, mastering software or Multi-track software using only few tracks.
-
Page 21: Clock
WaMi Rack 192 Series As you can see, MME, Multi-MME, ASIO and GSIF indicate driver names of WaMi Rack 192 Series. Along the vertical channel indicate number, output and input ports of each driver are showed. Just click desired output number of the driver and drag it to the input of the driver you want to record the source. -
Page 22: Sample Rate
WaMi Rack 192 Series as this ‘CARD SYNC. You can connect two cards using 2 pin sync cable of WaMi Rack 192 Series. 3. SAMPLE RATE -AUTO: Selecting ‘AUTO’ sets sample rate automatically detected and locked according to the sample rate of audio source. -LOCK: In this mode, you can set sample rate manually. -
Page 23: Output Level Fader & Meter
WaMi Rack 192 Series 2. Input 3,4 Under the Monitor select button, this is where to control and see input level of WaMi Rack 192 Series through Input 3,4, which can be switched between analog and digital channels. You can change the input level by click and drag the fader and the number at the bottom shows you relative amount of level in dB, by clicking it you can MUTE the channel. -
Page 24: Setting In Applications
WaMi Rack 192 Series 6. Setting in Applications WaMi Rack 192 Series is a premium professional audio/midi device designed to be used for professional audio work in a Windows environment. It has a wide range of usage from game sound to DVD surround sound. It is very easy to set up the WaMi Rack192X in the multimedia setup of the windows console. -
Page 25: Windows Multimedia Setup
WaMi Rack 192 Series 1. Windows Multimedia setup The Windows Multimedia setup is required to use WaMi Rack 192 Series as the sound system for Windows multimedia applications. Go to ‘My computer-> Console -> Sounds and Audio Device Properties -> Audio tab. Select WaMi Rack 192 driver as your playback device. -
Page 26: Channel For Dvd Player Application
WaMi Rack 192 Series 2. 5.1 channel for DVD Player application ( Ex. Power DVD ) WaMi Rack 192 Series can be used with 5.1 channel DVD software player to provide 5.1 channel analog surround sound. Since WaMi Rack 192 Series is built for professional audio, it will deliver optimal sound for your DVD player. - Page 27 WaMi Rack 192 Series Caution: This is 5.1 channel surround sound route This order will be varied by your operating systems. WaMi Rack 192 Series Output Speaker Front Front Center Surround Surround Configuration Left Right Woofer Left Right Caution: When you use 5.1 channel surround, you have to turn off ‘Input Monitor’.
-
Page 28: Asio 2.0- Cubase, Logic, Nuendo
WaMi Rack 192 Series 3. ASIO 2.0- Cubase, Logic, Nuendo -Cubase After launching Cubase, go to ‘System’ under ‘Audio’ menu. Select ‘ASIO 2.0 –WaMi Rack 192’ for the ASIO device and ‘WaMi Rack 192 Clock’ for the Audio clock source. - Page 29 WaMi Rack 192 Series -Nuendo After launching Nuendo, go to Device -> Device setup ->VST Multitrack. Select ‘ASIO 2.0 –WaMi Rack 192’ for the ASIO device and ‘WaMi Rack 192 Clock’ for the Audio clock source.
- Page 30 WaMi Rack 192 Series -Logic After launching Logic, go to Preference -> Audio Drivers2. Check the ‘ASIO’ and select ‘ASIO 2.0 –WaMi Rack 192’. And go to ‘Option>Setting>Synchronisation Setting>MIDI’ and uncheck ‘Transmit MIDI Clock’ for better performance.
-
Page 31: Sonar/Cakewalk
WaMi Rack 192 Series 4. Sonar/Cakewalk Before you using Sonar, you have to do several setting first. You have to set proper latency on the console of WaMi Rack 192 Series. After launching sonar, Go to ‘Option’ -> Audio and select ‘Wave Profiler’ of ‘General’ tab. - Page 32 WaMi Rack 192 Series...
-
Page 33: Sound Forge
WaMi Rack 192 Series 5. Sound Forge In Sound Forge, select ‘Option’ from menu bar. Select ‘Preference…’ then Wave tab. Choose ‘WaMi Rack 192 1,2’ (2ch) as Playback and Record device. -
Page 34: Wave Lab
WaMi Rack 192 Series 6. Wave Lab In Wave Lab, Go to Option -> Preferences -> Audio Card. Choose ‘WaMi Rack 192 1,2’(2ch) as Playback and Record device. -
Page 35: Giga Studio (V. 2.20.42 Or Higher)
WaMi Rack 192 Series 7. Giga Studio (v. 2.20.42 or higher) If you want to use WaMi Rack 192 Series with Giga Studio, you have to use Giga Studio v.2.20.42 or higher. Caution: If you want to use Giga Studio in Windows 2000 or XP, you need to use Giga Studio v.2.5. -
Page 36: Using Direct Wire
WaMi Rack 192 Series 8. Using Direct Wire By clicking this menu on WaMi Rack 192 console, DirectWire window will be appeared. DirectWire is a unique feature of E-WDM driver that make possible to transfer digital audio data within different applications using same/different drivers. As you can see, MME, Multi-MME, ASIO and GSIF indicate driver names of WaMi Rack 192 series. - Page 37 WaMi Rack 192 Series EX1. Recording from Winamp to WaveLab EX2. Recording from Winamp to Sonar EX3. Recording from Winamp to Cubase...
- Page 38 WaMi Rack 192 Series EX4. Recording from Sonar to Cubase or Vice versa EX5. Recording from Power DVD 5.1 to Sonar...
- Page 39 WaMi Rack 192 Series EX6. Recording from Power DVD 5.1 to Cubase EX7. Recording from GigaStudio to Sonar...
- Page 40 WaMi Rack 192 Series EX8. Recording from GigaStudio to Cubase...
-
Page 41: Specifications
WaMi Rack 192 Series 7. Specifications <WaMi Rack 192X> 1. Analog Input Specification 1) Type : 4 channel analog line input - 1/4" TRS Phone jack (X4) - Balanced XLR Connector (X4) 2) Level : +4dBu balanced, +4dBu Nominal, +22.5dBu Max (Gain +0dB) 3) Gain Adjustment : +0dB ~ +20dB 4) Impedance : 10K ohm... - Page 42 WaMi Rack 192 Series <WaMi Rack 192L> 1. Analog Input Specification 1) Type : 4 Channel analog input * 4 Unbalanced 1/4" TRS Phone Jack(Line in) * 4 Balanced XLR Connector(Line in, Mic in) 2) Level * +4dBu UnBalanced, +4dBu Nominal, +17dBu Max (Gain +0dB) * +4dBu Balanced, +4dBu Nominal, +22.5dBu Max (Gain +0dB) 3) Gain Adjustment : +0dB ~ +20dB 4) Impedance...
- Page 43 WaMi Rack 192 Series 1) Type : High perfomance SIGMA-DELTA ADC 2) Dynamic Range (S/N) : 100 dB A-Weighted (Typical) 3) Frequency Response : 20 ~ 22.5KHz (@ fs=48kHz) 4) Sample Rate Supports : Up to 96KHz 5) Resolution : 24 Bits 6) Interchannel Gain Mismatch : 0.5dB 7.