
Related Manuals for ESI Juli@


Summary of Contents for ESI Juli@
- Page 1 High Quality 24-bit 192kHz 4x4 reference audio interface with swappable I/O socket User’s Guide...
- Page 2 ESI - Copyright © 2004 - 2012 Revision 8, July 2012 www.esi-audio.com...
-
Page 3: Table Of Contents
Juli@ INDEX 1. Introduction..........................4 Key Features..........................4 2. Description of Juli@ ........................5 How to swap the Connectors? ...................... 7 3. Hardware Installation ....................... 11 System Recommendation ......................11 Minimum System Requirement....................11 Preparation for Hardware Installation ..................11 PCI Card Installation ........................ -
Page 4: Introduction
Juli@ 1. Introduction Congratulations on your purchase of Juli@ by ESI – High Quality 24-bit 192kHz 4x4 reference audio/MIDI interface with swappable I/O socket. Juli@ is the perfect reference audio interface for home studio recording applications. This audio card provides support for 24-bit 192kHz on 2 analog input and 2 analog output channels with a special swappable I/O socket. -
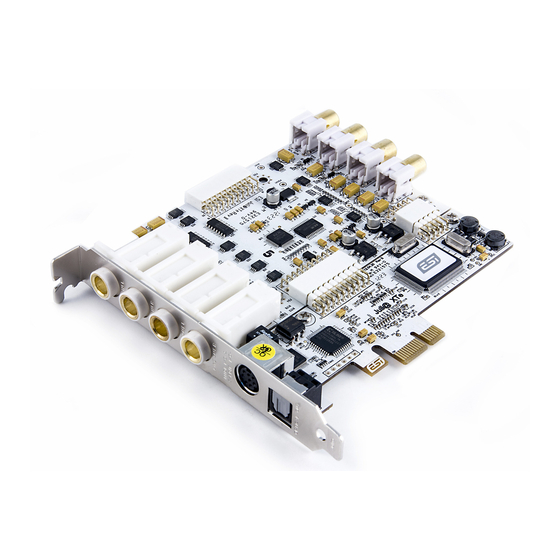
Page 5: Description Of Juli
Juli@ 2. Description of Juli@ Here is a short description of Juli@ ’s connectors. 1. 2. Analog Inputs 1/2 (top) and Analog Outputs 1/2 (bottom) These are analog Line inputs and outputs. Depending on the your requirements, you can select between balanced (+4dBu nominal TRS) and unbalanced (-10dBV nominal RCA) connectors (both cannot be used simultaneously). - Page 6 Juli@ 5. Juli@ breakout cable The Juli@ PCI card comes with a special breakout cable. This cable provides 24bit/192kHz coaxial inputs and outputs and 16 MIDI I/O channels. The coaxial I/O port sends and receives the signals from channel 3/4 (‘Juli@ 3/4’) from your audio applications.
-
Page 7: How To Swap The Connectors
Juli@ How to swap the Connectors? The following example shows you how to change from RCA I/O to TRS I/O connectors. Usually you change the setup of the card once before you install it and before you start to use it (both I/O connector types cannot be used simultaneously). - Page 8 Juli@ 3. Hold the edges of the card and carefully separate the PCI card like shown on this picture. Caution: Don’t touch the chipsets on the card like shown on the following picture. Otherwise the card could be damaged.
- Page 9 Juli@ 4. Turn the TRS connector parts toward to the bracket. Hold the edges of the card and carefully combine PCI card like shown on the pictures below.
- Page 10 Juli@ 5. Put the metal bracket to the card. 6. Tighten screws again (in opposite order).
-
Page 11: Hardware Installation
Juli@ 3. Hardware Installation System Recommendation Juli@ is not simply a standard digital audio interface card, but a high-resolution device capable of advanced processing of audio content. Even though Juli@ is built to have low-CPU resource dependability, system specifications play a key part in the Juli@ ’s performance. Systems with more advanced components are generally recommended. -
Page 12: Pci Card Installation
Juli@ To avoid possible static shock damage to the computer parts, discharge it by touching the computer case or something grounded. We recommend you use an anti-static device such as an anti-static wristband. When holding the Juli@ card, touch only the guide or the edge of card. Do not grab the card by the board or connector. - Page 13 Juli@ Figure 5. Juli@ Installed in a PCI slot Close the computer case.
-
Page 14: Driver Software Installation
4. Driver Software Installation Before installing the drivers of Juli@, we recommend to check on the download section of www.esi-audio.com for updated drivers. Windows XP Turn on your computer. Windows will automatically detect a new device installation and the Found New Hardware Wizard window will appear as seen on the following picture on the left. -
Page 15: Windows Vista & 7
Once this is done, the Found New Hardware Wizard will automatically appear again. Please follow the exact steps one more time, this time to install the ESI Juli@ Audio device. After that is finally confirmed on the last dialog via Finish, the Juli@ driver software has been completely installed. To confirm this, please check if the ESI icon is displayed in the taskbar notification area as shown below. - Page 16 Juli@ If the following window on the left will appears, click on Browse my computer for driver software (advanced) in order to show Windows where the driver files are located. The dialog on the right will appear. Via Browse, you can select the folder that contains the driver data. If you install from the original CD, select your CD-/DVD-drive and the \Windows Vista-7 folder.
-
Page 17: Mac Os X
Install before the driver installation proceeds. After some time, the installation of the ESI Juli@ Controller driver will be completed and you need to click Close. To confirm the completion of the installation, please check if the ESI icon is displayed in the taskbar notification area as shown below. -
Page 18: Juli@ Console
This chapter describes the Juli@ Control Panel. To open the panel double click on the ESI icon in the task notification area (or by double clicking on the icon in the Applications folder when using Mac OS X). The following dialog will appear: Pull down Menu The Juli@ console includes a pull down menu bar that contains the configuration menus for Juli@ . -
Page 19: Input Panel
Juli@ 2. Config – Mouse Wheel Controls the increment at which the volume is adjusted when using a mouse wheel. The adjustment step is from 1 to 8. 3. Config – Latency Adjust the latency (also often referred as buffer size) of the Juli@ . A faster latency is achieved by selecting smaller sample size which is ideal for software synthesizer and precise timing recording. -
Page 20: Output Panel
Juli@ Analog Input 1/2 This is where you can adjust the input monitoring level for the analog input 1/2. When you active ‘MON’ button of 1/2, the input monitoring level fader appears (displayed on the right picture). Now the analog input signal is routed to output 1,2 and you can monitor (listen to) the analog input signal in real-time. -
Page 21: Sample Rate And Clock
Juli@ can listen to the signal via the analog output in real-time. The monitoring level can be set using the mouse, mouse wheel, or cursor keys. MASTER FADER Allows you to change the level of the final output signal. The level can be set using the mouse, mouse wheel, or cursor keys. -
Page 22: Directwire
DirectWIRE What is DirectWIRE? DirectWIRE is a driver technology, developed by ESI, which can be used for routing audio streams internally within applications using EWDM Audio MIDI Drivers exclusively developed by ESI. With the DirectWIRE router, an application can record from other application’s audio outputs without ernal wiring or any loss of data when they are running at the same time. -
Page 23: Directwire Examples
Juli@ The number on the row represents the input or output port. The columns represent ins and outs (on and off) of the respected drivers. Patch the virtual cables from one point to another as you drag your mouse point. INPUT section: It's used to route signals from the card's hardware inputs. - Page 24 Juli@ Example 2. Recording from WinAmp (MME) to Example 3. Recording from WinAmp (MME) to SONAR (WDM). Cubase, Logic, Nuendo (ASIO). Example 4. Recording from GigaStudio (GSIF) Example 5. Recording from GigaStudio (GSIF) to SONAR (WDM). to Cubase (ASIO).
-
Page 25: Setting In Applications
Juli@ 6. Setting in Applications This chapter contains basic configuration examples for some software applications. Please also refer to the manual of the audio software you use for detailed information. Windows Multimedia Setup The Windows multimedia setup is required if you want to use your Juli@ as the main sound device for Windows multimedia applications. -
Page 26: Initial Setup
Devices menu. Select VST Audio System on the tree structure on the left part of the window and then make sure to select ESI Juli@ ASIO as ASIO Driver entry. You can verify your selection by selecting the ESI Juli@ device on the left. The dialog, now lists all input and output channels. -
Page 27: Specifications
Juli@ 7. Specifications <Analog Audio> 1. Analog Inputs * Unbalanced Part 1) Connector Type : Gold-plated RCA female (line in 1 and 2) 2) Peak level : 0dBFS @ +6dBV (-10dBV nominal) 3) Impedance : 10k ohms minimum * Balanced Part 1) Connector Type : 1/4"... -
Page 28: General Information
Juli@ 8. General Information Trademarks ESI and Juli@ are trademarks of and ESI Audiotechnik GmbH. Windows is a trademark of Microsoft Corporation. Other product and brand names are trademarks or registered trademarks of their respective companies. The FCC and CE Regulation Warning This device complies with Part 15 of the FCC Rules.